
Lighting Handbook: Scrim Photography Tutorial
Diffusion panels lower brightness by softening the light, and flags block it completely. So how can brightness be lowered without changing the light’s quality? The answer is scrims.
Compositionally, the brightest areas in a photograph draw the eye to them. It follows that the most important element wants to be brighter than the supporting ones. Whether using flash or continuous light, reducing the illumination on less important players in a photograph on set saves lots of time in postproduction. The challenge is to do exactly that while leaving its quality unaffected. Enter the lighting tool called a scrim.
What’s a Scrim?
Technically, a scrim is a lighting tool that’s placed between the source of illumination and the subject that lowers the amount of light without changing its quality. Well, that’s all good, but what do scrims look like? When and how do you use them?
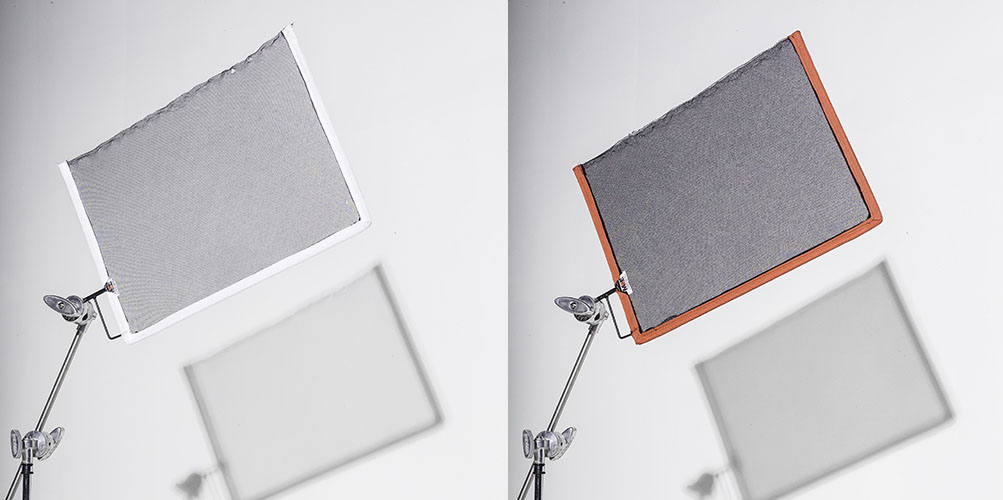
A scrim is a mesh similar to that on a screened-in porch or a screen door. For use with hot lights, there’s a metal mesh, so it won’t burn. For use with a flash, it’s fabric. Professional scrims use a material called bobbinette stretched over a U-shaped frame. Commercial scrims are made by Matthews Studio Equipment (www.msegrip.com). The scrim framed in white reduces light by 1/2 stop; the red-rimmed scrim lowers it 1.2 stops.
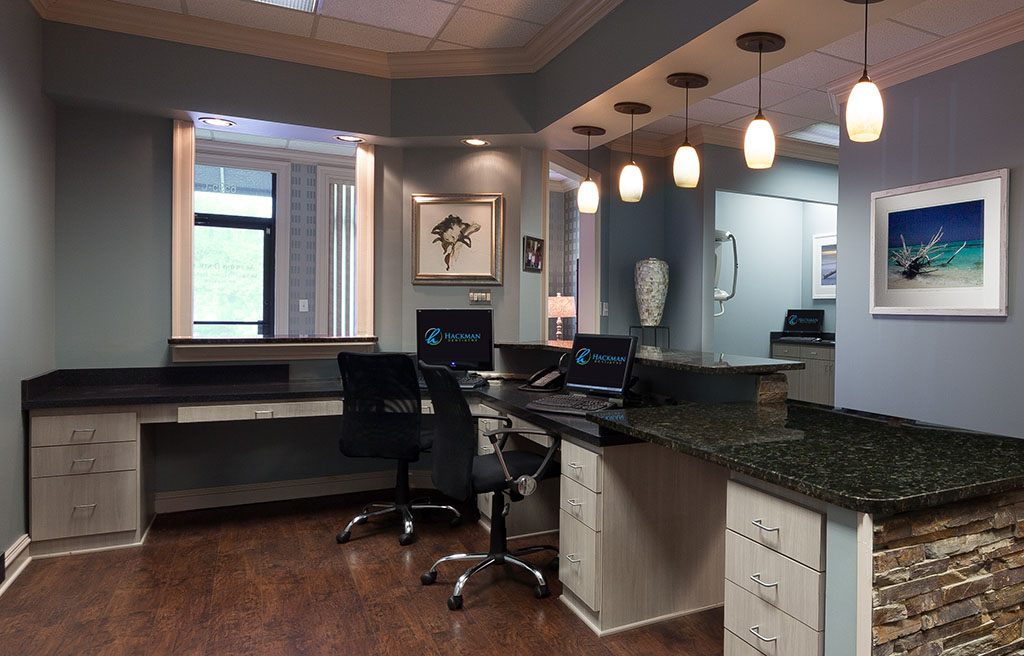
Chimera (www.chimeralighting.com) makes bobbinette scrims for their light panels, and just introduced an 84×42″ panel. Recently, I used one covered with a 2-stop scrim to reduce outside light shining through a glass door when shooting the interior of this doctor’s office reception lounge. It’s mounted on a light stand then positioned just outside the door.
Make Your Own
You can make your own scrims. Cover any frame with a screen mesh material. Measure the light hitting a subject, then put the scrim between the light source and the subject. Note the difference between the two in f-stops. That’s how much your scrim reduces the light. For example, a nonscrimmed subject outdoors on a sunny day might read 1/100 at f/16, ISO 100. The same subject scrimmed reads 1/25 at f/16. That’s a 2-stop difference. The homemade scrim reduces the light 2 stops.
The mesh can be bobbinette, black tulle, or even screen door screen painted black. Bobbinette, which is usually fire resistant, can be found online. Be warned, it’s pricey. Tulle, the mesh material used in bridal veils, will also work. The trick is finding it in black in fabric stores. Search online for “tulle fabric.” It’s available in 54″ widths and is quite affordable. Screen door screening is found at hardware stores, along with the necessary black spray paint.
Using Scrims
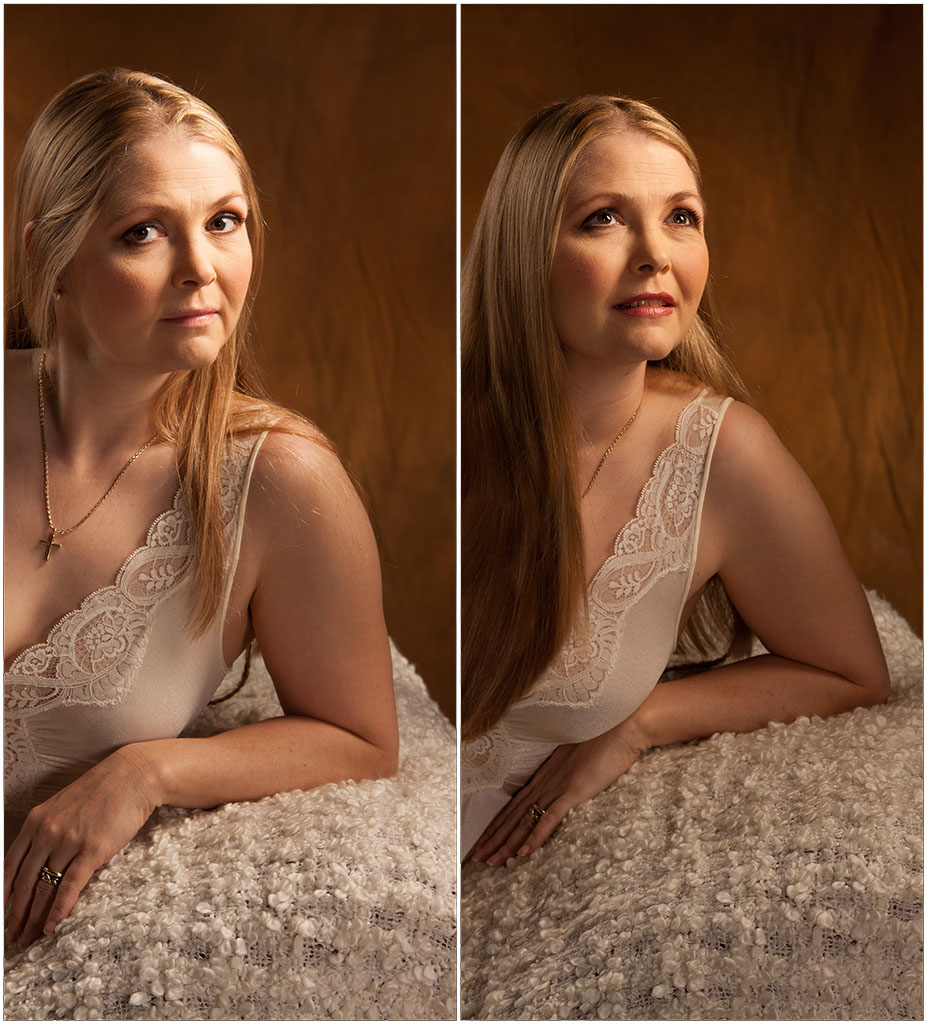
I use scrims a lot. The left section of the portrait above is before I scrimmed the white rug draped over a chaise lounge. It’s almost as bright as the subject’s face. I added the scrim then had Victoria turn her face into the light. She becomes the center of attention instead of competing with the white rug. Best of all, there’s zero postproduction. The brightness is all exactly where I want it for the entire take.

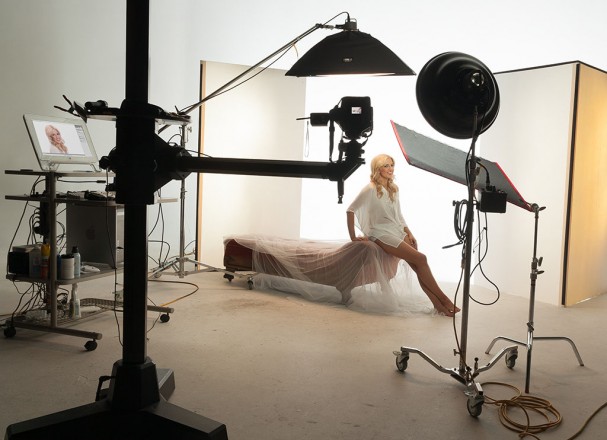
Recently, I had to photograph a woman wearing a white peasant top along with white shorts. The source of light on model Hope Anderson from Factor Women Atlanta is a 22″ Dynalite Soft Lite White Beauty Dish mounted on a Dynalite studio head receiving 100 Ws from an 800 Ws MP800 RoadMax Power Pack. Above her head, a 12×36″ Rime Lite strip bank covered with a Rosco 1/2 CTO gel serves as a hair light. The gel warms up the flash to be almost the color of late afternoon sunshine. The softbox has a Dynalite location head set at 200 Ws. The background is lit with two V-flats. Each one has two Dynalite location heads bouncing into the flats.
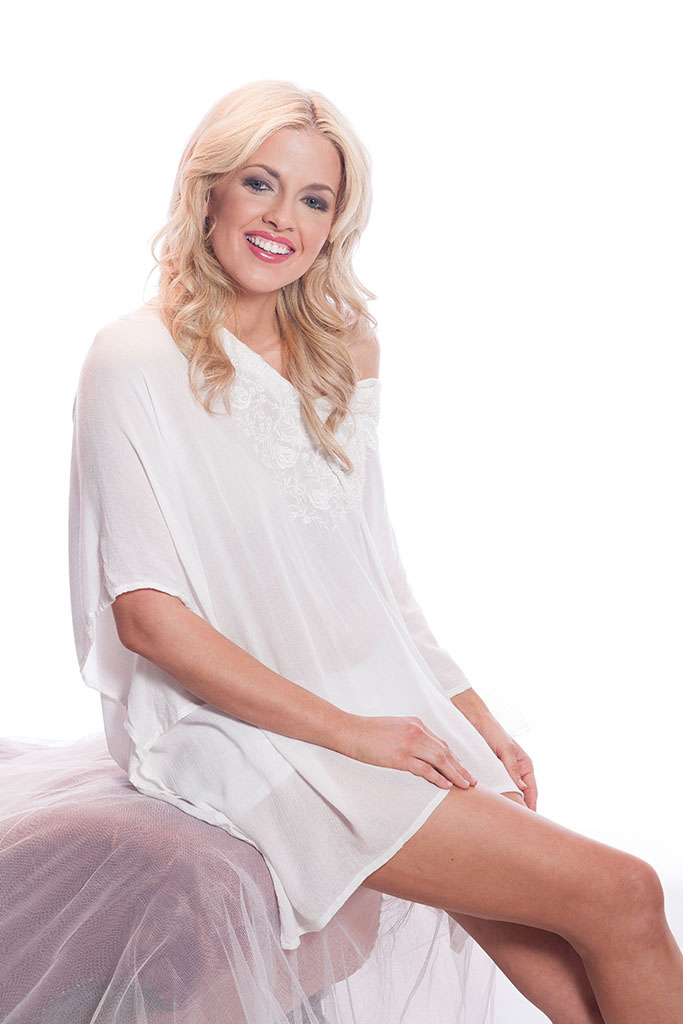 The challenge was having the white shorts visible trough the top. Here, the shorts are barely showing and Hope’s top is too white.
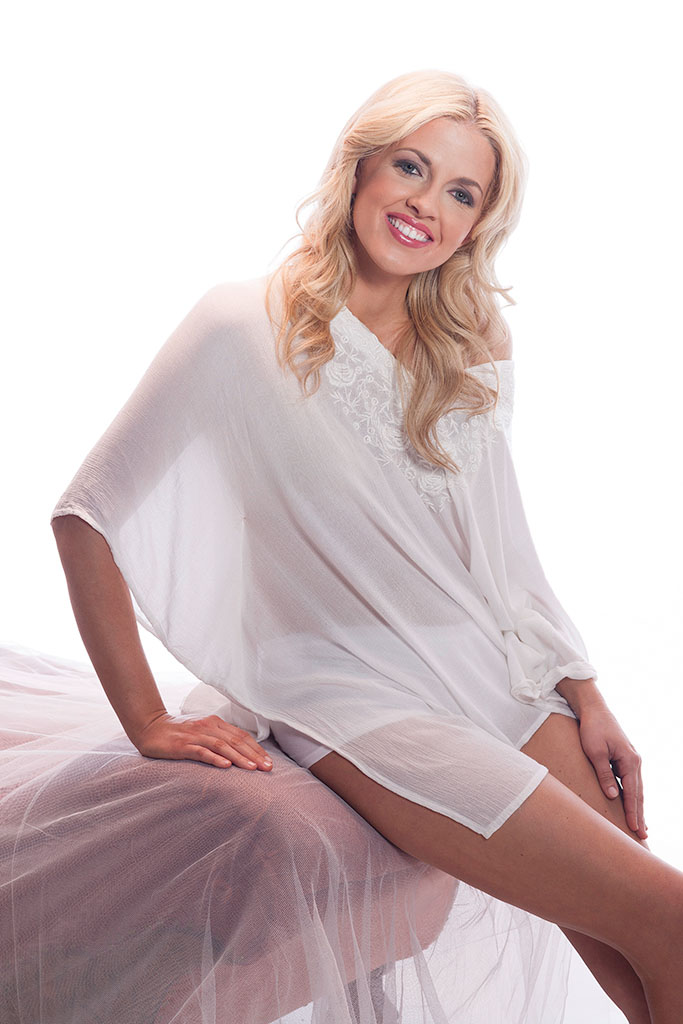
The solution was to drop the illumination on the top so the shorts would show. I placed a scrim between Hope and the beauty dish, dropping the light by 1.2 stops on the top and her legs. Now her shorts show! Best of all, they show throughout the entire take. All my client has to do is pick the hero. I also don’t have to explain to my client that their favorite shot will have to be fixed in Photoshop. Well-lit life is very good indeed.
If you find yourself doing a lot of vignetting in Photoshop, scrims are the ticket to keep you behind the camera instead of in front of your computer’s monitor. Scott Kelby shares this tip on how to make a quick and easy vignette in Lightroom on the LightroomKillerTips blog. See the rest of our Lighting Handbook posts for more on the science behind the lights.
