InDesign CS2 Tips & Tricks
There’s nothing so precious as the right tip at the right time—preferably something that gets you out of a jam right before your deadline. Here are a handful of my favorite InDesign tips and tricks, guaranteed to make your life a tad easier! (Guarantee fine print: If you don’t find these useful over the next five years, I promise to replace them with another set of tips for your reading pleasure.)
Snap guides to objects
It’s easy to add a page or pasteboard guide to your page: Just drag from on top of the ruler at the side of the document window (choose View>Show Rulers if you don’t see the rulers) onto your page. And it’s easy to snap objects to guides: Just drag an object with the Selection (V) or Direct Selection (A) tool until it’s within a few screen pixels of the guide. But how do you snap a guide to an object? No problem: First select the object (or group). Now drag the guide to within a few screen pixels of the object’s corner or side handle. When you get close enough, you’ll see the guide you’re dragging snap right to the handle. Magic!
Force pasteboard guides
If, when dragging out a guide, you release the mouse button when the guide is on the page, you get a page guide; if you let go over the pasteboard, you get a pasteboard guide. You can also force it to be a pasteboard guide by holding down the Command (PC: Control) key before releasing the mouse button.
Deleting guides
I know a guy who puts so many guides on his pages that it’s hard to see the content. Here are two ways to get rid of all the guides on a spread. You could choose Layout>Create Guides, turn on the Remove Existing Ruler Guides checkbox, and then press OK. Alternately, you could press Command-Option-G (PC: Control-Alt-G) to select all the guides on your spread. Then just press Delete to make ’em go away.
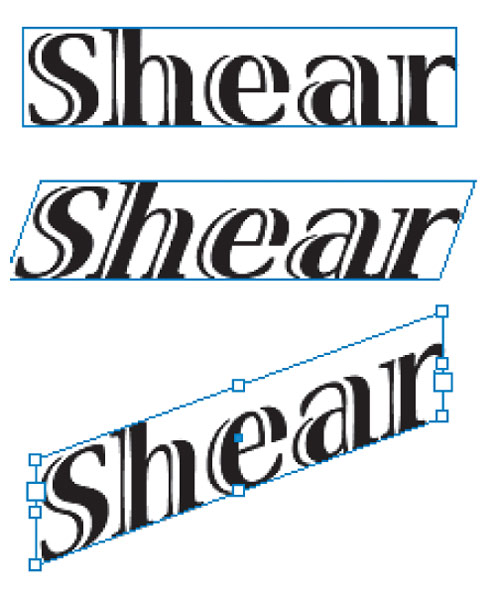
Shear versus Skew
InDesign’s Transform palette (Window>Object & Layout>Transform) and Control palette both sport a Shear X Angle field. Type a positive number and any selected object shears to the right; a negative number shears to the left. But how do you shear up or down? (Some people call this “skewing” an object.) It’s surprisingly easy: Just enter the same number in both the Shear X Angle field and the Rotation Angle field. Bonus tip: You can shear in any direction with the Free Transform tool (E). First click on any side handle (not corner handle) of the object with the Free Transform tool and then hold down the Command (PC: Control) key before you start dragging.
Center an object on the page
Why, oh why, won’t the Align palette (Window>Object & Layout>Align) let you center an object (or group) to the page or spread? It’s so frustrating. Fortunately, there’s a pretty quick workaround. In fact, there are two of them. First, you can draw any object the same size as the page, select this object plus the one you want to align, and then use the Align palette (or the Align buttons in the Control palette). Now you can delete that original “dummy” object. Here’s an even easier way: Select the object you want to center and cut it to the clipboard (Edit>Cut). Now press Command-zero (PC: Control-zero) to fit the page in the window (and center it). Now paste (Edit>Paste). Boom, you’re done. (Note that this second method isn’t quite as precise, but it’s still accurate enough for most work.)
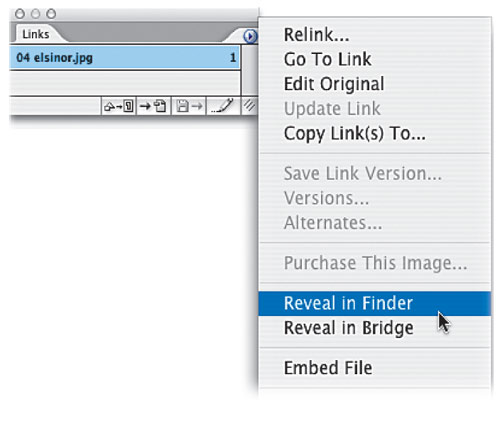
Find your picture on disk
You’ve got a picture in an InDesign document, but you’re not sure where the original high-resolution file is on disk—or was it on the server? InDesign offers a quick and painless way to find your images: Double-click on the image’s name in the Links palette and the Link Info dialog shows you the file path. Even better, in CS2 you can select the image on your page or in the Links palette, then choose Reveal in Finder (PC: Reveal in Explorer) from the Links palette flyout menu. That switches to the Finder (PC: Windows Explorer) and selects the file on disk for you.
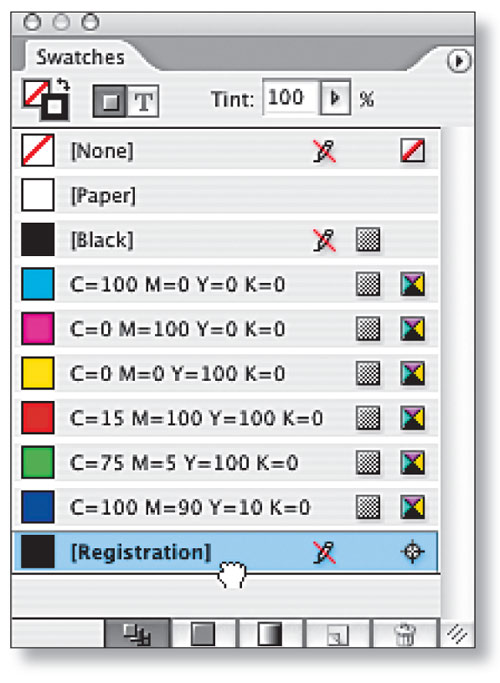
Move Registration color
The Registration color should be very rarely used for anything other than small registration marks. After all, 100% Registration will print 100% of every color (cyan, yellow, magenta, black, and spot colors). Unfortunately, Adobe placed the Registration swatch right next to the Black swatch in the Swatches palette, and too often people click on it instead of Black. Disaster! You can save yourself some trouble by dragging the color swatch down in the palette to the end of the list. Didn’t know you could drag swatches, did you? Do this when no documents are open and the re-ordering is good for every new document you create.
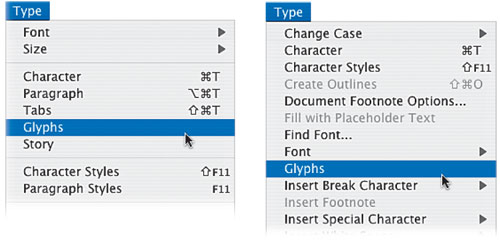
Alphabetize your menus
You’ve looked at the File menu a dozen times today but suddenly you can’t find the feature you’re looking for. You can call it a “senior moment,” but this “temporary feature blindness” happens to the best (and youngest) of us all. “Why on earth didn’t Adobe alphabetize these menus?” you wonder out loud (another sign of approaching senility). Fortunately, you can alphabetize your menus in InDesign: Just hold down Command-Option-Shift (PC: Control-Alt-Shift) before clicking on the menu title! This even works for submenus, such as the Font menu.
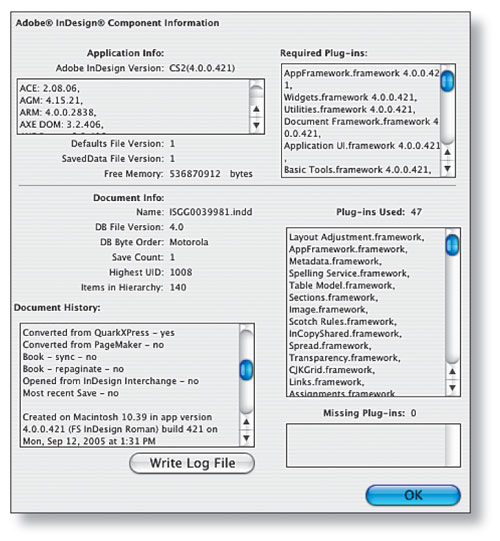
See your document history
When did you first create the file you’re working on? Was it originally made in QuarkXPress and then opened in InDesign? How many times has this document been saved under a different name? All these questions (and more!) are answered in a hidden dialog inside InDesign. Hold down the Command (PC: Control) key when you choose About InDesign from the InDesign menu (PC: Help menu) to see the Component Information dialog. Most of the information in this dialog is relevant only to Adobe’s software engineers and tech support department. However, the Document Info section can give you some valuable details, especially when you’re trying to troubleshoot your own problems.