How Do I Stitch Together a Pano in Lightroom?

Excerpt from Scott Kelby’s How Do I Do That In Lightroom? book.
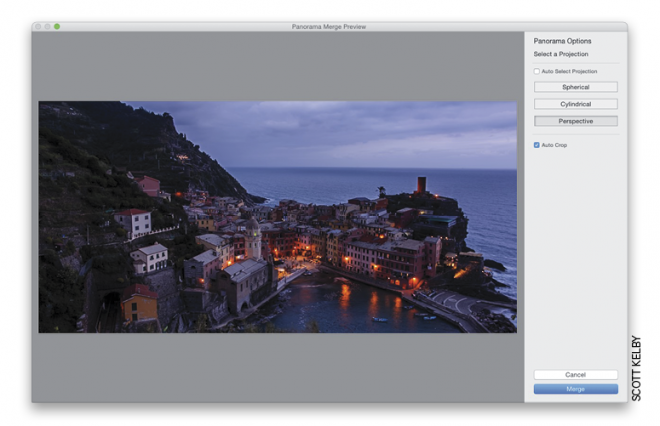
In the Library module’s Grid view, Command-click (PC: Ctrl-click) on the images you want to combine into a single panoramic image. Go under the Photo menu, under Photo Merge, and choose Panorama. In a few moments, the Panorama Merge Preview dialog will appear (seen above) and show you a preview of how your stitched image will look once it’s fully rendered. At the top right, if you turn on the Auto Select Projection checkbox, it chooses the style of panorama stitching that best fits the image, and it usually works pretty well (except for this image, where it chose Cylindrical, which in this case made the horizon line look curved, so I clicked on each projection individually and the Perspective choice looked much better, so I went with that). There’s also an Auto Crop checkbox, which automatically crops the image to where you don’t see any white space on the edges of the image that were created when Lightroom merged the pano (that white space is almost a given, so this saves you the extra step of having to crop it down yourself). Click the Merge button, and it creates the full-resolution version in the background, so you can work on something else. When it’s finished, it will appear alongside the images you chose for your pano.
Learn how to do more in Lightroom in How Do I Do That In Lightroom? or read it for free for a limited time. Also, be sure to check out all the great online Lightroom courses offered by KelbyOne.


