Using Behaviors in Dreamweaver

You can use Behaviors in Dreamweaver to create many interactive features; like opening a small browser window when someone clicks on an image. This is a great way to make supplemental information available without closing the page a visitor is already viewing.
When you set up a Behavior in Dreamweaver, you apply an Action to an element, such as Open Browser Window applied to an Image. Then you specify an Event to go with that Action, such as OnMouseOver, which will trigger the Action when a user rolls a cursor over the image. When you use the New Browser Window Action, which is covered in this tutorial, you can specify the size of the browser window as well as what page will be displayed when it opens.
STEP 1 Study the Design
efore we start creating this design using Dreamweaver’s Open Browser Window Behavior, let’s first take a look at the finished pages so you can see what we’ll be doing before we get into the details.
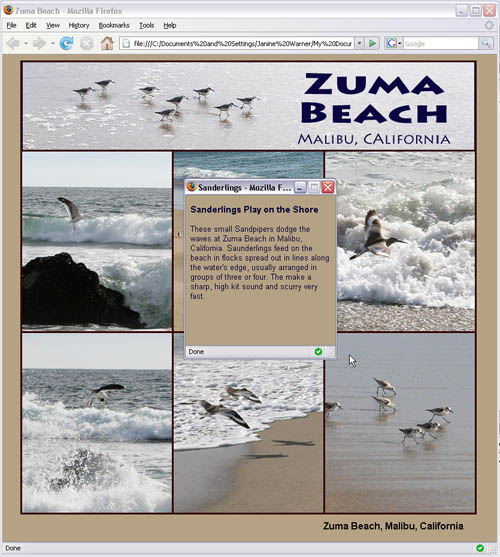
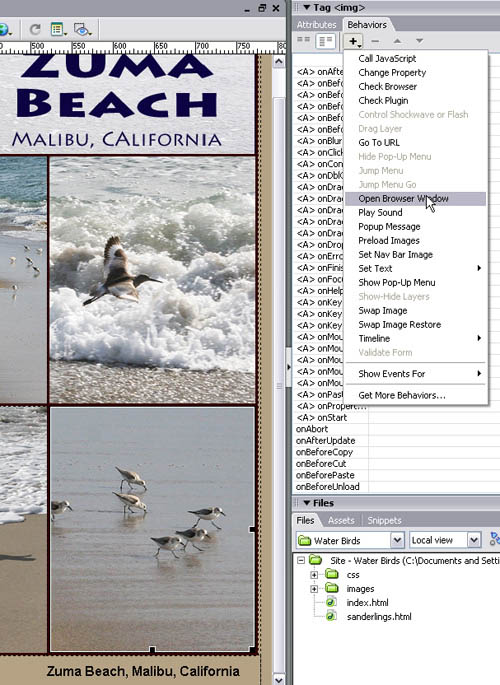
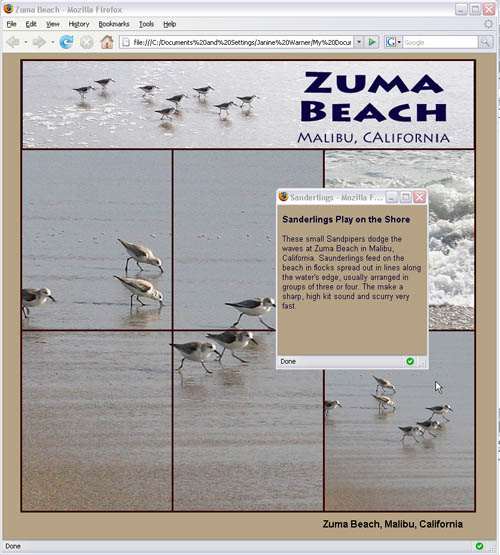
What you see in this screenshot is a page with six different images positioned under a banner. Notice that my cursor is resting over one of the six images (the one in the bottom right corner). Although you can’t see it in this static screenshot, I’ve just clicked on that photo to open the small browser window (above and to the left). What’s happening behind the scenes is that the trigger, in this case my mouse clicking on the photo, has caused a new browser window to open and display a specified page, in this case a page with some text about Saunderlings. The Behavior was also set up to specify the size of the new browser window, in this case 250 pixels wide and 250 pixels high.
STEP 2 Create a New Page to Display
Before we set up the Open Browser Window behavior on the existing page with the Zuma Beach photos, let’s create a new page that will be displayed in the new browser window. Here are a few reminders about creating a new page in Dreamweaver:
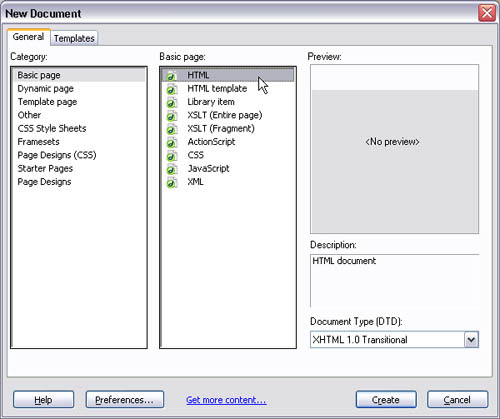
I. To create a static Web page, choose File > New, select the Basic Page category and choose HTML.
II. To ensure that links and image references are set properly, save each new Web page as soon as you create it.
III. When you name a file, follow the strict naming convention of no spaces or special characters (you can use underscores and dashes).
IV. Make sure that you have the site you are working on selected in the Folders list (if not, choose Site > Manage Sites, click to select the site name and choose Edit to load it into Dreamweaver). If your site is not listed in the Manage Sites dialog it means you probably haven’t completed the site set up process yet. (For instructions, refer to my Defining a Site in Dreamweaver column http://www.layersmagazine.com/defining-a-site-in-dreamweaver.html).
Making sure your site is properly set up in Dreamweaver helps ensure that links and Behaviors are set properly on all of your pages and that they will continue to work properly when your site is uploaded to a Web server.
STEP 3 Set Page Properties
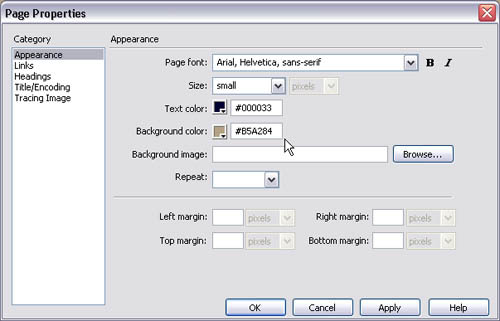
To set page-wide options, such as background, link, and text colors, choose Modify > Page Properties and choose the Appearance category from the left side of the dialog. For this design, I set the background color to match the background of my main page, using the hexadecimal color #B5A284. I also set the Page font, size, and color for the page.
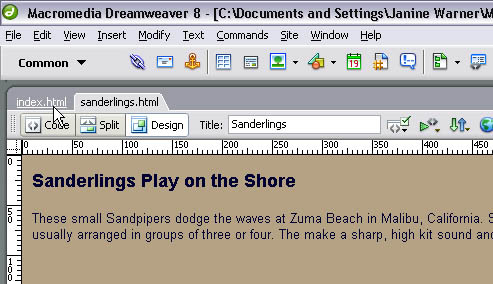
The page Title can be added in the Title/Encoding category of the Page Properties dialog or by entering text into the Title field at the top of design area.
Note: When you specify Page Properties, Dreamweaver automatically creates styles for your document, which are displayed in the CSS Styles panel.
STEP 4 Add Content
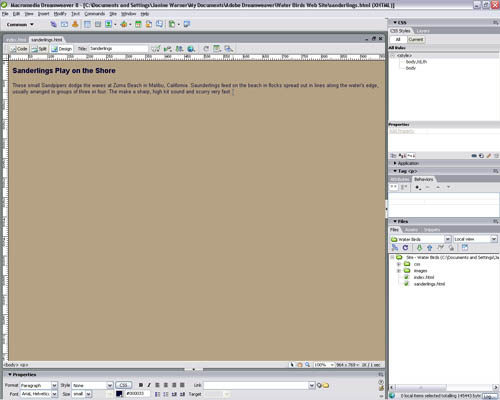
Now I can add content to this page just as I would add content to any other page. In this case I’ll keep it simple, adding text that will automatically be formatted based on my Page Property settings. The headline is formatted with an H3 tag, which also uses the font specified in the Page Properties.
Although I could format this page to better position or align the text, I won’t bother because when I set the new browser window size, the text will automatically adjust to fit the specified space.
STEP 5 Open the Page Where you Want to Apply the Behavior
If you already have the page open in the background, as I do, simply click on the folder icon at the top of the design area to open it. If it’s not open, choose File > Open and open the page where you want to apply the Behavior.
STEP 6 Open the Behaviors Panel
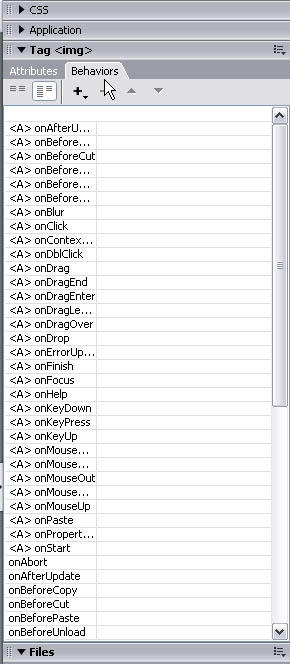
To open the Behaviors panel, choose Window > Behaviors. The Behaviors panel automatically opens in the right side of the work area, but you can move it by clicking-and-dragging it elsewhere on the page and you can expand it by clicking-and-dragging the top or bottom of the panel. You may also want to close some of the other panels to make room. You can display or hide Events by clicking on the Show All Events icon in the top left of the Behaviors panel. Note: Events that begin with an <A> are for elements that are linked.
STEP 7 Specify the Target Browser for Behaviors
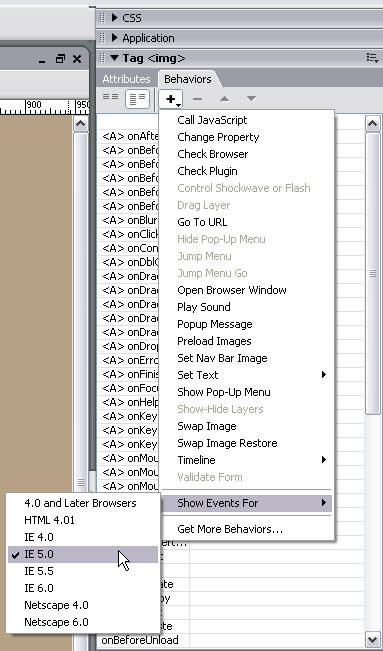
In the Behaviors panel, click on the Add Behavior arrow (just under the plus sign) and select Show Events For (second from the last at the bottom of the drop-down list). Then select a target browser. In this example, I’ve chosen IE 5 because I’ve decided not to worry about this page displaying properly for anyone using a browser older than Internet Explorer version 5.0. When you specify a target browser, you limit the Behaviors available to only those that will work in the selected browser and later versions. Behaviors that are not supported by that browser version will be grayed out and unavailable. Note: Behaviors may also be grayed out if they are not available for a selected element.
STEP 8 Select an Image and Choose Behavior
First, click to select an image in the design area that will serve as the trigger for the Action. Then click on the Add Behavior arrow in the Behaviors panel to open the drop-down list of Actions and select the Action you want to apply. In this example, I’ve selected the image in the bottom right corner of my design and chosen the Open Browser Window Action from the list of Behaviors.
STEP 9 Specify Browser Window Settings
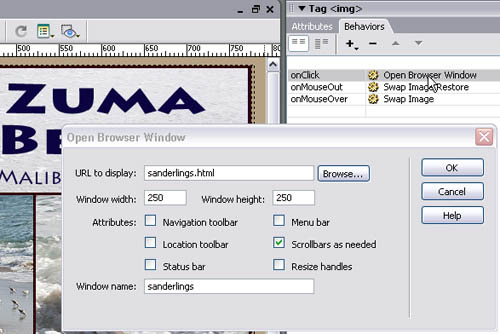
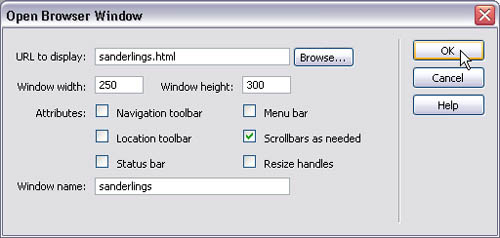
In the Open Browser Window dialog, use the Browse button to locate and select the page you want to open in the new browser window. In this case, I’ve chosen the page I created in step 2, which I named sanderlings.html.
Enter a width and height. By default, any number you enter will be measured in pixels. So, when I enter 250 and 250 respectively in these fields, the new browser window will open and automatically size to 250 pixels wide and 250 pixels high.
All of the Attributes are optional. If you don’t check any of the Attributes, the new browser will display with no menu or navigational elements. You can check all of the Attributes that you want included. In this example, I’ve selected Scrollbars as Needed (which I always recommend). With this Attribute selected, scrollbars will automatically appear in the new browser window, but only if your content extends beyond the specified size of the window. This is important because many Web surfers override your text settings and display text at a larger size for better readability. If you don’t include scrollbars, your text can get cut off.
You can also provide a name for the window. This is especially important if you want to be able to target this window in a script (you can’t use spaces or special characters in the name).
STEP 10 Specify an Event for the Behavior
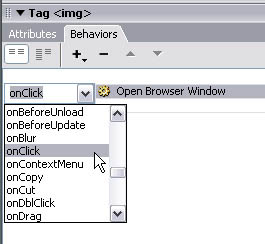
Once the Action is applied, you can specify the Event that will trigger the Action. To do so, you need to click in the Behaviors panel just to the left side of the specified Action, in this case Open Browser Window. When you click in the field, an arrow appears. Click on the arrow to open a drop-down list with Event options. For this Action, I’ve selected OnClick, which will require that a user click on the photo before the new browser window will open. You can also choose OnMouseOver to trigger this event when a user moves their cursor over the image, or you can select any of the other Events from the list.
STEP 11 Apply Additional Behaviors
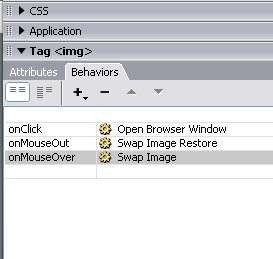
You can apply multiple behaviors to the same element. For example, this photo could open a new browser window OnClick, AND trigger a Swap Image Behavior OnMouseOver. In this screenshot you see what the Behaviors Panel looks like when multiple Behaviors are attached to the same element. (To learn more about using the Swap Image Behavior, see my tutorial in the March/April issue of Layers Magazine.)
STEP 12 Test Your Work in a Browser
You won’t be able to see the effects of Behaviors like this one until you preview your page in a browser like Firefox (shown here) and click on the image to trigger the action. In this screenshot, you see the results of both Behaviors applied at once. The new browser window has opened because I’ve clicked on the image and the Swap Image behavior has replaced the four images in the left side of this design because I’ve rolled my cursor over the image.
STEP 13 Edit a Behavior
You won’t be able to see the effects of Behaviors like this one until you preview your page in a browser like Firefox (shown here) and click on the image to trigger the action. In this screenshot, you see the results of both Behaviors applied at once. The new browser window has opened because I’ve clicked on the image and the Swap Image behavior has replaced the four images in the left side of this design because I’ve rolled my cursor over the image.