Cross-Lighting for Contrast

The middle of Manhattan isn’t the most likely place to photograph someone climbing around on giant rocks (sans ropes and rigging), but Central Park turned out to be the perfect place to shoot just that. Recently, I grabbed a climbing buddy of mine and set out to explore. We had only gone a few hundred feet into the park when we found a great spot to set up and shoot. At this point it was already late afternoon, so we needed to work fast—and without location permits in hand.
We decided to leave the big studio strobes at home, and all that we packed was in one small bag on my back (much like the kit described a previous post on traveling light), but it proved to be plenty, Here’s how we took advantage of the directional hard light produced by an unmodified small flash, and came away with some killer shots.
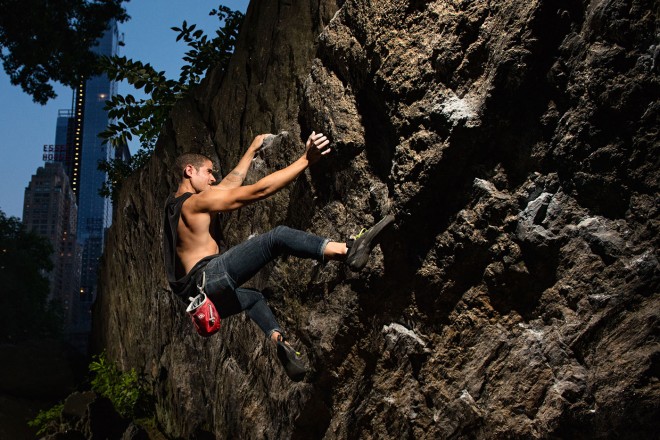
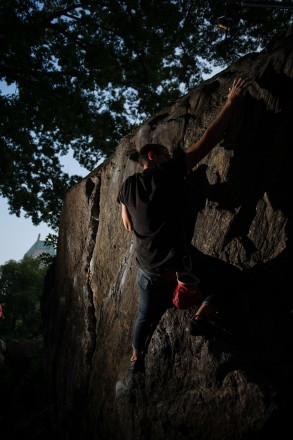
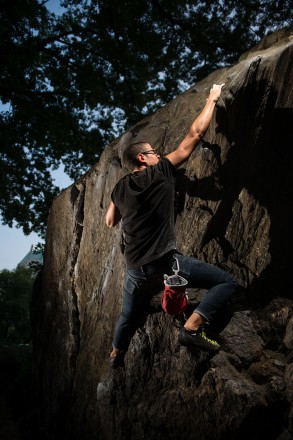
Here is the final image from the day:
Step One
One drawback of the park is that it’s surrounded on all sides by towering skyscrapers, which means that shade comes sooner than expected in the late afternoon. Because of this, our natural light photos seemed to fall a little flat. There was nice, soft, open shade from above, but the wall we decided to climb was definitely on the shadowed side of the rock.
This flat, shadowed lighting actually gave us the perfect canvas with which to work. Had we been in direct sunlight, we would have been at its mercy; instead, it was now easy to add our own light to shape the scene without having to compete with the sun. So, our first step was to manually set the camera to expose for the sliver of sky in the background: ISO 100, 1/250 at f/2.8.
Step Two
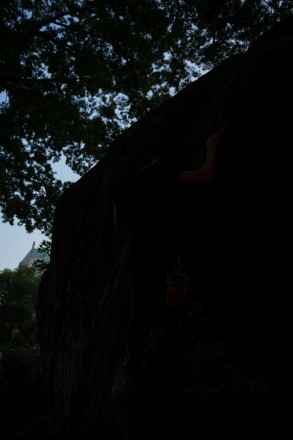
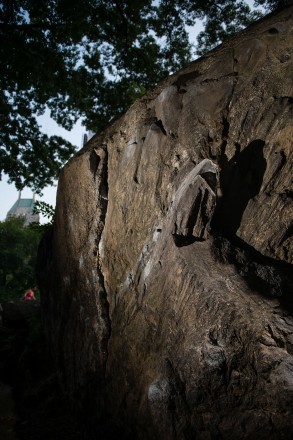
Now that we have a base exposure established, our rock wall went from flat to almost completely black, and here’s where a backpack with a couple small flashes really comes in handy. First thing to do is paint the terrain, which we did with one small flash on a light stand placed behind where the climber will be. By not putting a modifier, such as a softbox or umbrella, on the small flash, it remains a very small light source, casting very harsh shadows.
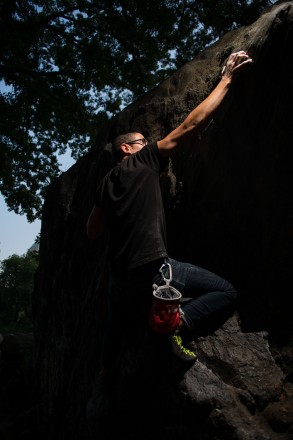
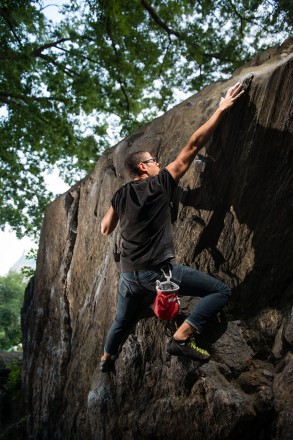
In these two shots, you’ll see that by positioning the flash far off camera, it lights the wall while simultaneously splashing it with pockets of deep shadow, which creates a three-dimensional look and feel. Once the climber is in place, notice that the flash also acts as a great rim light to separate him from the background.
Step Three
We’ve lit the environment and cut out our subject, and it’s looking good so far, except that the climber is still in the dark. Let’s back up a step and focus on lighting him now.
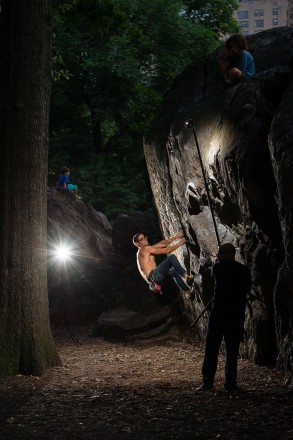
We added another small flash, which is then zoomed all the way out to 24mm to maximize the spread of light that it emits. We also added a 1/4 CTO gel to warm up the stone and skin tones just a bit. We anticipated that the climber would be moving across the rocks for this shoot, so the wide beam ensures that the light will hit him, even if it’s not aimed perfectly. This moving target is also why the light is positioned on the end of a 10′ light stand and my assistant is handholding the light to track the climber along his route. The flash is set at a constant manual power setting so that my assistant only needs to maintain a constant distance from the climber for every shot to be perfectly exposed.
Step Four
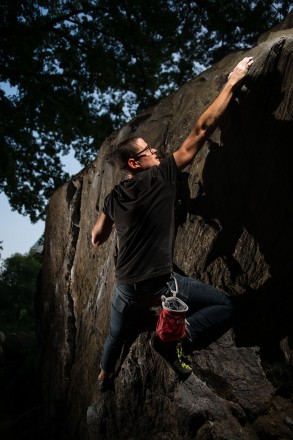
Both lights are now in position and the fun begins! After switching them both back on and taking a shot, the whole wall lights up, and our climber pops off the scene in 3D glory—a much more dynamic shot than we walked into originally.
The position of these two lights is referred to as cross- lighting. When a flash is placed on top of your camera, the resulting photos are flat because the shadow falls behind the subject, where the camera can’t see it. By placing the lights off camera, and across from each other, you create a ton of shadow, which is great for showing texture, and sculpting your subject. It worked perfectly here to define the climber’s physique and really enhance the structure of the wall he was tackling.
Step Five
Up until this point, all settings—from flash output to camera exposure—have remained constant. Once you’ve nailed the initial shot you set out for, I encourage you to play around with the ambient light in the scene.
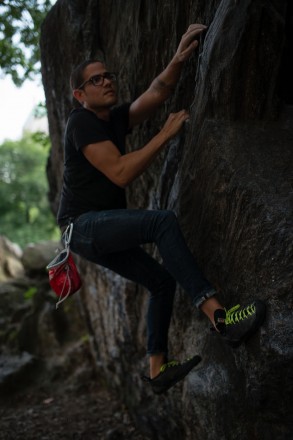
We were initially at ISO 100, 1/250 at f/2.8, then by slowing down the shutter speed, we allowed more time for the ambient light in the scene to make an exposure. Check out this image at 1/30. Notice the big difference that varying the shutter speed makes.
Depending on your taste and style, you may prefer the brighter, more natural-looking photo, while others may prefer the more contrasty, stylized shot. Either way, the climber and wall maintain that punchy cross-lit look, and remain the strong focus of the photograph.

