Create a Photo Montage with After Effects
A Photo Speaks a Thousand Words
Lots of programs and plug-ins create cool photo montages easily and quickly—handy for such things as photo DVDs and slideshows. But what if you don’t have those programs or plug-ins, or you want something a little more creative (yet still as easy to replicate and reuse) using a software program you already own? A few tricks and techniques in After Effects will have you up and running in no time at all.
If you’d like to download a finished movie for this tutorial, visit www.layersmagazine.com and navigate to the Magazine section. All files are for personal use only.
1 IMPORT SLIDESHOW ASSETS
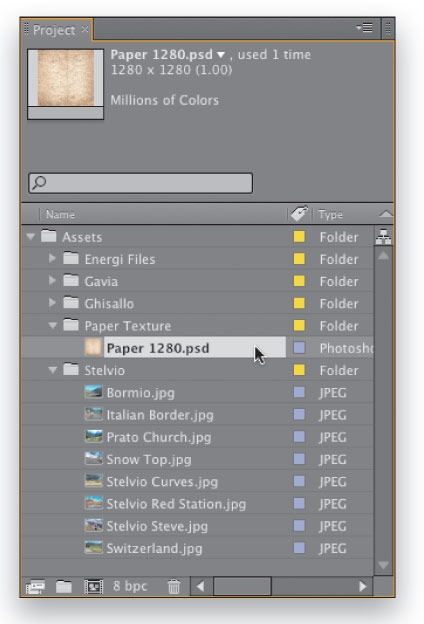
In After Effects, double-click in the Project panel to bring up the Import File dialog, then locate and import the images you wish to use. For our project, I’m importing three folders of photos of yours truly training in the Italian Alps before a big race in Spain and one paper-texture image I downloaded from iStockphoto to use as a background. Note: Though not imperative, ensuring your snapshot images are all the same pixel size will make this project a breeze to complete at the end.
2 CREATE COMP & ADD ELEMENTS
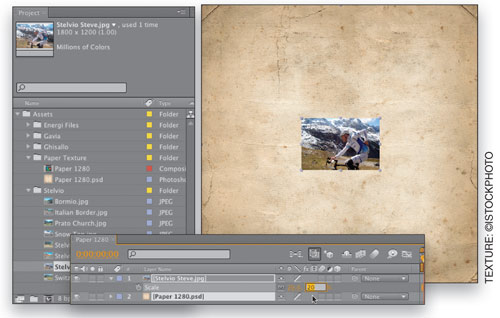
Select your chosen background texture image (ours is called “Paper 1280.psd”) and drag it onto the Create a New Composition icon at the bottom of the Project panel. This creates and opens a new Composition at the size of your image—ours is 1280 pixels square with a Duration of 10:00 (Composition>Composition Settings). Now, choose any one of your snapshot images and drag it into the Timeline above the texture image. Press S on the keyboard to reveal its Scale property, and adjust it down to 20% (or close to the visual).
3 ADD PHOTO EDGE
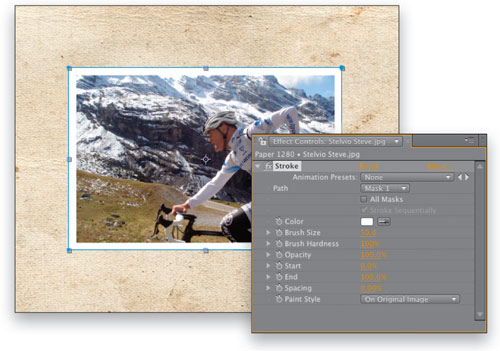
Probably 99.99% of digital images don’t come with a white edge, so we need to add one—but not in Photoshop on every image! Here’s a neat trick: With the snapshot layer selected, double-click on the Rectangle tool in the Toolbar to add a mask automatically around the layer. Now, go to Effect>Generate>Stroke. In the Effect Controls panel (ECP), adjust the Brush Size to 50 px, Brush Hardness to 100%, and Spacing to 0%. Nifty, huh? Nice thing is, we can reuse this on the other images later!
4 ADD DROP SHADOW
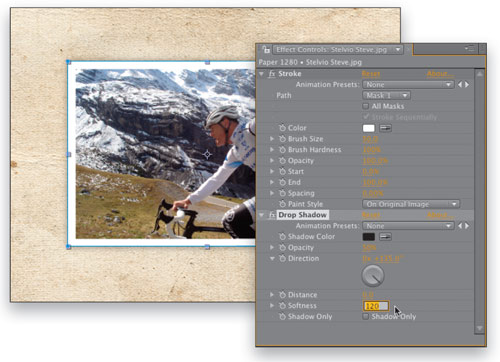
As we’re doing this quickly and efficiently, we’re not using 3D layers and lights to create shadows, so we need a quick effect to raise the photo(s) off the texture. Go to Effect>Perspective>Drop Shadow. Note: Radial Shadow is much more realistic and controllable for single images, but for a montage like this, we can keep it “cheap and cheerful.” In the ECP, set the Distance to 0 px and Softness to 120 px (or adjust to suit your images, as different sizes will yield different results).
5 KEYFRAME POSITION & ROTATION
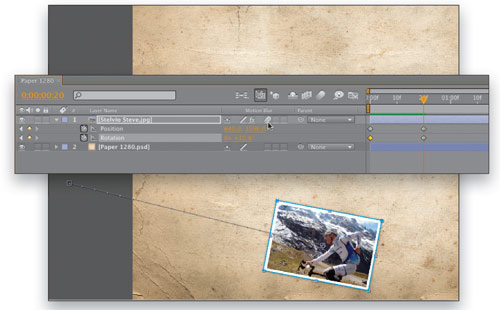
At 00:20f on the Timeline, press P and Shift-R to reveal the snapshot’s Position and Rotation values, and click their Stopwatches to add keyframes. Now press V (Selection tool) and move the image to the bottom of the Comp, then hit W (Rotate tool) and adjust its angle a touch. At 00:00f, rotate the image in the opposite direction as much as you wish, then press V and drag it to its off-screen starting position (as shown). While you’re here, click the layer’s Motion Blur switch also (circled).
6 EASE IN KEYFRAMES & ADJUST VELOCITY
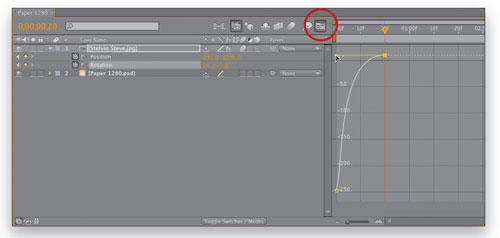
Drag a marquee across the keyframes at 00:20f to select them, then choose Animation>Keyframe Assistant>Easy Ease In. If you scrub the Timeline now, the spin and movement do slow down, but not “heavily” enough. Click the Graph Editor icon in the Timeline, then click just the Position value to show its motion velocity curve. Select that second keyframe to show its handle, then Shift-drag the handle to the left to force the velocity to decelerate very quickly from the start and slowly ease into the second keyframe. Repeat the exact same process for the second Rotation keyframe also.
7 DUPLICATE LAYER & ADJUST ANIMATION
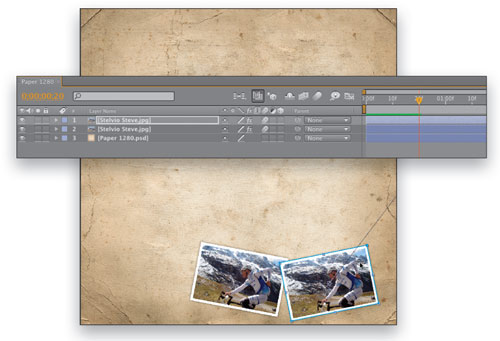
With Steps 3–6, we’ve prepared a single layer which can be reused many times, and whose core image can easily be replaced later on. Press Command-D (PC: Ctrl-D) to duplicate the layer and, ensuring you’re at 00:20f (to avoid adding intermediate keyframes by mistake), move and rotate this layer to a different end position and angle. Then, go to 00:00f (the Home key does this) and move and rotate (keep using those tool shortcuts!) this layer to a different start position and angle.
8 RINSE & REPEAT
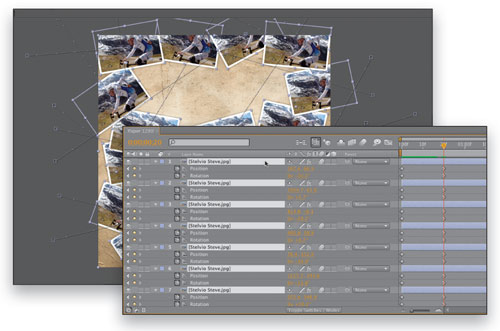
Now, repeat Step 7 (duplicate and adjust) as many times as you wish, making sure to only adjust the Position and Rotation values when you’re at 00:00f and 00:20f. Feel free to have the images come in from any position around all four corners of your comp, spinning as many times as you desire—this is your photo montage! Try to position the “rows” of images so they build upward from the bottom of the texture background to the top, perhaps leaving a gap for titles (or DVD menu buttons) later on.
9 SEQUENCE LAYER TIMING
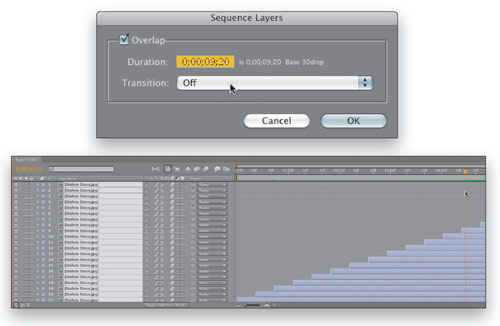
Now to make the layers animate in an offset sequence: Press F2 to deselect all layers, then select your bottommost layer first. Now, hold down Shift and select the topmost layer (this is important as it sets the sequence order). Now go to Animation>Keyframe Assistant>Sequence Layers, turn Overlap to On, Transition to Off, and set the Duration to 10 frames less than your Timeline length (in our example, the Timeline is 10:00f, so we’ll key in 09:20f). Now click OK, and preview your animation. Very cool!
10 LAYER REPLACEMENT
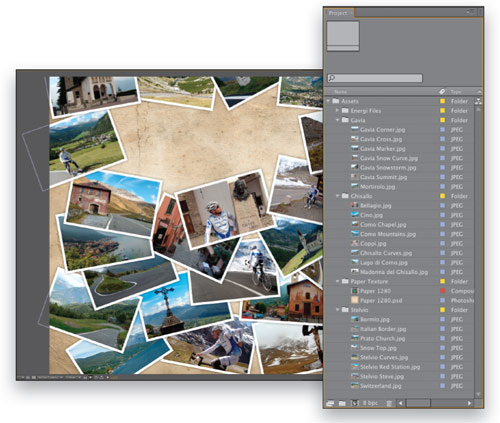
Now for the easy part—replacing all the images! Scrub along the Timeline to 08:00, or to where you can see all of your images, and select one of the layers. In the Project panel, select the image you wish to replace it with, and simply press Command-Option-/ (PC: Ctrl-Alt-/) to replace the animated layer’s contents, but retain the border, shadow, keyframes, and velocity control. “Rinse-and-repeat” this step for all your images, and when you’re done, be sure to Save your work.
11 NEST COMPOSITION
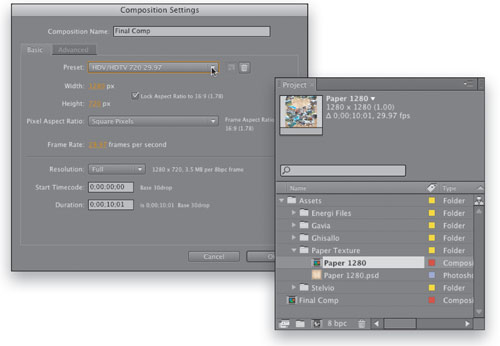
All the hard work’s now done, so let’s wrap this up quickly and easily. Close this composition, then press Command-N (PC: Ctrl-N) to create a new composition. Choose your desired size and format from the Preset menu (in our case, HDTV 720), Name the comp “Final Comp,” and click OK. Now, drag your master animation comp from the Project panel into the Timeline of the new comp, then Shift-drag it upward so its bottom edge aligns with the bottom edge of the new composition.
12 ANIMATE POSITION
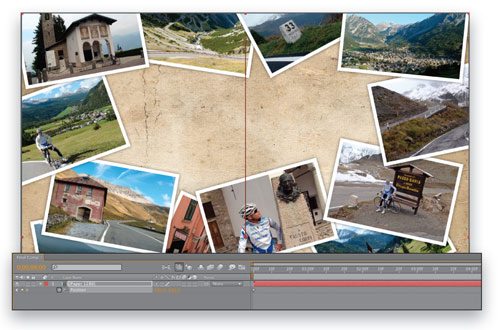
At 00:00f, press P to reveal the nested layer’s Position value, and click the Stopwatch to add a keyframe. Now scrub along to 08:00f, and Shift-drag the nested layer down (or adjust the Y Position value in the Timeline) until its top edge aligns with the top of the composition. Be sure to choose Animation>Keyframe Assistant>Easy Ease In again on that second keyframe, then hit 0 (zero) on your keypad to create a RAM Preview and see your beautiful composition in motion.
13 FINAL EMBELLISHMENTS
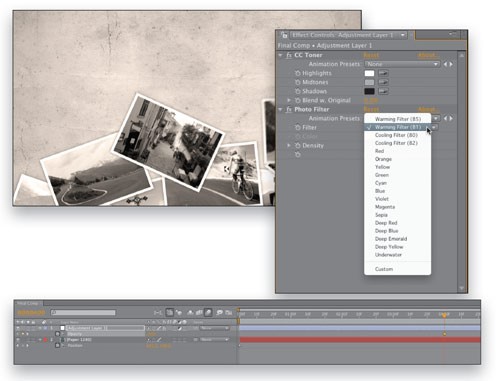
Go to Layer>New>Adjustment Layer, then Effect>Color Correction>CC Toner, and set the Midtones swatch to a mid gray. Now choose Effect>Color Correction>Photo Filter, and choose Warming Filter (81) from the Filter option. Press T to show the layer’s Opacity property, go to 04:00f and add an Opacity Keyframe. Go to 07:00f and change the Opacity to 0% to bring the original colors in at the end.
14 ADD FINAL TEXT
Add your final titles and this reusable, very cool photo-montage project is complete. Enjoy!

ALL IMAGES BY STEVE HOLMES, EXCEPT AS NOTED

