
Lighting Handbook: The Beauty Dish Lighting Tutorial
The beauty dish is one of the most useful and least understood of lighting modifiers. It’s beautiful for photographing women but how about using one for dramatic portraits of men? Beauty dishes are gaining quite a following. Here’s the skinny on the big light a beauty dish can supply.
Basically, a beauty dish is just that: a dish. It’s a big, wide—though not too deep—bowl with a light at the bottom. Usually there’s a baffle that kicks the light from the center of the bowl to the sides. The effect that everyone loves is the semi-harsh shadow edge that falls on the model’s neck cast by the chin. The catchlights are medium to small in size.
Begin by measuring the diameter of the beauty dish. A good rule is to place it twice the diameter of the dish from the subject; so a 22″ dish should be not quite 4′ from the subject. Heightwise, it goes up as far as possible while still filling the eyes with light.
Beginnings
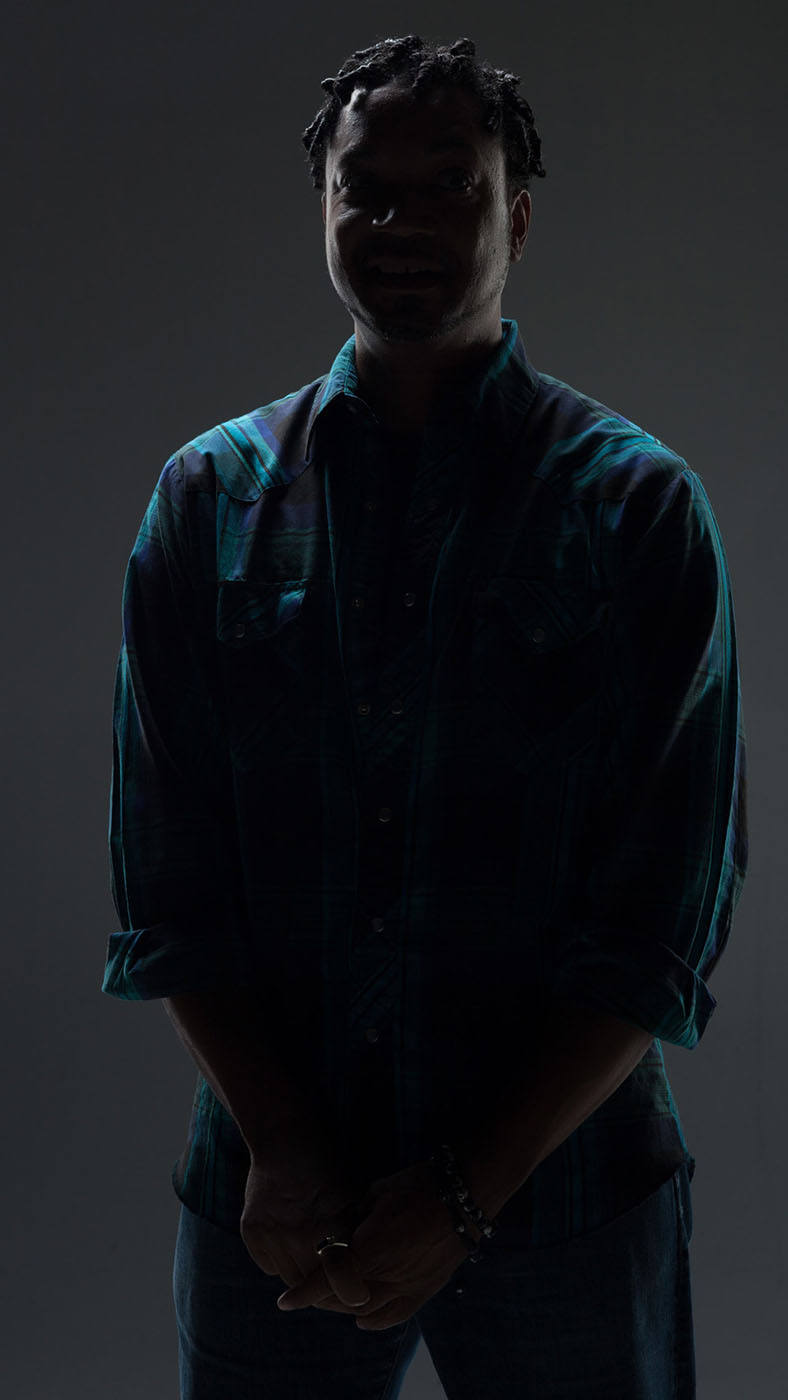
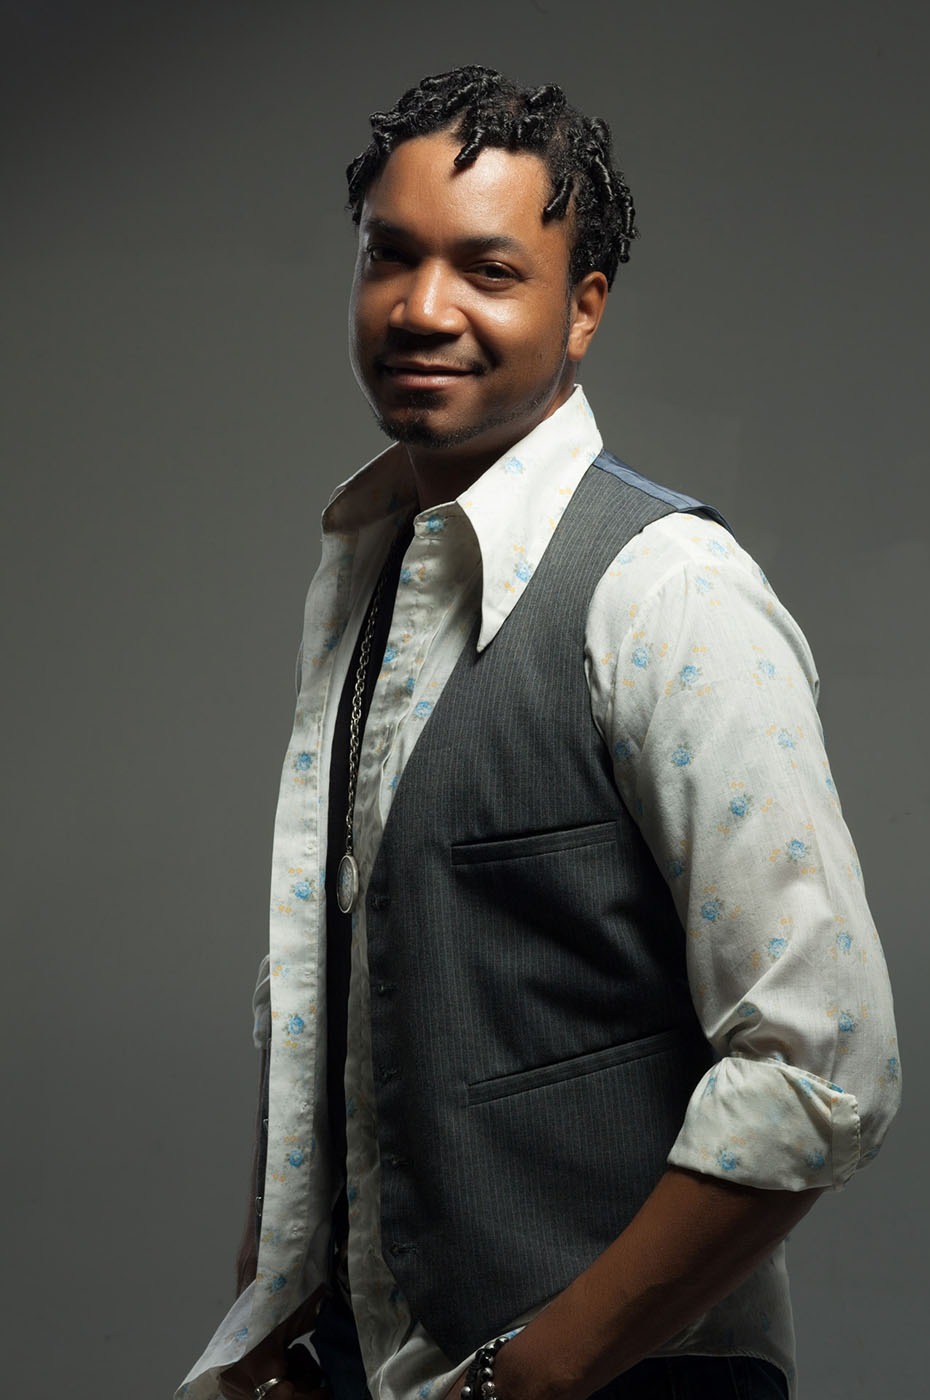
Jeff Paige (www.JeffPaigeMusic.com), a musician, actor, and comedian, booked a shoot with me to portray his new look. My concept for this session is to highlight Jeff’s face against a reasonably dark background. I set up a 9′ wide roll of white background paper that had previously been rolled with white paint for texture. As long as I keep my lights from hitting it, the background will be dark. Jeff, an African American, has moderately dark skin. His facial shape is defined by highlights rather than by shadows, as is the case with lighter Caucasian skin.
I set up two 12×71″ Rime Lite strip banks: one on either side of Jeff to edge-light his neck, the sides of his head, and arms. A medium Chimera Super Pro II softbox with a grid is on a boom directly over Jeff’s head to illuminate his hair and shoulders.
A single Dynalite RoadMax 800 pack supplies 100 Ws to each of the three sources.
Beauty Dish
I put a 22″ MOLA Demi beauty dish on a Dynalite Studio flash head powered by another 800-Ws pack. A secondhand Norman 22″ Honeycomb Grid is attached with bungee cords. (Hey, those things are expensive! It pays to scrounge. And, anyway, in the dark no one can see the bungees.) An incident meter reading told me that to get to f/11, the pack had to be at half power (400 Ws). The spotlight-like circle of illumination forces the viewer’s eye to Jeff’s face, while keeping the background subdued. I asked Jeff to keep his face turned up into the beauty dish.
Tip: When using a gridded beauty dish, have your subject look at the center of the light; then ask him take a step to the side. He will see that the amount of light is greatly reduced by the grid and understand the need to be centered
in the light.

Angles
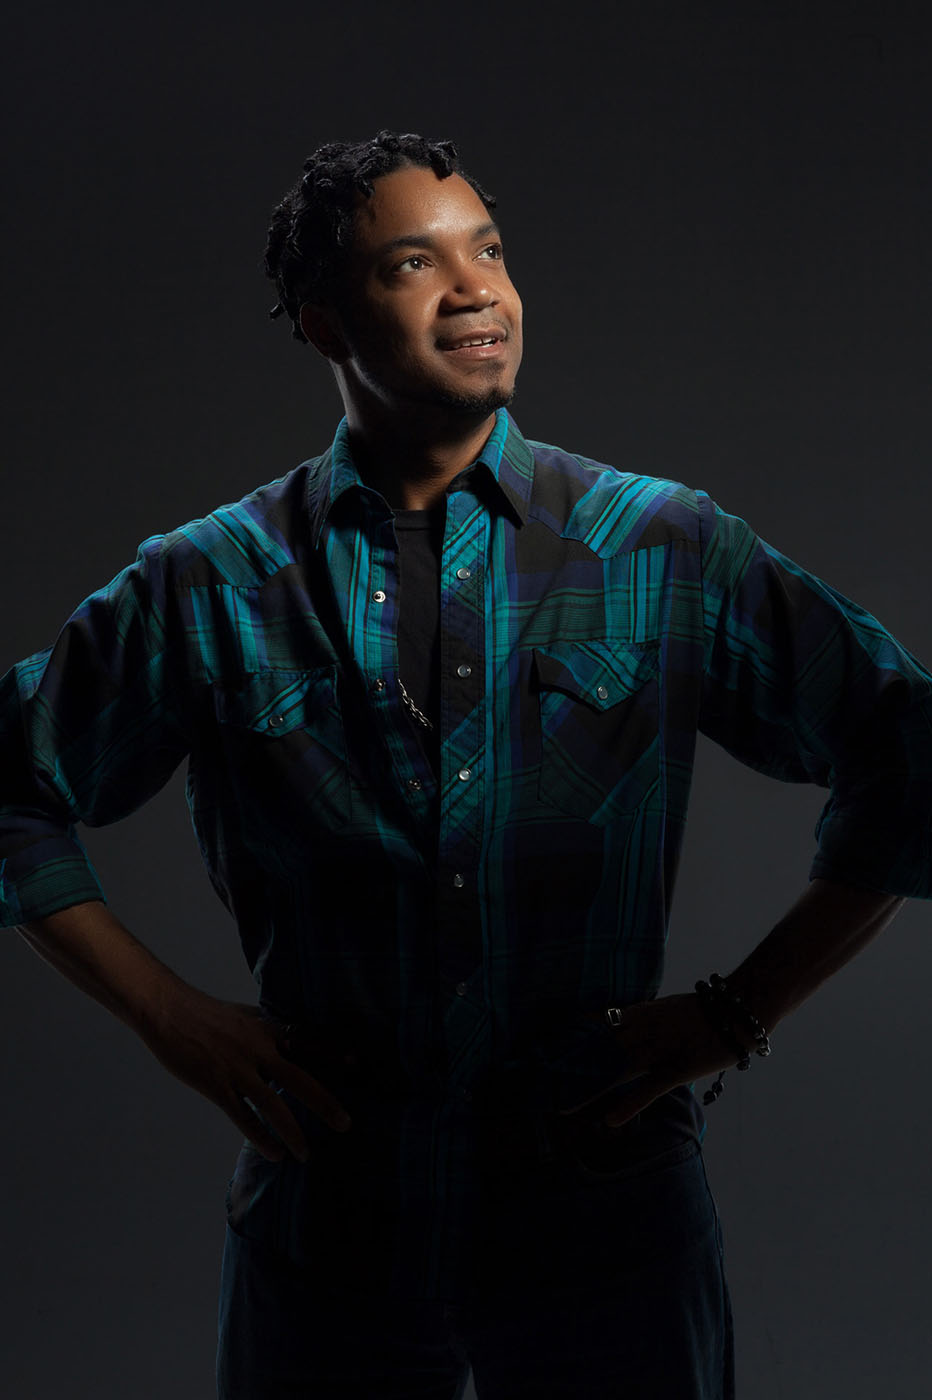
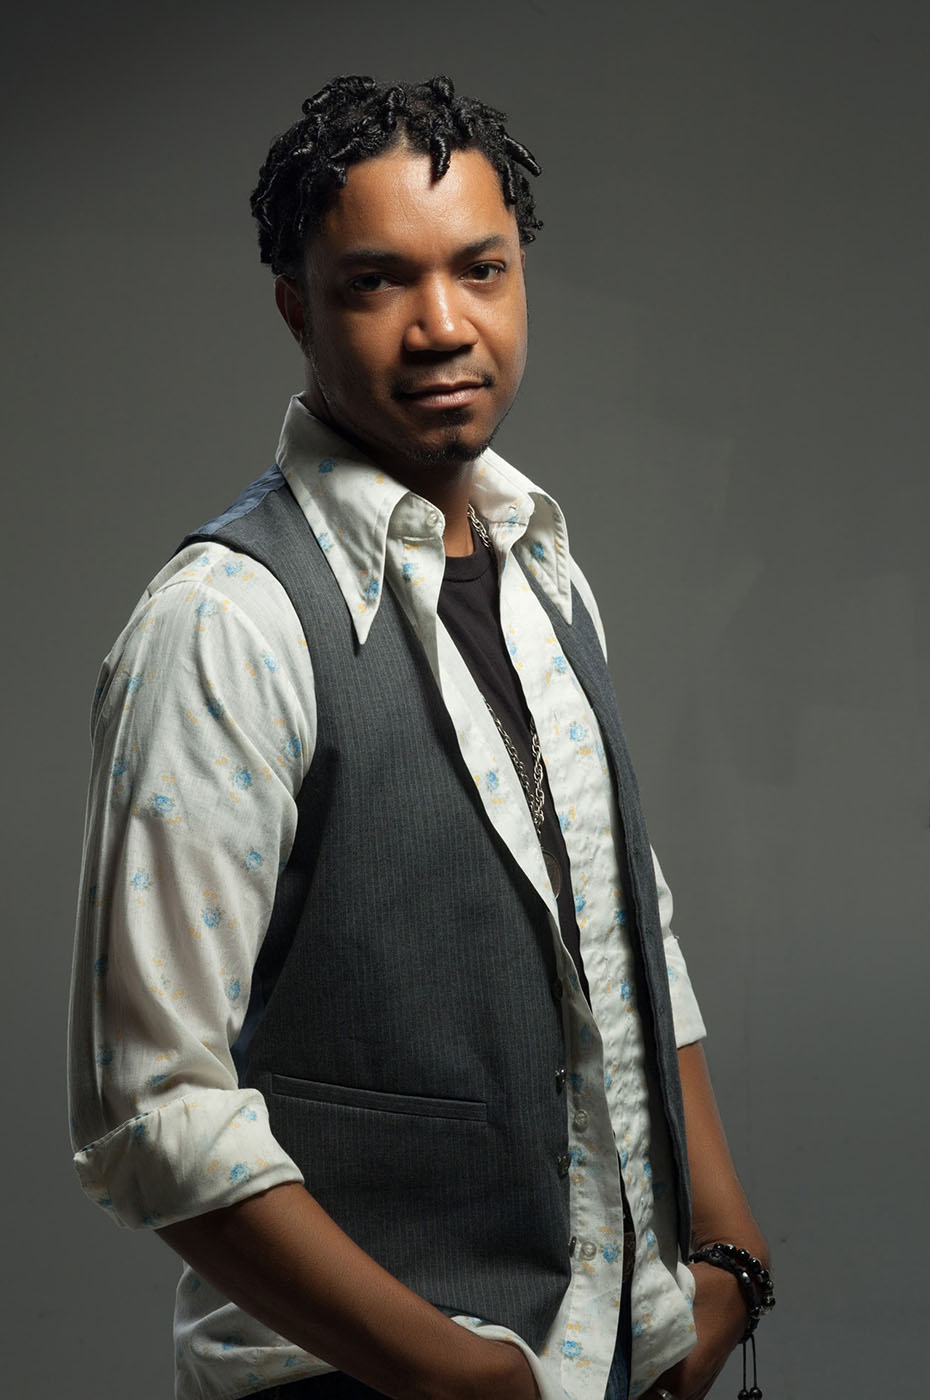
After an outfit change, I asked Jeff to turn his chin to his right. A small triangle of light appeared below his right eye. (This is a classic lighting form named after Rembrandt, the painter who originated it during the Renaissance.) The edge light on his neck and the glow in his hair are from the strip lights and the hair light. The beauty dish is in exactly the same position as the previous example, but this time the grid is gone. The light is dramatic due to the contrasting shadows on Jeff’s face. A large difference between highlights and shadows is high contrast, and the effect adds drama to the subject. His eyes are in shadow, making the look a little mysterious, as well.
The angle of the beauty dish is critical. I eliminated the shadows in Jeff’s eyes by lowering the dish not quite 1′. (Small changes make a big difference.) The distance to the subject is the same. Removing the grid, however, increases the amount of light from the dish, so I took a new meter reading. Maintaining the f/11 exposure required the pack to move down in power from 400 Ws to 100 Ws, or 2 stops less light. The grid really eats up light!
The lower angle fills in Jeff’s eyes and evens the light on his face, while the background brightens because of the spill from the beauty dish.
Tip: Compare the photographs without a grid to those with the grid to see how much light the grid controls.
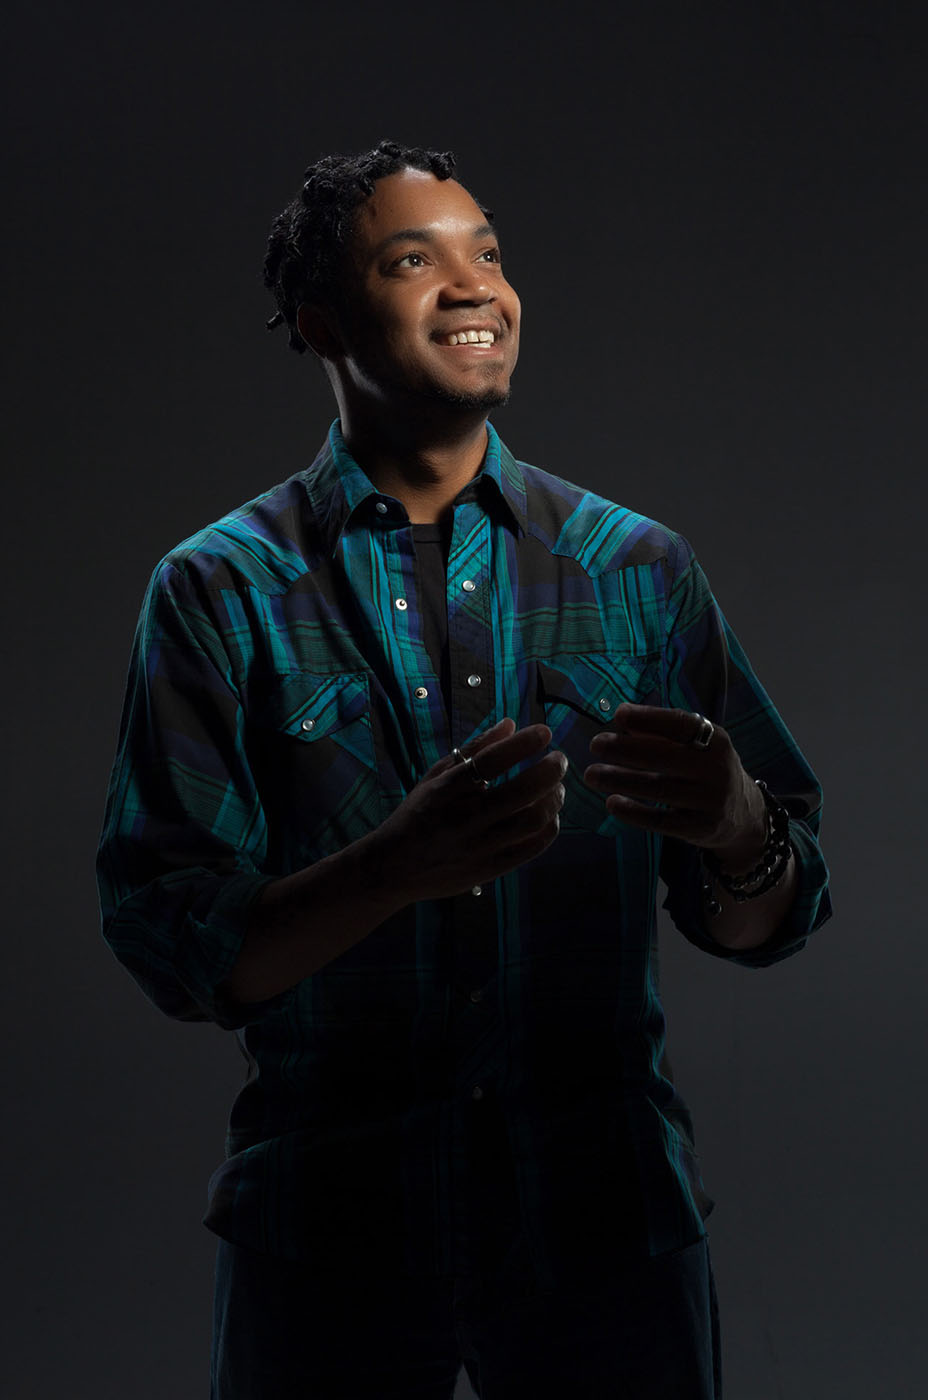
Beauty
The true beauty of the beauty dish is its versatility. Its quasiharsh light can be dramatic, or softer in contrast. Backgrounds can be made dark or light. This lighting tool’s adaptability allows a photographer to work quickly while exploring many effects, with minimal changes to the setup.

Lighting Handbook: The Beauty Dish Lighting Tutorial
Next time, the “Handbook” takes the beauty dish on location for a fashion shoot at Atlanta’s High Museum of Art. Check back on the KelbyOne Blog for the next post. In the meantime, Lindsey Adler has a great video on Fashion Lighting over on KelbyOne.
