
ARTISTIC EXPRESSIONS: Align Layers
Ever have one of those times with your spouse or friend where you’d love to have a shot of the two of you but there’s no one around to take the shot, and no place to set the camera for a timed exposure? My wife and I came across this very situation while visiting a little town in Germany a while ago. It was early in the morning, so no one was around to help us. The area in front of where we wanted to be photographed was a large plaza and I didn’t have a tripod at the time. We wanted the whole scene, so one of those “hold the camera at arms’ length” kind of shots wasn’t going to work. With a little careful planning, and a few tricks in Photoshop, the problem was solved.
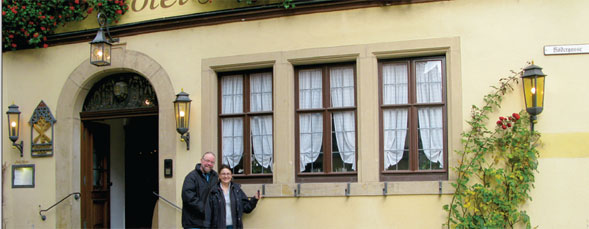
The planning part involves setting up the shot so things will work once you make the composite. The Photoshop part comes in with the use of align layers, a layer mask, and, if needed, a little retouching. Here’s a shot I took of my wife, Zosia, standing in front of a quaint little hotel. To take the shot, I stood at a specific spot that I marked on the ground, and then I took a shot of her. She then came and stood on the exact same spot to take the shot of me. My position was slightly to the left of where she was standing in front of the hotel. We now had two separate shots—so much for the photography and planning stage. Not much work, just a little attention to detail. Now comes the Photoshop part.

STEP ONE: In Photoshop, choose File>Open, navigate to the two shots you wish to align together, and click OK. Select the Move tool (V), press-and-hold the Shift key, and drag-and-drop one file directly onto the other. (Using the Shift key ensures the photos are centered.) The shot that’s copied onto the other shot will be converted into a layer (Layer 1) while the Background layer will contain the first shot placed in Photoshop.
STEP TWO: Shift-click each layer in the Layers panel to select them and choose Edit>Auto-Align Layers. In Auto-Align Layers dialog, choose any of the six methods for Projection that you think will work best for your images. We put our trust in Photoshop and chose Auto. After making your selection, click OK. Note: After clicking OK, the Background layer will automatically be converted into a layer called Layer 0. To make things easy, name the two layers to avoid any confusion that might arise while editing.
STEP THREE: Unless the two people taking the shots hold the camera in the exact, same position (my wife and I were in the same spot, but we must have shifted a little), there will be a shift in the final result. Doing a simple crop with the Crop tool (C) will fix any unwanted edge artifacts. Press Return (PC: Enter) to commit the crop.

STEP FOUR: Now comes the fun part. Select the topmost layer in the Layers panel and go to Layer>Layer Mask>Reveal All. A white layer mask will be applied to the top layer. Then select the Brush tool (B) and press D then X to set the Foreground color to black. Start painting where your missing subject is supposed to be, and you’ll start to see it appear where the mask is being painted. Zoom in to really see the mask.

The beauty of doing this type of compositing through a mask is that if you don’t get it perfectly the way you want, all you need to do is press X to switch the Foreground color to white and restore the unwanted masked areas.
STEP FIVE: Once the mask is complete, the two images will work as one. As mentioned at the beginning of this column, there might be a need for some retouching. In the case of the image used for this tutorial, there was a little retouching to be done. As you see here, my legs are behind Zosia’s but they appear to be fully exposed to the light in the scene. Based on the direction of the light source, she should be casting a shadow over me.

We selected the bottom layer that contained the image of me standing and selected the Burn tool (nested beneath the Dodge tool [O]). With a soft-edged brush, we passed the tool over the edges that fell directly behind my wife’s figure to add the necessary shadows to complete the scene.

The result is the two of us standing together in one shot that we could then show all our friends. I love telling people that if you can imagine it, you can create it in Photoshop. No matter what the imaging problem, somewhere in Photoshop you’ll find the answer. It’s a matter of understanding how the tools work. That understanding comes from sitting there and playing with Photoshop. Have fun, and play to your heart’s content.
ALL IMAGES BY BERT MONROY UNLESS OTHERWISE NOTED

