
In the olden days, we sent proofs via courier for clients to mark up and waited for their return. Later, we resorted to faxing, but the limitations of black-and-white rendering made it hard to discern some details. Then Adobe introduced Commenting and Review tools in Acrobat, which have made it a cinch to work collaboratively on documents. However, as easy as Acrobat’s reviewing features are, you still have to wait for the client to email the marked up PDF (or the Form Data File [FDF] file containing only the markups).
But what if you want instant gratification? In Acrobat 9 Pro, you can have it, thanks to new collaboration features that afford you real-time conferencing abilities. You can choose to view a PDF with a client simultaneously in Acrobat or expand your collaboration to include more than PDFs by using ConnectNow, Adobe’s latest Web conferencing environment.
LIVE COLLABORATION IN ACROBAT
STEP 1 Get Started
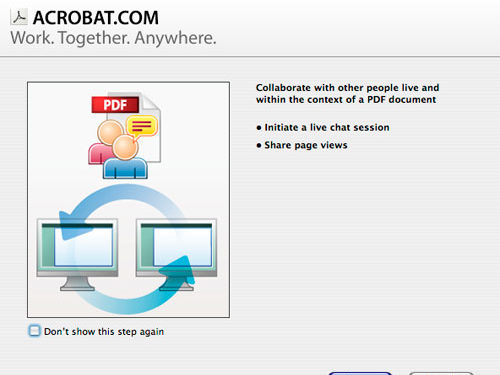
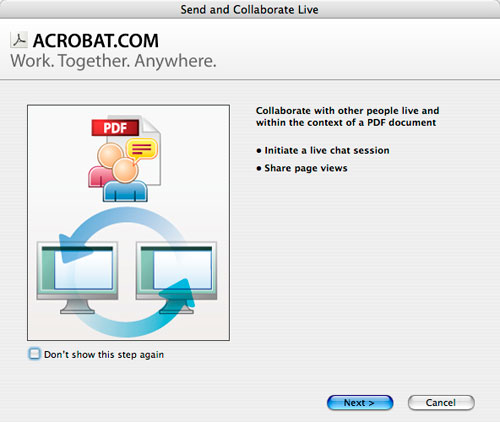
Open a PDF in Acrobat 9 Pro (File>Open). Click-and-hold the Collaborate button at the top of the window and choose Send and Collaborate Live from the drop-down menu. The introductory screen appears:
STEP 2 Send Out Invites
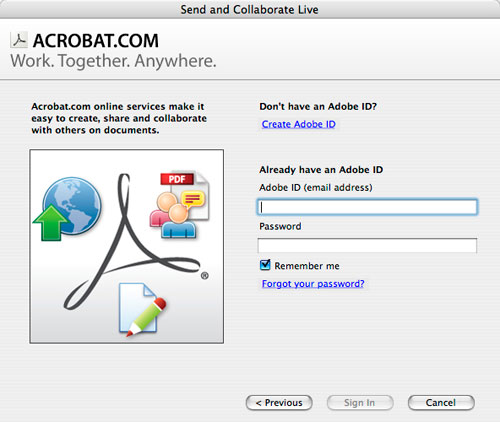
Click Next and enter your Adobe ID in the login window. Your Adobe ID gives you access to Acrobat.com. If you don’t already have an Adobe ID, click Create Adobe ID to make one.
Acrobat creates and posts a PDF on Acrobat.com with the “_collab” appended to the name (e.g., “Article.pdf” becomes “Article_collab.pdf” when posted). An e-mail containing the URL is automatically generated and is sent to the designated recipients using your e-mail application. As an alternative, you can e-mail the collaboration PDF to your invitees (that’s the one with the “_collab” added to its name). When they open the PDF, they’ll be automatically taken to the collaborative space online.
Note: Participants must have Acrobat 9 or Reader 9 to play along.
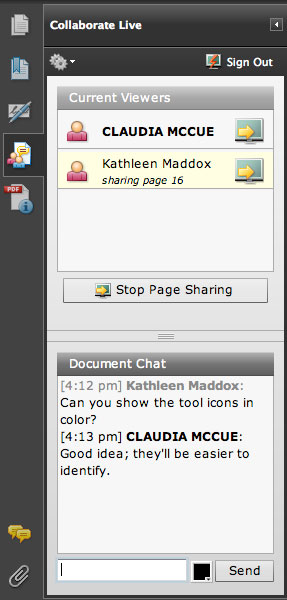
STEP 3 Start Page Sharing
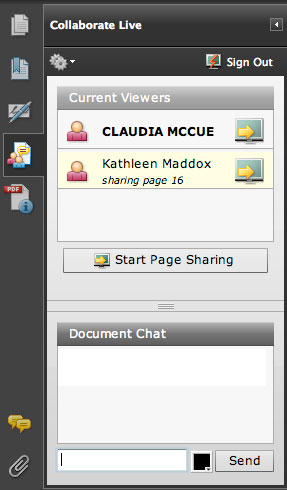
As the originator of the collaboration, you’re the “host” of the PDF. Once other participants sign in, click the Start Page Sharing button in the left column, so their view of the PDF is synchronized with yours. As you navigate through a document or zoom in and out, the online viewers will see the same view. And, since this mimics a real-life meeting in which all the reviewers are gathered around the conference table, anyone (host or other participants) can zoom or flip through the file. Everyone else will see the document view change simultaneously.
STEP 4 Start Collaborating
A chat module allows the host and participants to exchange conversations. To use it, type a message in the small field under Document Chat and click the Send button or hit the Return key (PC: Enter key). All participants can participate in the chat dialog, and it’s more cost effective than dialing long distance to out-of-town clients.
Note: While the host and participants can add sticky notes and other markups to the PDF they have open in their own copy of Acrobat, there’s no way to combine the comments into one PDF. If you’re interested in simultaneous markup of a shared PDF, consider trying the beta of Rosebud (www.rosebudplm.com). While it’s not yet a shipping product, Rosebud allows multiple participants to mark up a hosted PDF and retain everyone’s entries. Participants can also download and save the PDF with the current accumulated markups.
SHARING YOUR SCREEN VIA CONNECTNOW
As an alternative, you can take the ConnectNow route. ConnectNow was just released in Beta form and was formerly codenamed BRIO. It’s the third incarnation of the online environment Breeze, which became Connect—and now, after some streamlining, has become ConnectNow. Like WebEx (www.webex.com), ConnectNow affords you the ability to share whatever is on your computer screen with invited recipients as a fully functioning, easy-to-use Web conferencing platform.
STEP 1 Share Your Screen
To use ConnectNow, click-and-hold the Collaborate button and choose Share My Screen from the drop-down menu. (On the Mac, you must have a PDF open in Acrobat to see the Collaborate option.) If you haven’t yet created an Adobe ID, you’ll be asked to do so. If it’s your first time using ConnectNow, you’ll get a prompt to install the Adobe ConnectNow add-in. Click Yes to install it.
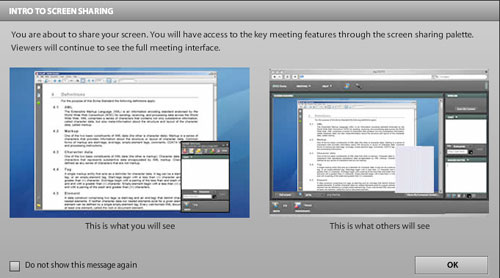
STEP 2 Familiarize Yourself with the Interface
Examine the Introduction to Screen Sharing window that appears. It gives you an idea of what you’ll see as a host of a ConnectNow meeting and what participants will see when they join you online. Participants see your screen, with a stack of three panels on the right: a Webcam, Chat, and a Shared Notes panels. (Note the odd gray rectangle in the example of a participant’s screen. This artifact appears on participants’ screens when the host is presenting from a Macintosh computer but does not appear on screen when the host is presenting from a PC.)
STEP 3 Send Out Invites
Click the Meeting button at the top of ConnectNow interface, and choose Invite Recipients. In the Invite Participants dialog, the URL of your meeting room will appear. You can either copy and paste the URL or click Compose E-mail, which launches your default email application and composes an e-mail containing the meeting room URL. Recipients with Adobe IDs can sign in with their ID info, and those without can sign in as guests. As the host, you’ll be notified that participants are waiting to enter the meeting. You can then click Accept (or Decline). Once participants are admitted to the meeting space, as the host navigates through files, the participants see everything the host sees.
Note: As the host, you’re not limited to Acrobat; whatever the you do will be broadcast, regardless of application you’re using. (So you might want to close out anything personal before inviting others to a meeting. Discretion is the better part of valor.)
STEP 4 Start Collaborating
The panels on the right side of the ConnectNow screen allow the host and participants to communicate using one of the communication modules. In the Chat module, attendees can decide whether to send a message to everyone, just the host, or just another participant (sort of like whispering during a meeting—except much sneakier).
Participants can also make entries in the Shared Notes module. Those notes are available to all participants but can only be saved by the host as a Microsoft Word (.doc) file.
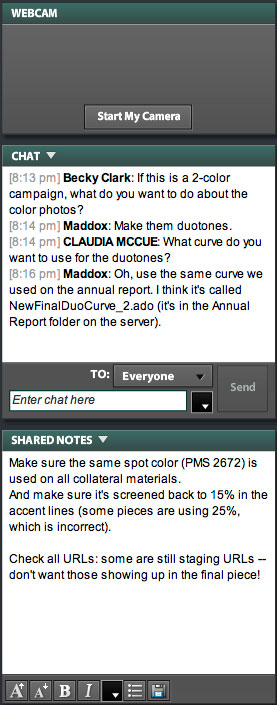
Participants also have a webcam module. Click the Start My Camera button inside the Webcam panel to crank up your webcam click Allow to allow acrobat.com to access your camera and microphone. And now you’re ready to see yourself and any other participants who have chosen to participate via webcam.
Downside: You have to style your hair before the meeting. I vote for conveniently overlooking this option!
STEP 5 Allow Remote Control
You can click on a participant’s name at the bottom of the screen and choose Ask This User to Share Their Screen from the pop-up menu that appears. As the host, you can also assign roles to participants, such as promoting a participant to be a host as well. Also, any participant can request control of the screen that’s currently active by clicking the button at the bottom of the screen that looks like a cursor. You can literally vie for control with whomever has taken over your screen. (Imagine Lily Tomlin taking over half of Steve Martin’s body in All of Me. Great fun.)
Now that you have two new avenues for client review, you won’t have to wait for marked-up proofs to be returned to you. Instead, you’ll have to figure out what to do with that time you’ve saved!
