Nearly everyone is getting into DVD these days—from photographers building portfolios to filmmakers publishing their features—and they all want attractive menus. After all, the DVD menu serves as the welcome mat and calling card for your DVD. There’s a lot to menu design, but in this tutorial (adapted from Photoshop for Video—Third Edition from Focal Press) we’ll focus on straightforward techniques.
1 LAUNCH PHOTOSHOP CS3 EXTENDED
To work with a video file inside Photoshop, you’ll need Photoshop CS3 Extended, which is included in both the Master and Production Premium collections. Photoshop CS3 Extended introduces the ability to use QuickTime-compatible movie clips in your designs—a new feature that will continue to evolve, but is worth investing your time for experimentation. By working with a video clip, you can create a DVD menu design that’s ready for Adobe Encore.
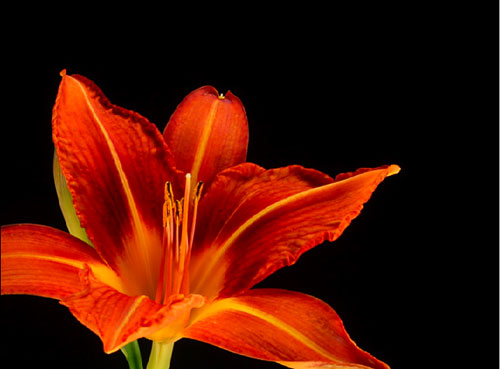
2 SELECT A VIDEO CLIP
Pick a clip of your own to use. Ideally the clip will have an “empty” area that can hold your menu’s buttons. This video can be a closeup image, a slow pan of a scenic view, or even a montage of clips. If needed, reposition the clip in the Photoshop document to make room. Photoshop Extended supports several different movie and sequential image formats. While a wide range works, it’s best to avoid the more heavily compressed formats. You should also edit the clip to the desired length. Most motion menus run between 20–60 seconds.
ARTBEATS
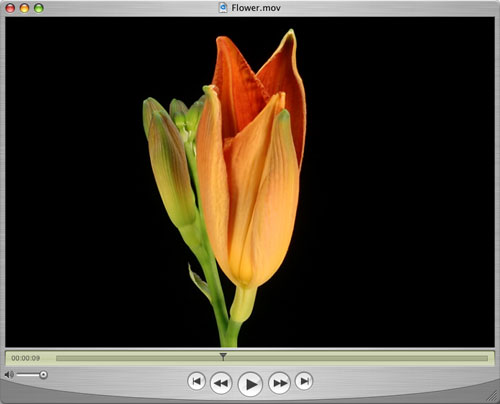
3 OPEN AND TRIM THE VIDEO CLIP
Choose File>Open and navigate to the video clip on your computer and click Open. Photoshop opens the video file and should correctly interpret the pixel aspect ratio (PAR) of your video. For most working with NTSC footage, this means that 4:3 video uses a PAR of 0.9, and 16:9 video uses a PAR of 1.2. If your video clip looks distorted, choose Image>Pixel Aspect Ratio and select the appropriate number for your footage format. Press the Spacebar to play your video clip.
4 ADD A SAFE TITLE AREA OVERLAY
To make your design process easier, you’ll need guides to identify where your text buttons should go. When designing for the video screen, the general practice is to keep your text elements inside the innermost 80% of the window. This area is called “title safe” and should be easy to read on a television set (which often clips the edges of the image). Open your Actions panel (Window>Actions) and click the flyout in the upper-right corner. From the flyout list, choose Video Actions to load their set. Open the set and run the Title Safe Overlay action.

5 ADD A BLACK & WHITE ADJUSTMENT LAYER
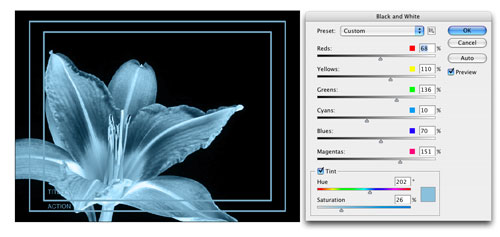
Click on the footage layer, then choose Layer>New Adjustment Layer>Black & White, and click OK. Photoshop performs a default grayscale conversion. The power here lies in the ability to adjust the conversion using the color sliders. In this case, we’ll click the Auto button, which sets a grayscale mix based on the image’s color values—it attempts to maximize the distribution of gray values. The Auto mix will often produce excellent results and can serve as the starting point for tweaking gray values using the color sliders. Don’t click OK yet.
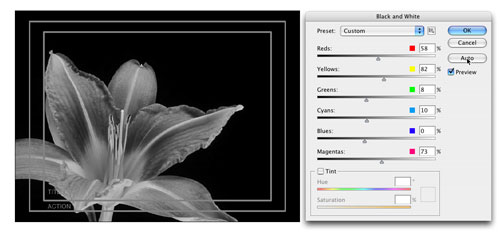
6 CREATE A DUOTONE
To create a duotone effect, check the box next to the Tint option. You can now adjust the Hue and Saturation sliders to taste. Once the tint color is adjusted, go ahead and adjust the color sliders to emphasize gray tones of specific colors in your image. Each image is unique, so you’ll need to find the right balance. Drag a slider to the left to darken or to the right to lighten. Make sure the Preview box is checked so you can see the results of your changes. When satisfied, click OK.
7 BUILD A BUTTON GROUP
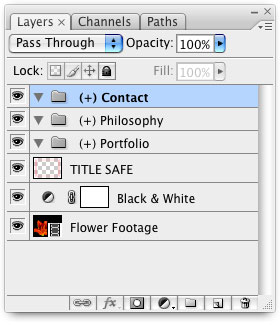
Adobe is known for their tight integration between software tools. Photoshop and Encore are no exception; however, you can harness a layer set to make each button for your DVD menu work better. Click the Create a New Group icon at the bottom of the Layers panel to create a group for each button, then drag the group to the top of the layers stack in the Layers panel. Name the layer “(+) layer name” (replacing layer name with a logical name for your button, as shown here). Each group will import into Encore as a button.
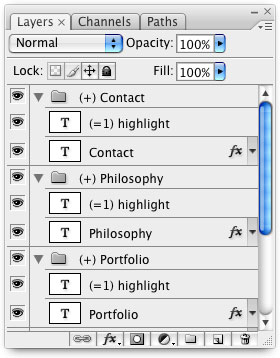
8 ADD YOUR TEXT AND LOGO
Within one of the groups, create a text layer for the button. Duplicate the text layer, edit the type, and drag the layer to one of the other groups (repeat for each group). The buttons should be similar in length and style. You’ll also want to add a logo or other art element for the title of the DVD. Next, create highlight layers, which will be used to indicate a layer is selected. In this case, we duplicated each text layer and changed the color of the type. Be sure to name the highlight layer “(=1) highlight.” For best results, leave drop shadows or glows off the highlight layer.
9 EXPORT A VIDEO CLIP
You’ll want to render the Background layer as a standalone video clip, so click on the visibility (Eye) icons to turn off the Safe Title and text overlay layers. This will allow you to render just the video clip that you’ll need in the background. Choose File>Export>Render Video and in the dialog that opens, specify a format and destination. Set the Alpha Channel to None because you don’t need embedded transparency. The default QuickTime Export (with the Animation codec) will work well. Click Render to write the file.

10 SAVE FOR ENCORE
After exporting the video clip, you’ll want to turn the visibility back on for your text buttons and logo (but not the Safe Title layer) so click on their Eye icons. Choose File>Save and write the file to the same location as your rendered movie.

11 IMPORT YOUR ASSETS INTO ENCORE
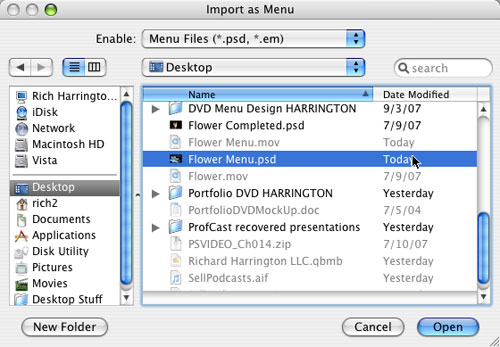
To build the DVD, you need to launch Adobe Encore. When you launch Encore, click the New Project button in the Welcome Screen, give the project a name, and click OK. Then bring in your design assets to build the menu. Choose File>Import as Menu to bring the PSD file in as a menu. Then choose File>Import as Asset and choose the rendered movie you made earlier to use as the Background layer.
12 REPLACE THE BACKGROUND MOVIE
The footage layer from Photoshop doesn’t import properly into Encore CS3. Instead, you’ll need to use the rendered background movie. Click on the Menu Viewer window so it’s active. The Layers panel updates to show you the layers. Turn off the visibility for the footage layer, black-and-white adjustment layer, and any other layers that are not to be seen in the final menu by clicking the Eye icon for each. Then in the Properties panel, select the Motion tab. Click-and-drag the pickwhip to connect it to your footage clip (as shown).

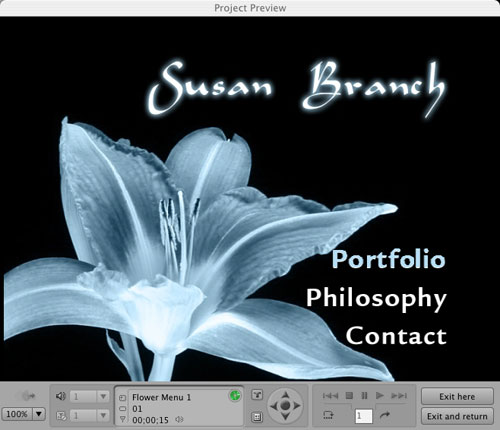
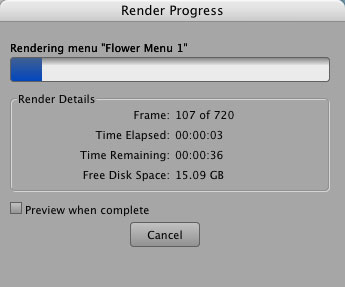
13 PREVIEW THE MENU
To view the menu in motion, you’ll need to render it. Choose File>Render>Motion Menus. Encore will build the menu and render the elements. When the Render Progress dialog goes away, the menu has been rendered. You can then Control-click (PC: Right-click) on the menu in the project list and choose Preview from Here for a simulation.
14 AUTHOR THE DVD
Once the menu is built, you can author the rest of your DVD in Encore. This will involve tasks like editing your assets using a nonlinear editor such as Premiere Pro and preparing a slide show using Adobe Photoshop. Authoring a DVD is a slightly challenging task but it’s made easier by Encore’s intuitive design.