Anyone can create a brochure in InDesign CS2 and export it to PDF for posting on a website. But you can make your brochure stand out by enhancing the user experience with a few simple techniques to make your brochure interactive. The ability to add hyperlinks directly in InDesign is a huge benefit when your end result is going to be a PDF file. Not only can you add Web links, but you can also add navigation from page to page in your document, as well as create buttons with rollover effects, and even add QuickTime movies for those times when words or pictures aren’t enough.
STEP 1 Open a Multipage Brochure
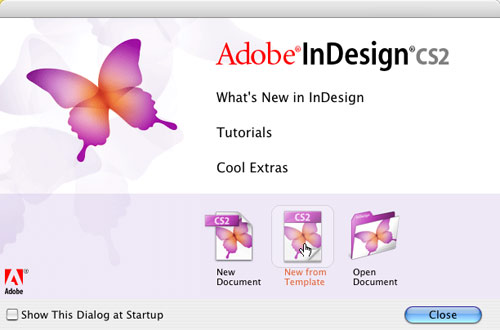
Since we’re talking about making an interactive brochure, the first thing you’re going to need is either an existing multipage brochure that you can open in InDesign (or some other multipage document). If you’re really stuck for a practice document, bring up the Adobe InDesign CS2 Welcome screen from the Help menu and click on New from Template to use one of the Brochure templates that are included with InDesign CS2.
STEP 2 Create Rollover Graphics
The next thing you’re going to need for the rollover effect is your rollover graphics, which can be created in either Illustrator or Photoshop. The goal is to create the same graphic with slight differences, such as a different color or perhaps a change in the text. Just think about how rollover buttons look on your favorite website and you’ll get the idea. It also helps to name your graphic files to include the word “over,” for example, “nature.ai” and “nature_over.ai.” This will help when it’s time to place your graphics.

STEP 3 Build Hyperlinks for Each Page
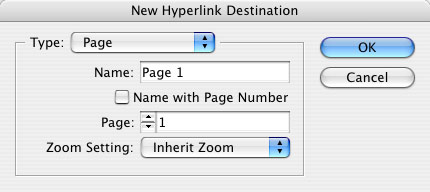
Now let’s build our hyperlinks so they’ll be available when it’s time to create our interactive table of contents. To build a hyperlink destination for each page in your document, bring up the Hyperlinks palette (Window>Interactive>Hyperlinks) and choose New Hyperlink Destination from the flyout menu. Make sure the Type is set to Page, and the Page number is the page you want to set up. Set the Zoom Setting to Inherit Zoom. Click OK. (Don’t worry that your hyperlink destination doesn’t show up in the Hyperlinks palette.) Repeat this for each page of your brochure.
STEP 4 Create a Frame; Convert Frame to Button
Go to the page on which you want to build your Table of Contents (TOC). In our example, it’s page 2. Create a frame that will contain your navigation (rollover) graphic from Step 2 but don’t actually place the graphic yet. With the frame selected, choose Convert to Button from the Object>Interactive menu.

STEP 5 Place Your “Normal” Graphic
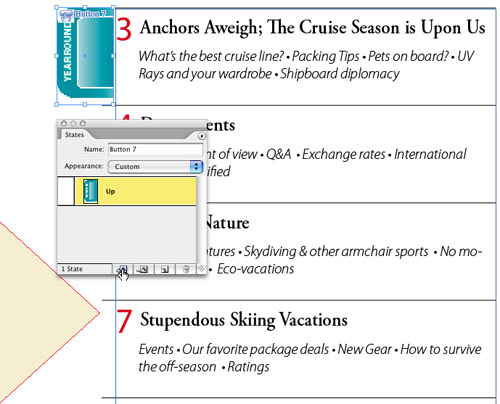
Bring up your States palette from the Window>Interactive menu. By default there’ll be an Up state already listed. Now we need to place the “normal” graphic—the one that will show when the mouse is not over the button. To place this graphic, click the Place Content into Selected State icon (at the bottom of the States palette). This will bring up the Place dialog and you can then choose your graphic and click Open. Resize the graphic with the Direct selection tool (A) if necessary.
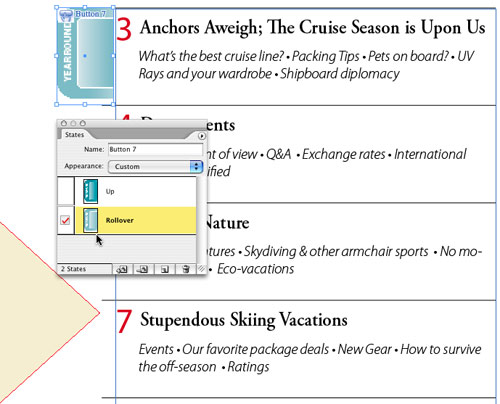
STEP 6 Create Rollover State; Place “_over” Graphic
Click the Create New Optional State icon at the bottom of the States palette, which will create the Rollover state for your button. Now click the Place Content into Selected State icon again. This will give you the ability to place your “_over” graphic into the button. Choose the graphic that you want to use for your Rollover state and click Open.
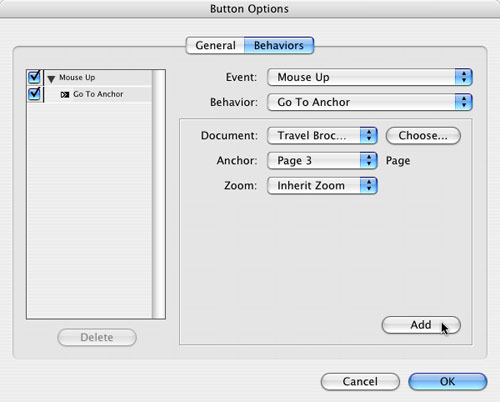
STEP 7 Assign Button Options
Your button is now set up graphically so next we have to assign the hyperlink to it. With your button selected, choose Button Options from the Object>Interactive menu and the Button Options dialog appears. On the first (General) screen, name your button, then click the Behaviors tab. Set your Event to Mouse Up and the Behavior to Go to Anchor. Under Anchor, choose the Page to which you want this button to navigate, set the Zoom to Inherit Zoom, and click Add. Click OK, then repeat Steps 4–7 for each button that you want to set up on the page.
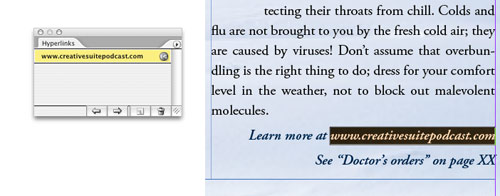
STEP 8 Key in URL and Add to Hyperlinks Palette
Now that we have set up the buttons, we can create hyperlinks for our URLs. Either key in a URL into your text or find one that’s already in your text. Select the URL with the Type tool. Choose New Hyperlink From URL from the Hyperlinks flyout menu and this automatically adds the URL to the Hyperlinks palette.
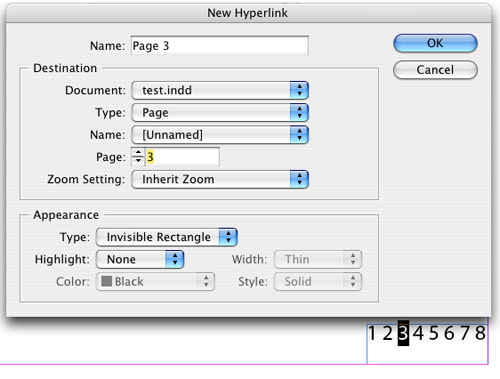
STEP 9 Create Page Hyperlinks
We can take advantage of the Page Hyperlinks that we’ve already created by putting all the page numbers on the bottom of each page. Go to your Master Page and create a text frame with all your page numbers at the bottom of your page. Select each number that you just entered with the Type tool and choose New Hyperlink from the Hyperlinks flyout menu. Name the link according to the page it goes to and then have it navigate to that page with your choice of Zoom Setting. You can also create hyperlinks for each page number in your TOC.
STEP 10 Export to PDF
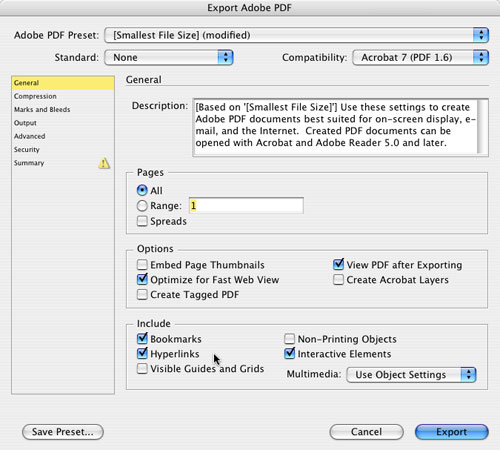
From the File menu, choose Export, select Adobe PDF in the Format pop-up menu in the Export dialog, and then click Save. In the Export Adobe PDF dialog, make sure you turn on the checkbox to Include the Hyperlinks and Interactive Elements in the PDF file. You can also check the View PDF After Exporting box to open it in Acrobat and test your new interactive brochure. Press Export when you’re finished.