
Update Your HTML Tables to CSS in Dreamweaver
If you’ve been thinking you should redesign your website with CSS and finally get rid of all those old clunky HTML tables, this column is for you. If you’ve already been through this torturous process, you may still learn a few tricks in this tutorial because HTML tables probably aren’t the only thing that needs to get updated when you bring an old website into the modern world of Web standards.
1 TABLES STILL HAVE THEIR PLACE
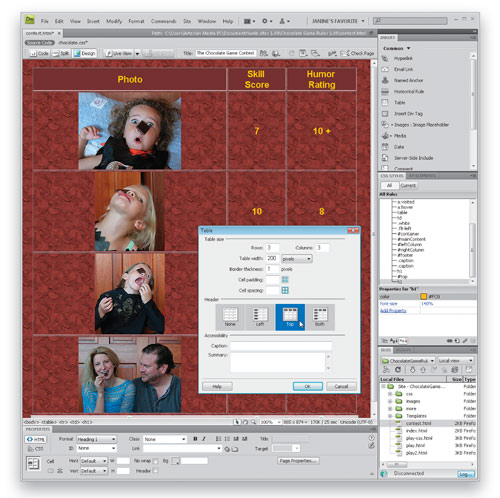
Before explaining why you shouldn’t use tables to create page layouts, it’s important to acknowledge the one remaining legitimate use of tables—tabular data. If you’re creating a page with consistent data split into columns and rows (i.e., an Excel spreadsheet or the contents of a database), then you can still use tables; just make sure your tables are accessible by using the table header tag (
CREDIT: JANINE WARNER
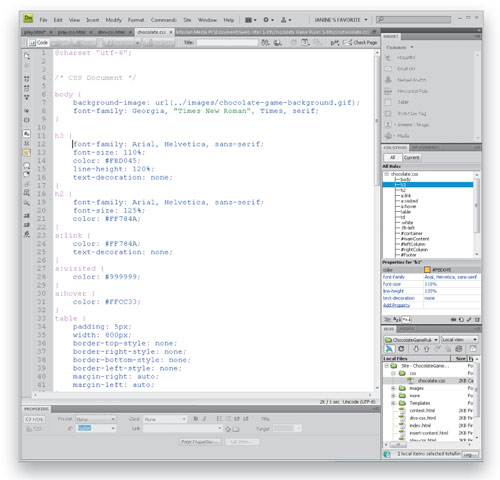
2 STUDY CODE IN OLD DESIGN FIRST
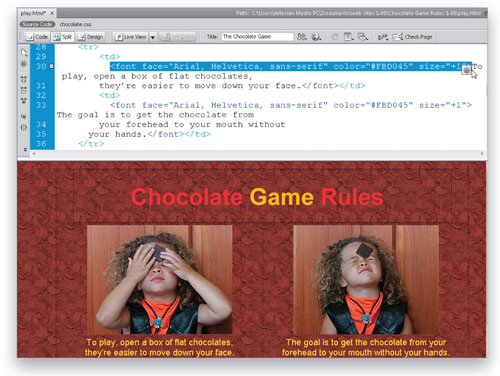
Before redesigning an old webpage, use Code or Split views in Dreamweaver to study the code. If the site was built with tables, it’s likely to have other old tags that are no longer recommended, such as the font tag shown here. To ensure your pages meet contemporary Web standards, get rid of font tags (and other deprecated code) while you’re at it. The font tag is best replaced with standard HTML tags and CSS. For example, you could use heading tags and then create a CSS tag style to change the font, color, and size.
3 USE DIV TAGS AND CSS IN PLACE OF TABLES
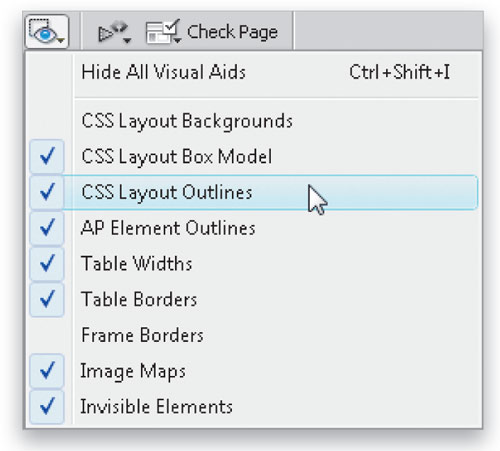
Think of HTML div tags as the building blocks of good CSS layouts. Use div tags to create boxes for all your content, and then create CSS styles that define the size, alignment, margins, padding, and borders of those boxes. Instead of merging and splitting cells to create designs using tables, you can create styles that align columns to the left or right of a page and precisely define margin and padding space on any or all sides of each div. Note that div tags are all but invisible unless you create borders. Turn on CSS Visual Aids to better see what you’re doing.
4 CREATE DIV TAGS FOR CONTENT
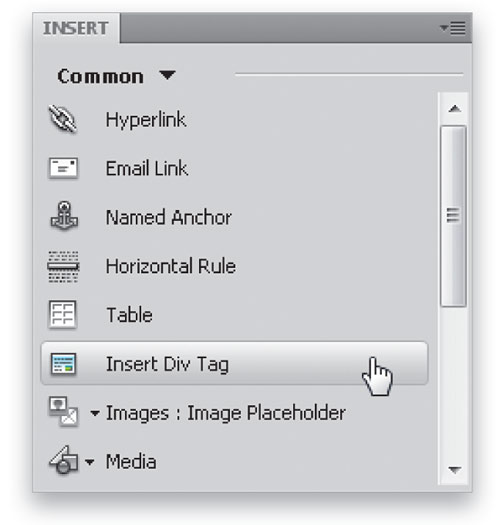
To re-create a design with CSS instead of tables, start by creating a series of div tags. Click on the Insert Div Tag icon in the Common Insert panel, or choose Insert>Layout Objects>Div Tag. Using the border settings, you can create borders on any or all sides of a div tag. Tip: Defining a border on only one side of a div is a great way to create dividing lines between columns or other elements. Use margin and padding settings to define the space between borders.
5 CREATE ID STYLES FOR DIVS
As you insert div tags in Dreamweaver CS3 and CS4, you have the option of defining styles at the same time. I like to create a style for each div tag as I create them, but usually define the styles later. You want to insert a div tag for each of the content areas of your page. For example, I created a div tag and a corresponding ID style named #container to surround all of my content and then created separate div tags for the top section, left and right columns, and the footer inside the #container div. (Note: ID style names always start with #.)

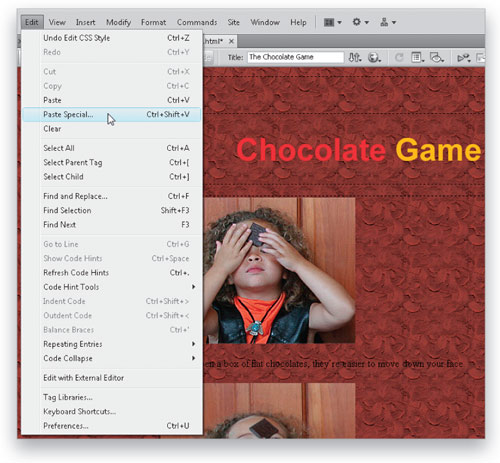
6 COPY-AND-PASTE CONTENT
Before you create styles for all your div tags, it’s often helpful to add a little content so you can better see what you’re doing as you create the page design. Most designers simply copy-and-paste text, images, and other content from the old pages into the new ones, which is fine as long as you’re careful not to bring along any old deprecated code (like the font tags shown in Step 1). Consider using the Edit>Paste Special option to add text without any formatting and then create styles to handle formatting in the new design.
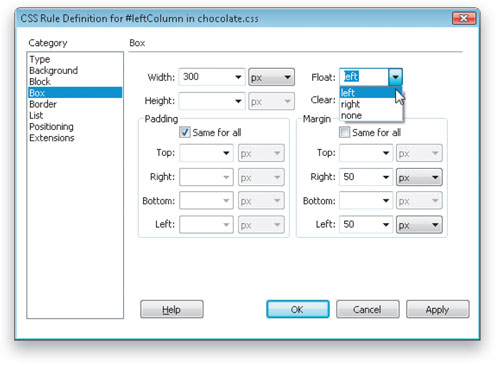
7 CREATING ID STYLES FOR DIV TAGS
With your div tags and some content in place, it’s time to define your ID styles. The ID selector in CSS is limited to use only once on a page, which makes it ideal for the main content areas of a page. Using CSS, you can control the width, alignment, padding, and margins, which all add up to great design control. So you could define the style for the left column to be 300 pixels wide with right and left margins of 50 pixels each (to separate it from the left side of the page and the right column) and set the Float to align left.
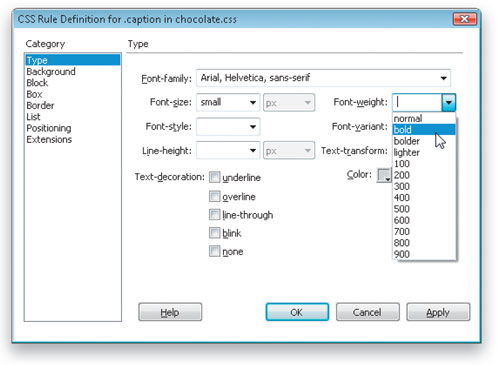
8 USE CLASS STYLES FOR RECURRING FEATURES
Class styles are ideal for recurring features, such as the captions under each image. Thus you could create a Class style called .caption that defines the font, size, and color of the text. (Note: Class style names always begin with a period or dot.)
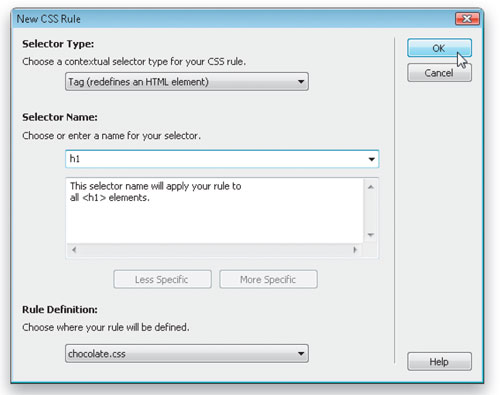
9 USE TAG STYLES TO PRESERVE HTML CODING
Whenever possible, it’s best to use standard HTML tags, but that doesn’t mean you can’t control the formatting options with CSS. For example, there are many advantages to formatting a headline with the h1 tag (search engines put greater value on words in an h1 tag, and heading tags convey the hierarchical importance of content on a page). But you don’t have to settle for all your headlines displaying in Times, 24 pt, bold text. By creating a style using the tag selector, you can change the text formatting option for the h1 tag, and any other tags you use.
10 USE EXTERNAL STYLE SHEETS
When you create styles in Dreamweaver, you have the option of saving them in an internal style sheet (meaning the styles are saved in the same document), or in an external style sheet (a separate file that can be linked to one or more pages in a website). External style sheets offer the advantage that you can use the same styles on many pages and that if you ever want to change a style, you can make the change once in the external style sheet and automatically apply it to all of your pages.
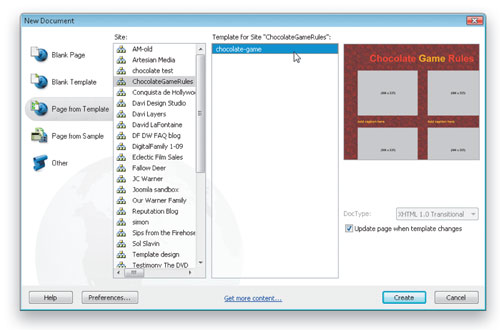
11 SAVE TIME WITH TEMPLATES
Once you’ve redesigned your page using CSS, create a template with your new layout. Templates and CSS play well together and combine to make creating new pages for your site much easier. If you redesign your site, you can simply edit the style sheet to change styles and edit the template to make changes to the HTML tags and the page content. Tip: If you edit a template, you change all of the pages created from it and all need to be uploaded to your server. If you change an external style sheet, you only need to upload the style sheet to the server.
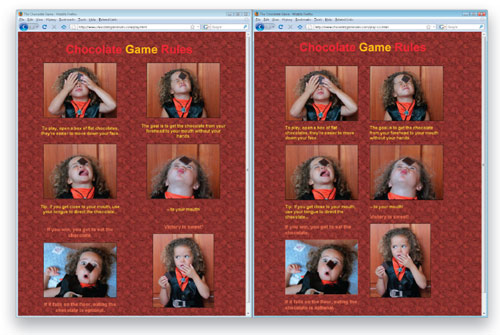
12 COMPARE TABLES AND CSS LAYOUTS
To help you appreciate that you can re-create any tables design using CSS, the layout shown on the left was created with tables, the one on the right was created with CSS. In the CSS version, I used the margin settings to create columns that better align the text with the images so that the text doesn’t extend beyond the width of the photos, as it did in the layout that uses tables. Using CSS, you can create much more complex and precise page designs.
13 TEST YOUR WORK IN DIFFERENT BROWSERS
To fully test a CSS Layout, you’ll need to preview your page in as many Web browsers as possible, including Safari, Internet Explorer, and Firefox. Ideally, you’ll test it in many different versions of each of those programs. Don’t have all those browsers on your own computer? Consider using the BrowserShots site to test you pages. Simple enter any URL into http://BrowserShots.org and you’ll be able to see how the page will look in more than 75 different browsers on Mac, Windows, and Unix operating systems.

