
The most frequently asked questions I get from people who are new to InDesign revolves around Text Wrap; however, there are also questions about text formatting that don’t get asked. But I know they exist because when I’m presenting in front of an audience and I start formatting text, I can see the look of amazement on some folks’ faces as if they’re thinking, “Hey, I didn’t know you could do that!”
1 [LET’S START WITH A BLANK PAGE]
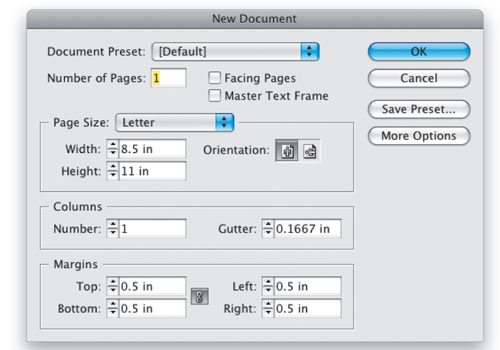
So that we’re all on the same page, literally, create a new blank 8.5×11″ page in InDesign by choosing New>Document from the File menu or by pressing Command-N (PC: Ctrl-N) on the keyboard. Uncheck Facing Pages and make your margins .5″ all the way around. Click OK.
2 [CREATE A TEXT FRAME WITH THE TYPE TOOL]
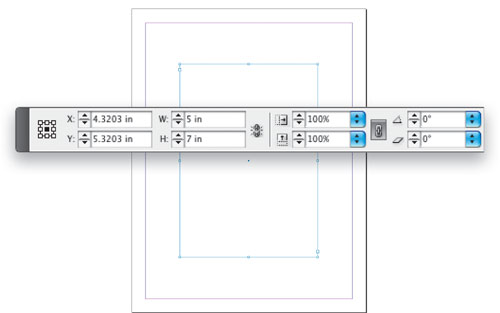
Select the Type tool (T) from the Toolbox and use it to drag out a new text frame on the page. Make it as close to 5×7″ as you can when you’re dragging it out. Of course it’s difficult to be precise when you’re dragging, so switch to the Selection tool, which should automatically select your frame as an object, and then key in the exact 5×7″ measurements in the Width and Height fields in the Control panel.
3 [ADJUST THE INSET; KEY IN YOUR HEADLINE]
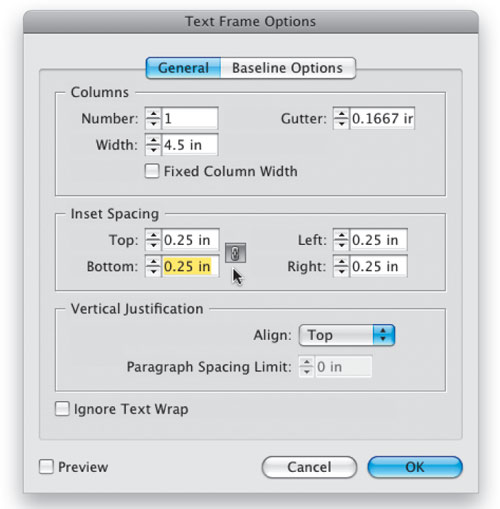
We’re going to add a border to our frame a little later and I don’t want that border to actually touch the text in our frame, so before we get started putting text in the frame, let’s set an inset.
Choose Text Frame Options from the Object menu. Set the Top, Bottom, Left, and Right Inset Spacing to .25″. If the little chain icon is enabled, setting one measurement makes all measurements the same. Click OK. Now that you’re back to your text frame, double-click on it with the Selection tool to switch to the Type tool and key in your headline.
4 [CENTER HEADLINE; BRING UP THE TABS RULER]
When you keyed in your headline in Step 3, chances are it was left aligned. So before we go any further, go ahead and insert a couple of new paragraphs (press the Return [PC: Enter] key twice) after the headline. Now select the headline and click the Align Center icon in the Paragraph Formatting controls in the Control panel. Once your headline is centered, adjust the font and size aspects to your taste. Now put your cursor on the last new blank paragraph that you created after your headline and bring up the Tabs ruler from the Type menu.
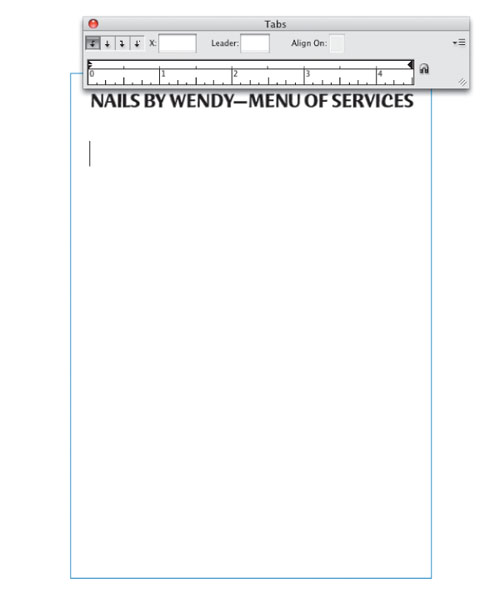
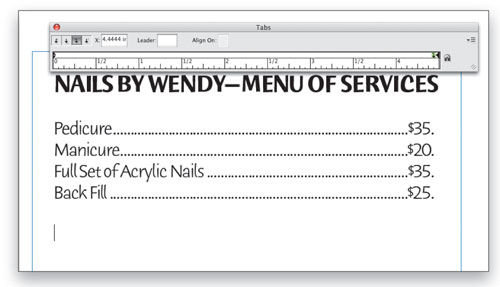
5 [SET A RIGHT TAB WITH LEADER DOTS]
We’re going to create a list with leader dots. When most people do this, they usually go about it the hard way. But here’s the easy way: Click the Right-Justified Tab (third one from the left) and then click on the ruler near the right indent to add a tab stop. While the tab stop is still selected, go ahead and key in a period in the Leader field.

6 [TEST IT BY KEYING IN A SAMPLE LIST]
Now you can key in your sample list. On the left side, which is where your cursor should be, key in the item name, then press the Tab key on your keyboard, and your cursor should jump over to the right tab that we set. Now when you key in your price/time/place, etc., it will be right justified at the tab stop and there will be leader dots from the item name to the item description that you just keyed in. Just press Return (PC: Enter) to create the next paragraph and your tab stop will be carried down automatically.
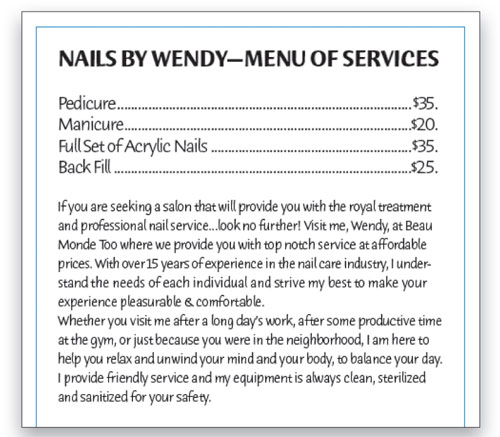
7 [KEY IN PARAGRAPH TEXT]
Now that you’ve created your list, it’s time to create some paragraph text with indents below the list. First, let’s create a standard paragraph of text and then we’ll add a second paragraph that we’re going to indent in the next step. You can close the tab ruler at this point.
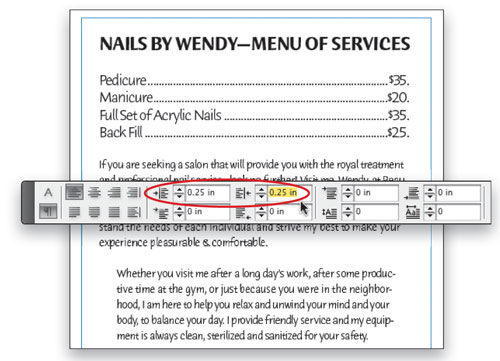
8 [ADJUST THE INDENTS ON THE CONTROL PANEL]
For the second paragraph of text, let’s indent it on both sides using the Indent controls (circled) in the Paragraph Formatting section of the Control panel. Set both the Left Indent and Right Indent to 0.25″.
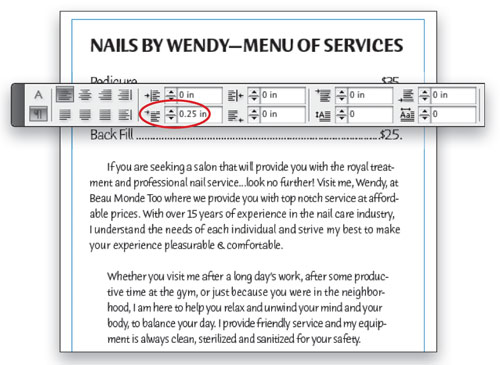
9 [ADJUST THE FIRST LINE INDENT]
Many times when I receive Word documents that I need to place into InDesign, the sender has taken the time to tab in the first line of each paragraph. If you use Indents especially in your Paragraph Styles, this becomes a very unnecessary step. Instead of tabbing in the first line of each paragraph, just set a First Line Left Indent in the Control panel. I’ve set mine to 0.25″.
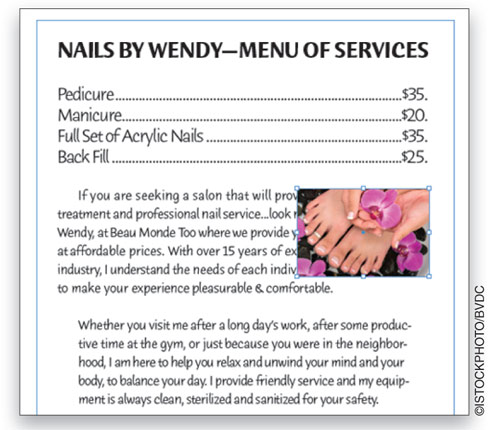
10 [USE “PROPORTIONAL PLACE”]
Now it’s time to place an image to dress things up a bit. In InDesign CS4, there’s a wonderful new feature I call “Proportional Place.” This means you can use the File>Place command, choose your image, and click-and-drag the image onto the page in the exact size you want. InDesign will constrain the proportions of the frame to the image you’re placing. Using this method, place an image over the right side of the first paragraph of body text.
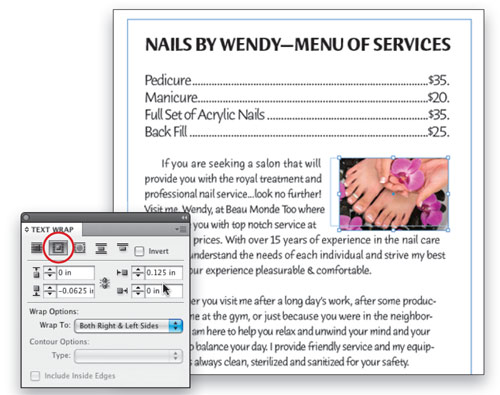
11 [WRAP YOUR TEXT]
Of course, the image is now covering part of your text and this is where Text Wrap comes in (Window>Text Wrap). With the image still selected, click the second icon, Wrap around Bounding Box, and your text should automatically wrap around your photo. Now you can adjust how close the text will appear around the sides of your image by adjusting the Offset measurements (as shown). If you like, you can use negative measurements to bring the text closer.
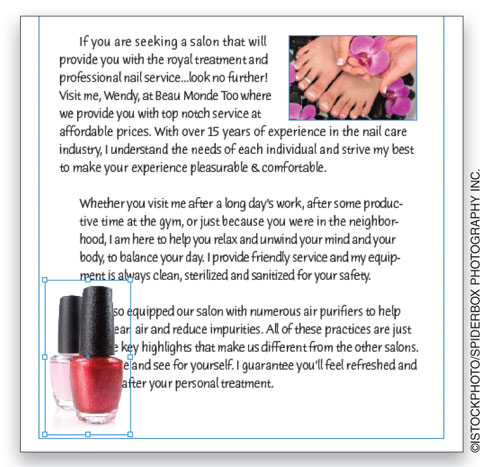
12 [PLACE AN IRREGULARLY SHAPED GRAPHIC]
Wrapping text around a square or rectangle is easy; however, wrapping text around an irregularly shaped object requires a few more steps. An irregular object can be a vector graphic such as an Illustrator or EPS logo or a Photoshop file where you’ve removed the background. In this example, we’re using a photograph where I removed the sky and saved it as a layered PSD file. I also added a third paragraph to the document.
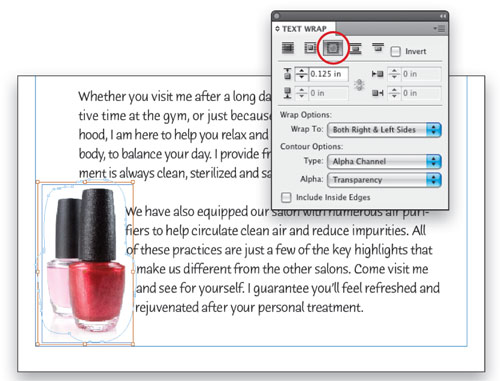
13 [WRAP TEXT AROUND IRREGULAR SHAPE]
Now go back to the Text Wrap panel and choose the third option, which wraps around an object shape. But you’ll see that it still looks like all it did was wrap around the bounding box. This is where you have to choose the right Contour Options: For a transparent PSD file, use the Alpha Channel option; and for an Illustrator or EPS file, choose the Detect Edges option.
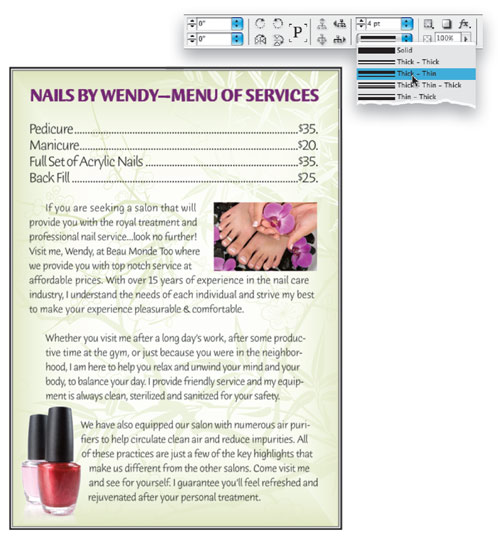
14 [ADD A FRAME BORDER]
Now to put the finishing touch on this design, we’ll add a nice border to our frame. Select the Frame with the Selection tool and then choose the weight and style of border that you want from the Control panel (we chose 4 pt, and Thick – Thin).
ALL IMAGES BY TERRY WHITE UNLESS OTHERWISE NOTED
