Creating Collapsible Panels with Spry in Dreamweaver
The following tutorial shows you how to create a Collapsible Panel with Spry, an interactive feature that enables visitors to your site to open and close panels to display more or less information without reloading the page.
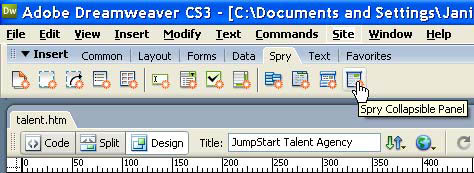
In Dreamweaver CS3, Adobe added the Spry framework – a new set of tools you can use to create drop-down menus, collapsible panels, and other advanced features. You’ll find these options in a new Insert bar at the top of the work area.
STEP 1
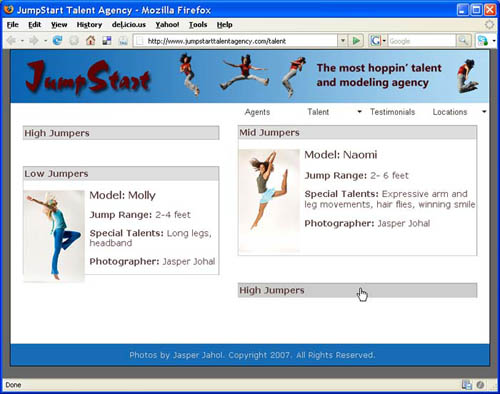
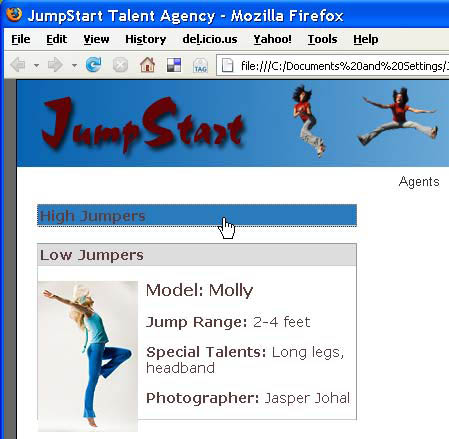
Spry Collapsible Panels in Action
You can add as many Spry collapsible panels to a Web page as you like and visitors can open and close them independently. In this page, displayed in the Firefox Web browser, there are four collapsible panels. Two are open and two are closed. To test these and other Spry features, you’ll have to preview your pages in a browser that supports CSS and Javascript.
STEP 2
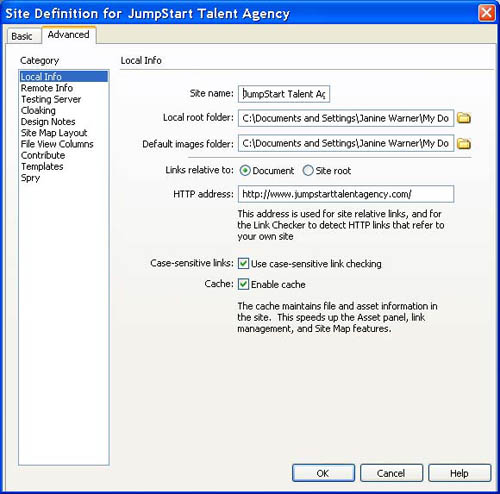
Set Up Your Site
You can add a Spry menu to a new or existing page, but like most of the features in Dreamweaver, things works better when you’ve first defined your Web site in Dreamweaver. If you’ve already gone through the site setup process, you’re ready for step two. If you’re creating a new site, choose Site > New Site, select the Advanced tab and fill in the fields of the Local Info category. For more detailed instructions, read the online tutorial Defining a Site in Dreamweaver on the Layer’s Web site. (link to: HYPERLINK “http://www.layersmagazine.com/defining-a-site-in-dreamweaver.html” http://www.layersmagazine.com/defining-a-site-in-dreamweaver.html )
STEP 3
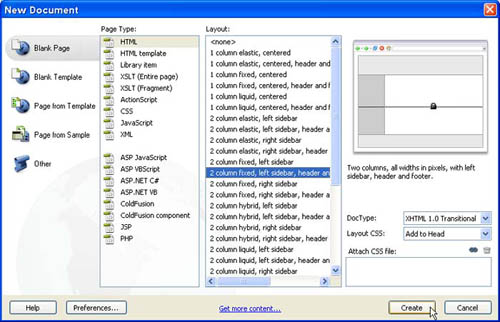
Create a New Page or Open an Existing One
To create a new page, choose File > New and then select a file type. In the New Document Window, you can choose from a variety of file types, including ASP, PHP, and CFM. If you’re creating a new page for a basic, static Web site, choose Blank Page, HTML, and then select a CSS Layout or choose None to create a completely blank page. If you choose one of the CSS Layouts, you can alter the layout to better suit your design by editing the CSS definitions. (You’ll find tips for editing CSS layouts like this one the Dreamweaver tutorial in the last issue of Layers Magazine.) (link to: HYPERLINK “http://www.layersmagazine.com/css-jump-start.html” http://www.layersmagazine.com/css-jump-start.html )
STEP 4
Insert Spry Collapsible Panel
To insert a Spry Collapsible Panel, first open the Spry Insert Bar at the top of the workspace by clicking on the Spry Tab, or choosing Spry from the Insert Bar drop-down list. Place your cursor where you want to create the panel in your Web page, and then click on the Spry Collapsible Panel icon at the far right of the Insert bar.
STEP 5
Add Content to Panel and Tab
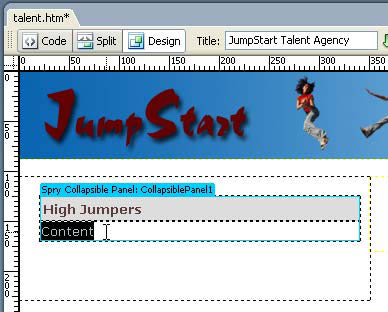
When you insert a Spry Collapsible Panel, a two-section panel is added to the page. The top section is labeled Tab, the bottom section, Content. The Tab area is what a user will click on to open or close the bottom section. You can replace the word Tab with any text you want by selecting it and typing new text in its place. Similarly, you can replace the word Content with your own text, images, and other elements.
STEP 6
Edit Style Definitions
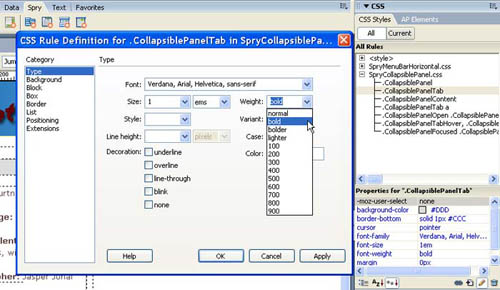
The format of the text in a Spry Collapsible Menu is controlled by CSS. Thus, to alter the appearance, you need to edit the CSS definitions. For example, to make the text in the tab area bigger or bolder, you could double-click on the style named: .CollapsiblePanelTab in the CSS Panel and in the CSS Definition dialog. Use the settings in the Type category to specify the font face, size, and style.
STEP 7
Add Additional Panels
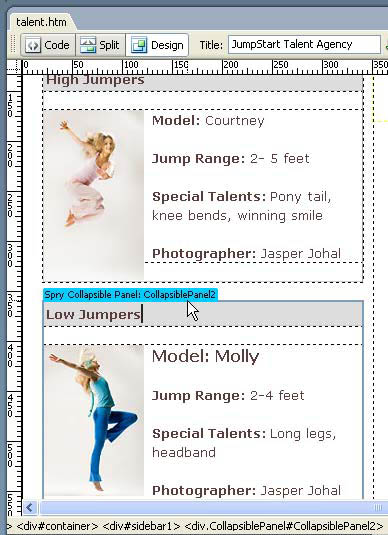
To add more Collapsible Panels to the same page, repeat steps 4 – 6. Each time you add a Collapsible Panel, Dreamweaver automatically inserts the corresponding code in the HTML page and names the panel in the order it was created, CollapsiblePanel1, CollapsiblePanel2, etc. However, only one set of CSS styles is added to the page for all of the panels. If you want to alter the display of the panels so that they are not the same in appearance, you’ll need to create new styles using the panel name to target the id of the Div that surrounds the panel.
STEP 8
Preview in a Browser to Test
To test a Spry feature, like a Collapsible Menu, you’ll need to preview your page in a Web browser, such as Safari or Firefox. Click on the tab at the top of the Collapsible Panel to close it, click again to open it.
STEP 9
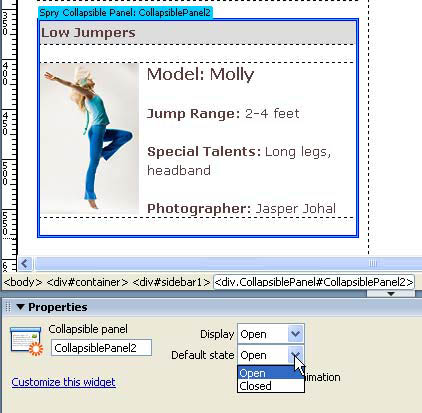
Change Menu Display Options
You can change the basic panel settings by altering the options in the Property inspector. To do so, you need to select the blue tab at the top left of the Collapsible Panel in Dreamweaver to display the settings in the Property Inspector. These settings are specific to each panel and are edited independently.