Add Some Flash to After Effects
[This article was co-authored by Marcus Geduld]
Even before it was acquired by Adobe, Flash was used by artists to create content for After Effects. Flash has easy animation tools, vector morphing, almost-instant rendering, and a sophisticated scripting language called ActionScript. For many, ActionScript is the key benefit of Flash. True, After Effects has Expressions (written in another scripting language), but they aren’t as powerful or versatile as ActionScript programs. But if you know ActionScript or work with someone who does, you probably learned the hard way that it doesn’t export to After Effects…that is, until Flash CS3! With CS3, you can finally bring your scripted Flash movies into After Effects, Premiere Pro, and other applications. Here’s how:
STEP 1 Create Your Flash Movie
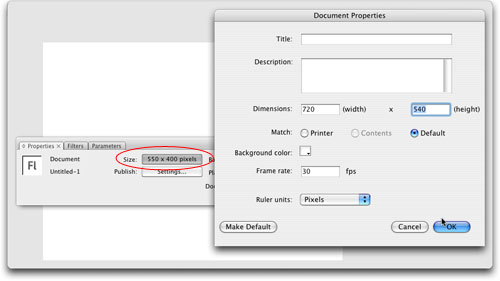
Flash uses square pixels, not the nonsquare ones used by After Effects for NTSC and PAL video. So if you want your movie to fill the entire screen, make it 720×540 for NTSC and 768×576 for PAL. Those are for standard video. For widescreen DV, use 768×576 for NTSC and 1024×576 for PAL.

STEP 2 Add ActionScript
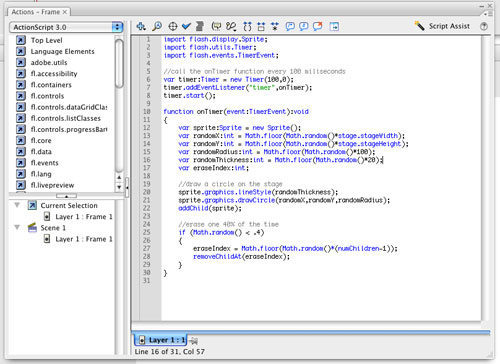
There are several ways to do this: You can write the script in the same file as your animation, or link to a script in an external file. To keep things simple, we decided to write our script in the same file. Click in the first frame of the Timeline and choose Window>Actions from the menu, then type your script. If you don’t know ActionScript, you can download our file used here by going to http://layersmagazine.wpengine.com and navigating to the Downloads section.
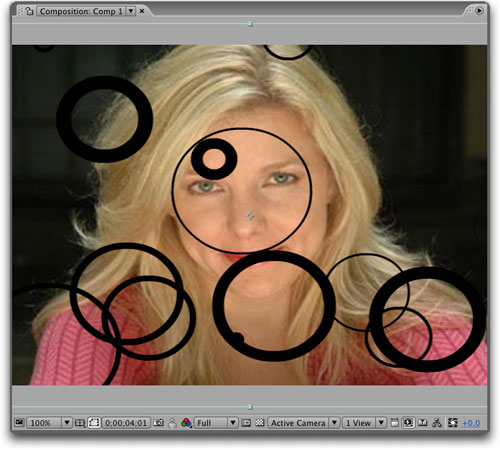
STEP 3 Test Your Movie
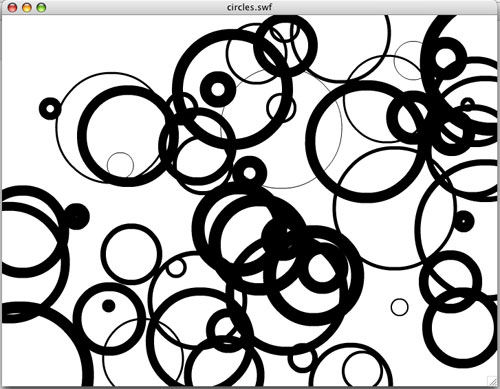
To test the movie, choose Control>Test Movie from the menu. As you can see, our movie draws random circles on the screen. This would be time-consuming to do with standard animation, but our short script makes it a snap.
STEP 4 Save Export File in QuickTime Format
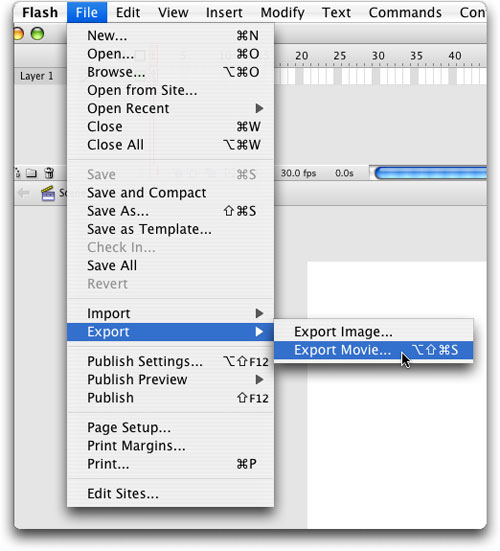
Choose File>Export>Export Movie to export the movie for After Effects. In the Export Movie dialog, choose a location on your hard drive where you want the file to be saved, enter a filename, and choose QuickTime from the Format drop-down. Then click the Save button.
STEP 5 QuickTime Export File Settings
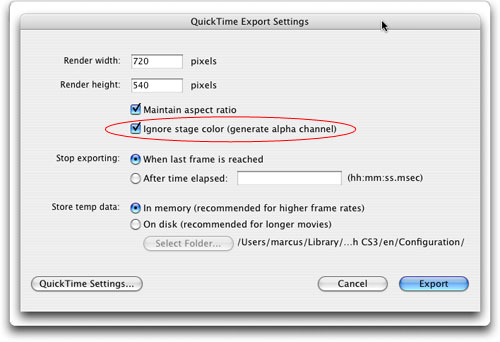
In the QuickTime Export Settings dialog, check the Ignore Stage Color (Generate Alpha Channel) option. This will export your movie with a transparent background so that you can overlay it on other footage in After Effects. Don’t click the Export button yet.
STEP 6 The Movie Never Stops
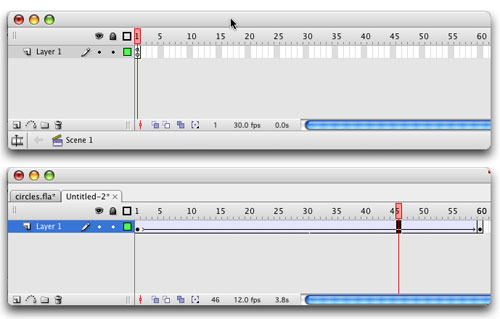
Movies made with ActionScript often don’t rely on the Timeline for animation. As you can see, our movie (top) has no Tweening in the Timeline (as opposed to the one on the bottom, which uses standard animation instead of ActionScript). If you run our movie, it never stops; it would run forever if you didn’t close its window. But we don’t want to bring an infinitely long movie into After Effects.
STEP 7 Set 15-Second Animation
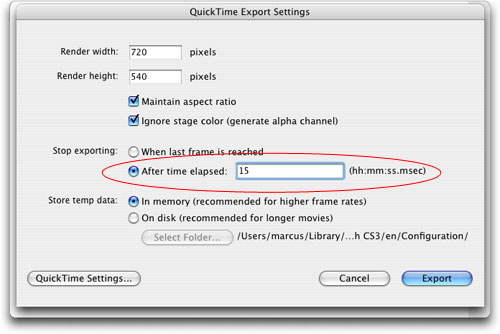
Our After Effects project calls for a 15-second animation, so in the Stop Exporting section of the QuickTime Export Settings dialog, select After Time Elapsed and type 15 in the field.
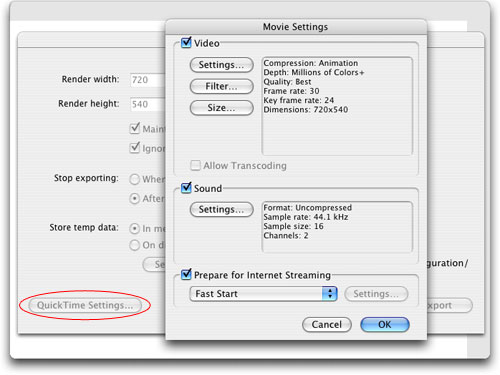
STEP 8 Adjust Movie Settings
If you want to choose compression settings (and other advanced QuickTime options), click the QuickTime Settings button. This will open the Movie Settings dialog. (If left at their defaults, these settings produce results that are suitable for broadcast.) Once you’ve finished adjusting these settings, click OK to close the Movie Settings dialog, and then click the Export button in the QuickTime Export Settings dialog.
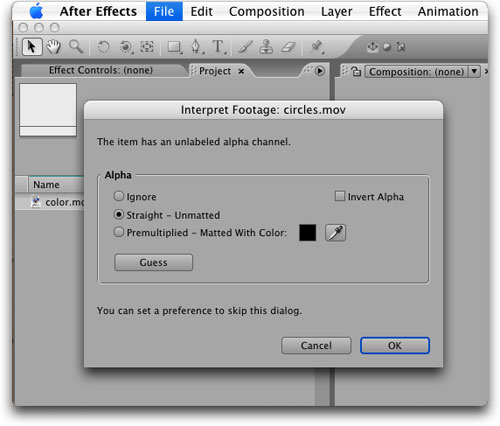
STEP 9 Import File into After Effects
In After Effects, choose File>Import>File and select the QuickTime movie on your hard drive. If the Interpret Footage dialog appears, choose Straight – Unmatted as the Alpha channel type and then click OK. (We also imported a standard video to play under our Flash-generated file.)
STEP 10 Adjust Composition Settings
Choose Composition>New Composition from the menu. We chose NTSC DV from the Preset drop-down and entered 1000 (10 seconds) in the Duration field. Click OK when you’re done adjusting Composition Settings.

STEP 11 Drag Files into the Composition
Drag the Flash-generated file (and any other footage you’d like to use) into the Composition. We dragged our standard footage first, then we dragged in the Flash file.
MARCUS GEDULD
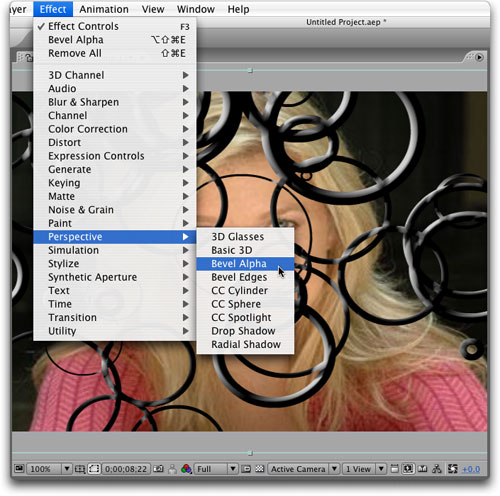
STEP 12 Add a Bevel Effect
In this example, we’ve applied a bevel effect to the Flash footage: Select the footage in the Timeline and then choose Effect>Perspective>Bevel Alpha.
STEP 13 Use Flash Footage as a Matte
As an alternative, you can use the Flash footage as a matte. We used three layers: on the bottom, a black-and-white, blurred video; above that, a color version; and on top, the Flash footage. Next, we clicked the Toggle Switches/Modes button at the bottom of the Timeline to toggle to Modes view, and in the color layer’s track matte drop-down menu, we chose the Flash footage as an Alpha matte.
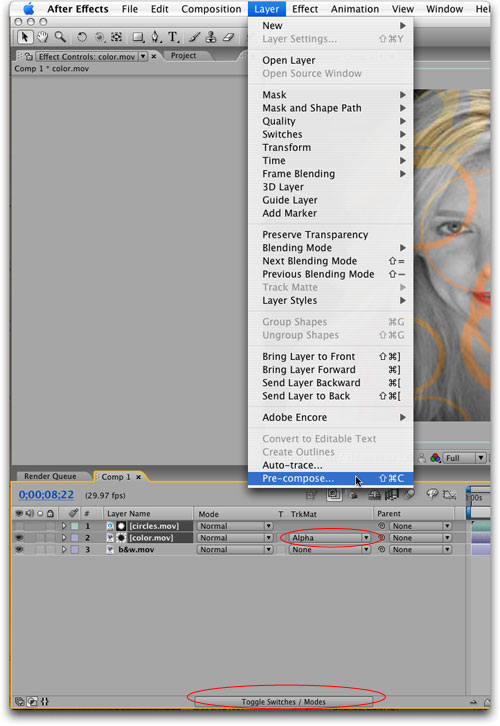
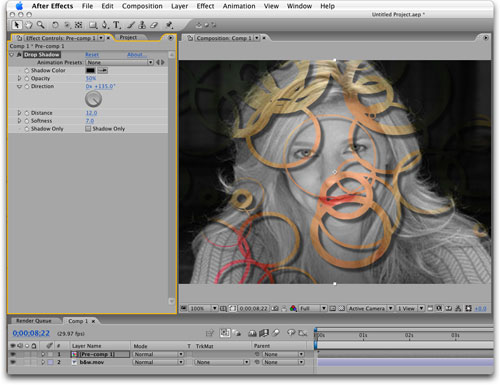
STEP 14 Precompose Top Layers; Add Drop Shadow
Finally, we selected the top two layers, precomposed them (Layer>Pre-compose), and applied a drop shadow effect (Effect>Perspective>Drop Shadow) to the resulting Pre-comp 1 layer.