
RAW Rules!

In a previous column, I mentioned a few of the benefits of RAW files. Many attendees at my seminars at Photoshop World in Boston told me they enjoyed the article, and wanted more info on shooting RAW files and processing those files in Adobe Camera Raw. Well, here goes!
To illustrate this article, I’ll use some of my favorite pictures from a recent trip to Panama where I photographed two of the indigenous tribes: the Kuna and the Embera. I’ll also share a couple screen grabs of the Adobe Camera Raw dialog. That’s where you process and take total control of the RAW file, also known as a digital negative. I’ve also included a few fun facts about RAW files and Camera Raw that may be new to you.
RAW power
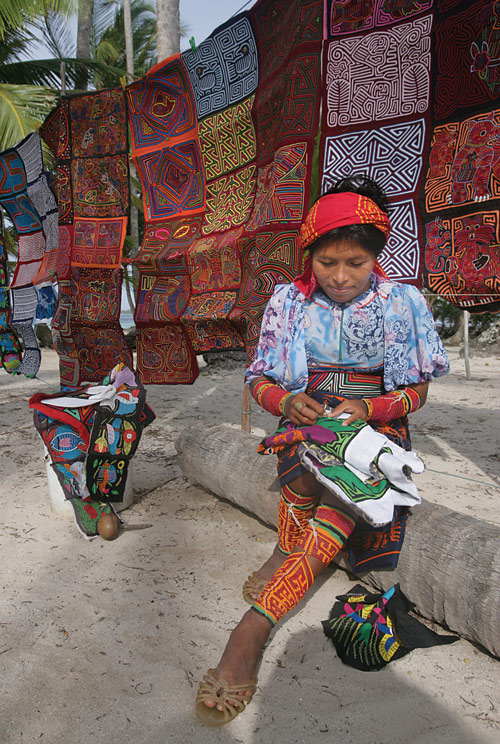
Okay, now let’s take a look at why RAW Rules. Did you know JPEG files toss away 1/3 or more of the image data—without even asking you? Can you imagine what that trashing does to your image? That’s right: it trashes it. So, RAW files contain more data than JPEG files, which is very important when you want to capture the fine details in a scene, such as the pattern in the beautiful blouse this Kuna woman is wearing.

Processing RAW files in Camera Raw is less destructive to an image than processing a JPEG image in Photoshop CS2 because you’re working in 16-bit mode. The more bits an image file contains, the better the quality will be. It’s similar to the scenario facing film photographers: If a landscape image shot with 35mm film looks okay, it will look great when photographed on 4×5 sheet film!
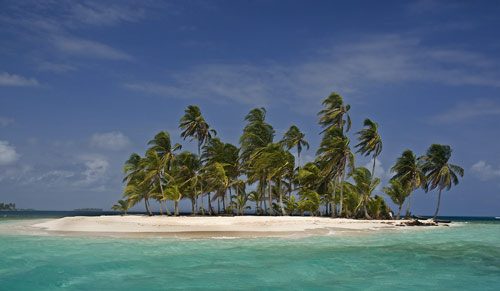
JPEG files are already processed when they come out of your camera—with color, sharpness, and other enhancements already applied. With a RAW file, you get the RAW image that you can process to your heart’s content. The only data applied to your image in-camera is the ISO, f-stop, and shutter speed. For scenes like this, where oversharpening and oversaturation (especially of the red tones) could cause a loss of detail, I prefer not to let the camera set the file’s sharpness, contrast, and saturation. By the way, I spent half a day photographing this Kuna woman on the small island that’s pictured at the beginning of this column. As the old real estate saying goes, “Location is everything!”
RAW files have a wider exposure latitude than JPEG files, so they’re more forgiving of your exposures. That’s quite cool when you’re shooting high-contrast scenes or scenes with bright highlights, such as sand on a beach.
The histogram on your camera’s LCD monitor isn’t the histogram for the RAW image, but for a JPEG version of that image. So, judge your exposure accordingly. Likewise, the overexposure warning on your camera isn’t for the RAW image: It’s for a JPEG version of that image.
Camera Raw
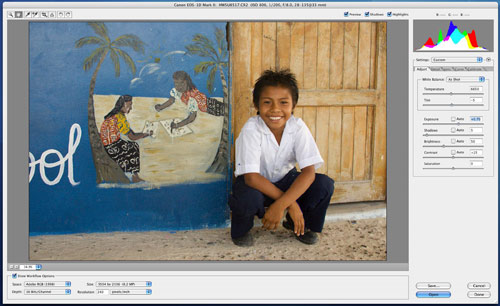
You can easily correct and adjust all of the following in Camera Raw: exposure, white balance, contrast, saturation, brightness, tint, chromatic aberrations, luminance and color noise, sharpness, and vignetting. Shown here is the dialog for the Adjust tab, which is where most pros start their image processing.

Camera Raw has the amazing ability to recover overexposed areas of a scene—sometimes a full f-stop. In this portrait of a Kuna woman, her nose ring (which the Kunas believe helps keep evil spirits from entering the body) is the brightest highlight. I believe the nose ring would have been washed out in a JPEG file due to the brightness range of the scene. The highlight and shadow clipping warning in Adobe Camera Raw makes it easy for you to see what areas of an image are or will be washed out (shown in red) or lost in the shadows (shown in blue).
You can see that the highlight clipping warning in the example here shows the overexposed areas of the scene, which I have circled in white so you can easily see them. Also note the default settings in the Adjust tab, namely the +1.10 Exposure setting and the 31 Brightness setting. To rescue these overexposed areas, I changed the Exposure setting to -0.30 and then the Brightness setting to 84. Then I adjusted the Shadows and Contrast until I was pleased with the image. That said, I know some photographers (including the President of the North American Nature Photography Association, Darrell Gulin) start with the Saturation slider. One reason to start with the Saturation slider is that oversaturated areas lose detail and can look washed out, too.


Using the controls in the Calibrate tab, you can even calibrate Adobe Camera Raw to your camera. It’s in this window where you select and adjust the built-in profile that was used to create the profile for your camera model and the camera that you’re actually using. Serious about calibration? Do a Web search on the Macbeth 24-patch Color Checker. Then get one and get to work. Again, calibration is for the serious shooter—who is very serious about color.

And finally, Camera Raw, in conjunction with Adobe Photoshop CS2 and Adobe Bridge, makes finding, processing, and enhancing pictures super easy—and fun!
Always start with the best image
So by now I’m guessing that you agree that RAW Rules! However, it’s still as important as ever to start with the best possible in-camera image—and to carefully select the subject and compose the scene, two of the most important elements in photography. This picture of a little Embera girl is one of my favorite photos from my Panama trip. And, believe it or not, the image needed very little image processing, because I followed my own picture-taking advice.

