
The Digital Camera: Colorful Expressions
Follow These Simple Steps for Good Color in Your Digital Photographs
When I teach a photography workshop, one of the subjects I talk about is color: how we see it, how to capture it with our digital cameras, and how to get prints with good color. I stress that “good color” can be different than “true color” because sometimes we like to enhance or tweak the color of a scene to suit our own personal taste.
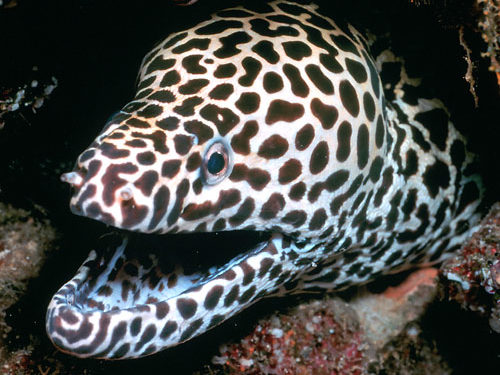
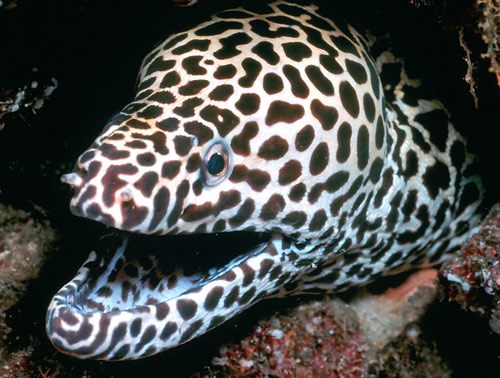
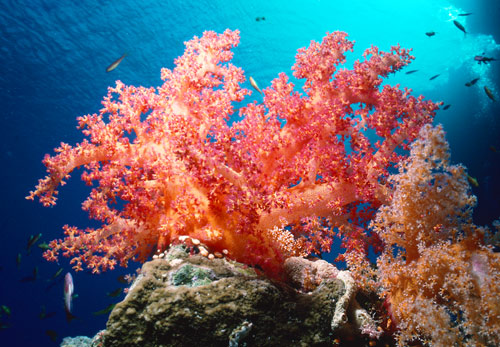
Following are the main topics I discuss. To illustrate good color, I’ll share a few pictures taken while exploring some of the most colorful places on earth: coral reefs.
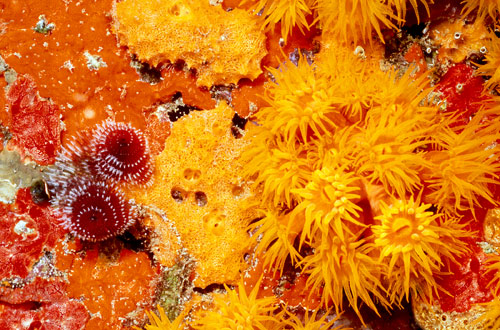
Colorful subject: If you photograph a gray stingray, you can make a print or have a print made based on true color, but my guess is that no one looking at the picture will comment on the great color. So the first thing you need for a colorful picture is a colorful subject.
White balance: When you set the white balance on your digital camera, you’re telling the camera that all the whites in the scene should be white. If they look white, all the other colors should be “right on.” So, for most situations, it’s important to set the white balance for the existing lighting conditions (daylight, cloudy, shady, tungsten, etc.) if you want true color.
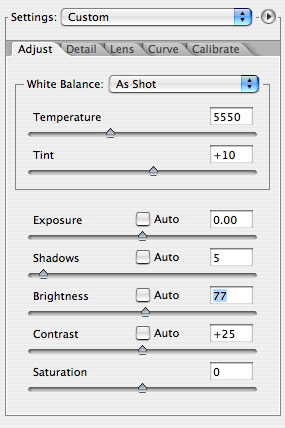
Some cameras let you set a custom white balance and even bracket your white balance; however, that only applies to JPEG files because when you shoot in RAW mode, you pick the white balance setting in your RAW digital darkroom program. I use Adobe Camera Raw. In Camera Raw, I do as much as possible with the 16-bit image—adjusting the White Balance, Temperature, Exposure, Saturation, and so on.
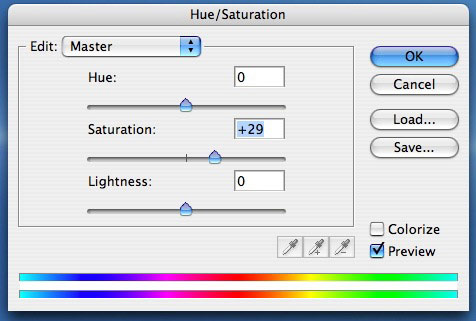
Parameter setting: Some digital cameras offer a feature called Parameters. With Parameters, you can increase or decrease the Contrast, Sharpness, Saturation, and even the Color of a picture. With this control you can also set the camera to take a black-and-white or sepia-tone picture.
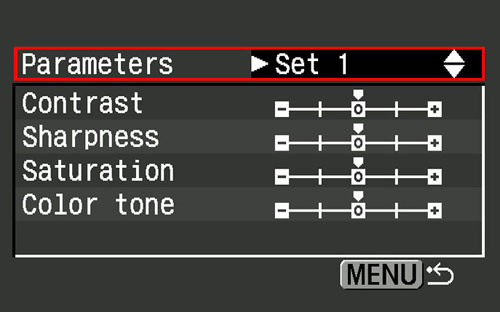
For a more colorful picture, you might want to boost the color and saturation of a picture—in-camera. I usually don’t recommend this because you can do the same thing in Photoshop. What’s more, if you boost the contrast and saturation too much, you may lose important details in the scene. However, it’s fun to see on a camera’s LCD monitor how a change in color and saturation can enhance a scene.
Exposure: Getting a good exposure is critical, which is why it’s important to look at the histogram on your camera’s monitor. Note that when your camera is set to capture RAW images, the histogram isn’t the histogram for the RAW file but for a JPEG rendition of that file. The same is true for the overexposure warning. Why is that important to know? Well, in some situations the highlights may be shown as washed out, but you may be able to rescue them in Camera Raw.
You can slightly underexpose a picture to get a slightly more saturated and colorful picture—but watch out for digital noise, which occurs mostly in the shadow areas. With the highlight-recovery capability of RAW files (up to one f-stop), many professional photographers are moving the histogram on the camera to the right (highlight area). That technique helps to avoid digital noise.
Personally, I boost the saturation and darken the image in Photoshop for deeper colors. Adjusting the color sliders in the Color Balance dialog also gives me color control, as does adjusting Curves, Levels, and Contrast.
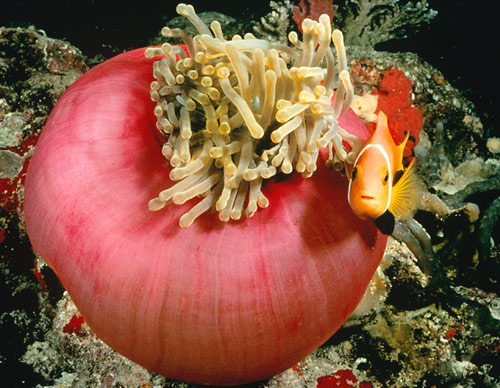
Monitor calibration: This picture of a clown fish and sea anemone is jam-packed with color. The print I made on my inkjet printer and the online print I had made look exactly the same as the image on my monitor. How did I get such an accurate print? The first step was to calibrate my monitor. I simply opened the calibration profile from the CD that came with my calibration device, hung the calibration device on my monitor over the calibration window, ran the program, and in a few minutes, I was all set to go. (Note: I recommend using a hardware-based calibration device. Whatever device you use, follow the manufacturer’s instructions for calibrating your monitor.)
Calibrating your monitor corrects onscreen color for the most accurate visualization of color on your monitor. Simply put, if you don’t calibrate your monitor, the colors you see could also be off in your prints. What’s more, you probably want to calibrate your monitor at least once a month to keep it tuned up. Also be sure to keep your room light consistent. That can affect how colors look on your monitor, too.
Printer profiles, paper, and ink: After you calibrate your monitor, it’s almost time to make an inkjet print. Before you do, you need to download the manufacturer’s profiles for the printer, ink, and paper that you’re using. This is very important. If you don’t download the appropriate profiles, it’s like having your computer talking to your printer in a different language! Once you download the profiles, just follow the manufacturer’s instructions for installing and using them.
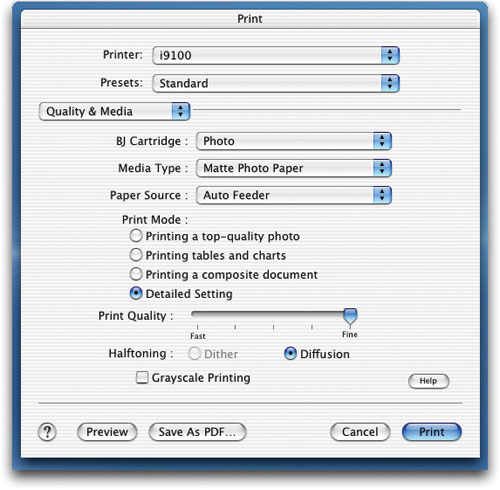
You need to tell your printer what paper type (glossy, matte, etc.) you’re using. If you don’t match the paper type in the Print (PC: Page Setup) dialog with the paper you’re using, your pictures might look muddy or off color and they may take a long time to dry.
Make sure to use the highest-quality inks, ones that have a wide color gamut to accurately print your images. Also, make sure to use archival ink so that your pictures don’t fade after just a few years.
Ordering prints online: Online processing is easy and fun. If you follow the lab’s guidelines (including color space, color profiles, file type and size, bit depth, etc.), your prints should match the images you see on your monitor. So the key is to follow those guidelines very carefully after you’ve calibrated your monitor.
All together now: My last tip isn’t really a tip in and of itself; rather, it’s the idea that all of the aforementioned tips work together in the process of getting a good print. Follow all the tips from start to finish and you should be happy with your prints.
I actually do have one more tip: Have fun and be creative. Your idea of good color may be different from someone else’s vision. Keep in mind that exploring the world of color—in-camera and in the digital darkroom—can be a very rewarding experience.
