
Scott Kelby: Shooting in Daylight

Hey everyone! Scott is in Amsterdam for Professional Imaging, where he will be teaching lots of his cool techniques. But, he didn’t forget about us. Look — he left something just for you: An excerpt from The Digital Photography Book, part 5. ENJOY!
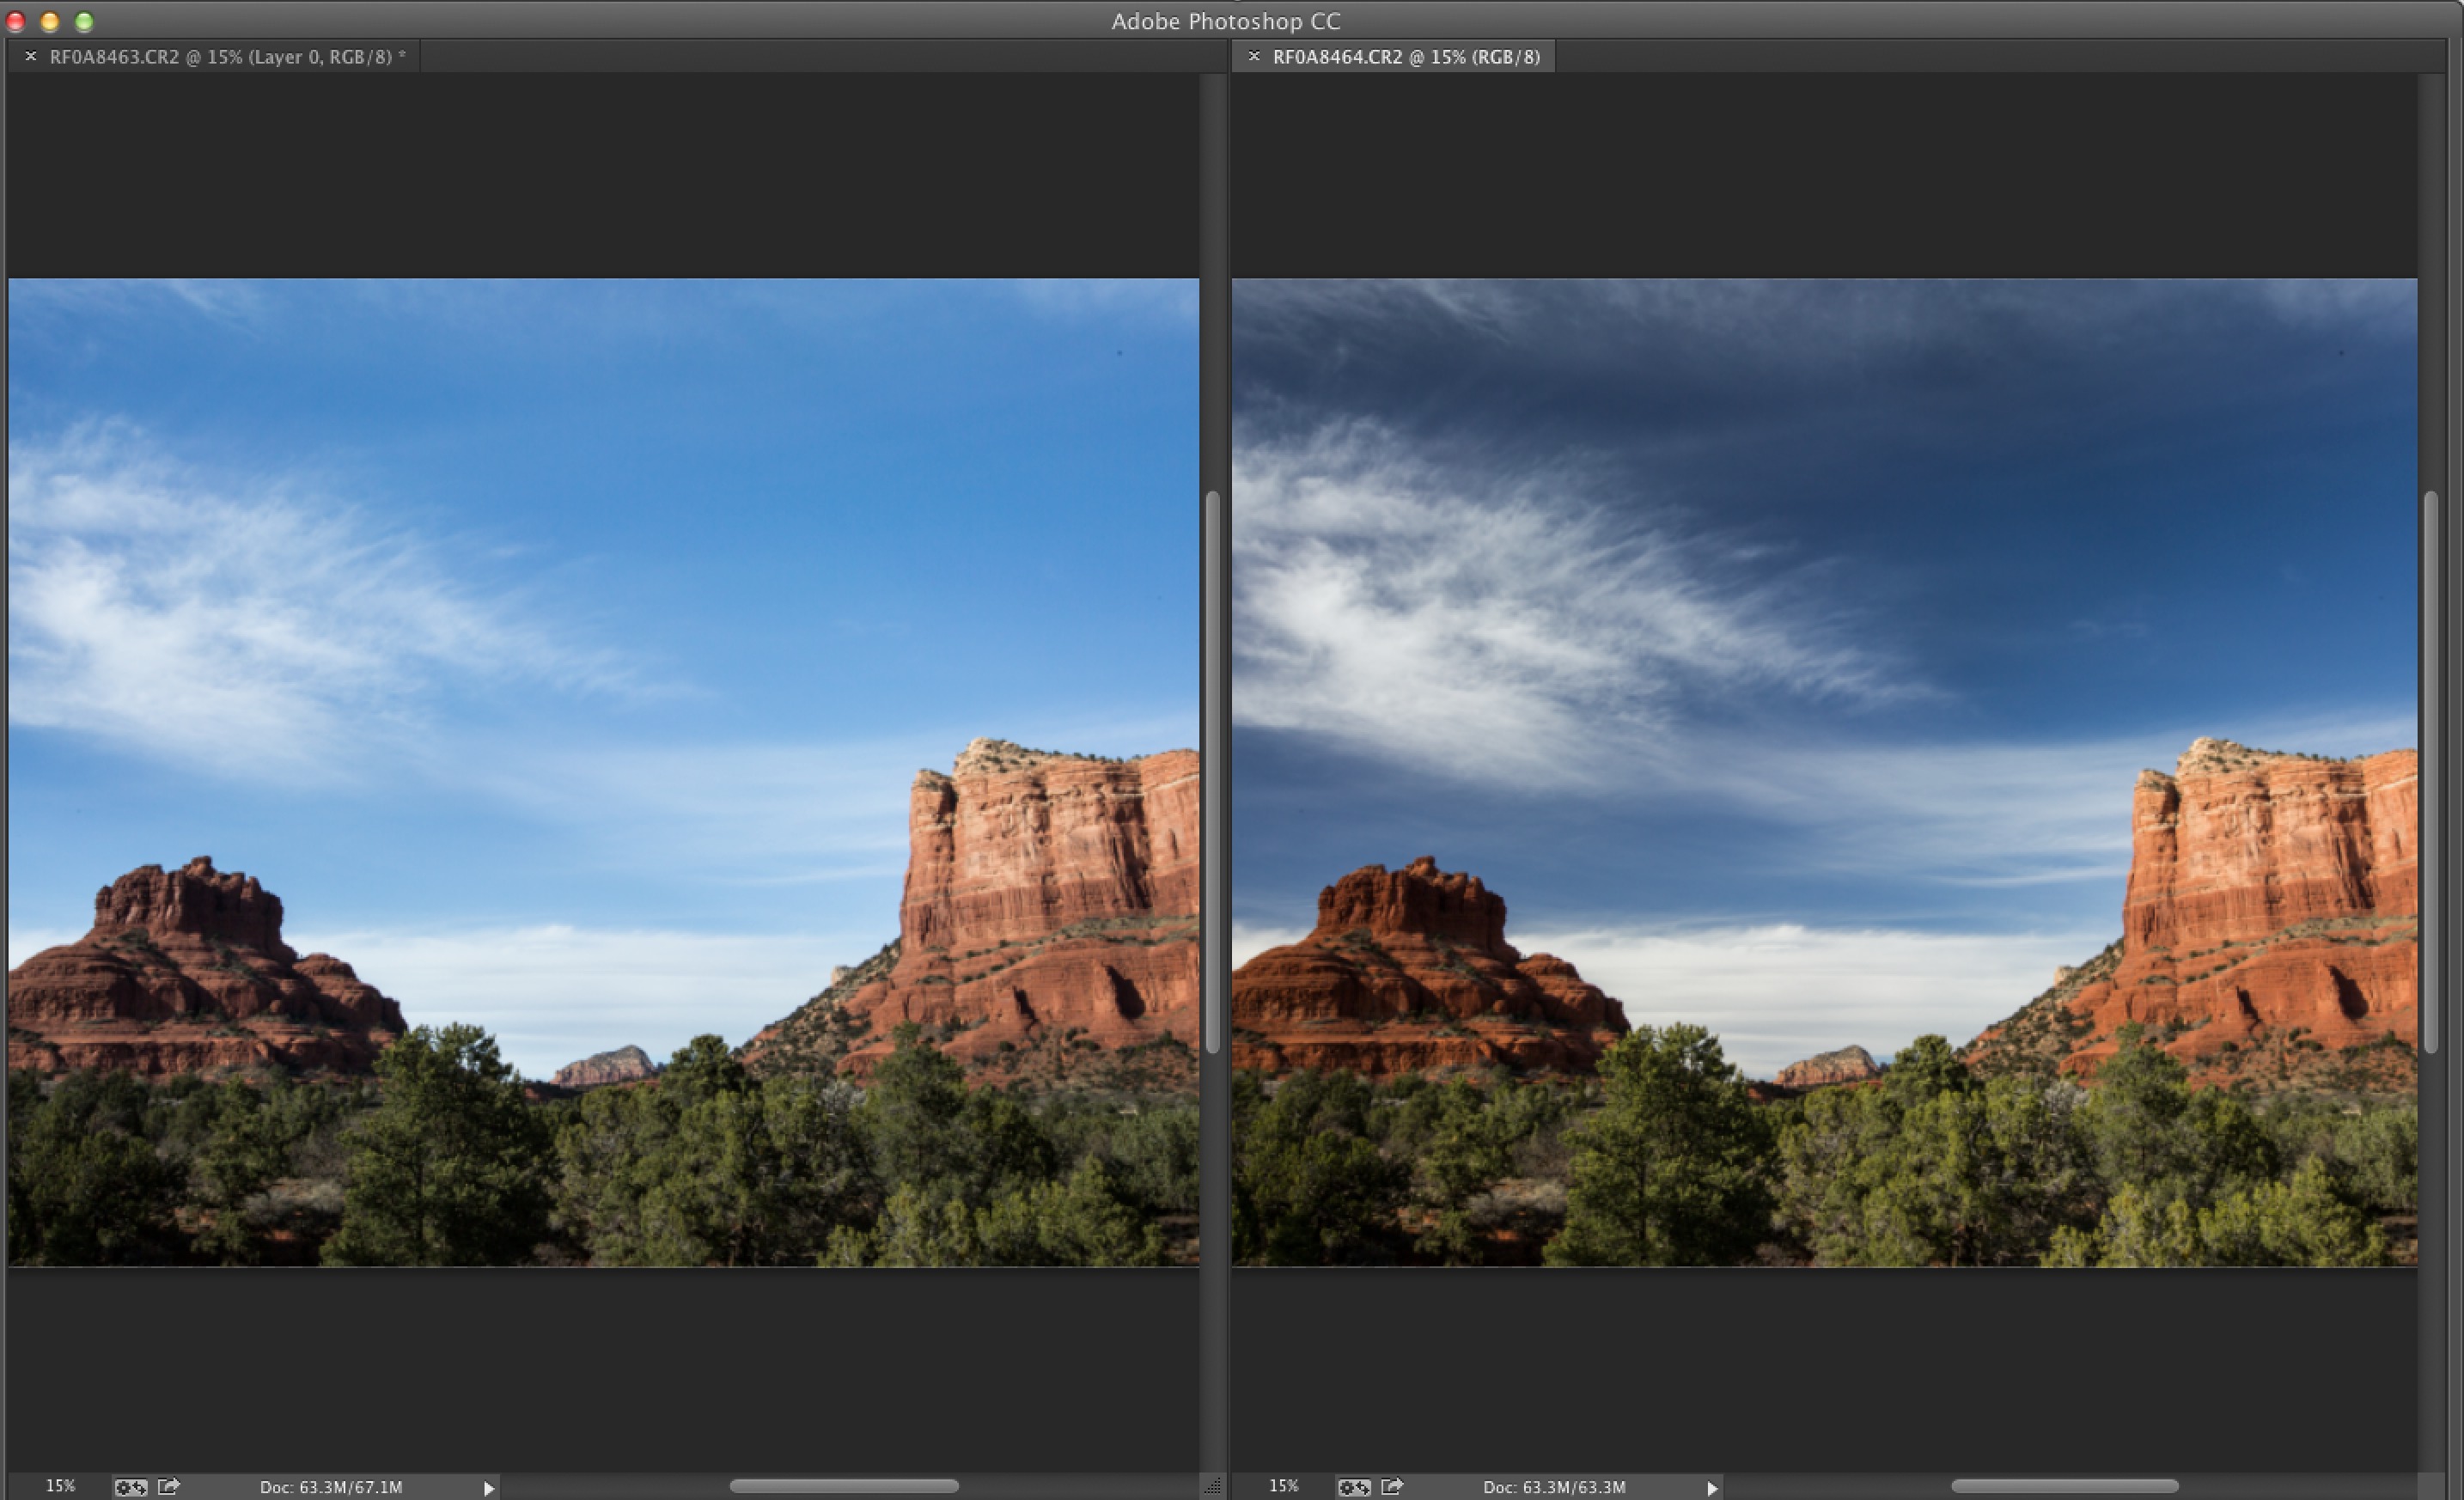
BEHIND THE SCENES: Here you’re seeing a before/after of a shot taken during the day (I usually don’t shoot landscapes in the middle of the day — only around dawn or dusk, but since you get the most impact from a circular polarizer during the day, I shot these at around 5:40 p.m., when sunset was just after 8:00 p.m.).
This before/after is actually a side-by-side of two images (the shot taken without the circular polarizer on the left, and the one with it on the right), both open in Photoshop at the same time (if you have two images open in Photoshop, and you go under the Window menu, under Arrange, and choose 2-up Vertical, it gives you this side-by-side layout onscreen.
CAMERA SETTINGS: This was taken using a 16–35mm f/2.8 lens, zoomed in to 30mm. I’m at f/22 (a popular f-stop to choose for landscapes where you want everything in focus from front to back). My ISO is 100 and my shutter speed was just 1/10 of a second, so I’m on a tripod, using a cable release, to keep my camera as still as possible for the sharpest possible image. One reason my shutter speed is so slow is that it’s late in the day, and you lose around a stop-and-a-half to two stops of light by adding a polarizing filter in front of your lens.
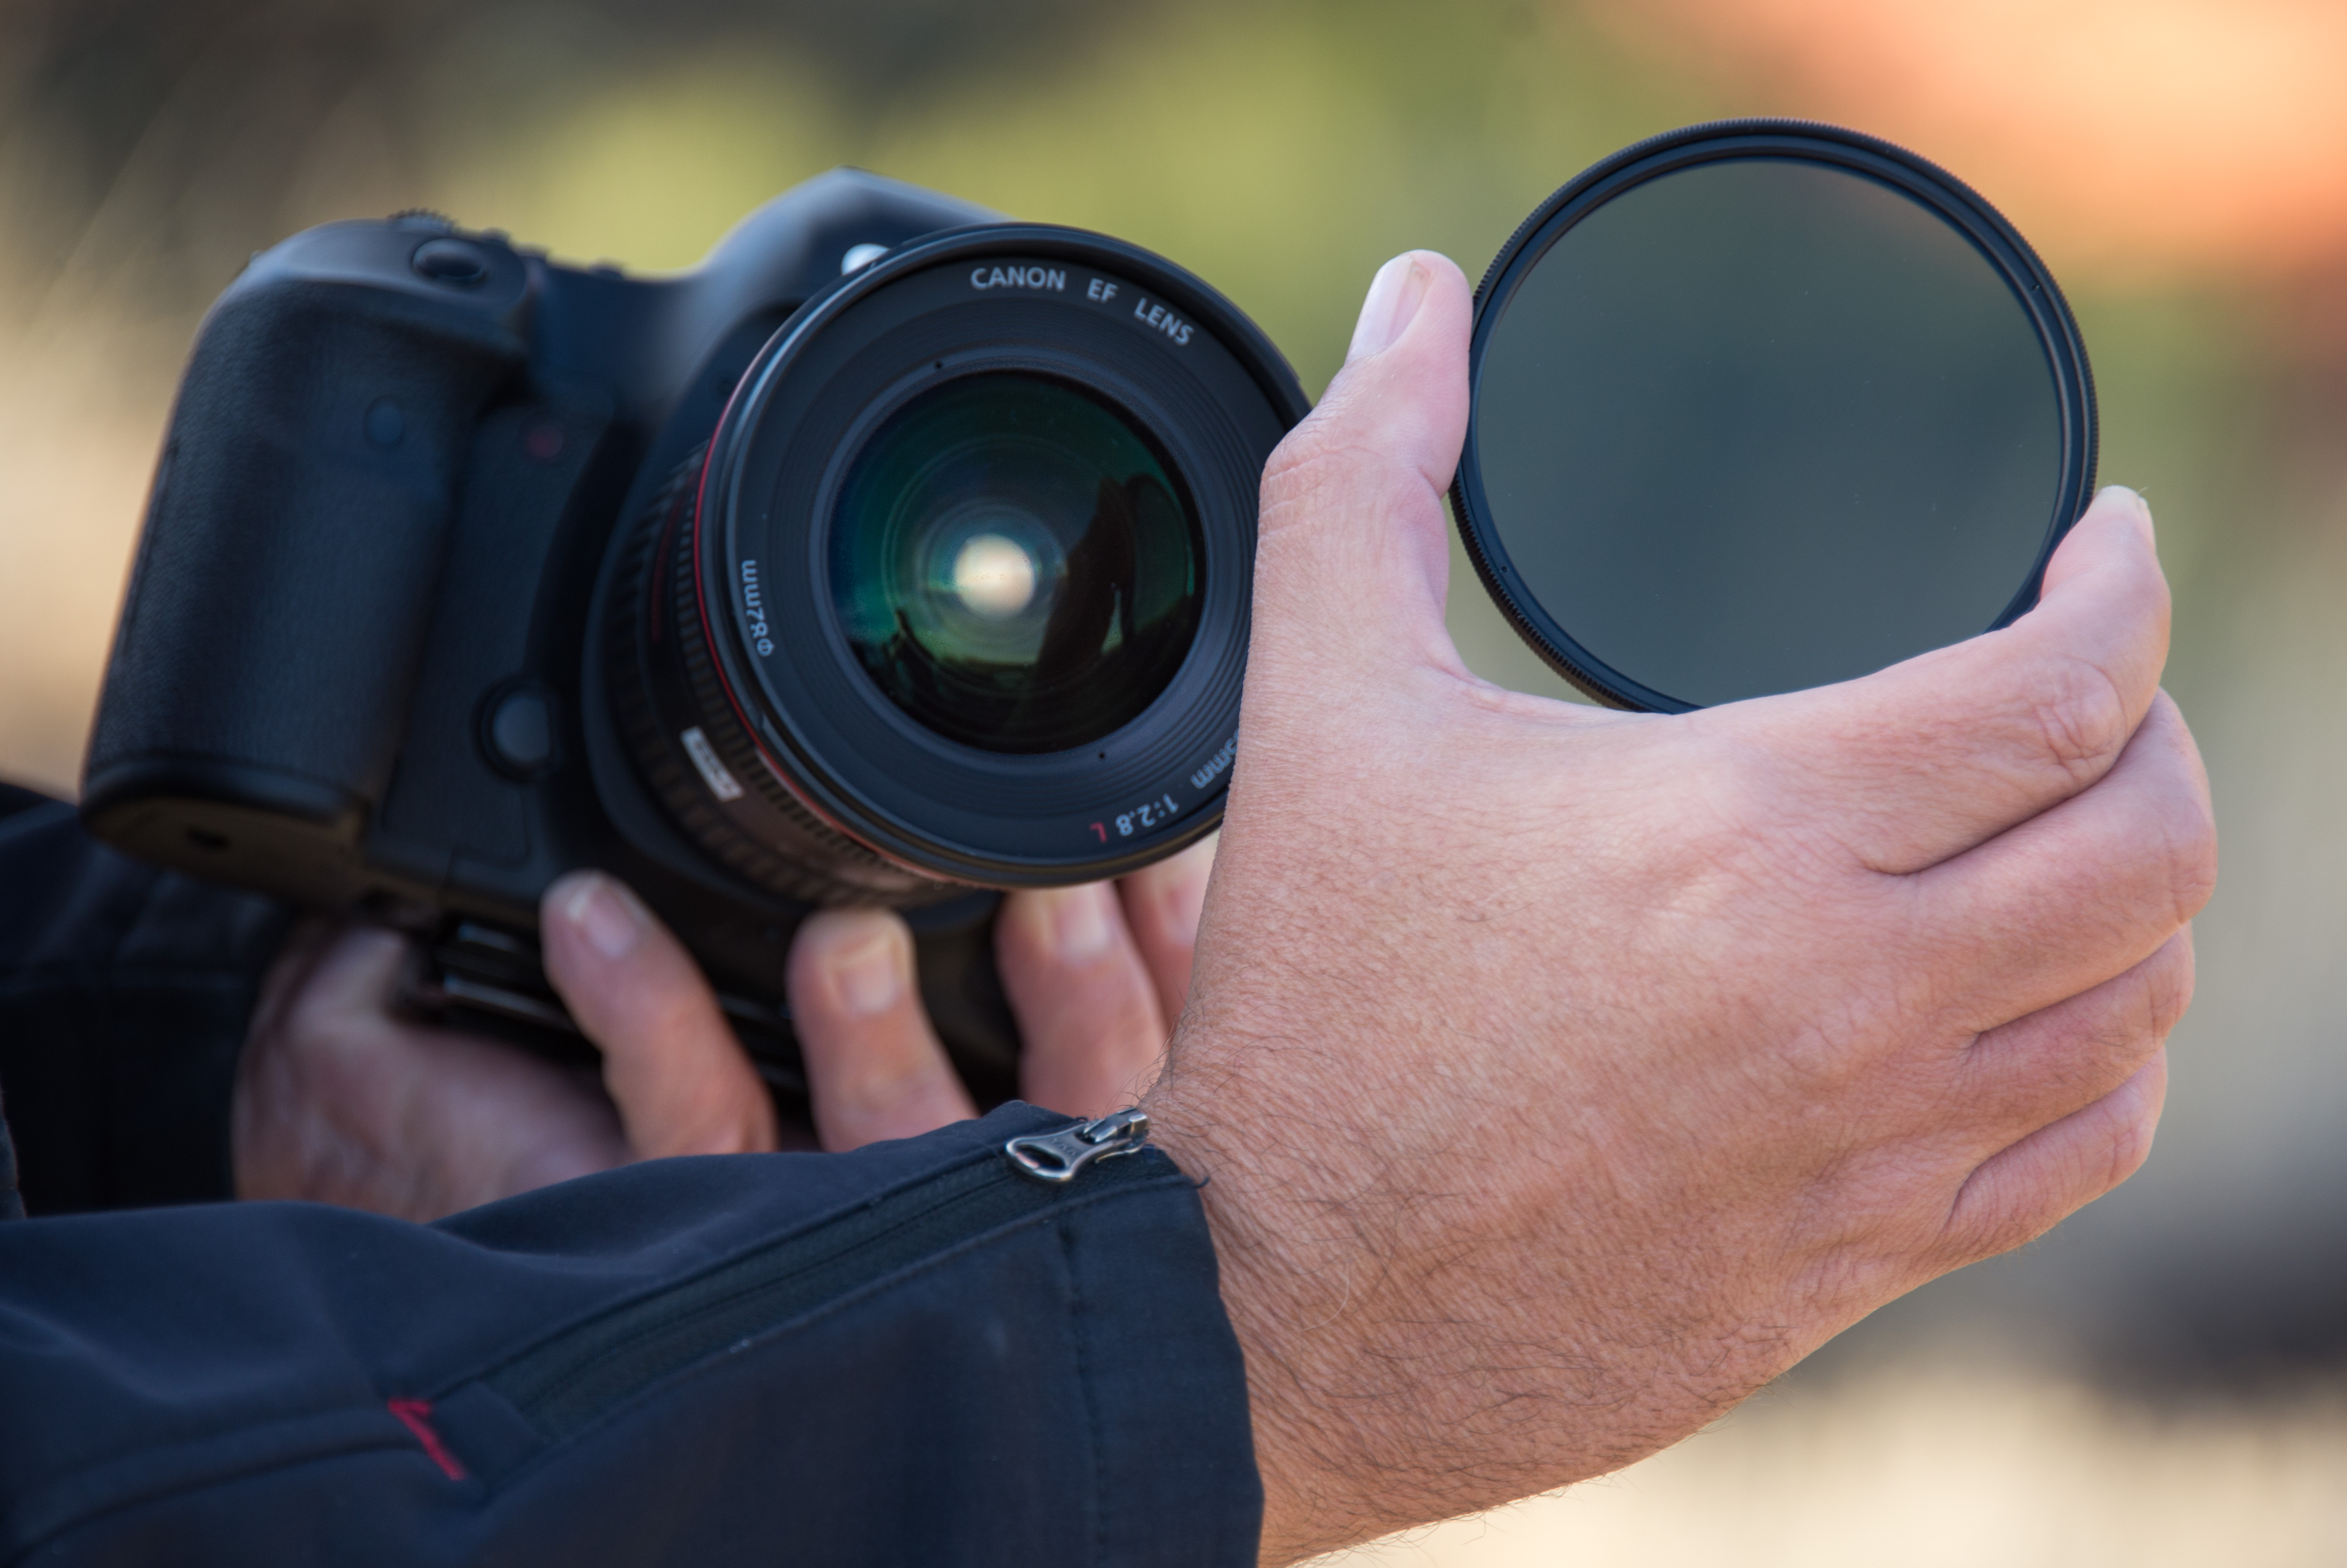
THOUGHT PROCESS: Although we usually think of using a circular polarizer to get better, more colorful, more saturated skies when we’re shooting during the day, a polarizer does more than just help the sky (take a look at the after shot, and you can see the effect the polarizer has on the entire image). Adding a polarizer is kind of like adding a pair of polarized sunglasses in front of your lens: it makes almost everything look better in bright daylight.
The thing that trips up a lot of folks using a polarizing filter is that the amount of the effect changes pretty dramatically depending on your position in relation to the sun itself. It can either have a huge effect (which mostly happens when you’re at a 90° angle to the sun), or little to no effect if you’re aiming anywhere else, especially if you’re aiming at the setting sun. Also, once the polarizer is on your lens, you’ll need to slowly rotate the front of the filter to control the strength and position of it, so make sure you rotate as you’re looking through the viewfinder (you’ll see how it affects the scene as you rotate it).
One thing to keep an eye out for: if you use a polarizer on a wide-angle lens, like I did here, be careful when positioning the darkening in the sky (while rotating the front of the filter) because you can wind up with an uneven effect, with part of the sky being darkened and part of it not being darkened nearly as much.
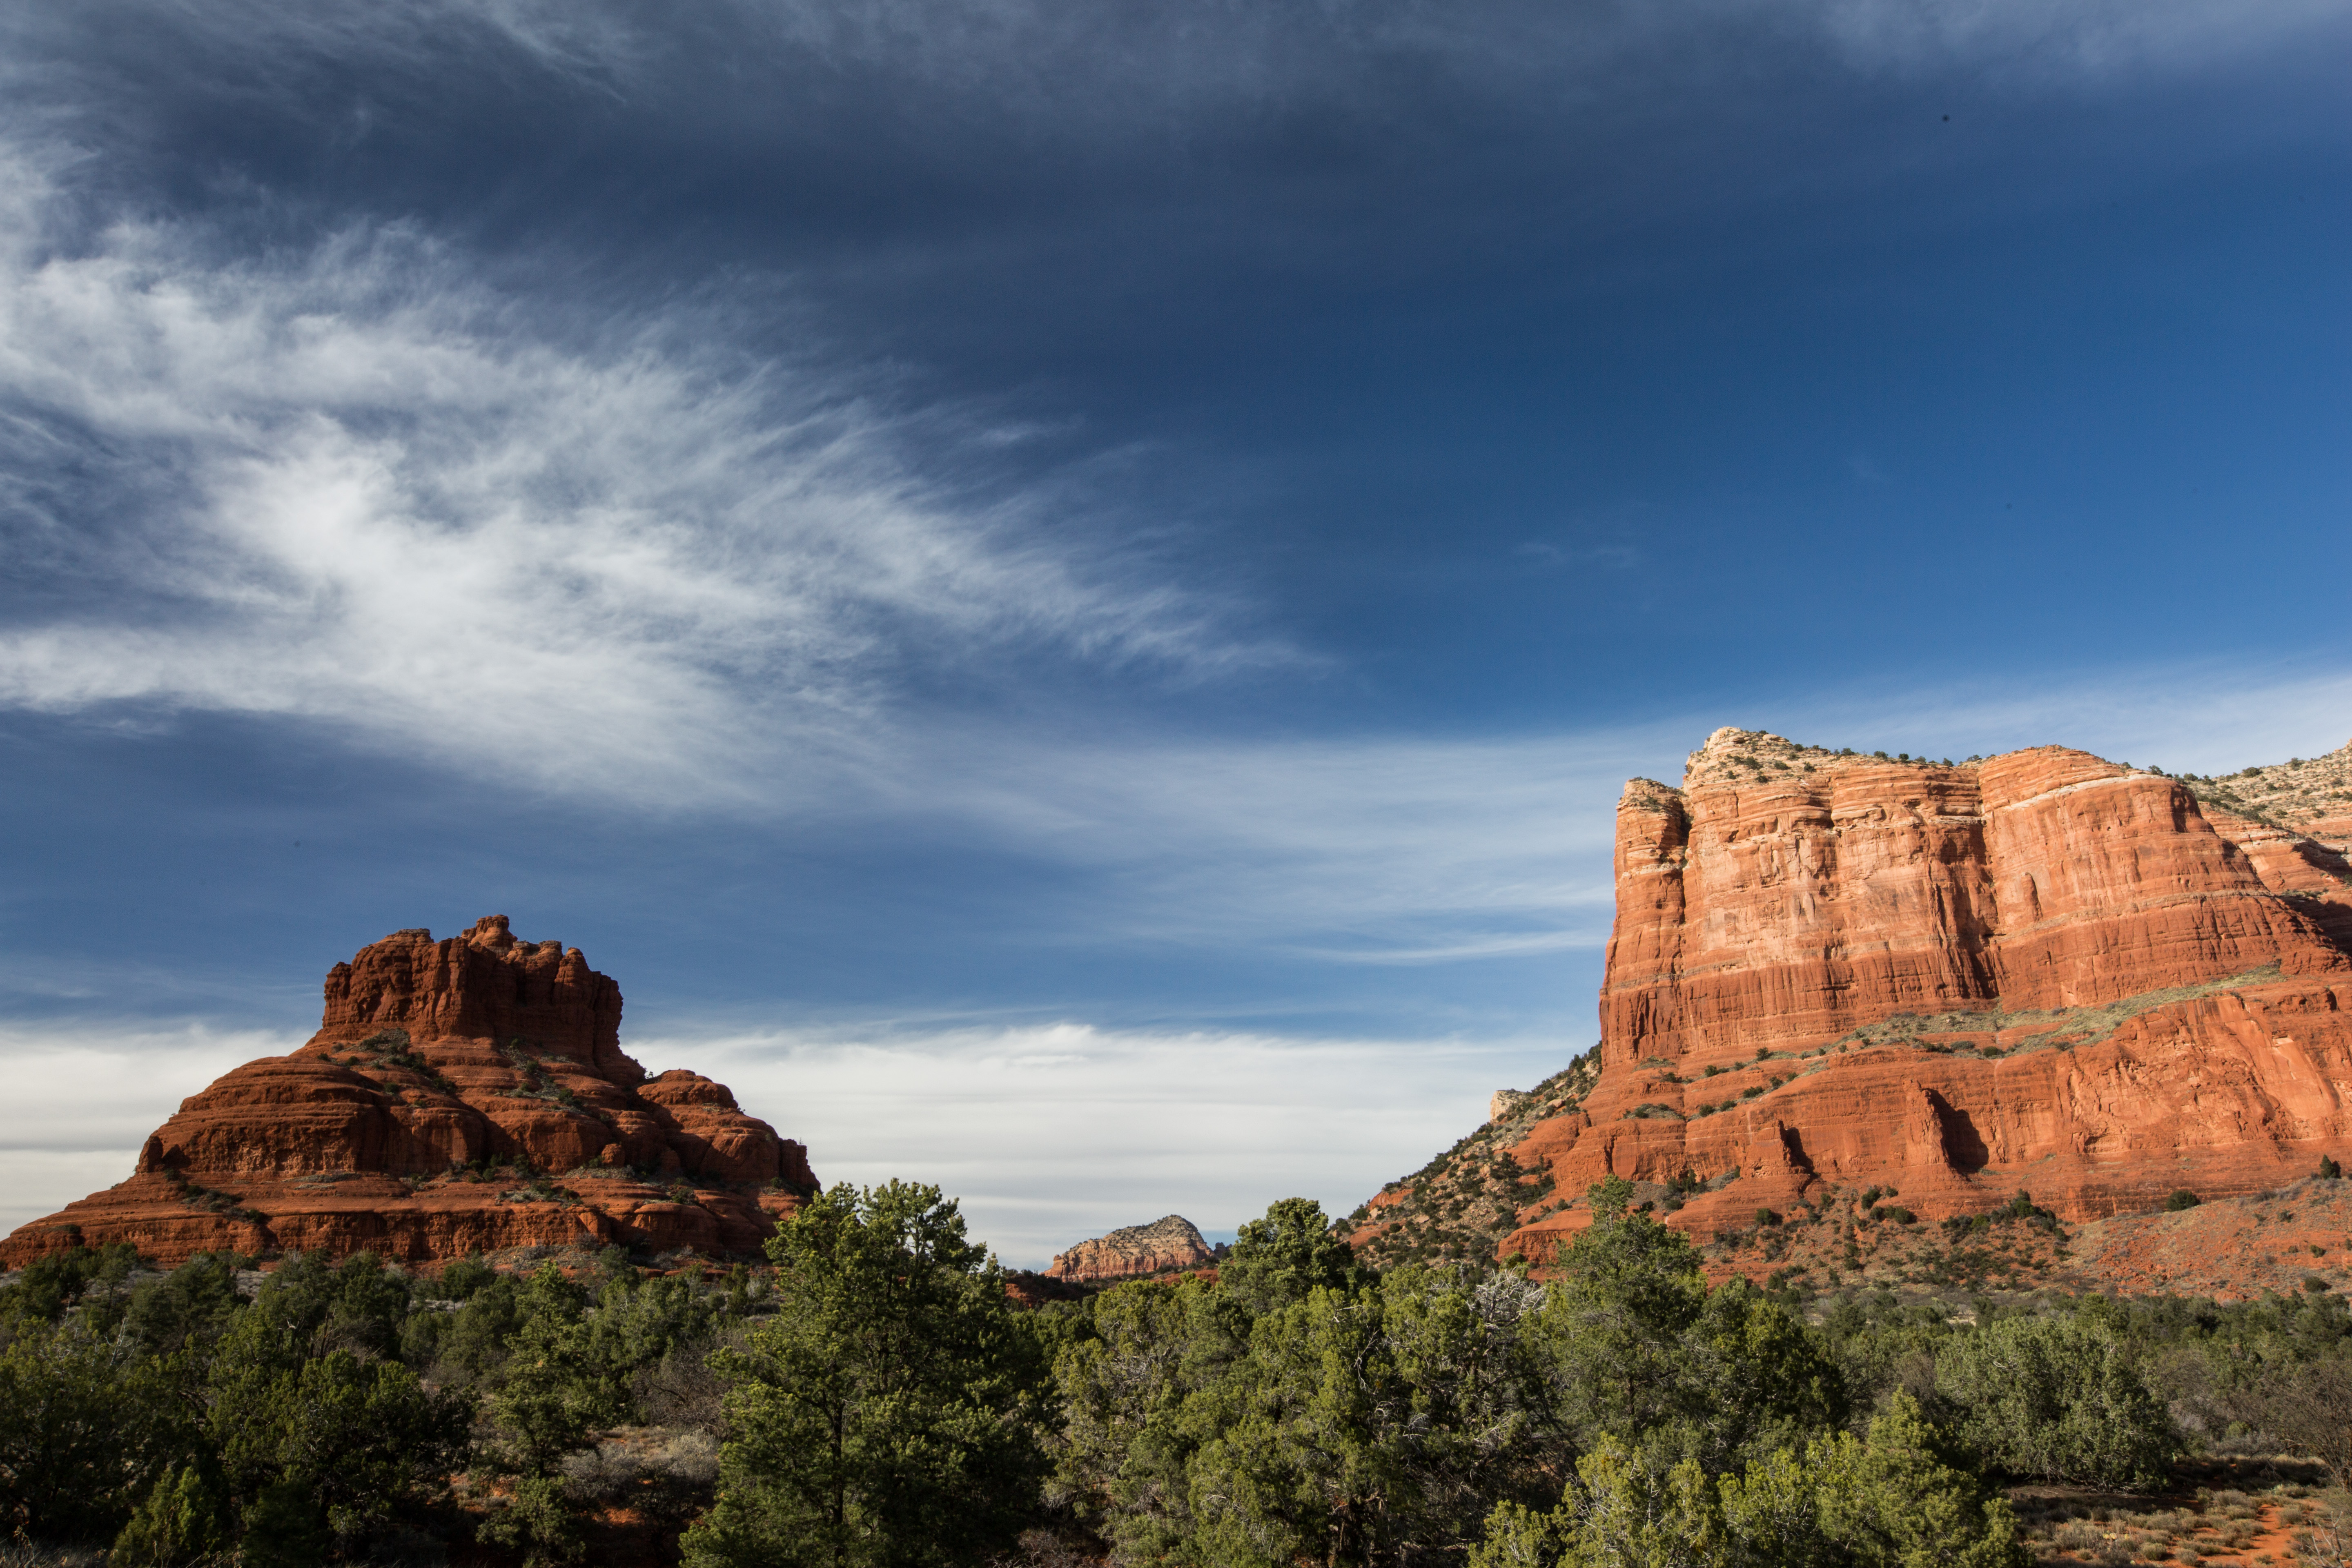
POST-PROCESSING: Nothing much. Just added some contrast in Lightroom’s Develop module (or Camera Raw), and of course sharpening (every image gets sharpened).

PS — Learn how to do more from The Digital Photography Book, part 5, here: http://kel.by/K1SMBook5
