Fix Dappled Light in Your Photos
What is dappled light and how do we fix it? Read on.
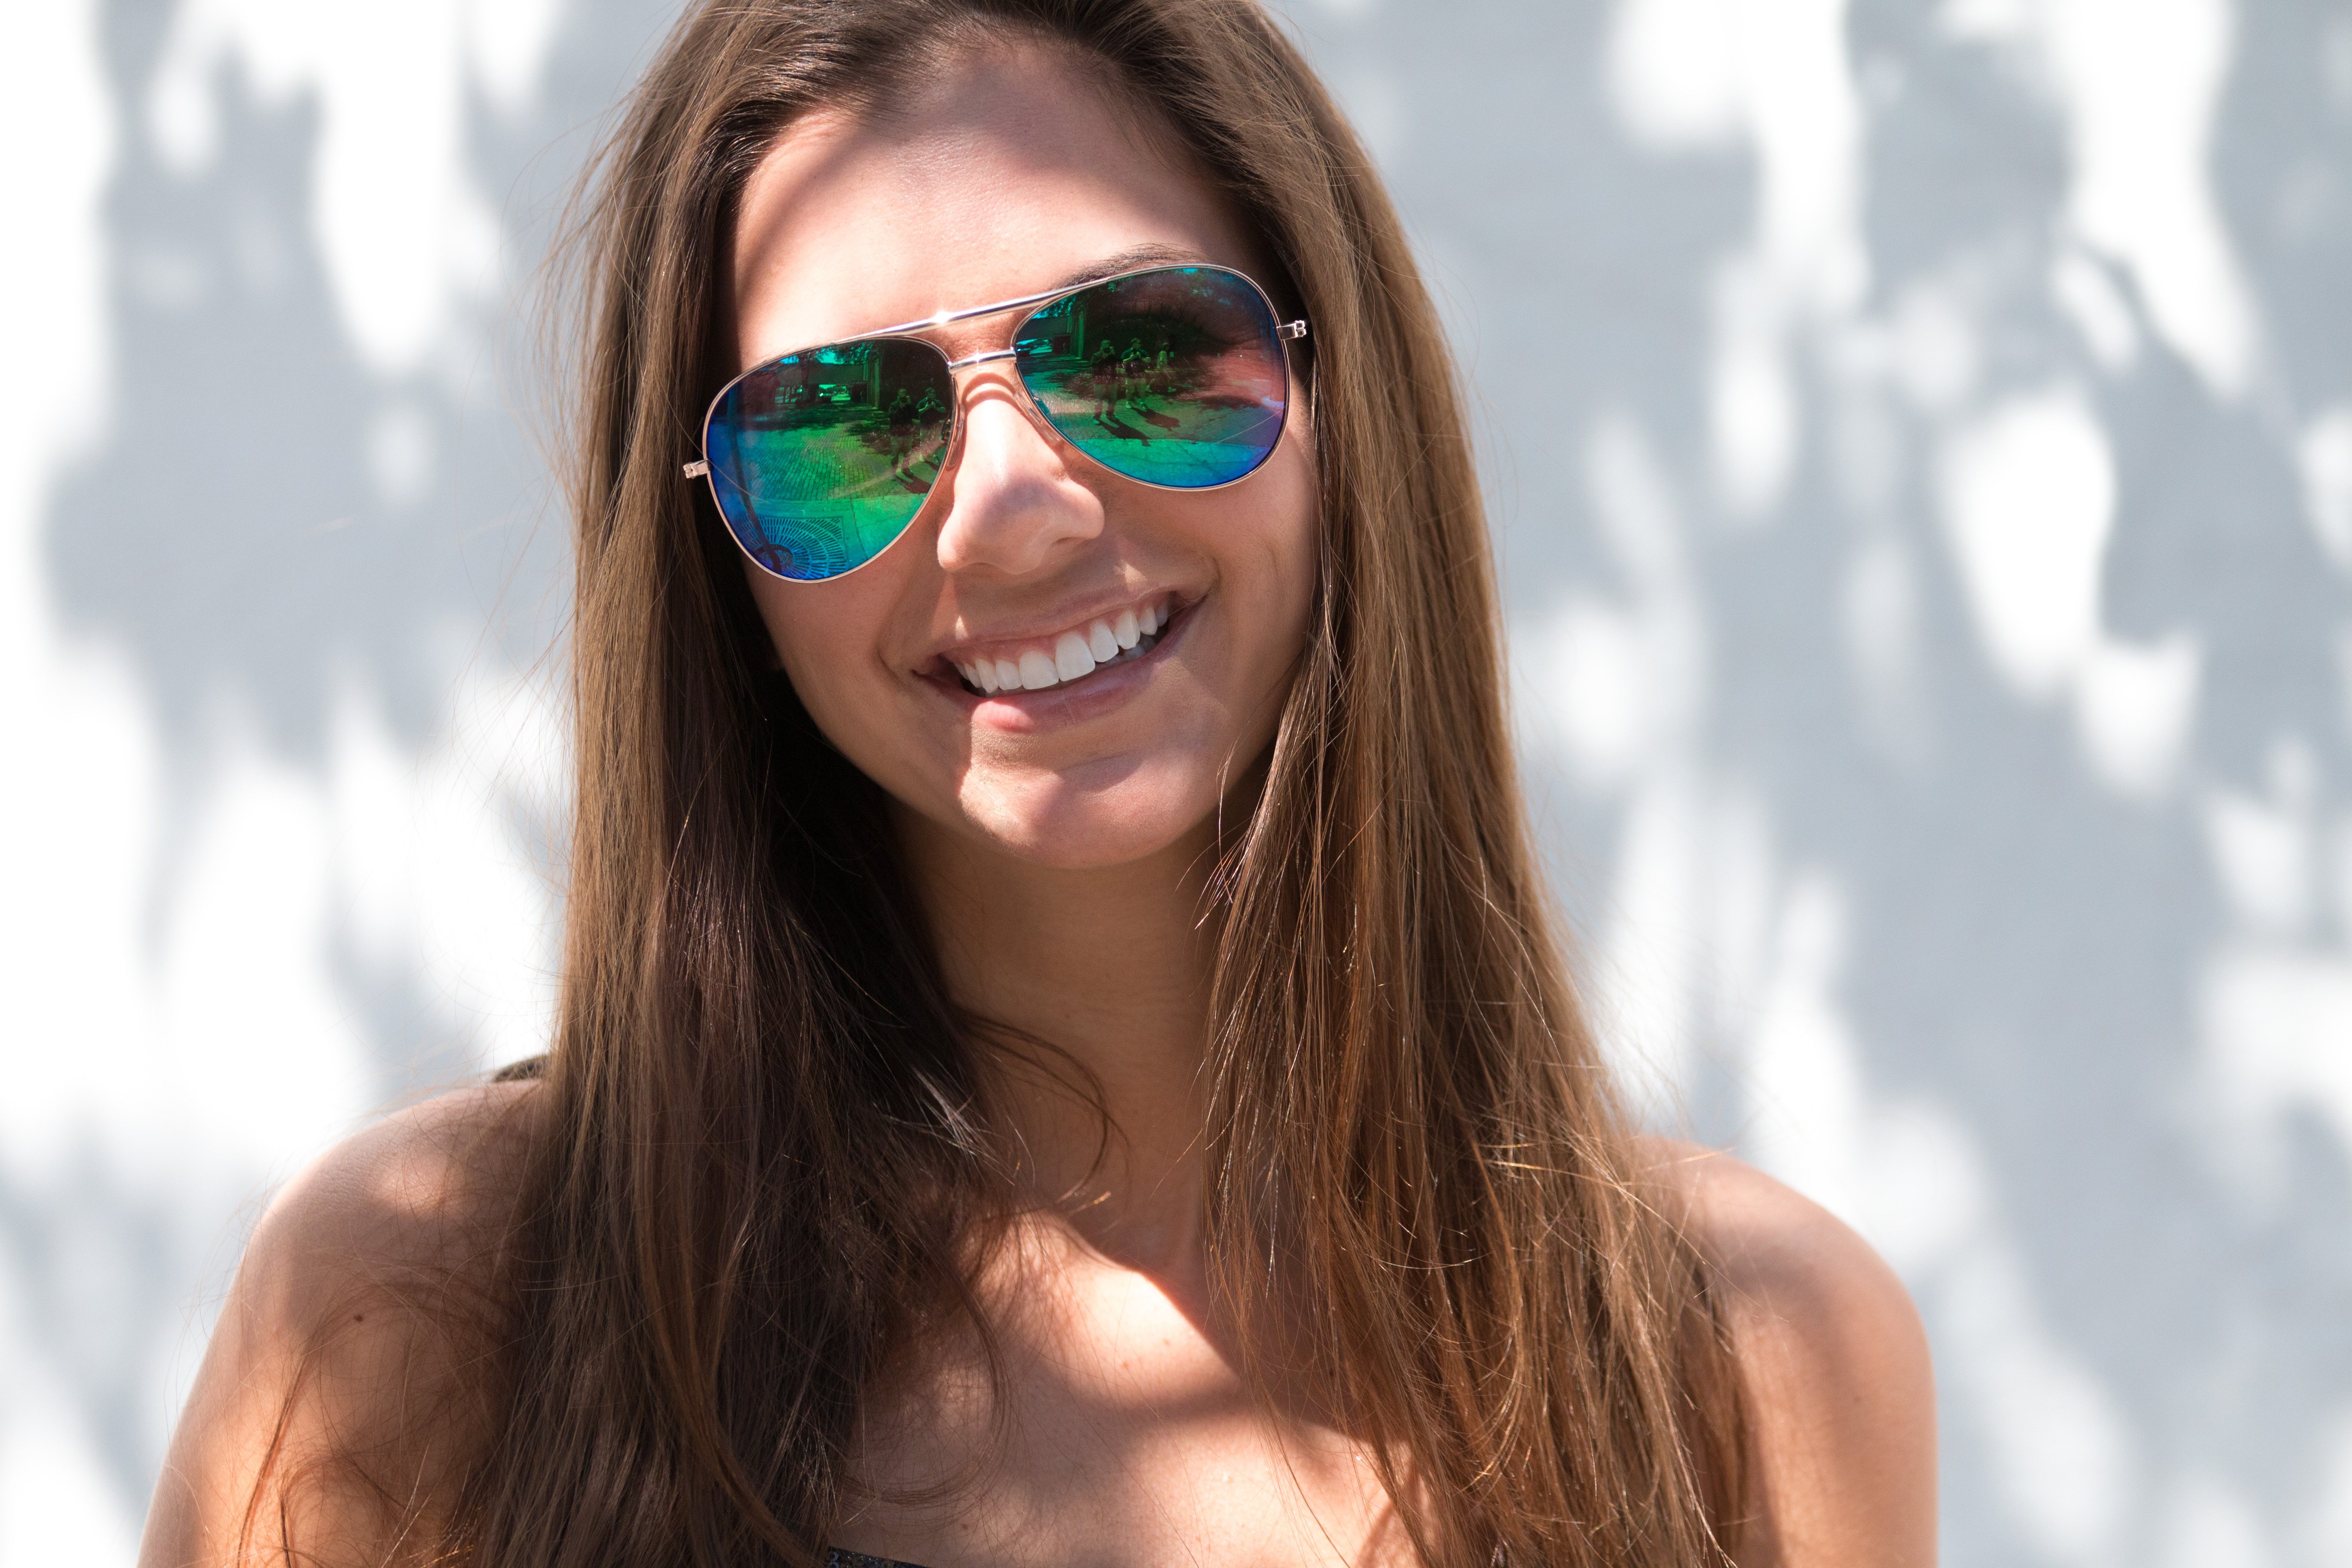
BEHIND THE SCENES: What you’re seeing below is a nightmare. You see all those big bright spots of light hitting our subject in different areas (like on the bridge of her nose, her forehead, her upper chest, and her arms)? Those harsh beams of light coming through the tree she’s standing under are called “dappled light” and, for the most part, we want to avoid it like the plague (I say “for the most part” because you could possibly make a case for using dappled light in some fine-art piece, but generally, we do our best to avoid it). You see how you can also see individual tree branches (like the one on the left side of her forehead)? Yeah, that’s all bad, bad stuff.
CAMERA SETTINGS: For the final image (on the facing page), I’m using a 70–200mm lens zoomed in to 182mm, so I’m pretty tight. I’m at f/2.8 (if your lens doesn’t go that low, you can use either f/4 or f/5.6—as long as you’re zoomed in tight using the lowest-number f-stop your lens will allow, the background will still be soft). I’m at 400 ISO at a shutter speed of 1/1000 of a second.
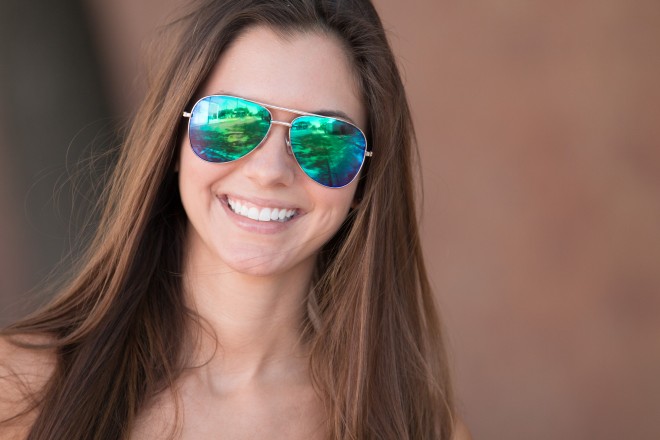
THOUGHT PROCESS: If dappled light is so bad, what is it exactly that we want? We want nice, even shade like you see in the shot at the end, which was taken literally just a few feet from where the first shot was taken. The next tree on the street had a lot more leaves on it, so there wasn’t nearly as much dappled light. There was some at the edges of the shade, so I looked through the viewfinder and had our subject keep taking a step backward, until I could see through the viewfinder that no annoying streams of light were showing through the leaves, and it was just nice, even shade (you can see the behind-the-scenes shot below, after I moved our subject away from the evil dappled-light tree and over to the more solidly shady tree). Doing this also created a happy accident, in that the background looked more interesting in the second shot than the dull white wall in the dappled light shot.

POST-PROCESSING: Just two things: (1) standard ol’ portrait retouching, and (2) in Lightroom’s Develop module (or Camera Raw), I dragged the Post Crop Vignetting Amount slider, in the Effects panel, to –11 to darken the edges of the image just a tiny bit (I do this quite a bit for natural light images. It helps draw the eye to your subject by darkening the edges all the way around). The final retouched shot is below.

Excerpt from Scott Kelby’s The Digital Photography Book, part 5.