
DIY Photography: Working Lights for Low Light Situations

This is a do-it-yourself lighting article in a magazine about lighting for photography, but I’m cheating a little bit this time because it’s not really about using light specifically to capture an image. This DIY is about using lights so you can see to work in low-light situations.
Maybe you’ve heard about adding a flashlight to your camera bag so you can see in your bag in the dark. That’s a basic tip we’ll cover in this article, but we’re taking it to the next level. So let’s start with choosing the basic flashlight itself.
Light Selection
Camera bag space is always at a premium, so smaller is better. Fortunately, LED flashlights allow manufacturers to create bright flashlights that are very small, but that’s a double-edged sword because most flashlights will be too bright for many things you need to illuminate. You’ll definitely want to find a small light with a low brightness setting.
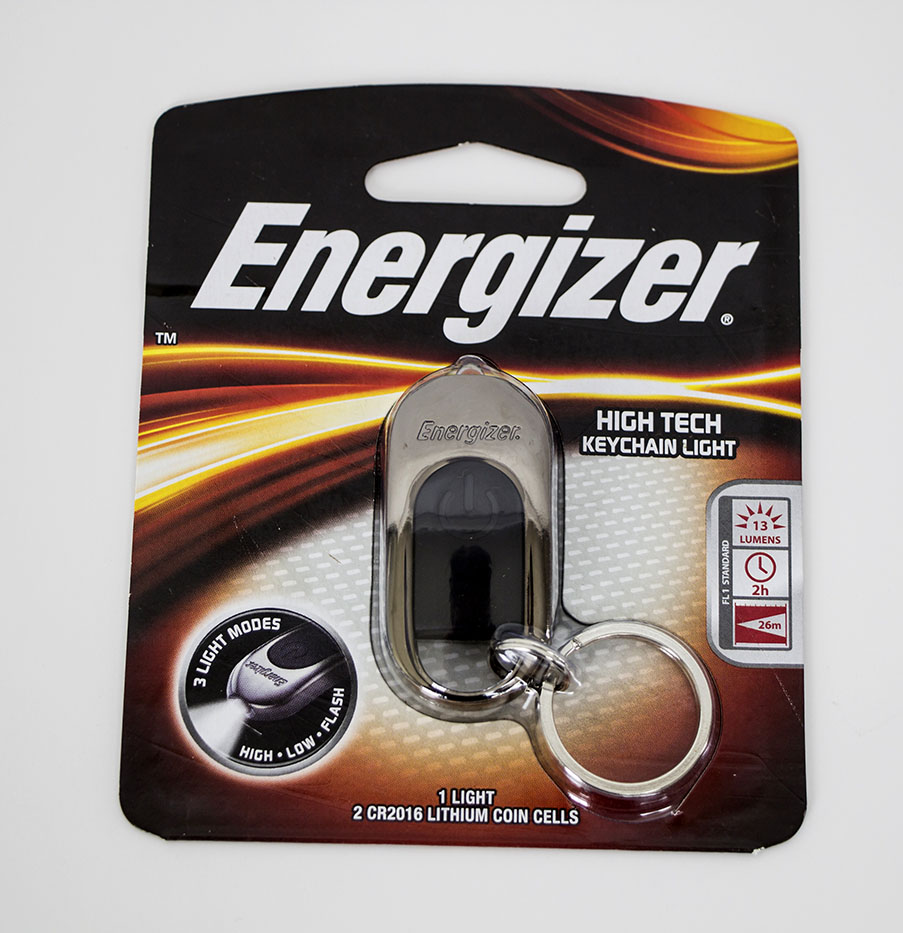
One of the first companies to reach the market with a very bright, key-ring size flashlight was Inova. They’re available from Target online only, but I found an Energizer flashlight on Target shelves for the same $6.99 price that has the same features and is almost identical in size.
There are a couple reasons these lights are so great. First, there’s a low brightness setting, in addition to the bright and blinking modes. While I never use the blinking mode, the low setting is great. Better yet, some of these flashlights are available in other colors. If you can find a red one, buy it because red light does the least damage to your night vision. For example, if you’re trekking to a great location for a predawn landscape setup, your eyes will adjust to the very low light. Then if you look through your bag with a very bright light, or you look at your camera to adjust settings in the dark, your night vision can get temporarily blown out, even with the little keychain lights on low power. With a red flashlight, you won’t have that problem. Another problem is that bright white lights can distract fellow photographers who are shooting the sunrise landscapes with you.
Lighting for Focus
While we’re talking about these keychain lights, there’s another situation when these come in handy. If you’re in a very low-light situation and using a flash to light your subject, if your subject is more than 10 or 15′ away, your camera’s illuminator light might not be bright enough to help you focus. In this case, hand the flashlight to your subjects so they can temporarily light themselves. That way you can focus, they can drop the light on the ground, and you can get the shot with your off-camera flash lighting the image.
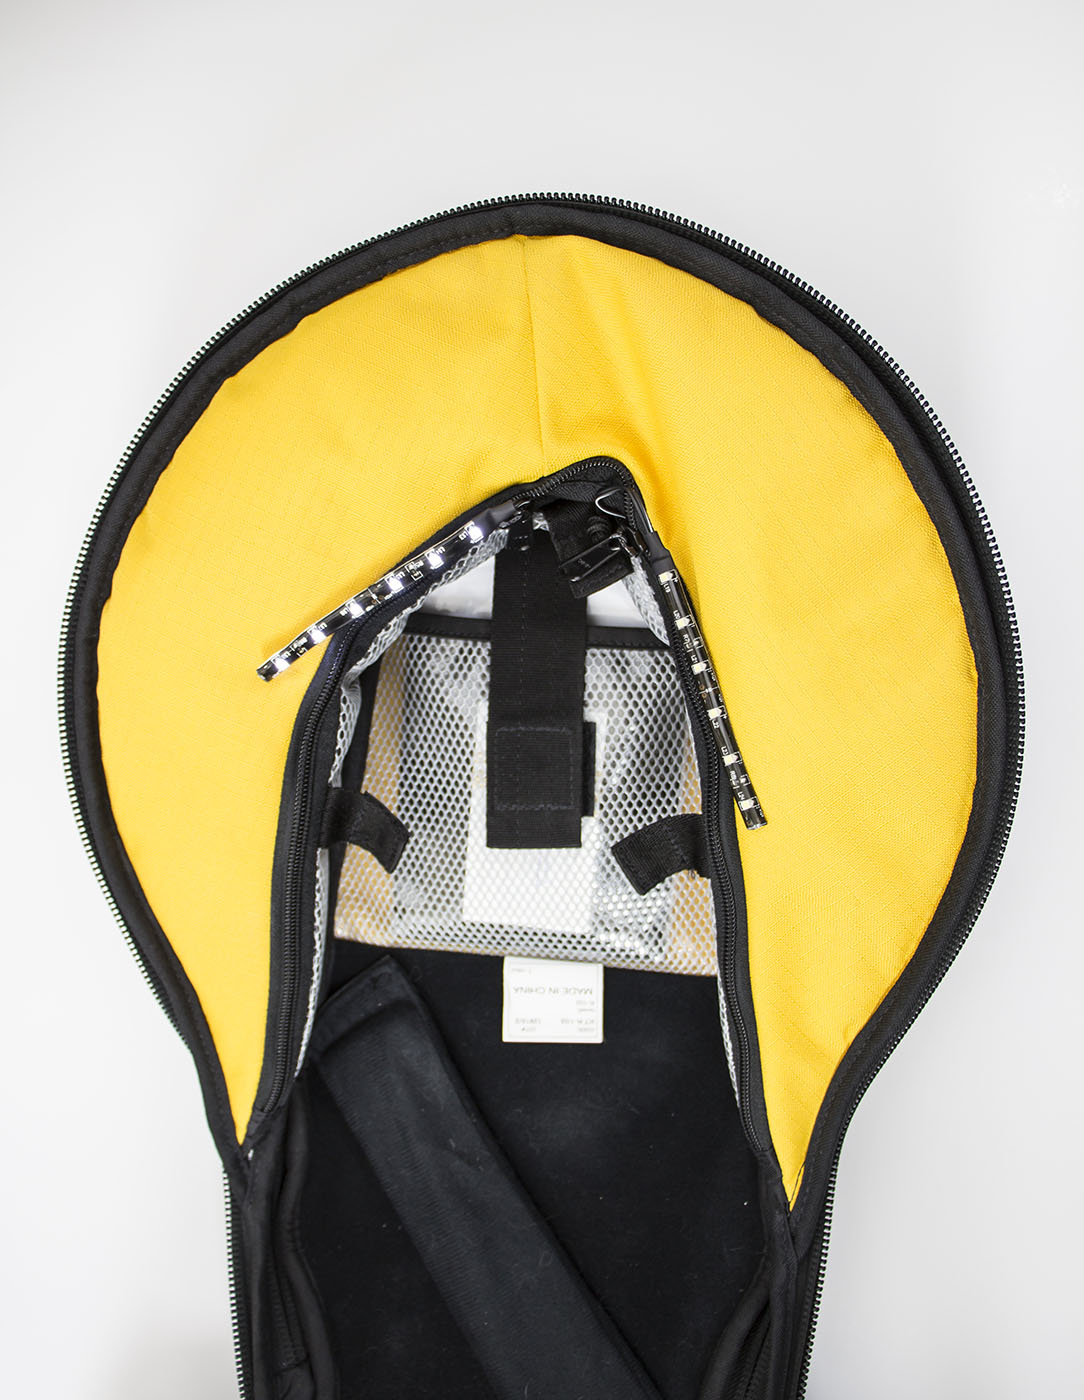
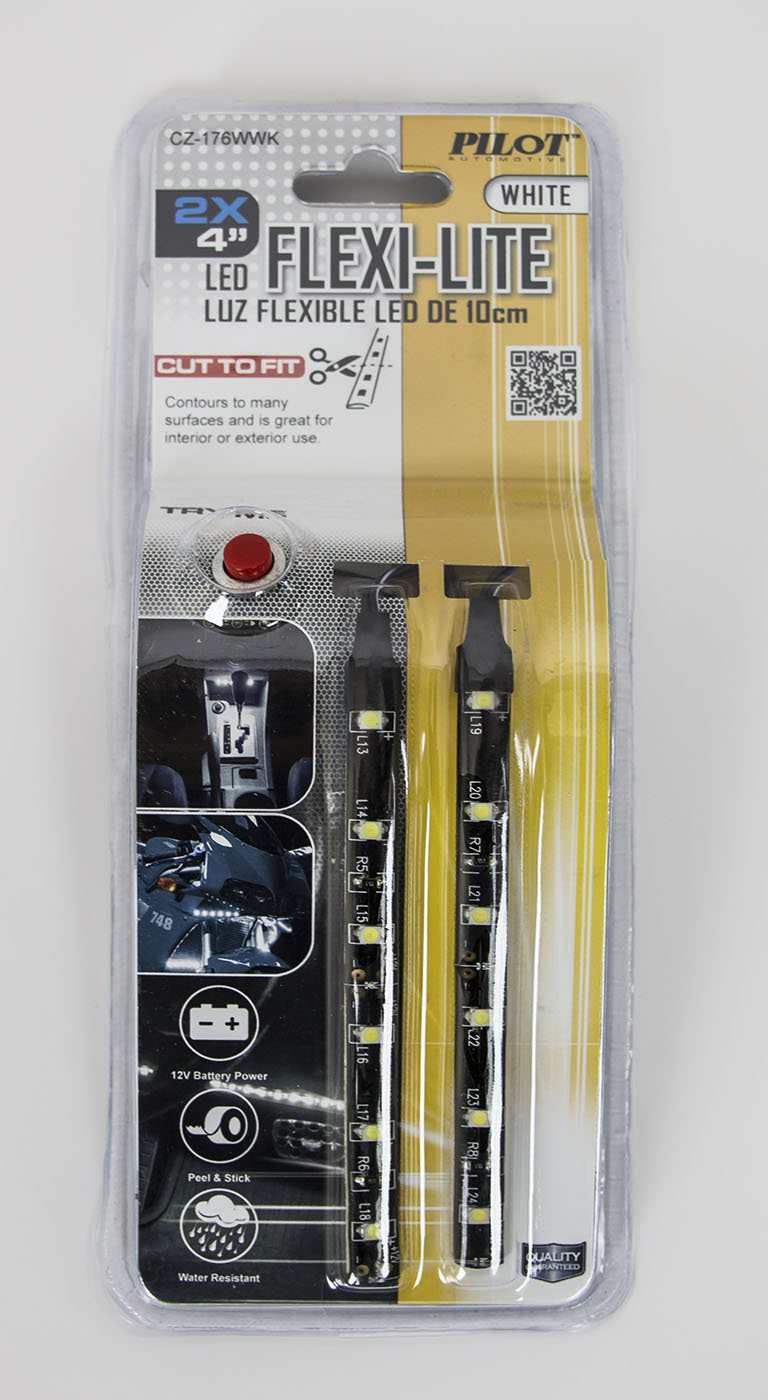
Add Strip Lighting to Your Camera Bag
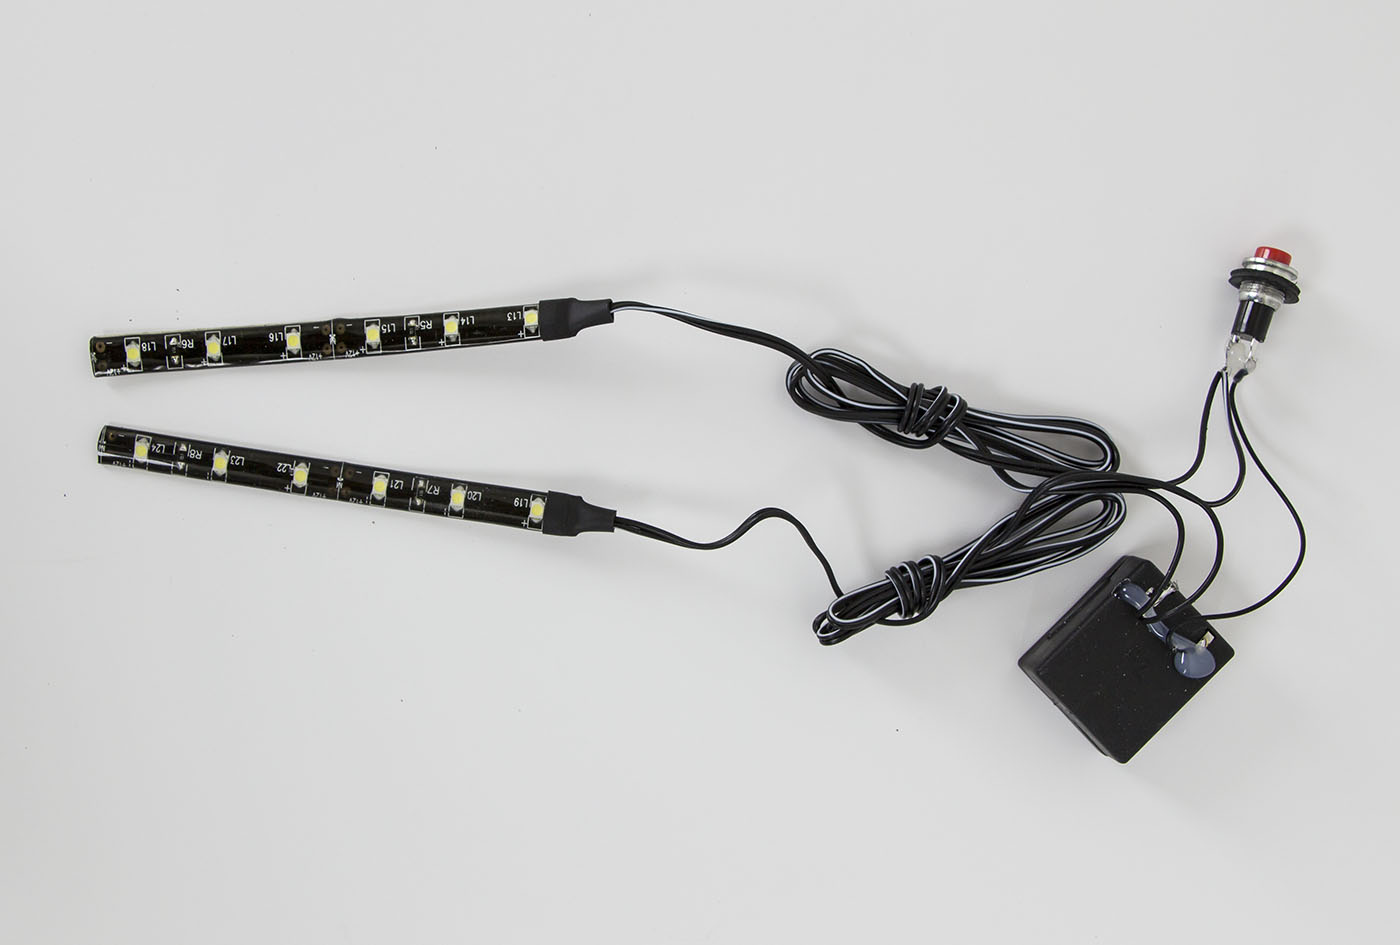
Another thing you can do is add a strip of LEDs to the interior of your camera bag. This is easier than you might think and very affordable. Start by going to the automotive department of most any Walmart or your local auto parts shop. There, you’ll find a wide variety of LED strip lights, and they’re available in a variety of colors. The cool thing is that lots of these have a test switch on the package so you can see them light up right there in the store. For this installation, I bought white LEDs, but blue or red would probably be bright enough, too, and they’d be better for night vision.
The test switch and supplied 12-volt battery are supposed to be thrown away when you install the lights in your car, but since we’re putting them in a camera bag, you can use them for the short term. Cut the lights out of the packaging and keep the battery and switch intact. Now install the strips in your bag in a strategic spot that also leaves you some place to easily keep the battery. Depending on your camera bag, you can install the LED strips by hand sewing some loops of thread around them, or you can use double-sided tape.
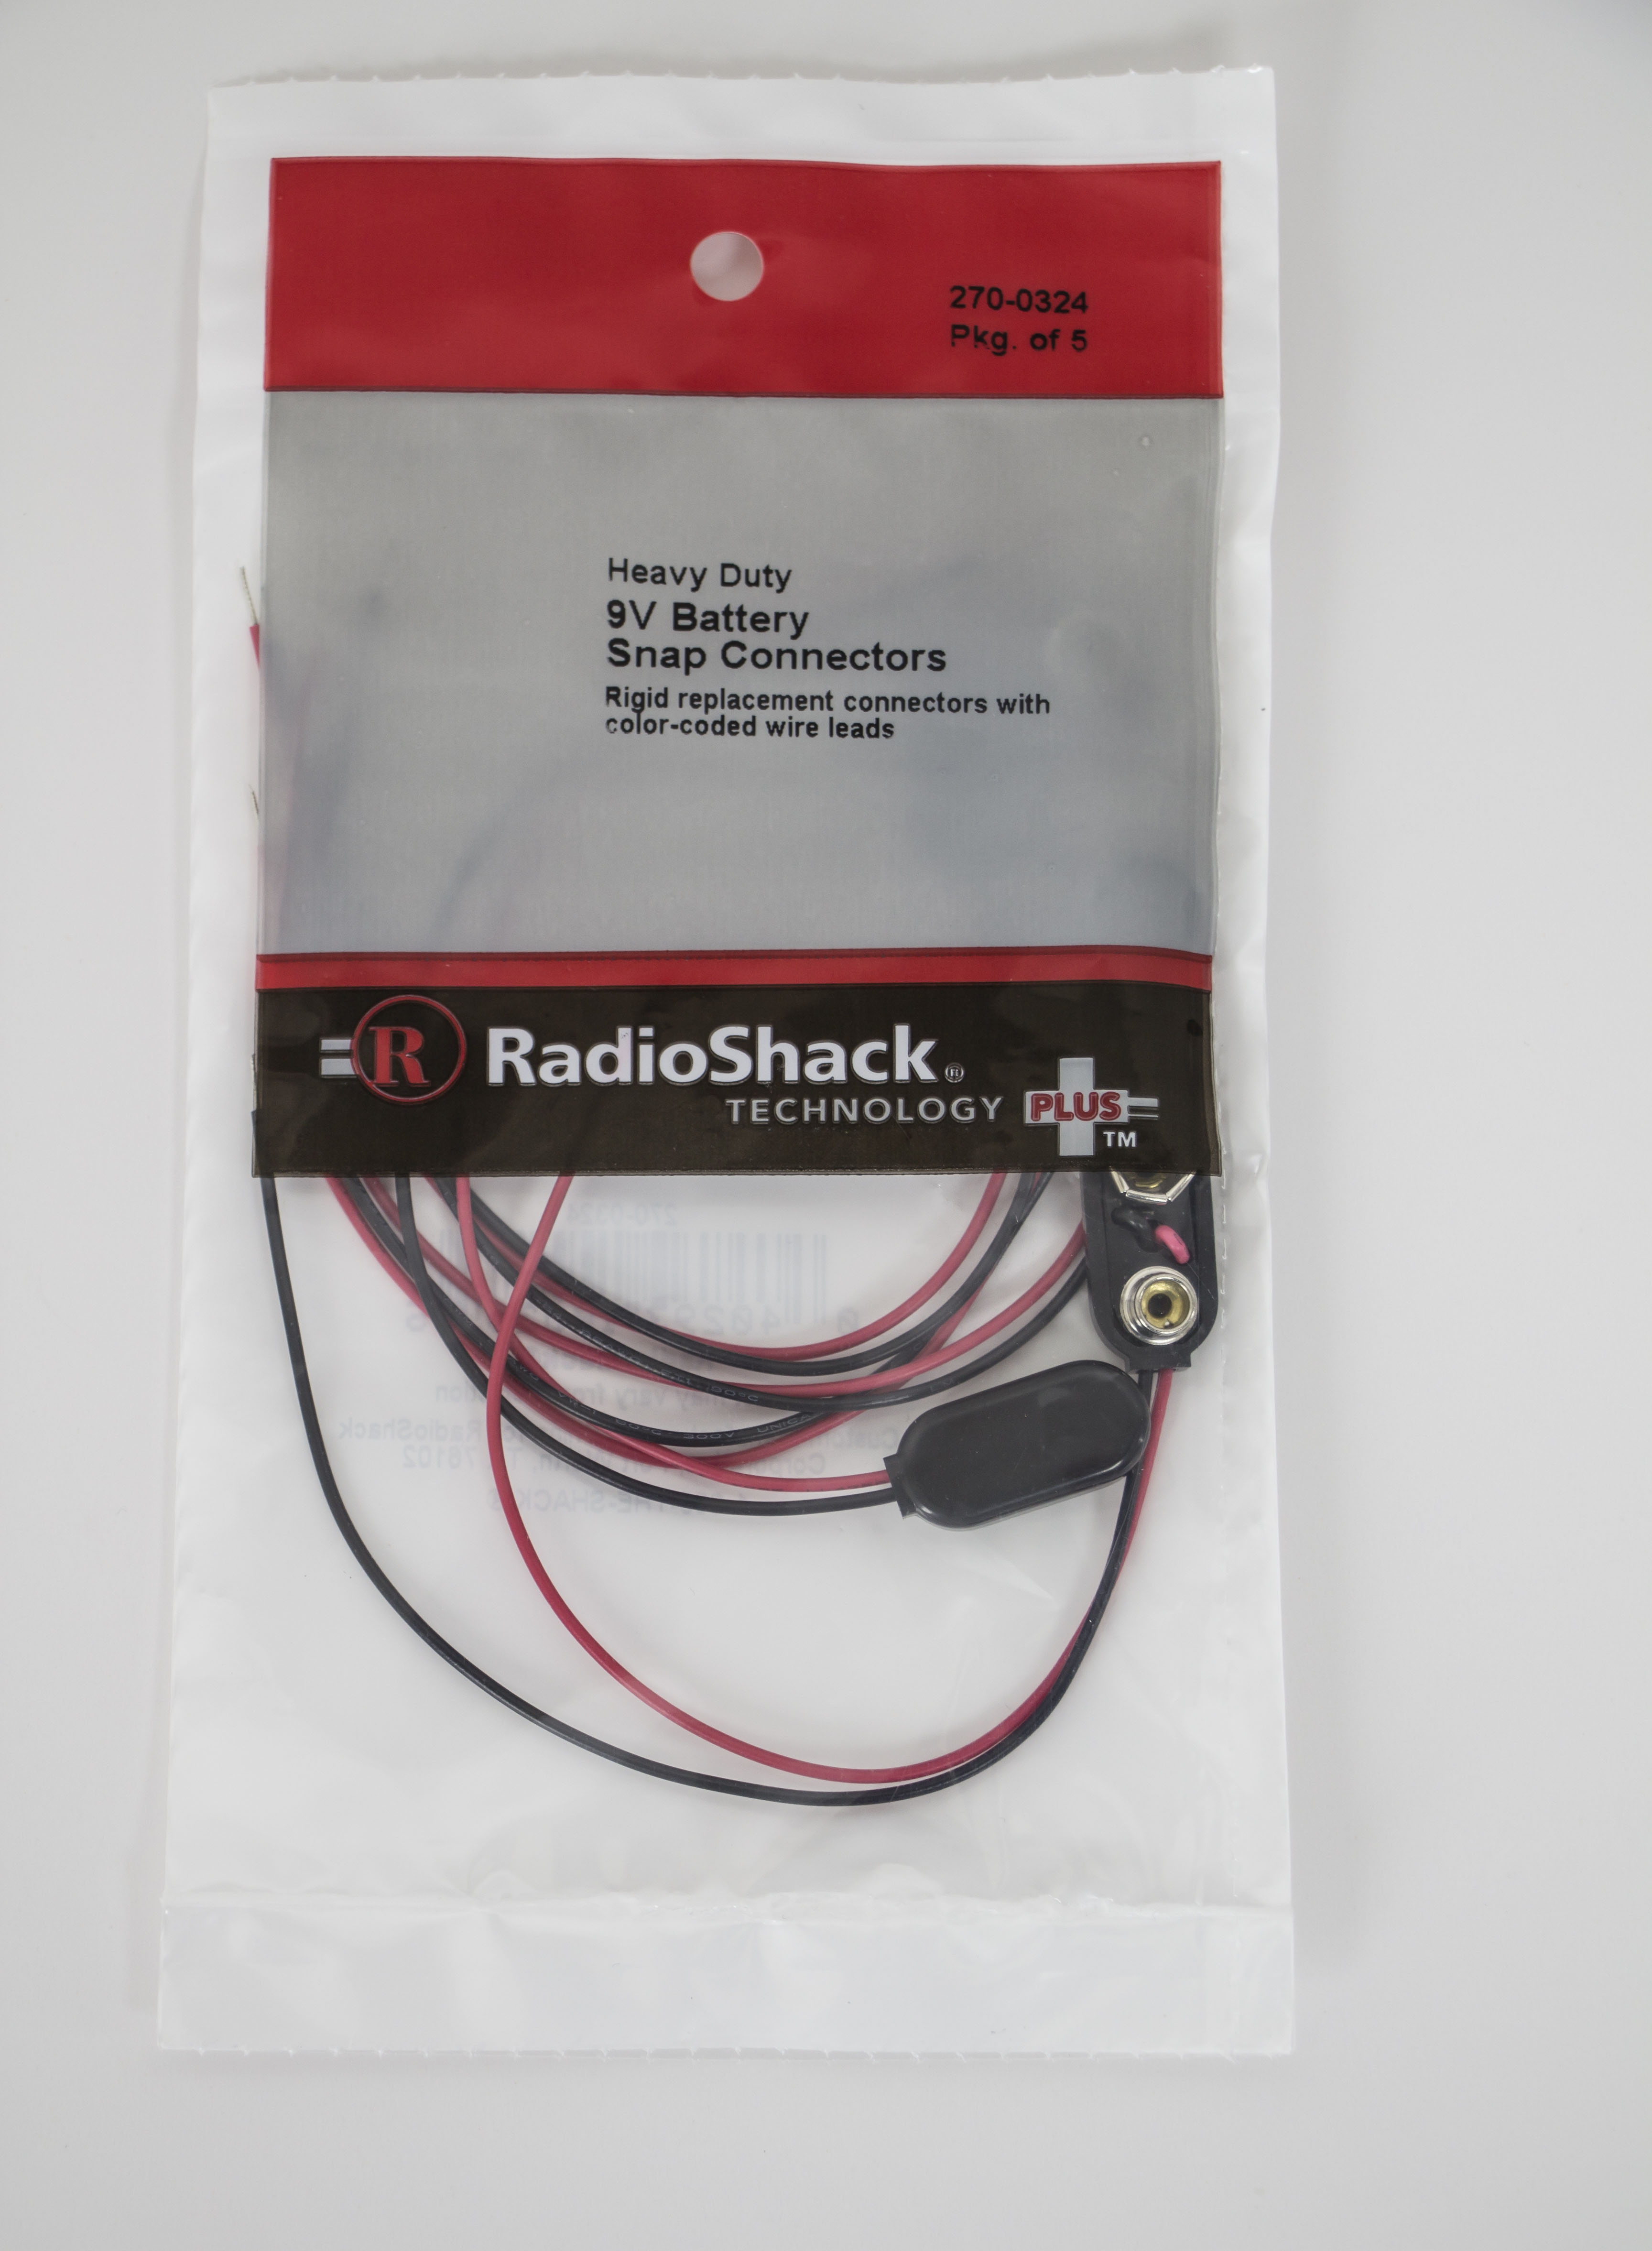
Keeping the 12-Volt Battery
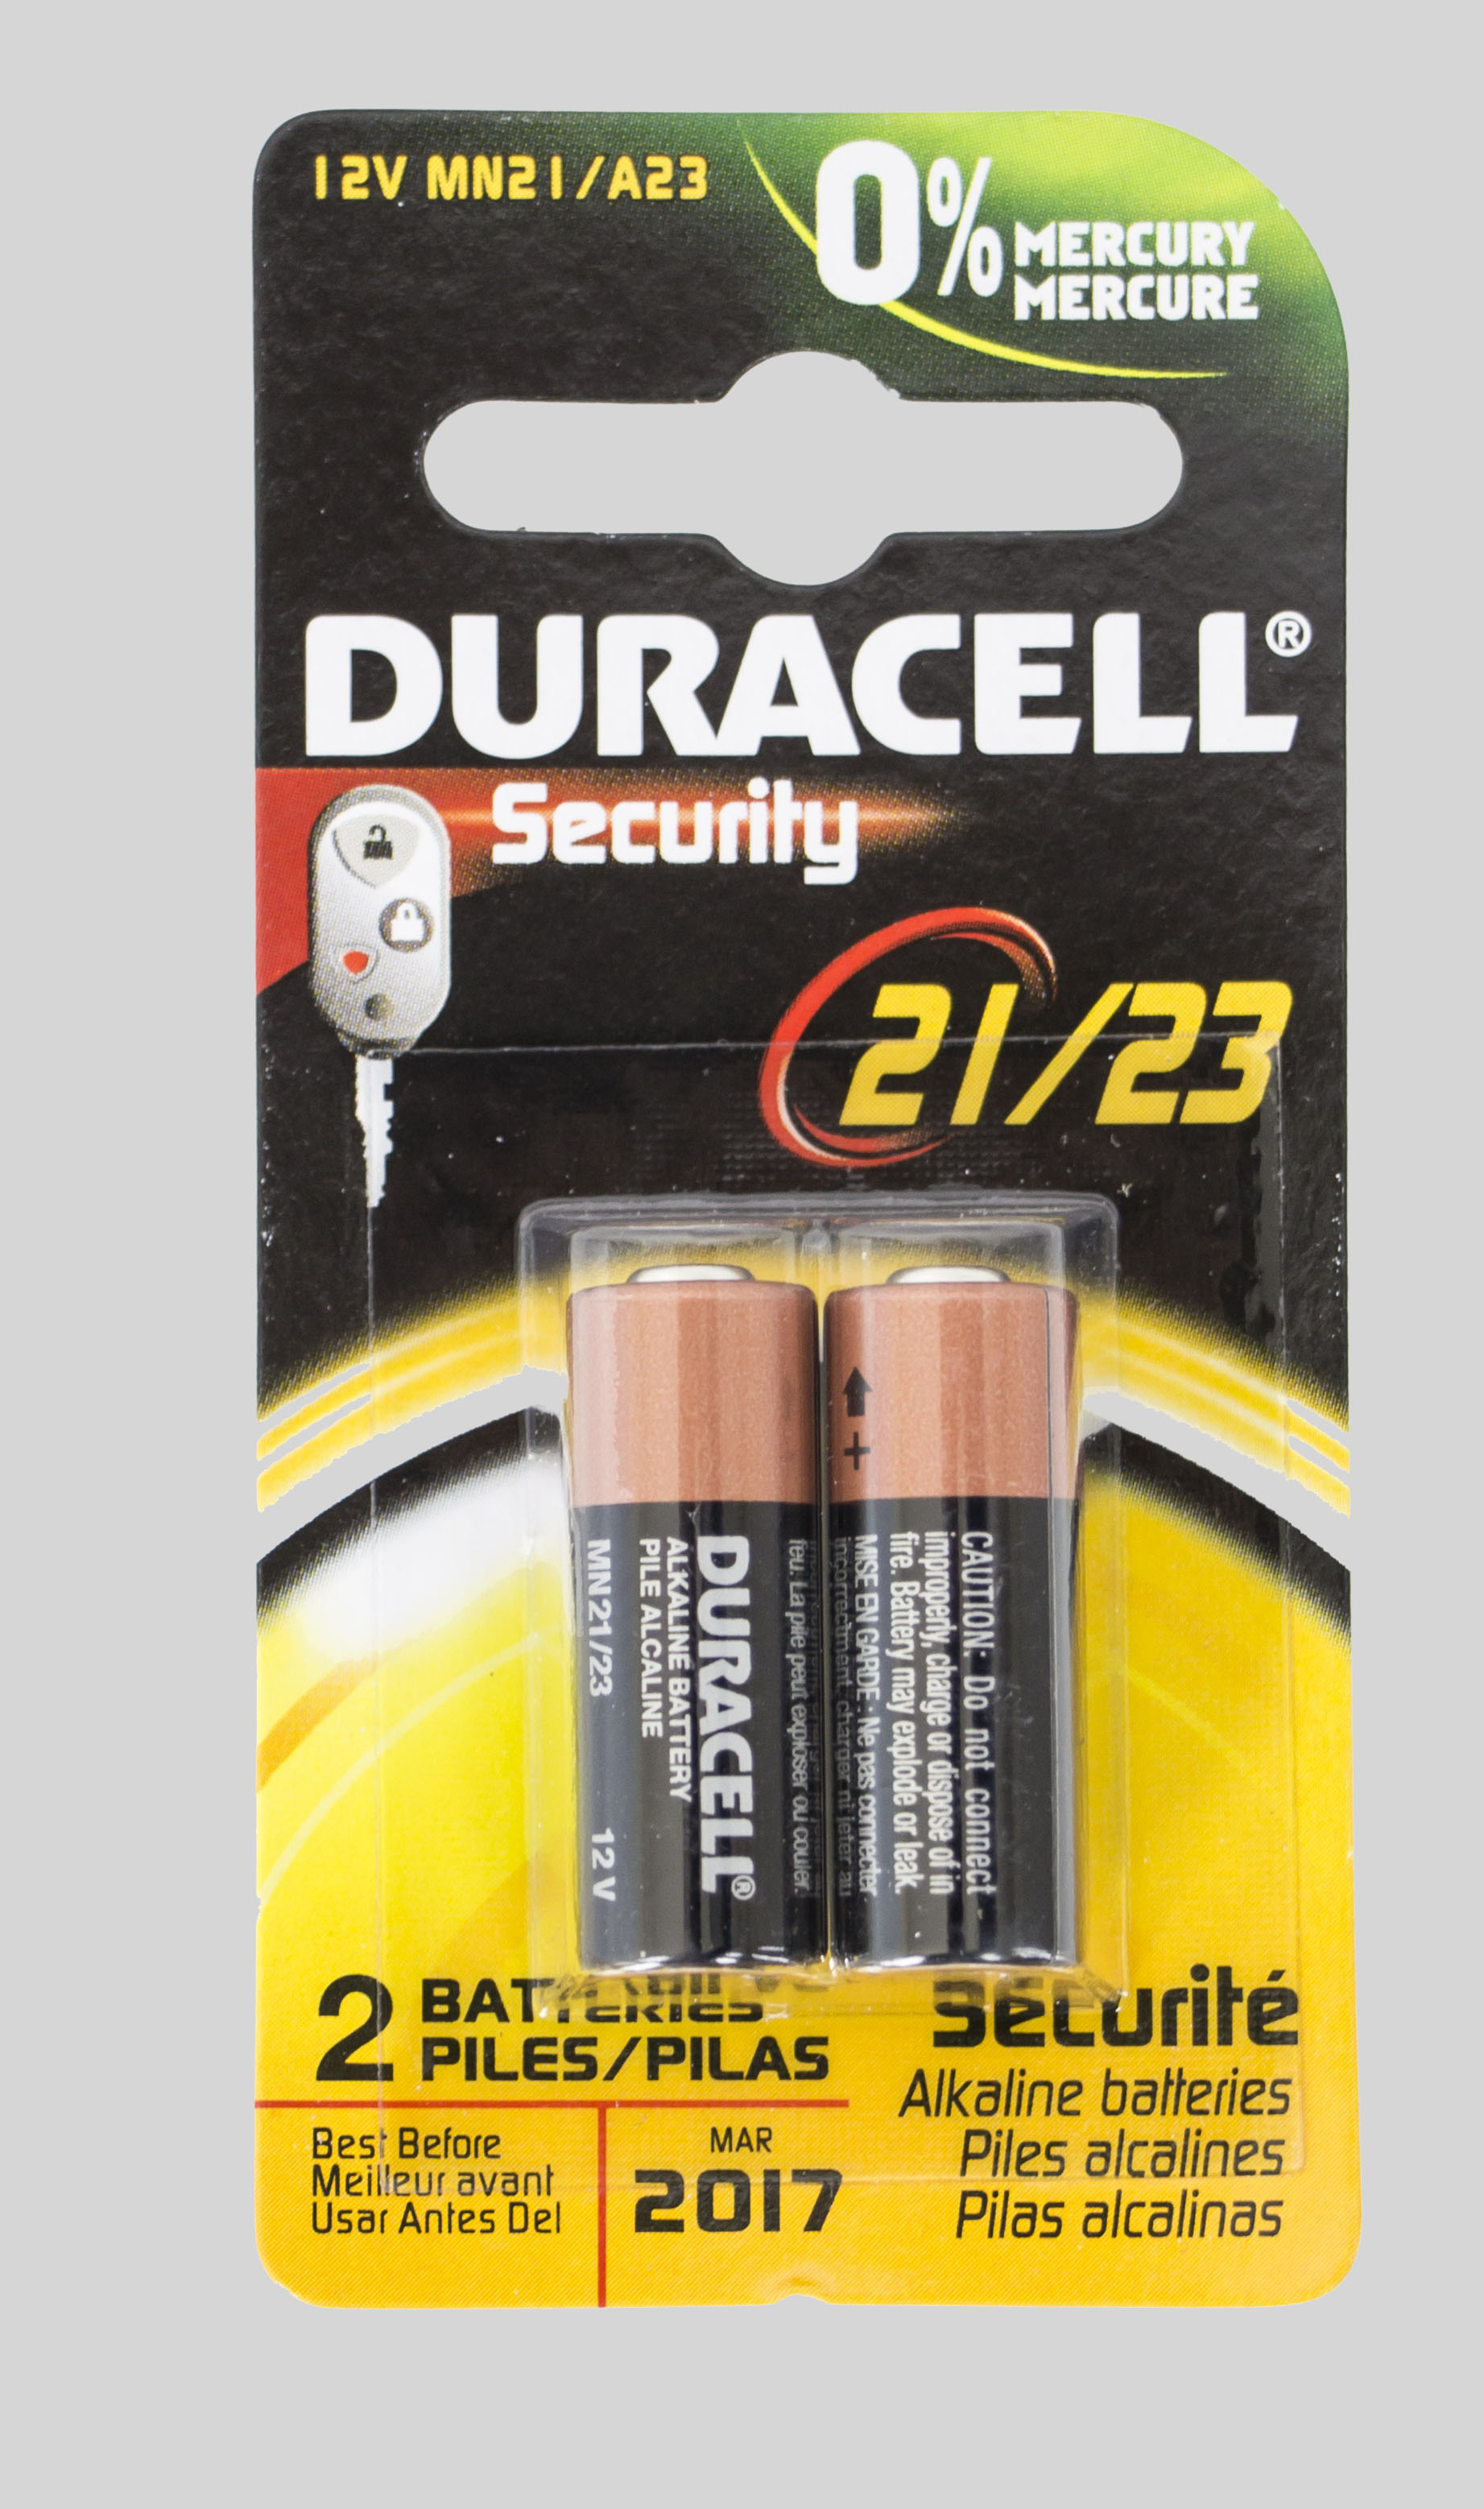
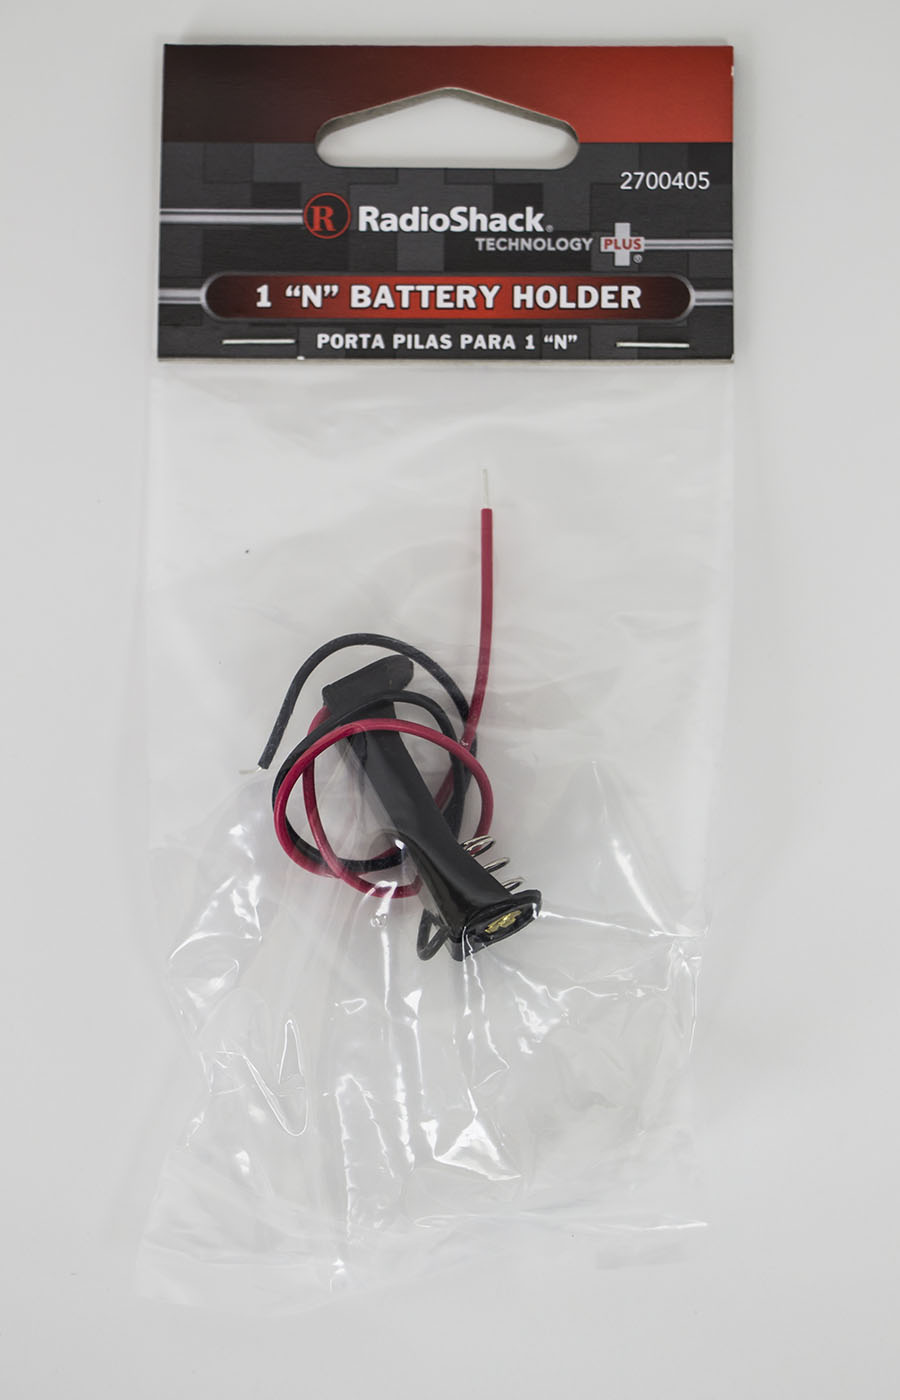
Because the battery will die eventually and the switch doesn’t have a locked-on position, you’ll probably want to get some small 12-volt batteries to power the LEDs. I recommend A23 batteries, and I’ve found 5- and 10-packs of them online for around $1 per battery. If that’s the small battery you decide to use, you’ll want to get a clip holder that has a red and black wire on it so you can easily wire your setup together.
Wiring couldn’t be easier. Just twist one end of the LED strip wires to one of the battery holder wires, and twist together the other LED wire with the remaining wire on the battery holder. If you want to get fancy, you can buy some sort of switch from an auto parts place and wire it into your setup. I just insert or remove the battery to turn the lights on and off.
The total cost of my parts was around $15, and the A23 batteries are about $1–1.50, depending on the quantity you buy.
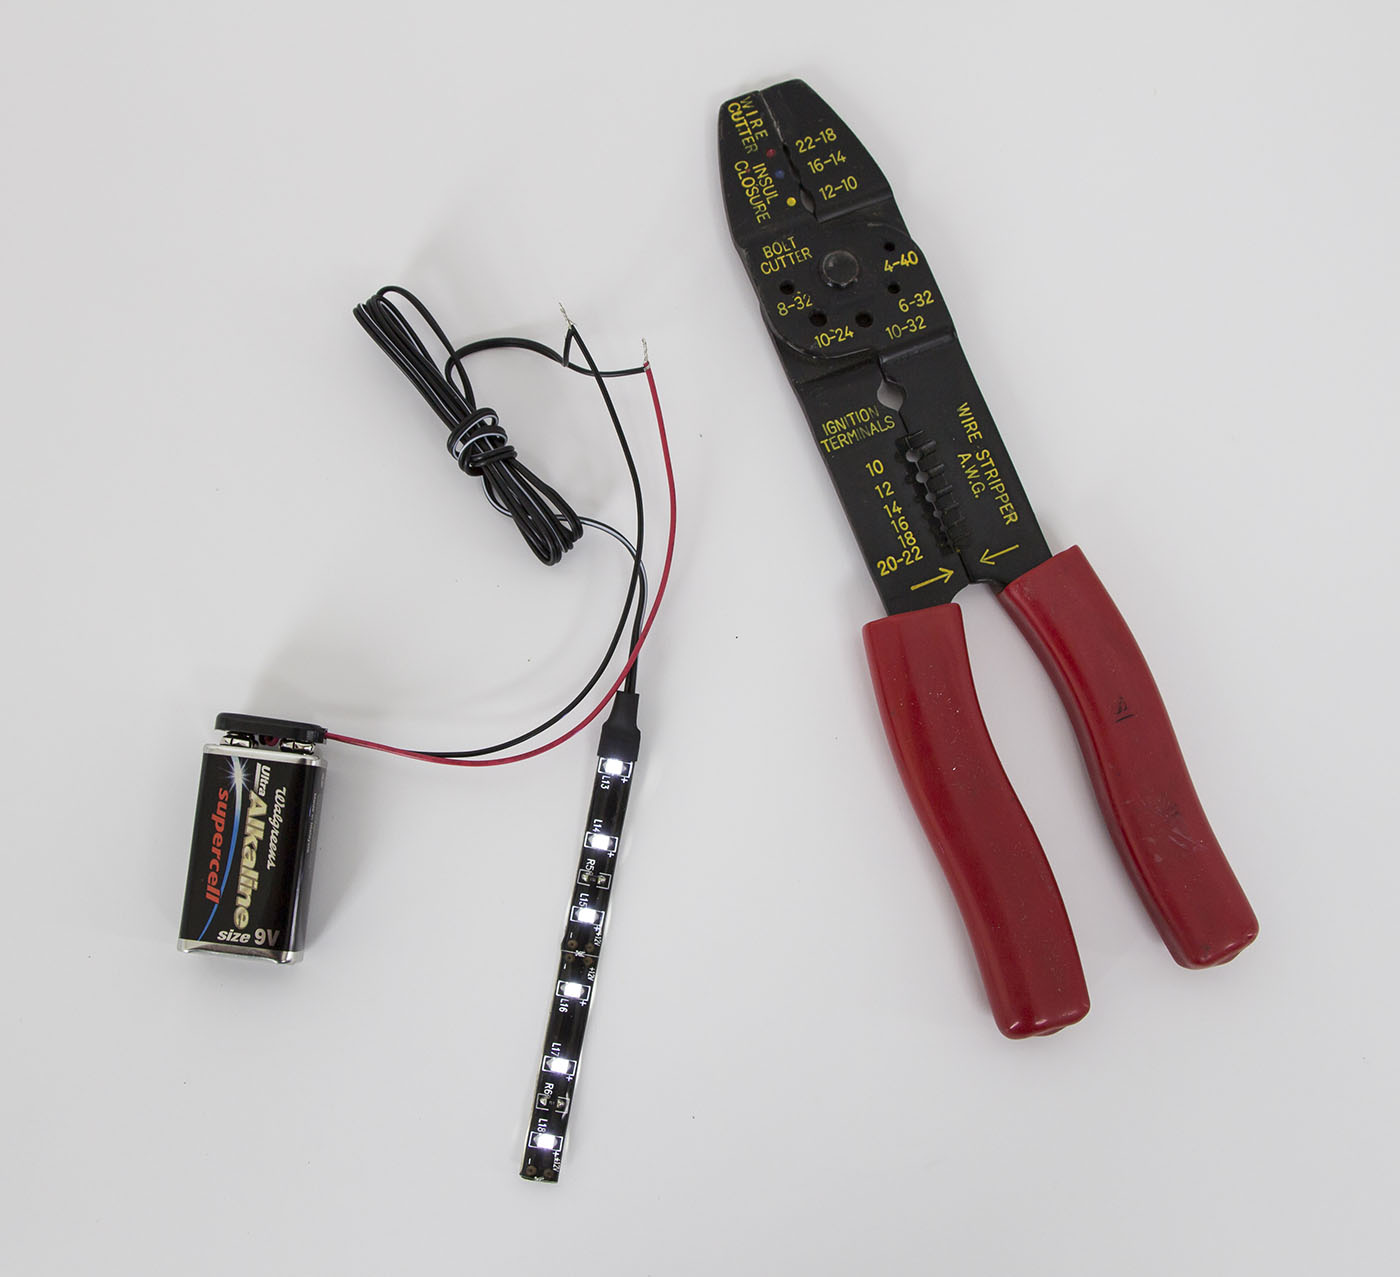
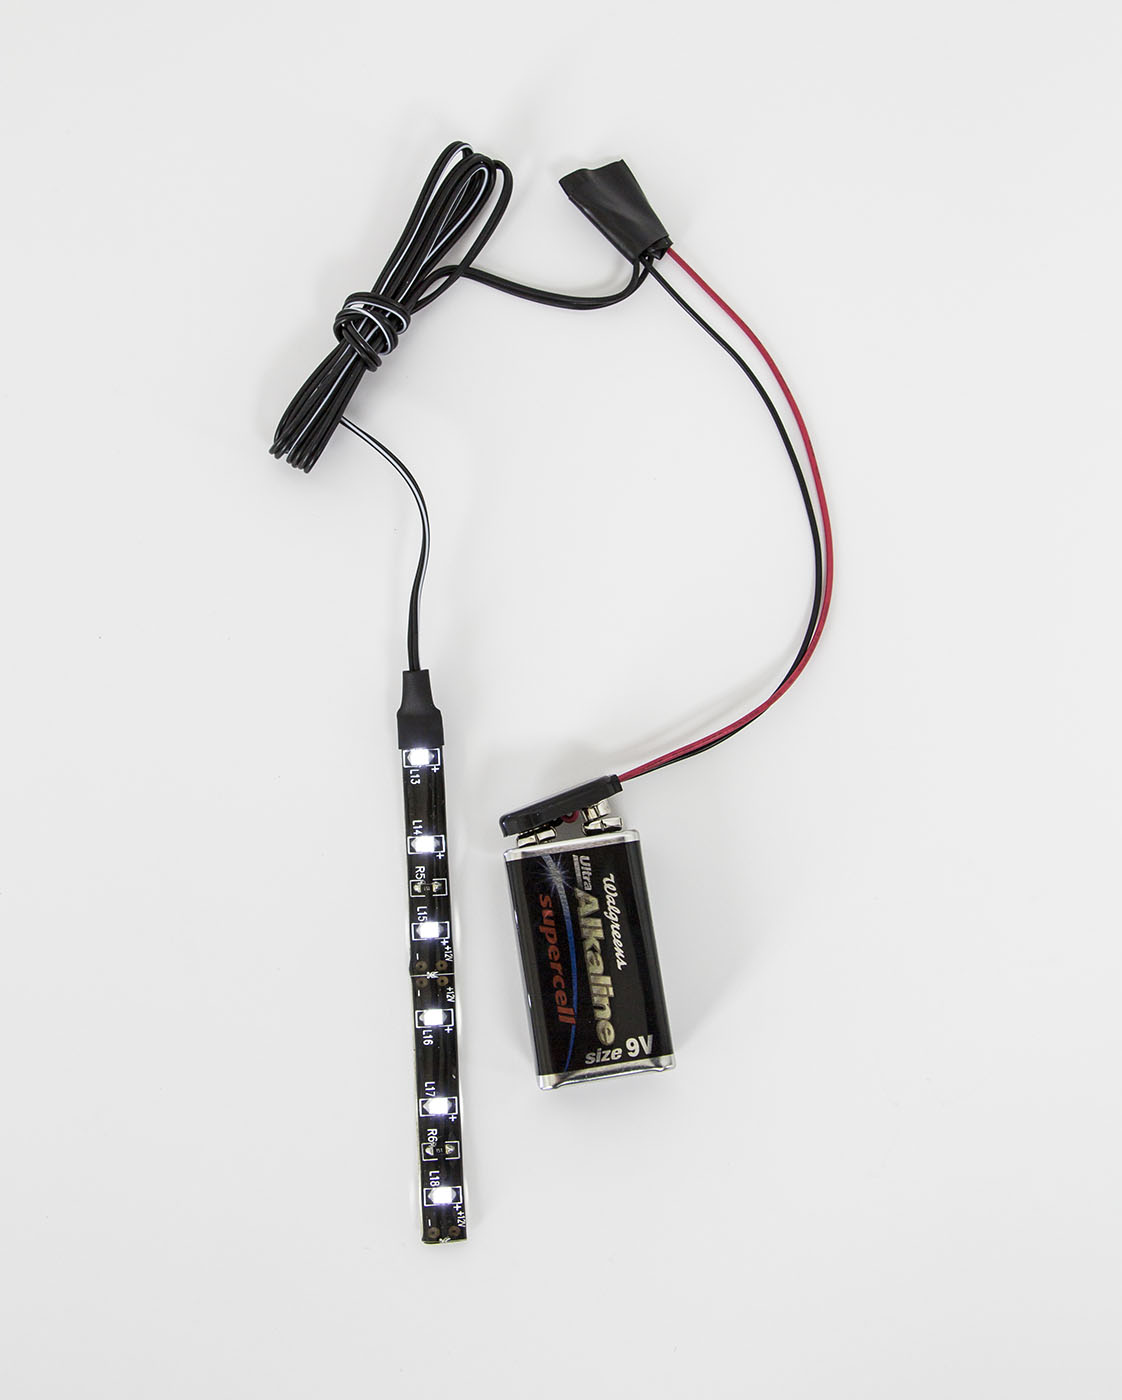
The 9-Volt Option
One last option is to use a 9-volt battery. While the lights are rated for a 12-volt power source, 9-volt alkaline or rechargeable batteries are more widely accessible and it will work. If you’re using this a lot, the idea of rechargeables is more appealing to some folks. The lights won’t be as bright as they could be if you had a 12-volt power supply.
Now you can see what you’re doing and what’s in your bag on those really dark shoots.
