
DIgital Camera: Get the Best Possible In-Camera Image

As photographers, it’s great to have Adobe Photoshop at our fingertips to help us save our shots. But it’s also very important to strive to get the very best possible in-camera image. As much as I love Photoshop, I prefer spending my time outdoors shooting rather than sitting at a computer.
In this article, I’d like to share with you my top tips for getting the best possible in-camera image. You can use these techniques when you’re traveling to far-off places, such as Galapagos National Park, or when traveling to the other side of town to a local park.
And speaking of Galapagos, I’ll use some pictures (taken with a Canon EOS-1Ds Mark II, a full-frame image sensor digital SLR) that I took in Darwin’s Enchanted Islands during an August 2006 trip. All the images are RAW files, which capture the maximum amount of detail, and my ISO for each image was set to the lowest possible setting for the cleanest possible image. Let’s go.
Think out of the box
It’s easy to get locked into thinking about using telephoto lenses for wildlife photographs and portraits and wide-angle lenses for landscapes and street shots. But I like to think out of the box when it comes to lenses and do just the opposite when the situation calls for it and for when I want to be more creative.
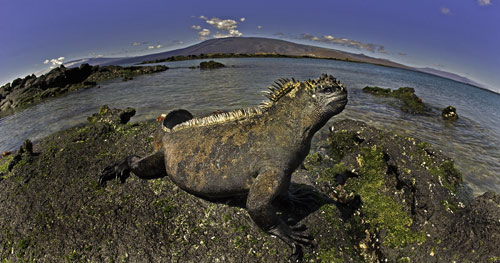
I used a full-frame, 15mm fisheye lens for this environmental portrait (a subject in its environment) of a marine iguana. To get everything in the scene in focus, I used a small aperture (f/11) and, using the camera’s focus lock, set the focus 1/3 into the scene. This is a basic technique pros use for getting great depth of field. To create the curved horizon line, I tilted the lens down slightly.
If you can’t get to Galapagos to photograph the marine iguanas with a super-wide-angle lens, try this technique on your cat or dog for a more creative shot.
Be prepared
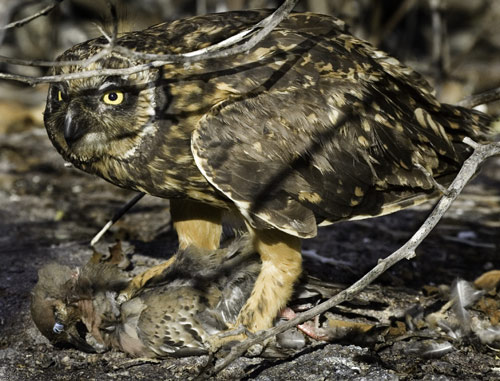
As photographers, we need to be prepared for unexpected photo opportunities, such as when this short-eared owl flew across the lava, and with one swift bite to the neck, caught and killed a dove. I’m always prepared with a digital SLR hanging from each shoulder—one with a telephoto zoom and one with a wide-angle zoom. Both cameras are set on aperture priority with an f-stop of f/8 and the ISO set to 400. That setup basically lets me point and shoot in an instant, so at least I have a shot. Then, if there’s time, I adjust the aperture for the desired depth of field, and I use the exposure compensation to dial in the correct exposure. I took this shot with my 70–200mm lens set at 200mm.
Being prepared means always being on the lookout for pictures. But most importantly, being prepared has a lot to do with being aware.
Expose for highlights
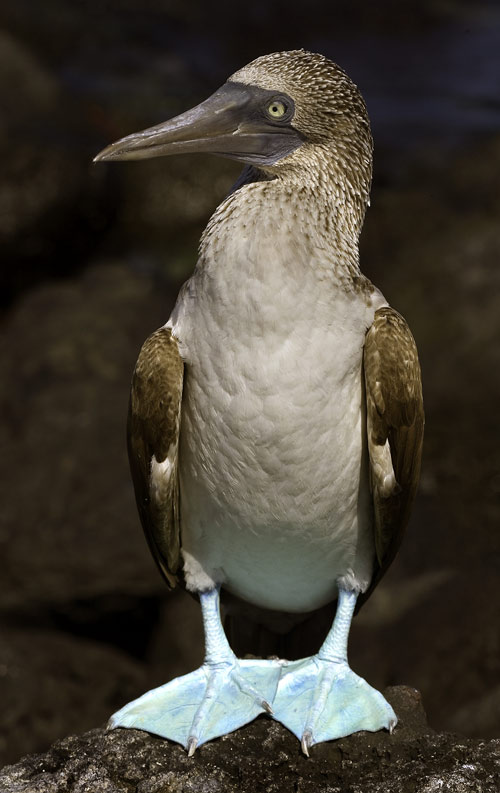
This might be one of the most important tips in this article. When setting the exposure, it’s super important not to have any areas of the scene overexposed, such as the white feathers on this blue-footed booby’s breast. Sure, we can rescue an overexposed area up to one stop in Camera Raw, but why take a chance in not capturing all the detail. (Shoot JPEGs, and you’re sunk if the highlights are washed out.)
Checking your camera’s overexposure warning and histogram can help ensure a correct exposure. But learning how to see the light (the difference between the light and dark areas of a scene) is the key to setting the correct exposure. I shoot digital like I used to shoot slide film, which has relatively narrow exposure latitude. I set the exposure for the brightest part of the scene.
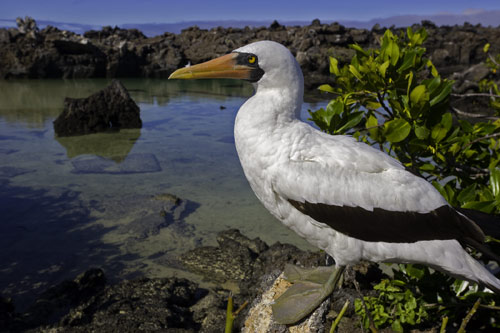
Dead center is deadly
Here’s an easy one: Placing the subject in the dead center of the frame is, well, deadly—as far as composition goes. That’s why I composed this picture of a masked booby with the animal off center.
Now you might think that the short-eared owl and the blue-footed booby in the previous examples show the animals in the center of the frame. Well, they actually fill the frame, and the most important part of the picture—the animals’ heads—are off center.
Tell a story
I like pictures that tell a story. Portraits of animals and people are nice, but pictures that show some behavior or interaction are usually more interesting to view. So look for those types of pictures.
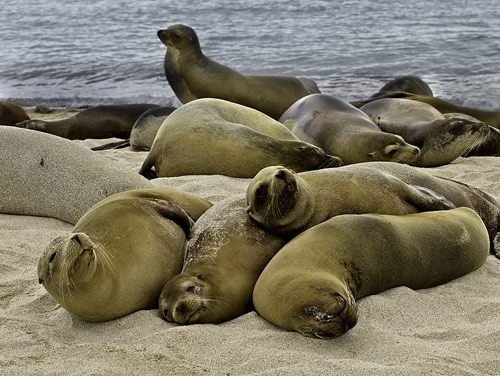
Be aware of the background
I used to tell my workshop students that the background is almost as important as the main subject. These days, I tell them it is as important, because it can make or break the scene. So, when I’m composing a photo, I’m always asking myself, “How will the background affect my picture?”
In this picture of several sea lions relaxing on the beach, the lone sea lion in the background adds a nice element to the image. I have many other pictures of resting sea lions, but this is my favorite.
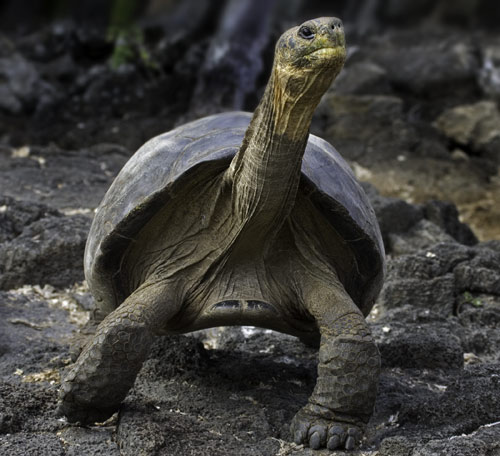
Capture the peak of action
Okay, I agree that a photograph of one of the slowest moving animals on the planet lifting its head as high as it can is not really considered capturing the “action.” But relatively speaking, this is about as action packed as you get when it comes to the Galapagos tortoise!
Seriously, try to anticipate the peak of action, of an animal in the wild or a sports player on the field. Shoot at the peak of action. Use a 1/500th of a second shutter speed to “freeze” the action.
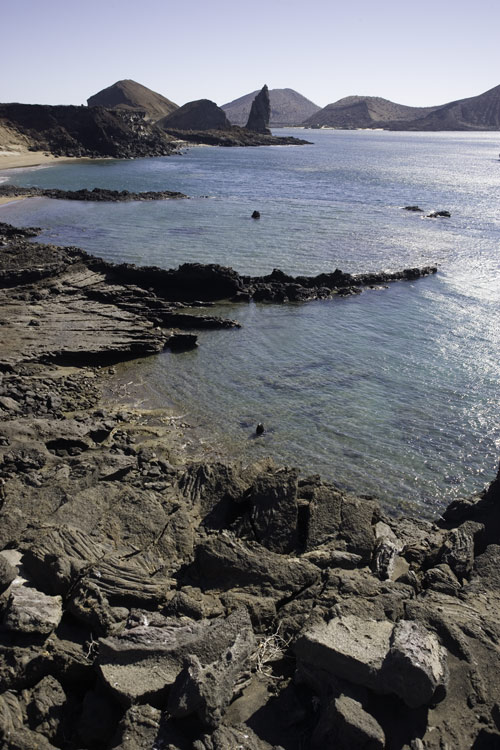
Pack a polarizing filter
We have many different filter effects (in Photoshop and with plug-ins) that we can digitally apply to our pictures, but one effect that can’t be duplicated 100% is a polarizing filter: No digital polarizing filter can reduce glare on water and let us see through water like a real glass polarizing filter does. (The Polarizing filter in Color Efex Pro 2.0 [www.niksoftware.com] does a good job of darkening a blue sky and making white clouds look whiter, as does a polarizing filter.)
Use a polarizing filter (which is only effective when the sun is off to your left or right) and you’ll get better outdoor images.
With polarizer
Without polarizer
The eyes have it
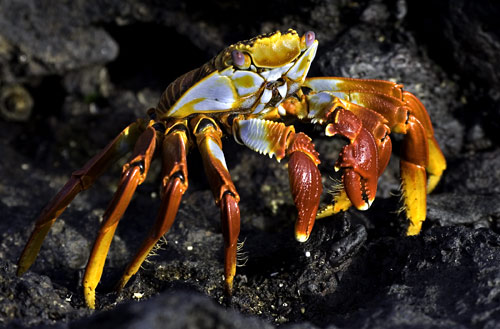
In animal and people photography, if the eyes are not in focus and well lit, you’ve missed the shot. I use the focus lock on my camera to lock in the focus on the subject’s eyes before I shoot, as I did for the photograph of a Sally Lightfoot crab at the beginning of this column. I also often use a flash to brighten the subject’s face and to add some “catch light” to the subject’s eyes.
Well, those are my top photo tips. However, here is one more: Have fun! After all, you picked up a camera to have fun, right? Don’t get so caught up in all the technical aspects of picture taking that you miss the fun. And of course, continue that fun in Photoshop.
