
Clamshell: Foolproof Beauty Light
Clamshell lighting is a technique commonly used by fashion and beauty photographers to create flattering, glowing light. In fact, if you look at a majority of beauty campaigns for the biggest brands, you will likely see this technique employed. It’s best used for flattering portraits for women and beauty photography.
Clamshell lighting is when the photographer uses two frontal light sources to illuminate the subject, helping to minimize shadows and often giving a glowing effect. Though usually achieved by using studio strobes, it can also be achieved using constant studio lights. Think of your two light sources as the shells, and your subject is the happy clam in the middle.
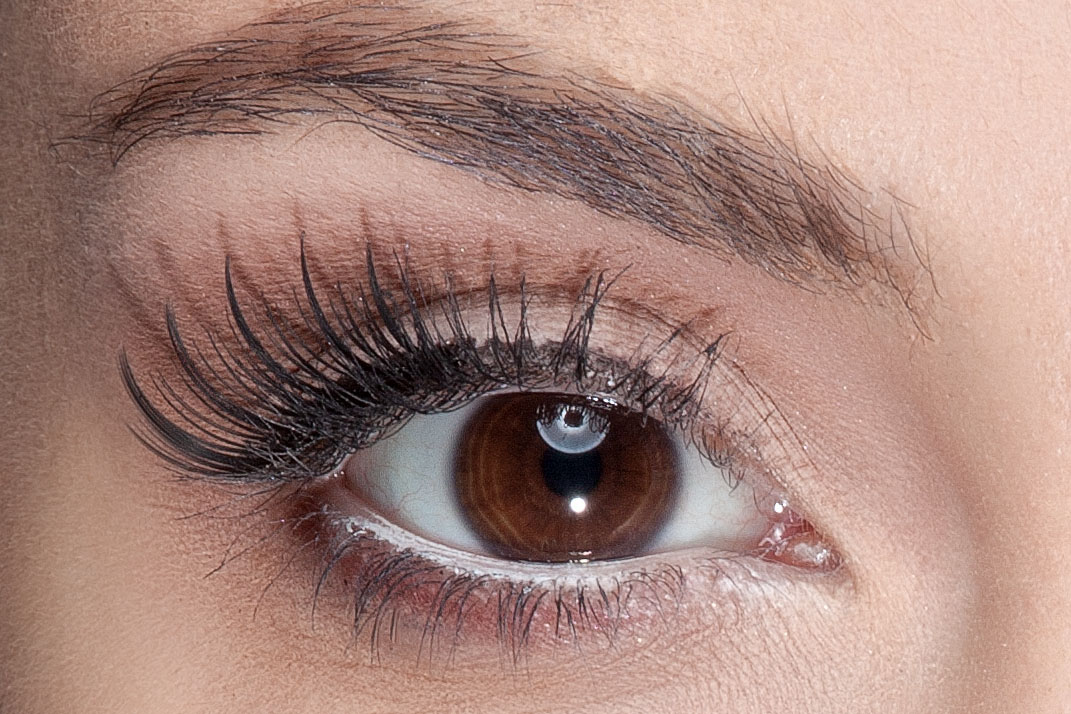
You can identify clamshell lighting in a magazine if you see two distinct highlights or catchlights in the eye. Usually you see one toward the top of the eye, and another a bit further down in the pupil. The shapes and sizes of these catchlights will vary drastically, but when you see the two highlights you can readily identify clamshell.
Although this lighting technique may seem relatively straightforward, there are many variations on clamshell lighting for different effects. What’s great for you is that clamshell lighting can be achieved with pretty much any light modifiers and can be mimicked even with just one light.
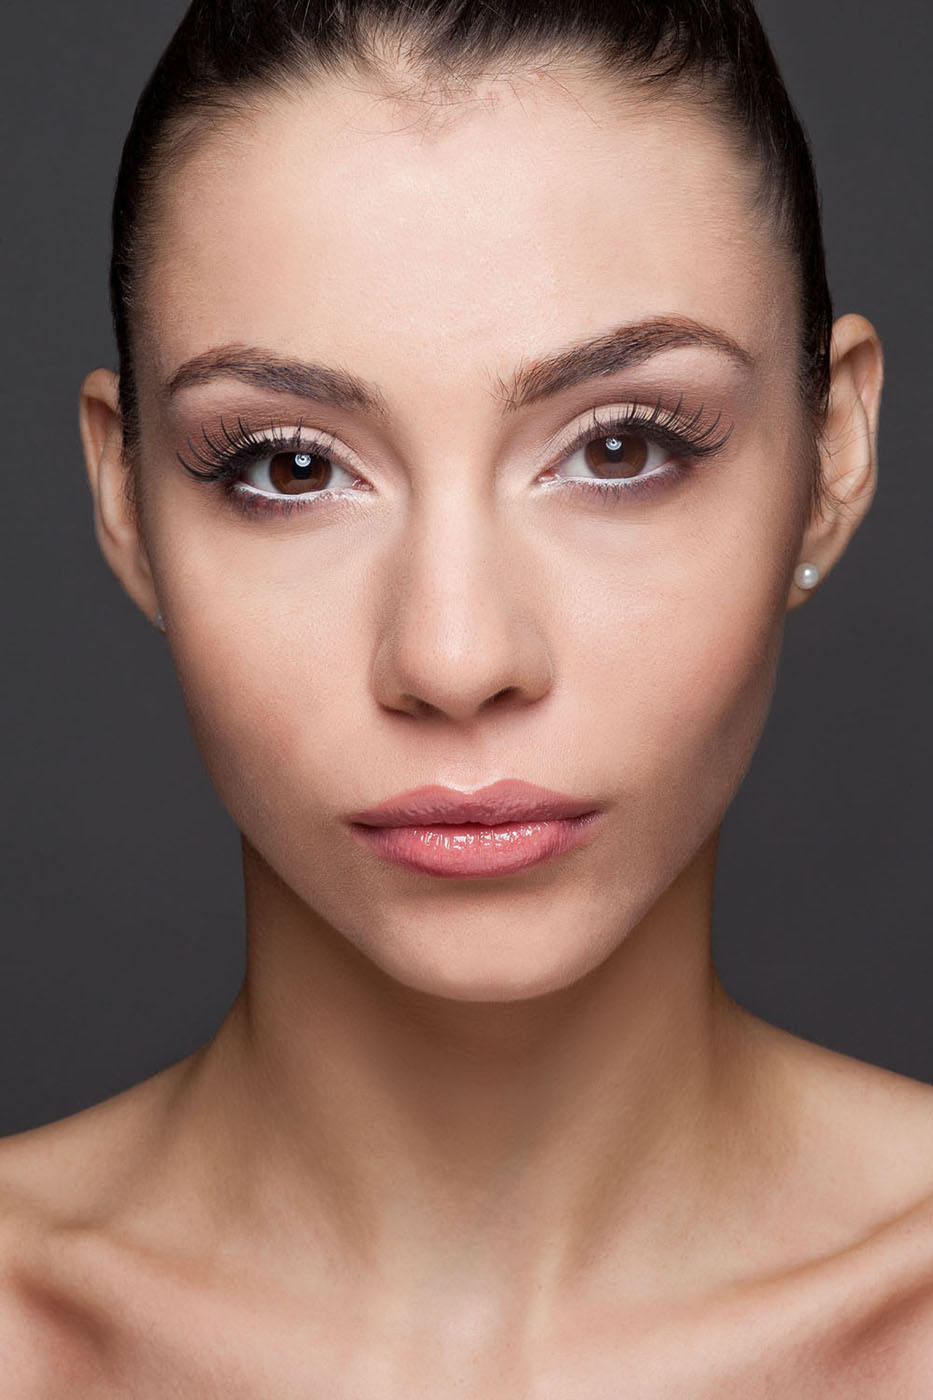
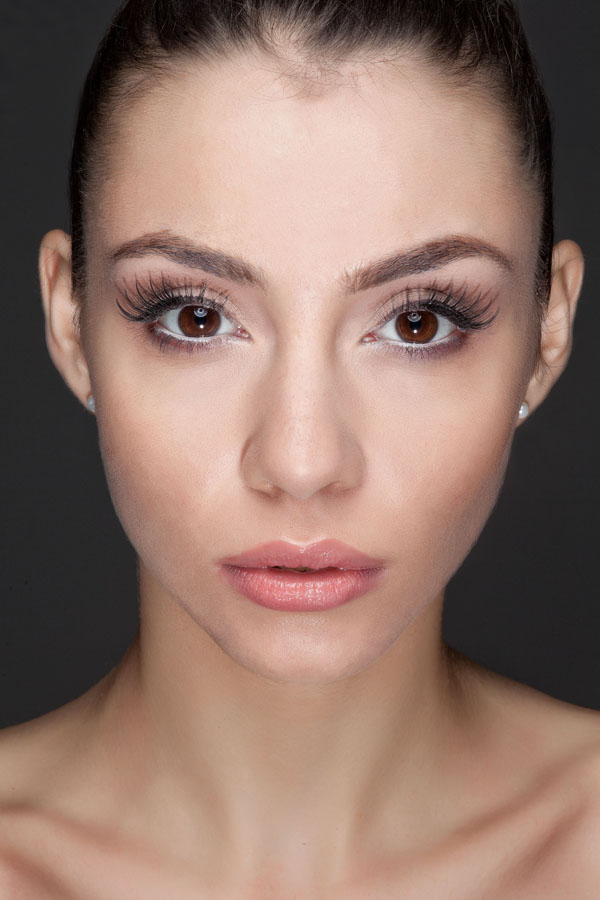
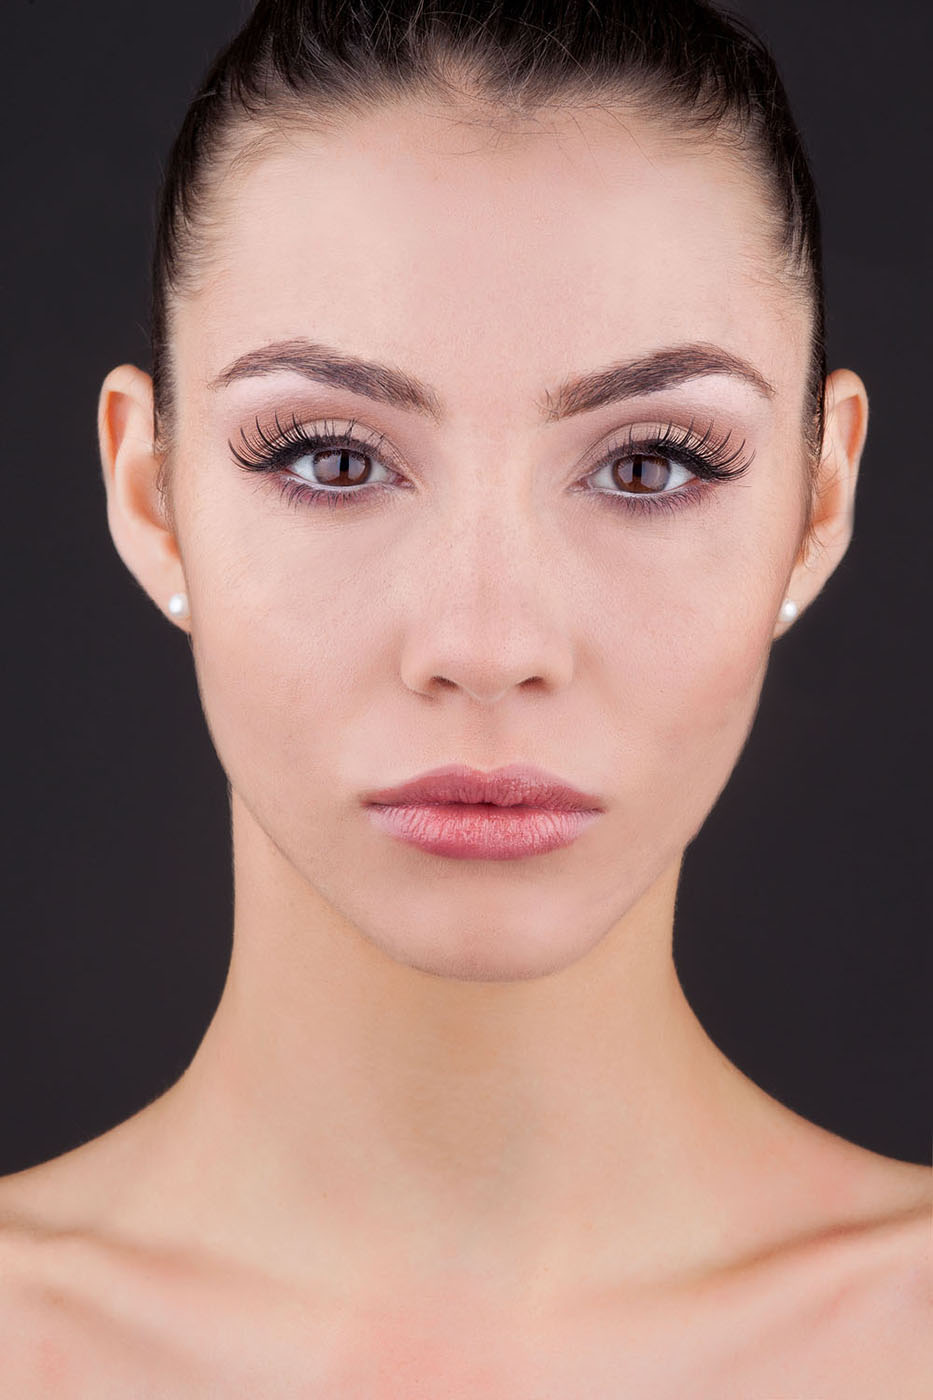
The two catchlights of clamshell lighting. The model was illuminated by a beauty dish (top catchlight) and a silver dish reflector (bottom catchlight).
The One-Light Example
My light modifier of choice for beauty photography is the beauty dish. A beauty dish is a fantastic light modifier because it gives you defined shadows but not harsh light. For example, a softbox has wrapping shadows and soft light. A silver reflector dish modifier has defined shadows but harsh light. A beauty dish is a fantastic light that’s a happy medium between the two. Beauty dishes are regularly used by the world’s most successful portrait and fashion photographers.
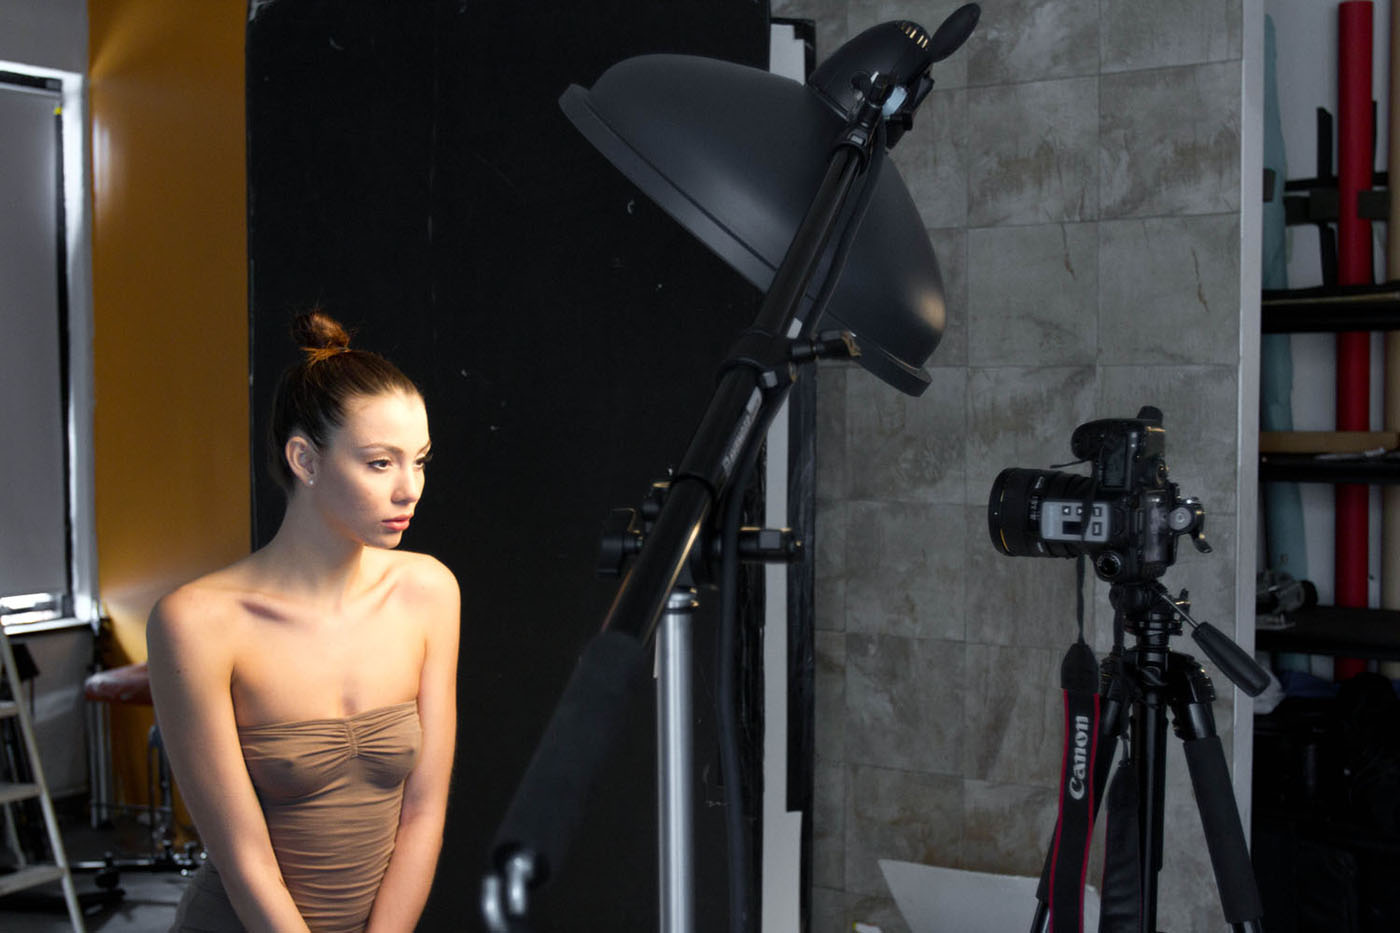
To create a clamshell lighting effect with a beauty dish, place the beauty dish centered in front of the model, slightly above eye level. Typically, I put the bottom of the beauty dish about eye level with the subject or even a bit lower. The higher the light source is in comparison to the subject, the more defined the shadows become on the subject’s face. As you lift the light up, the shadows beneath the nose and neck become more apparent. If you raise the light too high, you may lose catchlights in the eyes altogether. Play around with the height and angles and experiment to see which effects you like best. If you have the light at a high level, you may have a more dramatic image that suites your style.
With the light just above eye level, tilt the dish down toward the model at a 45° angle. This step is important for clamshell lighting. To create the clamshell effect, you can now place a reflector beneath the chin or chest of your subject. Because you angled the light modifier downward, it can now reflect the light of the beauty dish back into the shadows under the chin, nose, and in the eyes. The result is relatively even, glowing light.
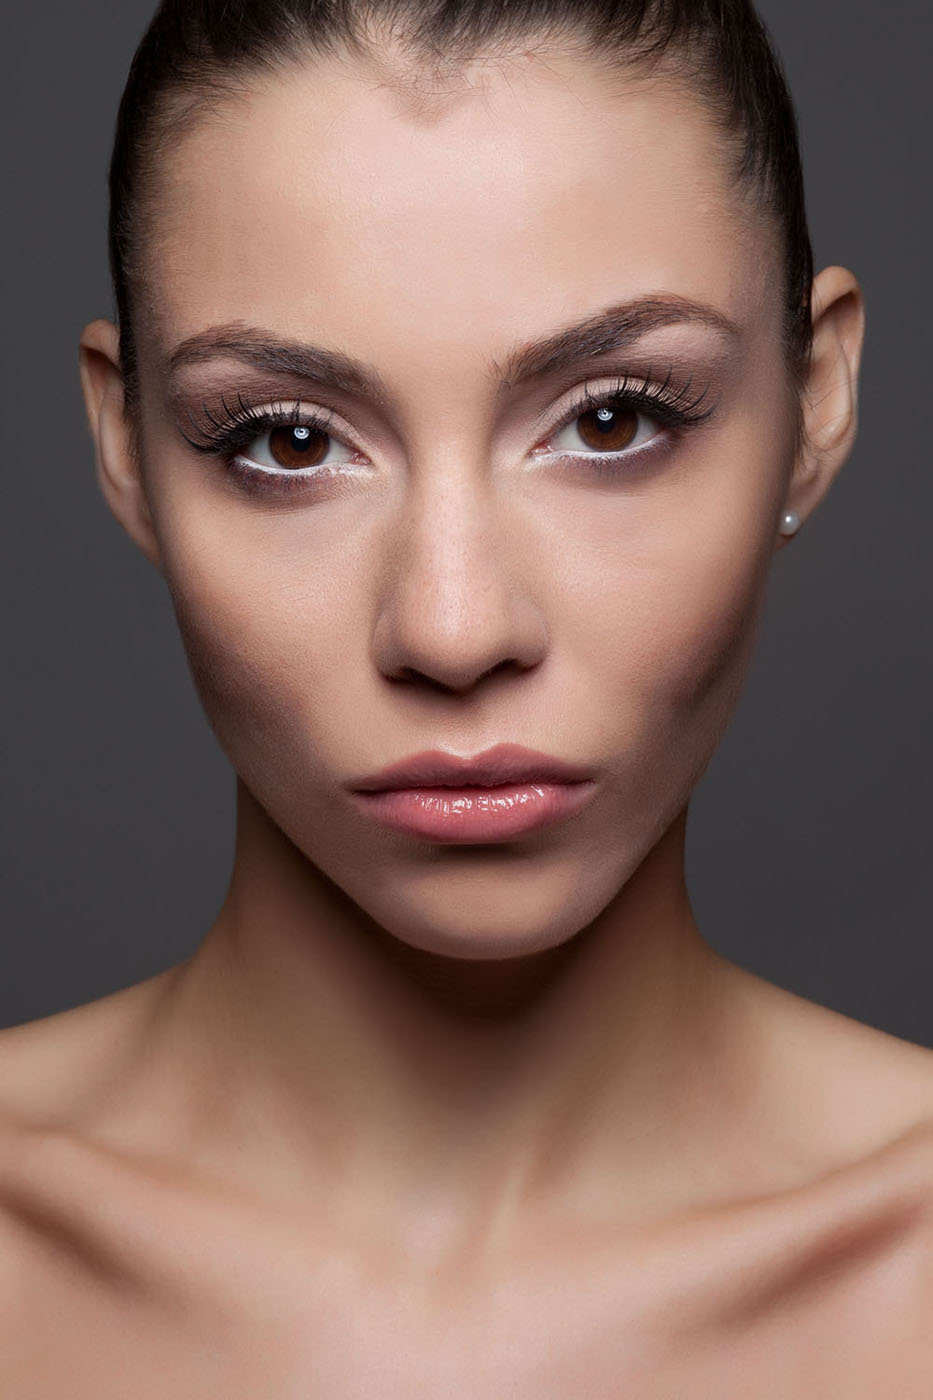
The subject is illuminated by a beauty dish only. There are no additional light sources or modifiers. The result is defined shadows that help shape the face,
but a bit of darkness under the chin, nose, and in the eyes.
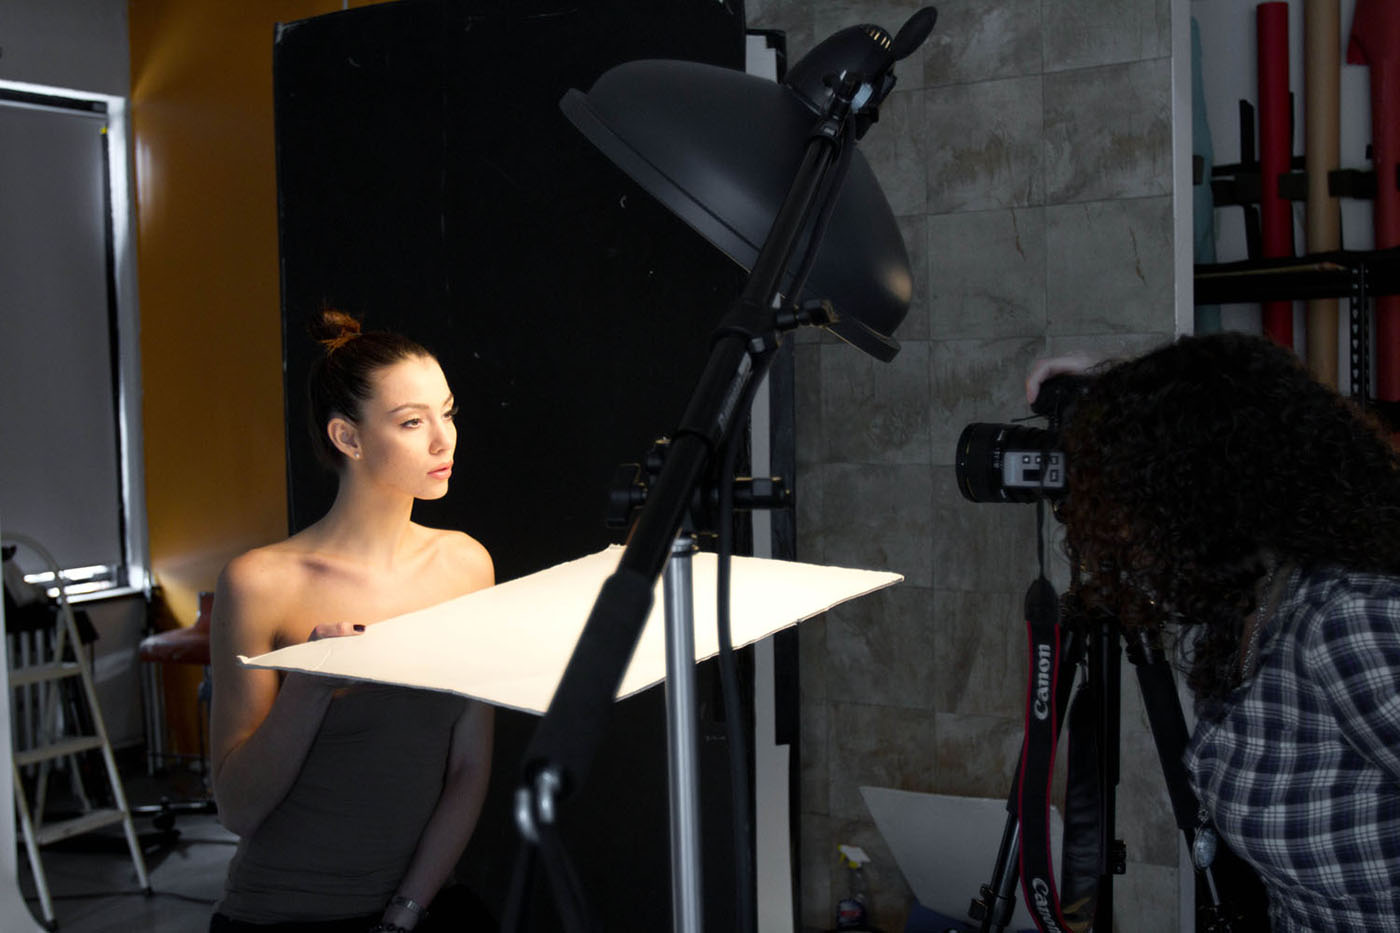
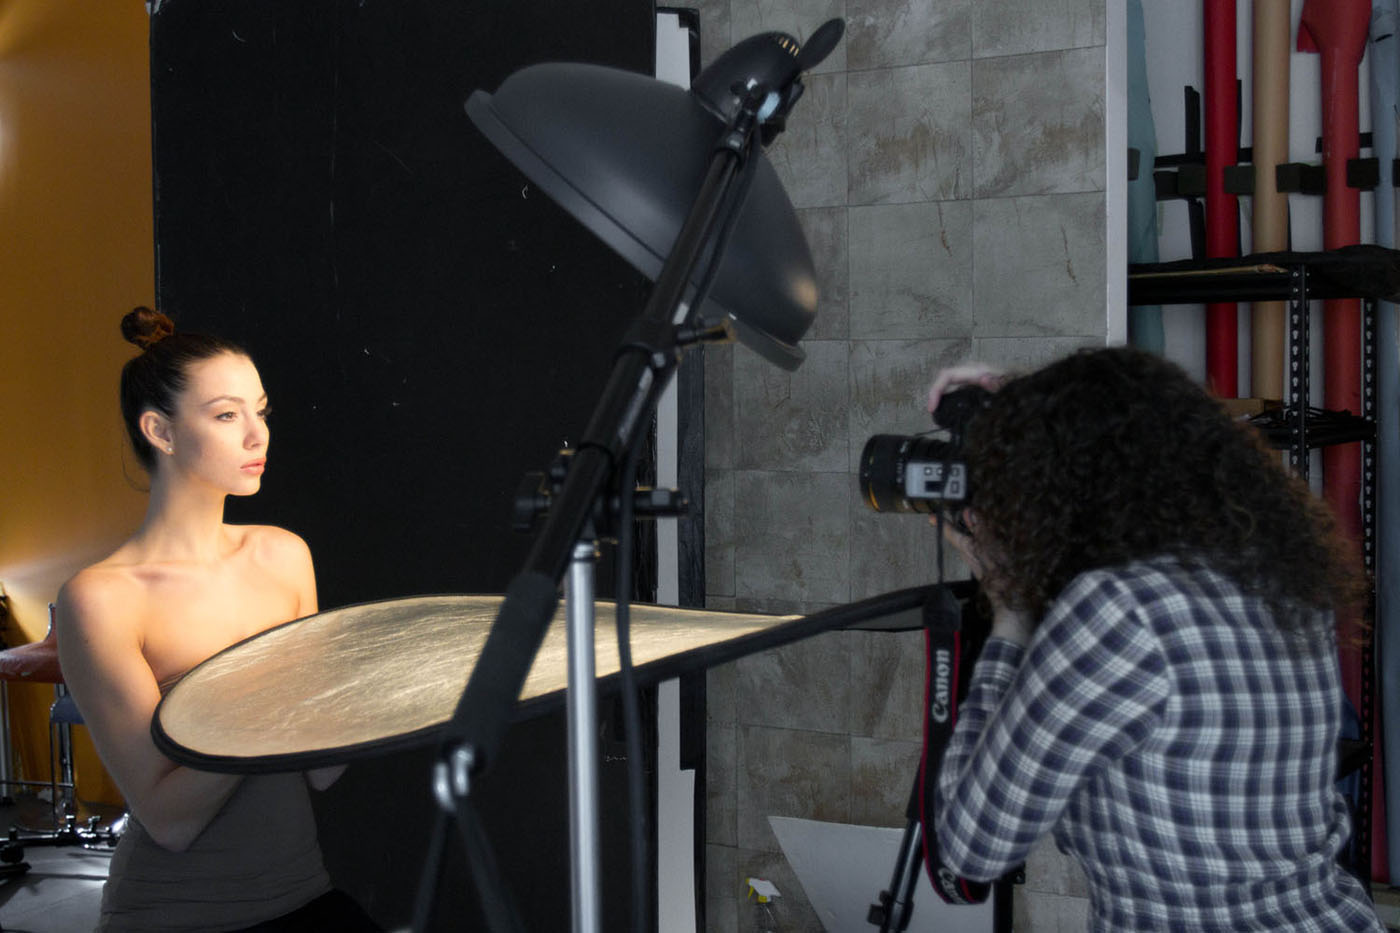
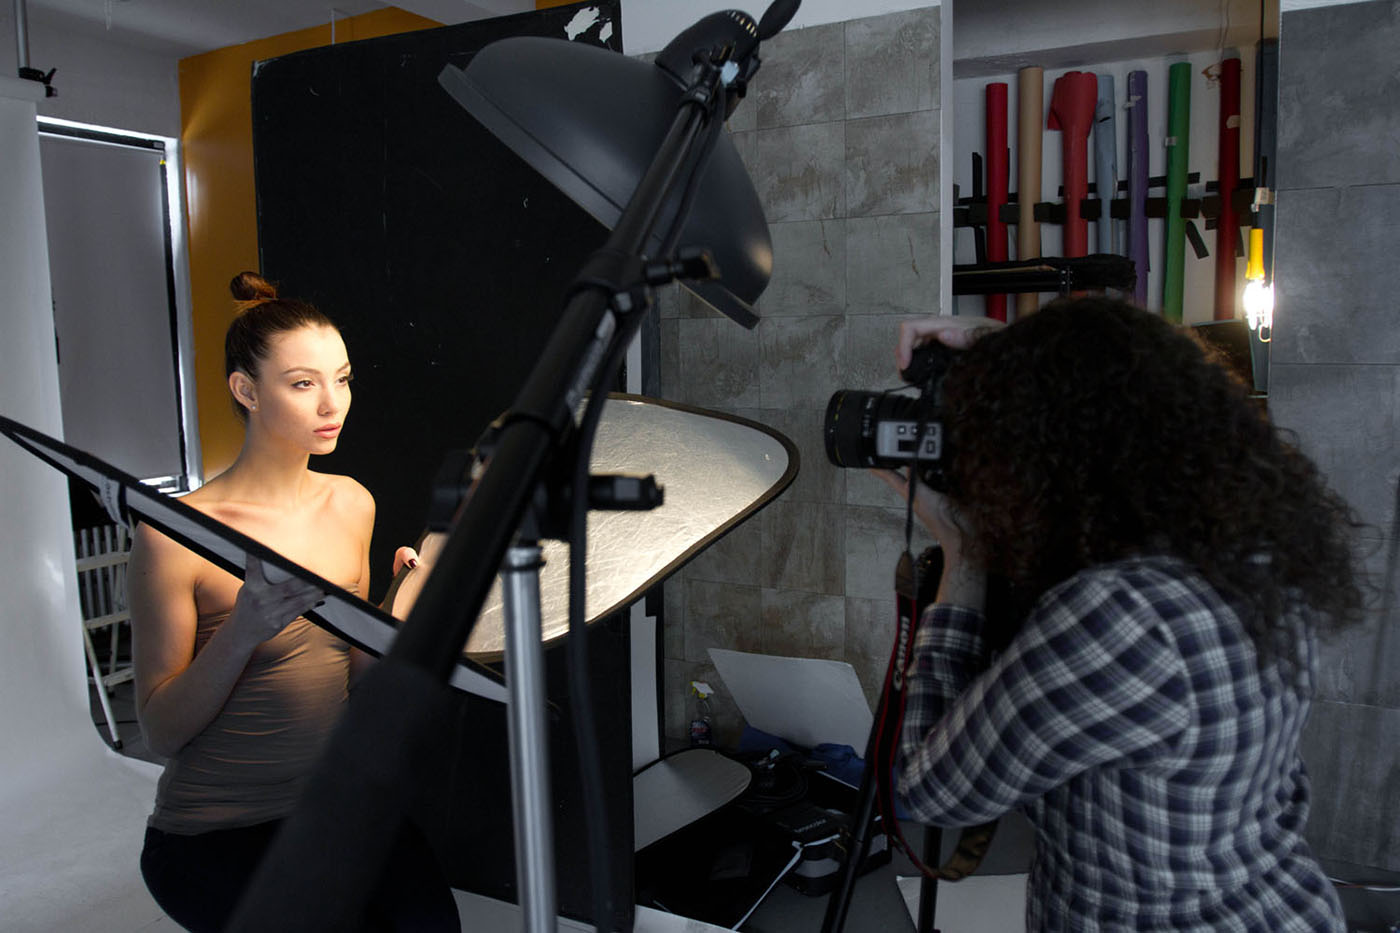
It’s important to note the light-to-subject distance in clamshell lighting. The distance from your light source to your subject definitely makes a difference in this setup. You want the light to only be a couple of feet from your subject. Generally, I’ll have my light about 2.5–5′ away (usually I’m at about 3′). If you move the light too far from the subject, then your reflector is going to lose some of its power. Put the reflector just out of your frame right up against the subject. In fact, I often have my subject hold the reflector for me. If for some reason you think that the reflector is filling in too many shadows, you can always lower the reflector or change the angle so that it’s not catching as much light. This is called feathering the reflector.
You have several options for your reflector. First, you can consider using a white fill card. The fill card will give you some illumination but the effect will not be as strong. I recommend using a silver reflector disk to help kick light back into the shadows. If you look closely in the catchlights of the eyes, you can clearly see the beauty dish as well as the silver reflector used to fill in the shadows from beneath. Silver gives me more reflecting power than a white fill card, and I can really emphasize that glowing light effect if desired.
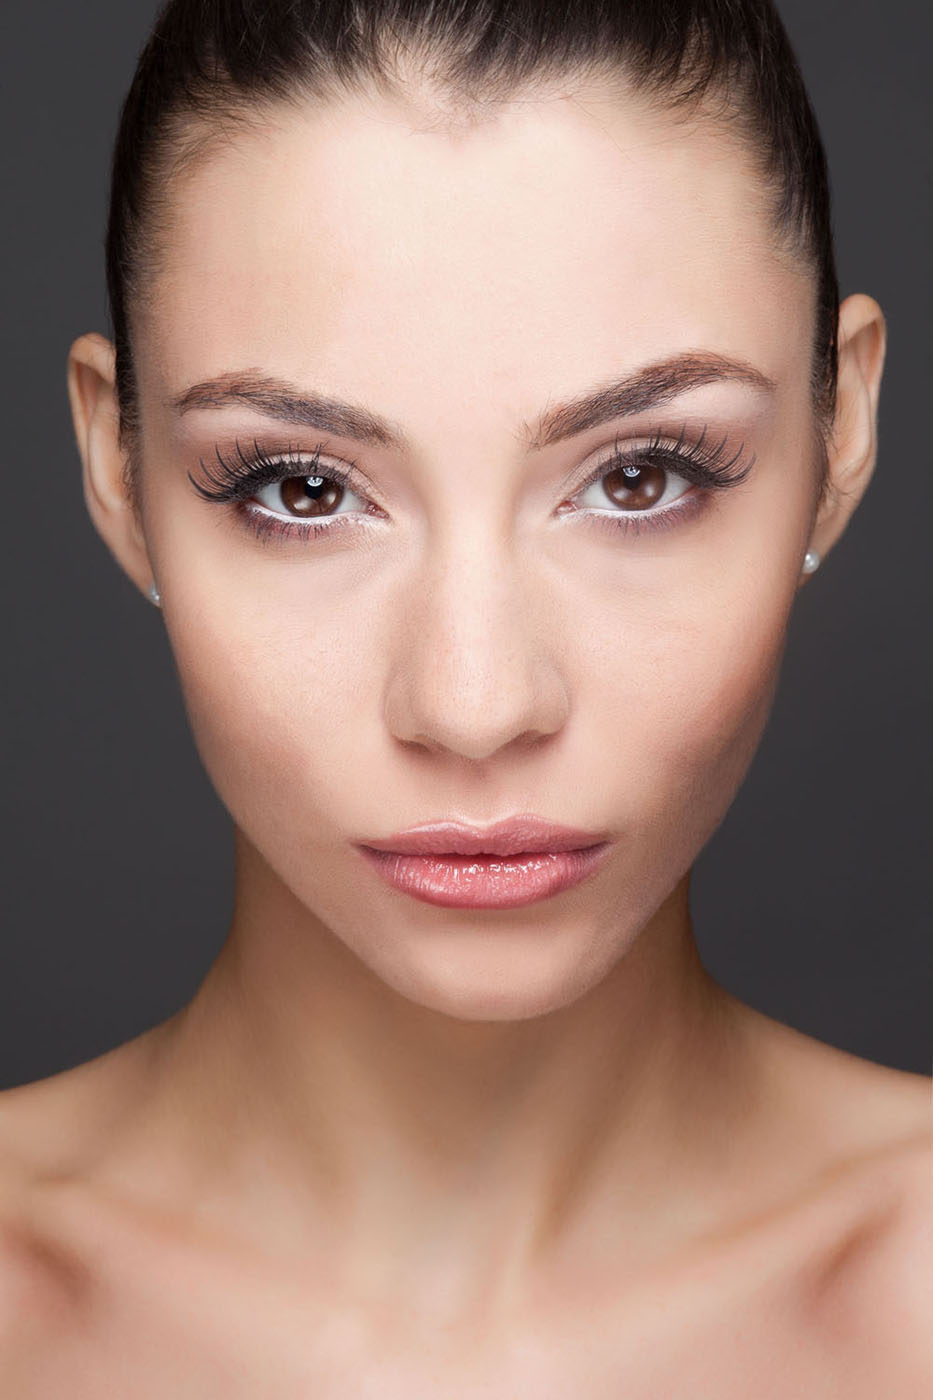
Here you can see the difference between a white fill card (this image) and silver reflector (next image). I avoid using a gold reflector because then the image looks like it has mixed light sources and the bottom portion of the face has a much warmer tone. The larger the reflector you use, the more fill you’re going to get and the more it will wrap around the face. I recommend using a 32″ silver reflector if you have one available. Notice that these reflectors help fill in the shadows compared to the previous shot, giving a lighter feeling image.
A beauty dish plus white foam core board is used to reflect light back into the subject’s eyes. If you look closely, you can see the outline of the foam core in the catchlights.
The One-Light Example
A beauty dish plus a silver reflector is used to bounce light back into the face. Look at the catchlights of the eyes and you can see the defined silver shape of the reflector.
The Eye Lighter
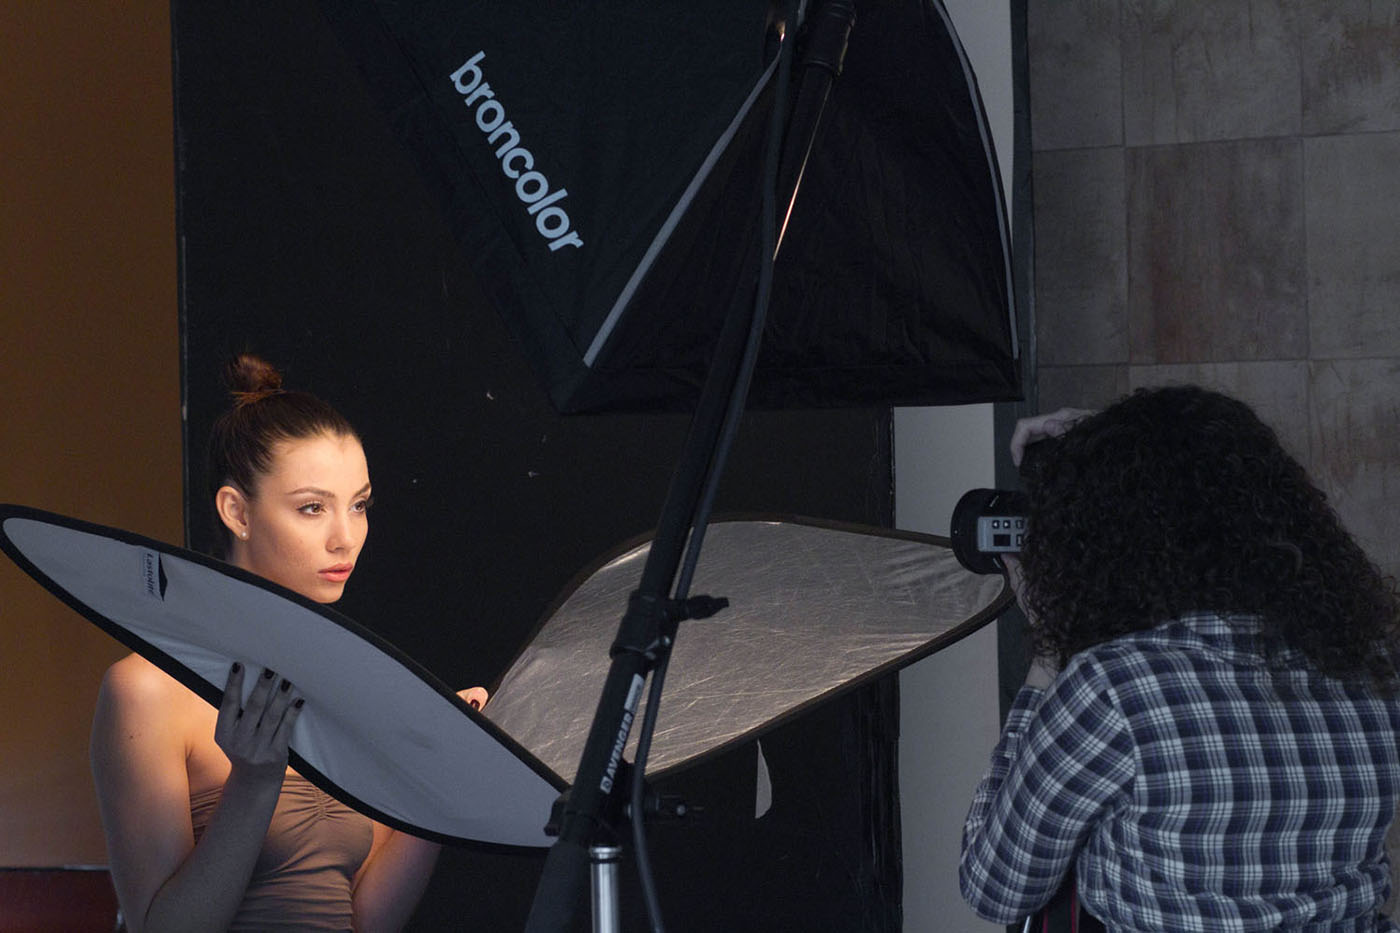
Another product many photographers use is called “The Eye Lighter.” This reflector makes a scoop-like shape to help bounce light from all angles back into the subject in a clamshell setup. It has a very flattering effect, but you can also create your own by using multiple reflectors to catch more light. Here, I have used two small silver reflectors in a V shape to bounce in even more light. The results are striking catchlights in the eyes and glowing illumination.
While I used a beauty dish in this example, you can easily use a silver reflector dish, umbrella, or softbox. Any light source you have can work well for this effect, just remember to angle the light down toward the model at a 45° angle or steeper so that your reflector can catch the light. By using a softbox, you’ll get a softer and generally less contrasty effect than if you used a beauty dish.
Two small silver reflectors are placed in a V shape to catch the light around the model.
The Eye Lighter
Here’s the same image taken with a softbox instead of a beauty dish. I centered a 2×2′ softbox as the main light, and two small silver reflectors to add the fill light.

The quality of light is a bit softer
and more wrapping. Two small silver reflectors fill the light back into the eyes.
Considerations for Your Clamshell Lighting Setup
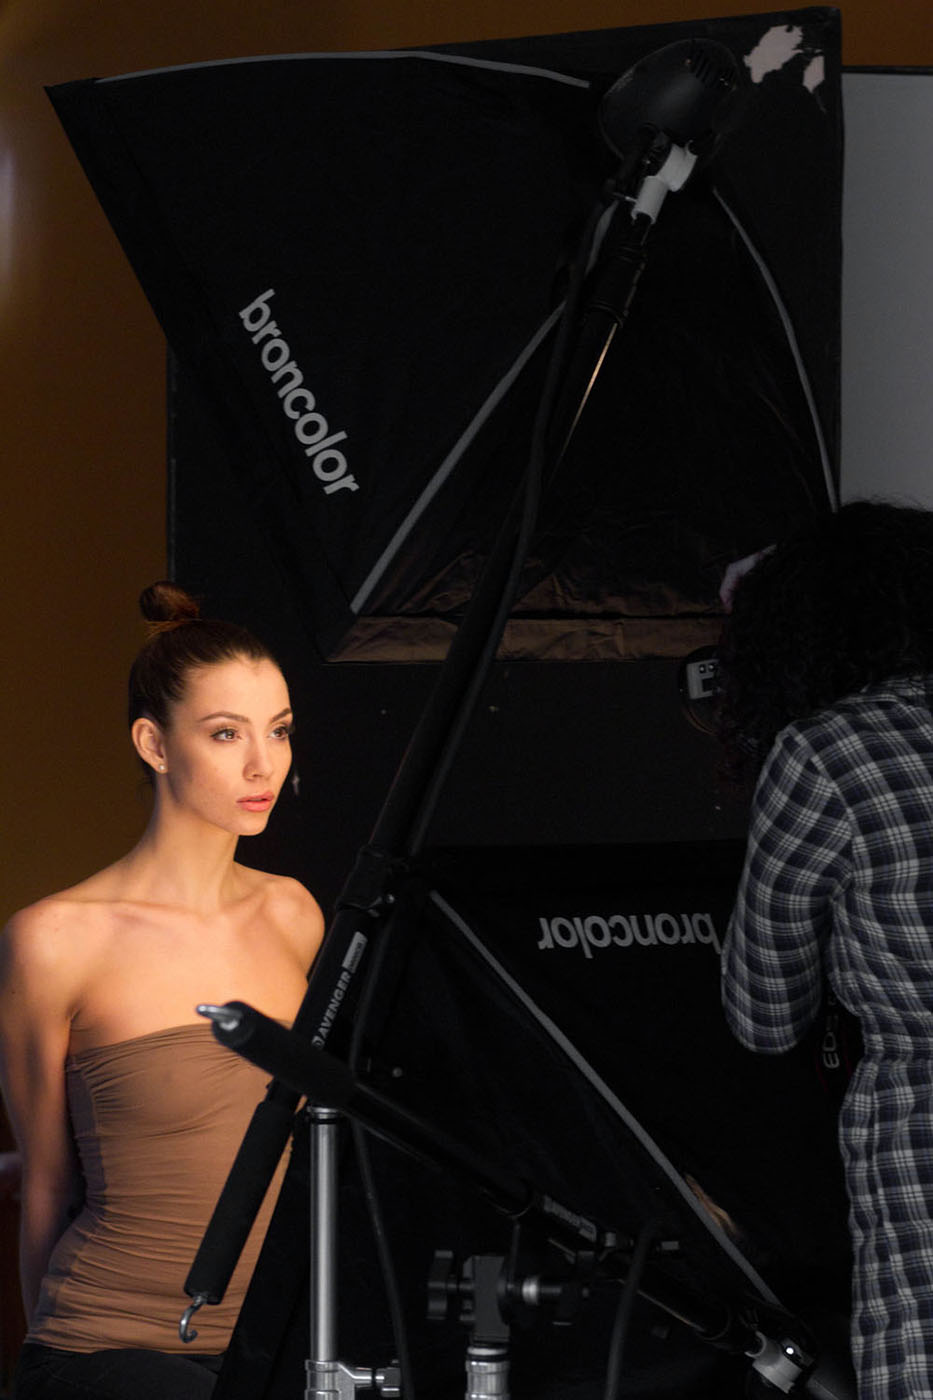
When people traditionally think of a clamshell lighting setup, they think of two lights in front of the model evenly spaced, with the camera shooting between the two. These lights are basically stacked on one another with a small space in between, leaving you with a very small space to shoot through. It may feel unusual, but that means you’re doing it right! This can be done with any combination of lights: two beauty dishes; two softboxes; a beauty dish plus a silver reflector dish; a beauty dish and strip light; and an endless array of combinations. The most popular combinations are two softboxes or a beauty dish plus a silver reflector dish.
Be sure your lights are at roughly even output powers, ideally with the bottom light powered down a bit. If your bottom light is stronger than your top light, you’re going to have ghastly bottom light that’s extremely unflattering. If your bottom light is too strong, consider turning down the power or pulling it further away from the subject. If you’re shooting with constant light, you might consider moving your top light closer to the subject and pulling your bottom light further away. Shooting with strobes is going to give you more control, but it’s not essential for this lighting effect.
The two light sources are a beauty dish (main light on top) and a silver dish reflector (fill light on bottom). Notice that this effect creates darker and more defined edges around the face when compared with other lighting setups, such as the two even-sized softboxes (next image).
Considerations for Your Clamshell Lighting Setup
If you have light sources of uneven sizes (e.g., softbox and a silver reflector dish), be sure the larger light source is stacked on top. This generally creates a more pleasing shape to the face and shadows. It allows the top light to define the shape of the face and the bottom light to reduce or eliminate the shadows.

You may want to vary the height of your lights. If you think the light looks too flat, consider raising your top light to pull out some more shadows. If the shadows still look flat, turn down the power of your bottom light. By turning down the power of the bottom light, you’re reducing the fill light and more of the shadows on the face can now show through. Many beauty campaigns will have a little bit of fill so that the face still has shape, but overall the image has an airy feel.
If you use harsher light sources for your clamshell lighting, you’ll have more defined shadows on the sides of the face. For example, if you use large softboxes, the light will wrap almost completely around the subject and eliminate most shadows. On the other hand, if you use a beauty dish and a silver reflector dish, you’ll begin to see more defined edges on the face and neck of the subject. Sometimes I prefer the harsher light sources because they give a more chiseled look to the photo. In the two examples that follow, both have distinctive effects but give glowing beauty light on the face.
For any of these lighting setups, any f-stop is acceptable. I generally shoot beauty somewhere around f/8 or f/11 because I want to keep all my details in the shot very crisp. Sometimes I’ll go the other extreme and use a very wide aperture for a narrow-depth-of-field effect. It all depends on what you want to achieve creatively.
This image uses two equal-sized softboxes that create two squares surrounding the pupil. These interesting catchlights create a surreal and beautiful effect in the eyes.
Clamshell Variation
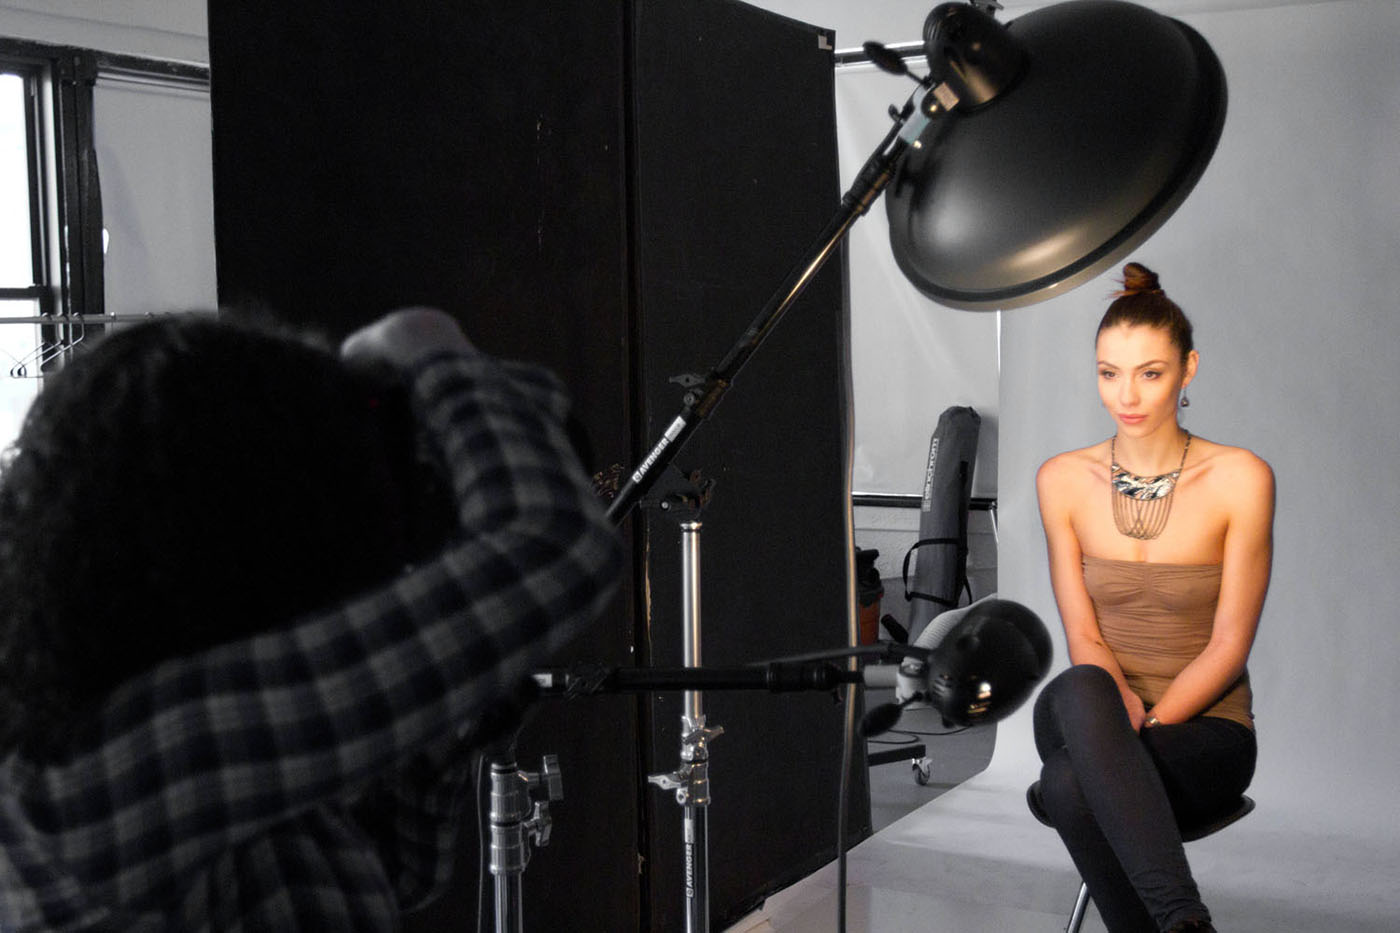
If you want to mix this all up, you may consider turning this lighting setup on its side, literally! Many photographers will put two lighting sources side by side to create a variation on clamshell lighting. These two lights can be pointed back at the subject for light that envelops the entire face and creates very even illumination. This is a very popular technique for portraits.
For this lighting setup to be most effective, try to use two evenly sized light sources. This will create identical lighting on the left and right sides of the face. If you use two different modifiers, then the light may be uneven and will not give you symmetrical lighting on the face, which is the goal of this light setup.
When you set up your two light sources, face the lights toward one another. Put them roughly even at about a 30° angle with the widest part facing the back toward the model. You should only have about a 1′ opening between the lights to shoot through (again, the clamshell effect). Place the model about 1–2′ from the center of the lights. The light will now completely wrap around her and create two giant (and beautiful) catchlights in the eyes. This gives stunning clamshell illumination.
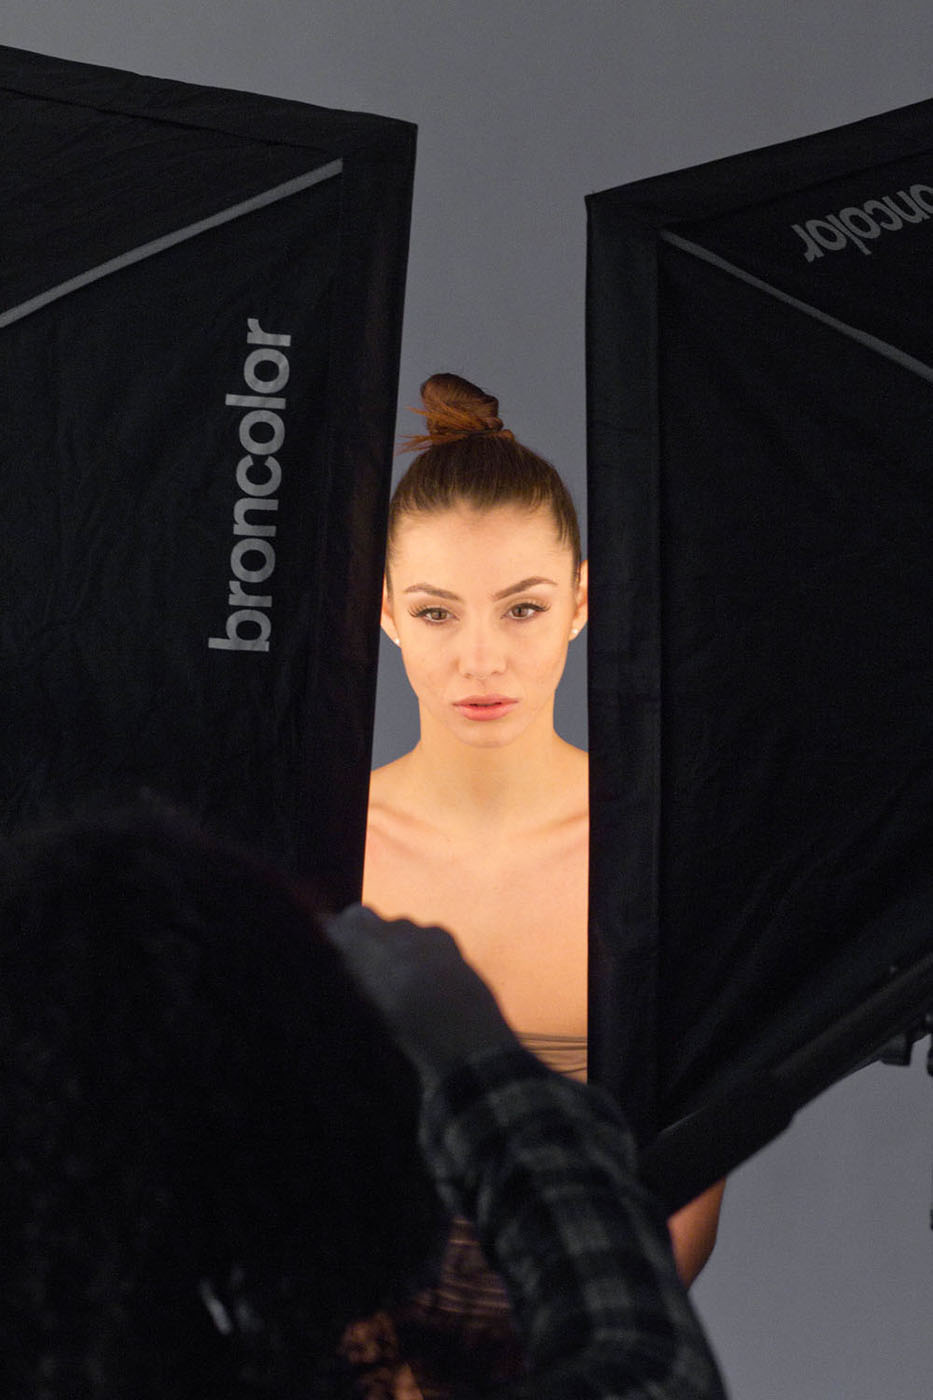
Another twist on the traditional clamshell lighting is to put two evenly sized lights side by side in front of the model. This creates a narrow opening to shoot through. Notice how different the quality of the light on the face is. The lights are coming from either side and wrap around the face for a different clamshell effect.
Now you’re prepared with the tools you need to make your own clamshell lighting. Stack the lights! Vary their heights! Change your modifiers! Clamshell light is sure to give you a wide range of options for perfecting your beauty imagery.
