
How to Create a 3D Coin in Photoshop
The new enhanced 3D capabilities built into Photoshop CS4, coupled with the animation function, bring new features for you to explore that you might not have considered before. In the past, creating a simple animation of a twirling coin required the use of multiple applications to achieve the effect. One of those applications was a 3D program that was usually costly and required a long learning curve to master. Now it can all be done within that program we all know and love—Photoshop.
Don’t fear change
Perhaps I was a little off in saying all you need is Photoshop, there’s one other thing you need to create this animation and that’s an image with some coins.
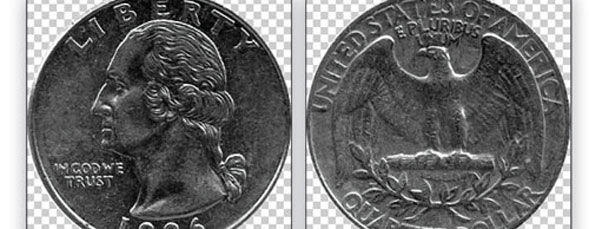
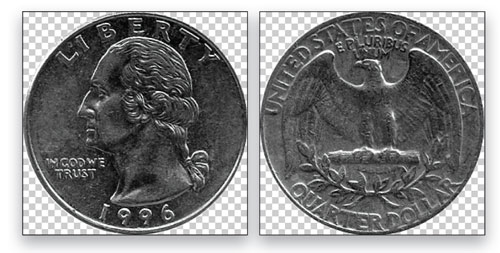
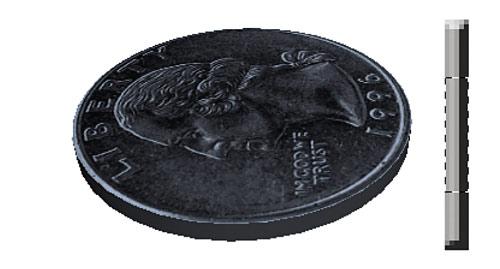
STEP ONE: Start by finding or creating an image that shows both sides of a coin. Using the Elliptical Marquee tool, select one side of the coin (press-and-hold the Shift key to get a perfect circle; press-and-hold the Spacebar to reposition the selection as you drag). Once you’ve made your selection, press Command-C (PC: Ctrl-C) to copy the selection, choose New from the File menu, and click OK. This will create a document that matches the size of the copied selection. Press Command-V (PC: Ctrl-V) to paste the data into your new file. Once pasted in, drag the Background layer to the Trash icon at the bottom of the Layers panel to delete it. This will leave the coin with transparency around its edges. Repeat for the other side of the coin then save the two files with the appropriate names for the front and back.
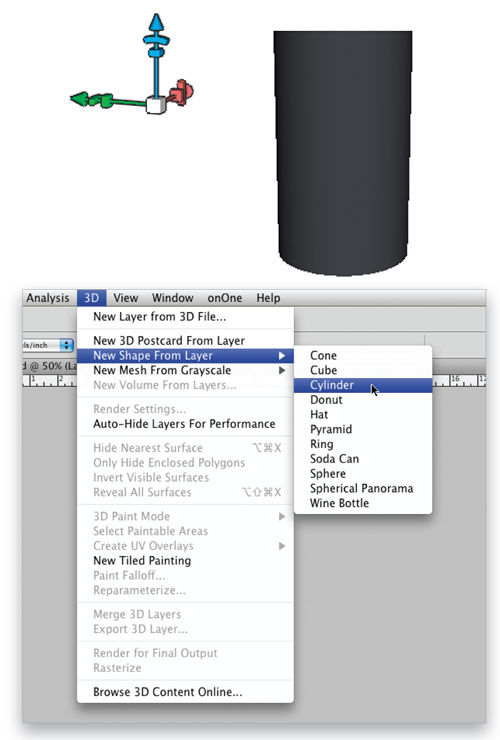
STEP TWO: Go to File>New and create a new file 8×4″ at the same resolution as your coin files. Click on the Create a New Layer icon at the bottom of the Layers panel. Press Shift-Delete (PC: Shift-Backspace) to open the Fill dialog, choose 50% Gray from the Use drop-down menu, and click OK. This layer will be our 3D coin. Under the 3D menu, choose New Shape From Layer>Cylinder. The flat, gray layer will turn into a gray cylinder.
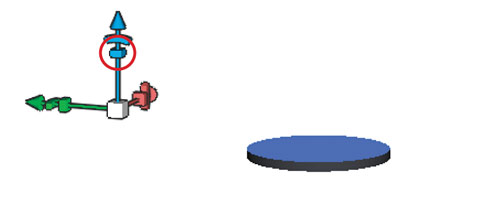
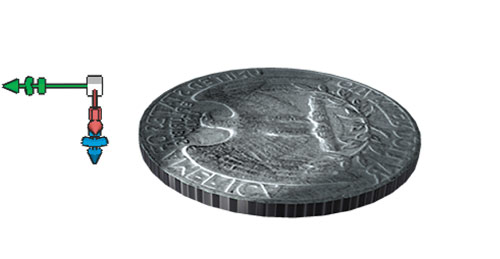
STEP THREE: The 3D widget that appears when you’re working with your 3D tools allows you to control many of the object’s attributes. This is that little object with the three colored arrows you see located at the upper left of our cylinder. If yours isn’t showing up, select one of the 3D tools from the Toolbox by pressing N or K (if you still don’t see it, make sure that the Enable OpenGL Drawing option is turned on in the Performance Preferences). Each color represents a different plane of the object’s axis: red contains the controls for the x-axis, green controls attributes for the y-axis, and blue denotes the z-axis. Passing your cursor over the various symbols on the 3D widget, and clicking-and-dragging once the point you’re hovering over turns yellow, will activate its specific control. The small box where the three axes converge will control the size of the overall object. Traveling up one of the tiny poles you’ll come across three symbols. The arrow at the top controls the placement of the object within the file window on its plane; the arc rotates the object; and the little box below the arc controls the size of the object in the direction of the arrow’s plane. Clicking on the little box on the blue pole will allow you to shrink the height of the cylinder to resemble an actual coin, as you see here.
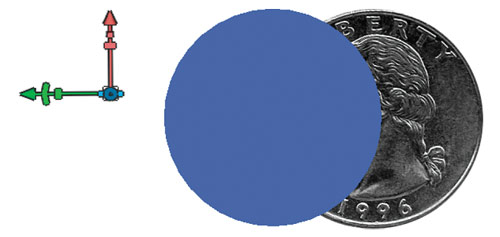
STEP FOUR: Using the 3D Rotate tool (K), orient the 3D coin so that it’s facing the same direction as the image of the original coin. Select the Move tool (V) and drag-and-drop one of the saved coin images into the 3D coin file. Select the 3D Scale tool (nested under the 3D Rotate tool in the Toolbox or go up to the Options Bar and click on Scale the 3D Object icon) and resize the 3D coin so that it matches the size of the saved coin image. When finished, drag the saved coin image layer to the Trash icon at the bottom of the Layers panel.
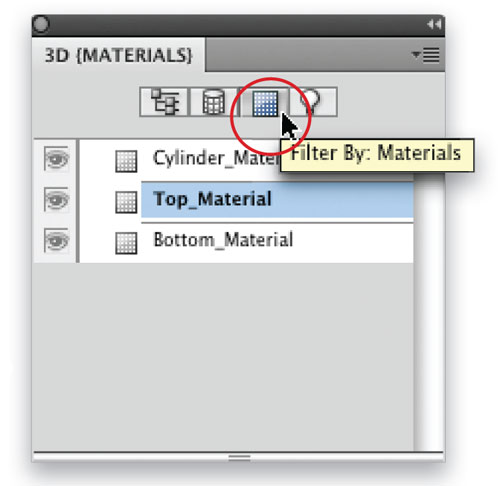
STEP FIVE: Now let’s turn this thin cylinder into a coin! Make sure your 3D layer is selected. Call up the 3D panel from the Window menu. Click the Filter By: Materials icon to access the Materials section of the 3D panel. There you’ll find the three sides of the coin. I know you always hear “there are always two sides to every coin” but in this case we’re also dealing with the edge.
STEP SIX: Click on Top_Material to bring you to the section that contains the attributes for that side of the coin. Click the Edit the Diffuse Texture icon (to the right of the color swatch next to the word “Diffuse”) and choose Load Texture from the drop-down menu. Navigate to the file that contains the face of the coin and click Open. The cylinder will now have the face of the coin appear on the top.
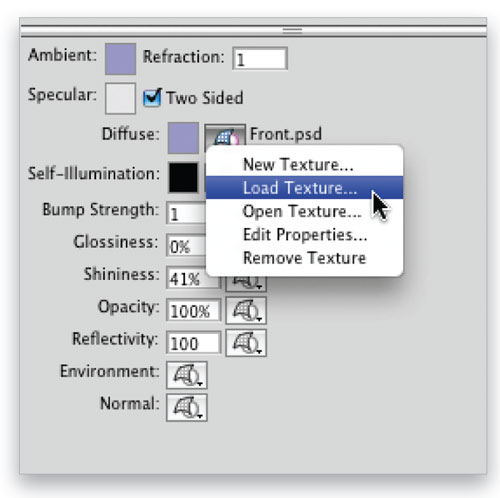
For the bottom part of the coin, choose Bottom_Material and apply the file with the back of the coin to it the same way you applied the top part of the coin.
STEP SEVEN: The edge of our coin requires a little more work. A real quarter has ribbing along its edge. You must create a bump map that will simulate that ribbing. In a new layer, create a very narrow, vertical selection with the Rectangular Marquee tool (M). It should be about the thickness of a single rib on the coin. If you keep the 3D layer visible and turn the coin to its edge, you’ll be able to approximate a thickness by comparing the selection to the 3D coin. Fill the selection with a 50% gray. Don’t deselect the rectangle yet.
Click the Add Layer Style (ƒx) icon and apply a Bevel and Emboss. You’ll have to adjust the Size of the bevel so that you get an even amount of light and dark along the edge. The default setting might be too much to actually see a bevel and emboss within the rectangle.
Using the Rectangle Marquee tool with the Option (PC: Alt) key pressed, drag around the top and then the bottom of the rectangular selection to deselect those areas. This will leave you with a selection that has even tones for the vertical rib (as shown). Choose Define Pattern from the Edit menu, name your pattern, and click OK. You can now drag this layer to the Trash icon and deselect.
Create a new file of any size you want, making sure it has the same resolution as your 3D coin file. Open the Fill dialog again, but instead of using 50% gray, choose Pattern from the Use drop-down menu. Then, click the preview thumbnail next to Custom Pattern to open the Pattern Picker. Click the vertical rib pattern that you saved and then click OK. Save the file with the pattern of the ribbing with the other faces of your coin.
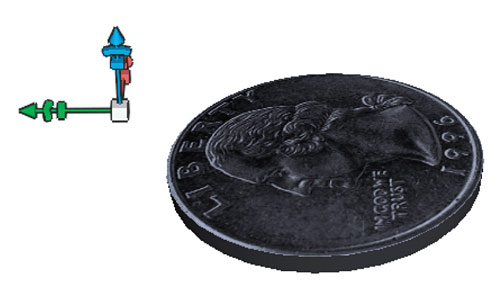
STEP EIGHT: Back in the file with the 3D coin, choose Cylinder_Material in the 3D panel. This time we’ll load the texture in the Bump Strength section: click the Edit the Bump Texture icon to the right of the Bump Strength value and choose Load Texture from the drop-down menu. Find your file with the ribbing pattern and click Open. You can push the Bump Strength number up to about 10 or whatever value looks best for your coin. Here we’ve added a spotlight to accent the edge where you can see the ribbing.
Put your money in motion
Now that our coin is complete, it’s an actual 3D object that can be moved around in three-dimensional space with any of the 3D object and 3D camera tools. It can also be animated, so let’s open the Animation panel from the Window menu.
The Animation panel will display the various layers that your file contains. Choosing the layer that contains the 3D coin and clicking on the small arrow to the left of the layer name will drop down the parameters for the layer’s movement. Click on the Time-Vary Stopwatch next to the 3D Object Position property. This will place a diamond-shaped indicator in the Timeline—this is called a keyframe. Move the Current Time Indicator (CTI; the small, blue arrow at the top of our Timeline) over to the position in time where you want the movement to end. Using the adjustment tools for the 3D object, move it, rotate it, or whatever else you want to do to it. Once you’re done, a second keyframe will automatically appear at the new place in the Timeline. Photoshop will now interpolate between the two keyframes, thus generating the movement.
This is a whole new capability available to the Photoshop user. It’s powerful and far easier than many of the previous ways of achieving these effects. One small caveat is that to properly view the 3D functions it does require a video card with enough power to display it. The world of 3D opens new doors for you to explore and enjoy. Have fun!
