Going from print to Web just got a lot easier with Adobe InDesign CS4. In the past, we concentrated on going from InDesign to HTML or PDF. While the interactive features in InDesign still work nicely for PDF, they also now work for going to Flash. There are two ways to turn your InDesign document into Flash content. Let’s take a look at both of them.
1 CREATE A MULTIPLE-PAGE DOCUMENT
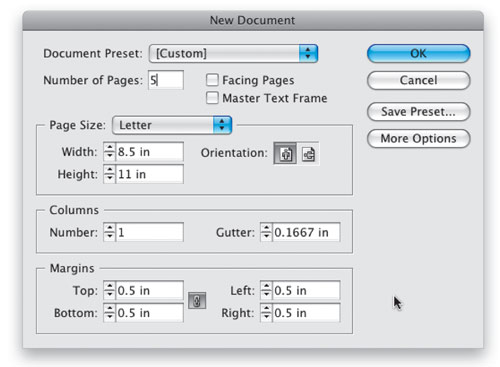
One of the main things we’ll want people to be able to do is turn the pages of our document on the Web. So for this we’ll need a multiple-page document. You can either work with an existing document or create a new one (from the File menu, choose New> Document, create at least two pages (we used five in our example), and accept the defaults.
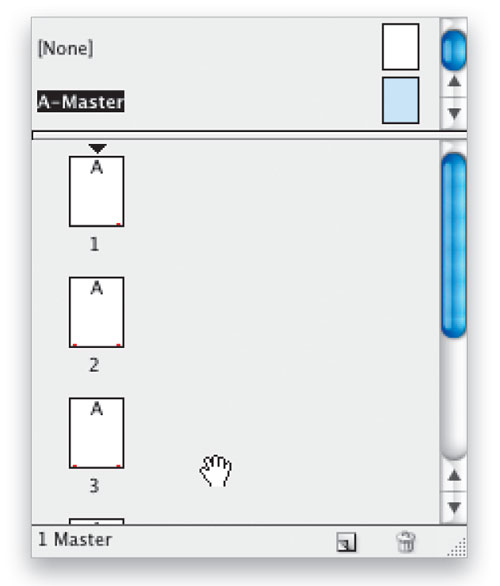
2 SWITCH TO THE MASTER PAGE
We’d like to create navigation buttons so that users will be able to turn the pages of the document from within their Web browser. The best place to do this is on the Master Page. This way, you only have to create the buttons once. Bring up your Pages panel (Window>Pages) and switch to the A-Master page.
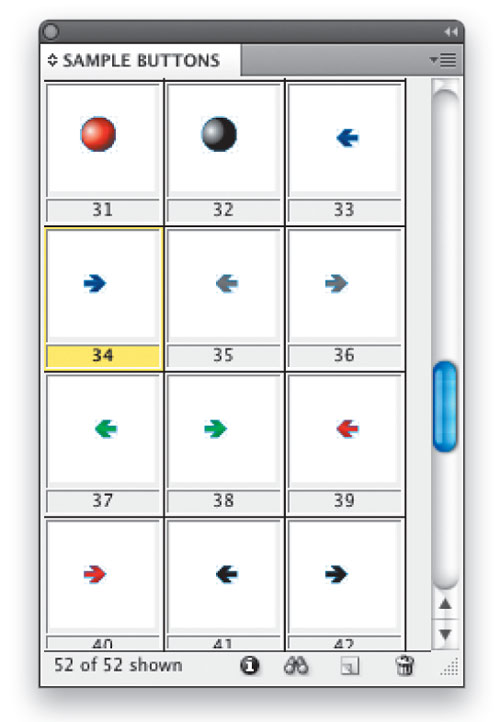
3 BRING UP THE SAMPLE BUTTONS LIBRARY
The way we create buttons in InDesign CS4 is a little different than we did in CS3, where we actually had a Button tool. In CS4, the Button tool is gone, but we don’t need it anyway. You can turn any frame into a button using the Buttons panel, and in CS4 we also now have a library of Sample Buttons. Bring up the Buttons panel (Window>Interactive>Buttons) then from the Buttons panel’s flyout menu, choose Sample Buttons. Scroll down to the buttons shaped like arrows.
4 CREATE YOUR BUTTONS
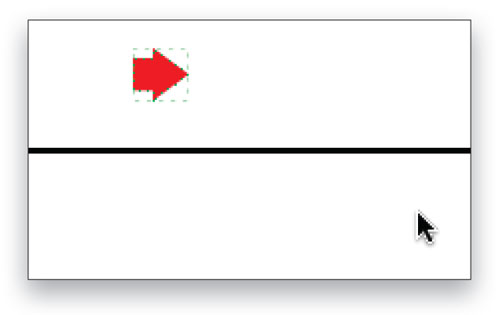
We need a Left Arrow button and a Right Arrow button. Pick your favorite ones from the library and drag them onto your A-Master page at the bottom of the page. Once they’re in place, close the Sample Buttons library. With one of the buttons selected, go back to the Buttons panel, and you’ll notice that the default action is already set for the arrow button to Go to Next Page and Go to Previous Page.
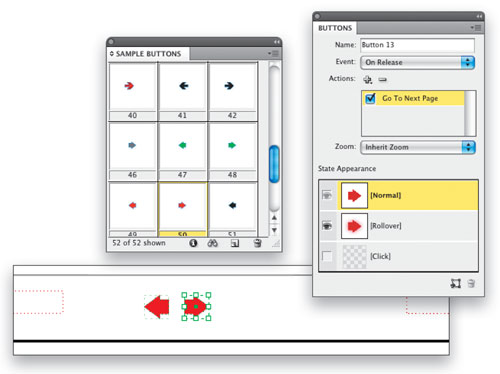
5 REMOVE BUTTONS YOU DON’T NEED
Now switch back to Page 1 in your Pages panel. You’ll notice that both Arrow buttons are there. Well we don’t need the Left Arrow on Page 1 because there’s no previous page. So let’s delete it. Hold down your Command-Shift (PC: Ctrl-Shift) keys and click on the Left Arrow button with the Selection tool. This unlocks it from the A-Master page so that now you can just delete it. Do the same thing on the last page for the Right Arrow button.
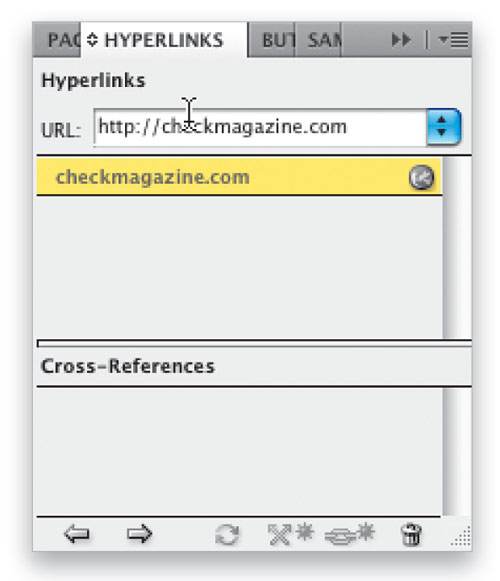
6 ADDING URLS
Since this document will be on the Web, we can take advantage of hyperlinks. Users will be able to click on your text and objects to navigate to other webpages or websites.
Return to the A-Master page in the Pages panel. Create a text frame in the lower-right corner of the page and type the name of the site you want to link to. This text will be for display purposes; it doesn’t have to be the actual site address.

7 CREATE A HYPERLINK
Highlight the text with the Type tool. Now bring up the Hyperlinks panel from the Window>Interactive menu, key in the actual URL for the site you want users to go to when they click this link, then press the Return (PC: Enter) key. Once you’ve entered your link, you can return to Page 1.
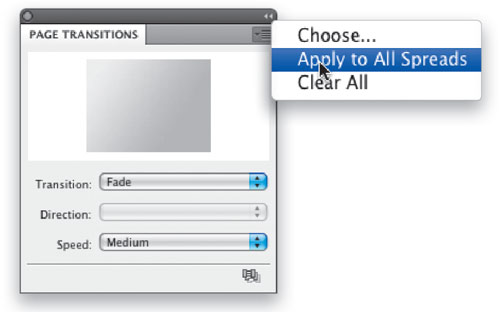
8 ADD PAGE TRANSITIONS
Both Flash and Adobe PDF support page transitions and now we can create those transitions right in InDesign CS4. Bring up the Page Transitions panel from the Window>Interactive menu. Choose your favorite Transition from the list and then use the flyout menu to apply it to all spreads.
Note: If you want to have a different transition for each page, you can set them individually, page by page.
9 EXPORT TO SWF
Now we’re ready to export to SWF. By exporting to SWF, we can take the work we’ve done in InDesign with all of our interactivity and go straight to a SWF file that can be placed on the Web—no additional knowledge of Flash is needed for this.
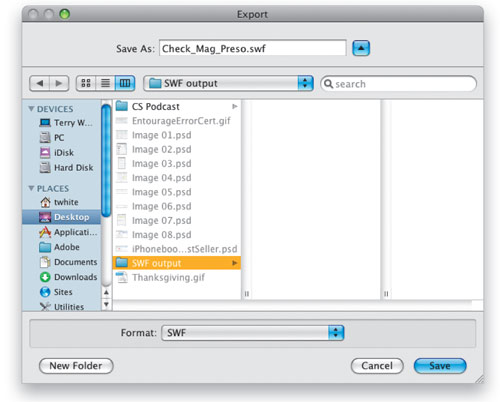
Choose File>Export and in the Export dialog, select SWF from the Format pop-up menu. Choose a location or folder and click Save.
10 SET YOUR SWF OPTIONS
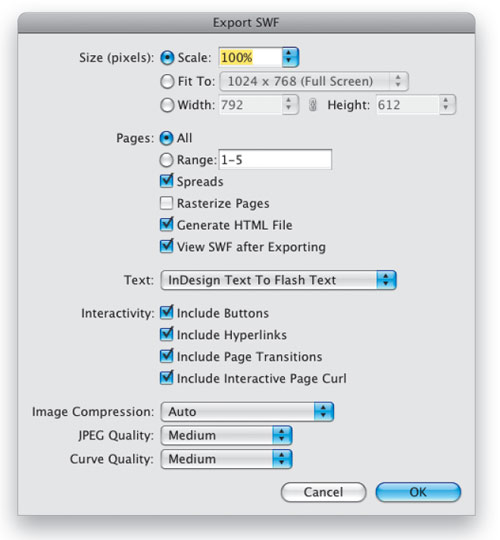
At this point we’re pretty set. The defaults in the Export SWF dialog are good. The ones you may want to adjust are: Scale, if you’re trying to fit your SWF to a certain screen size; Range of pages if you don’t want all of your pages exported; and Image Compression if you have certain requirements. Make sure the View SWF after Exporting box is checked and click OK.
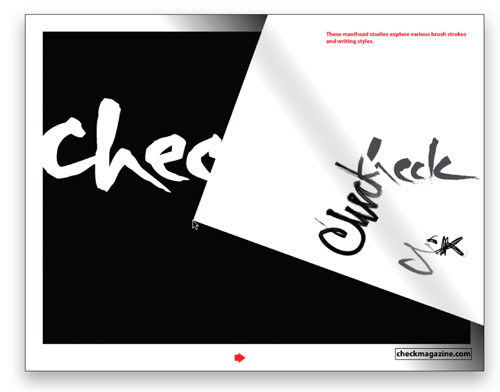
11 TEST IT
You’re now looking at your new SWF file in your default browser and you should be able to click your navigation buttons and hyperlinks. And there’s a hidden goodie…because Include Interactive Page Curl was checked by default in the Export SWF dialog, we can also turn our pages by peeling the actual corners of the pages back. How cool is that?
12 EXPORT TO XFL
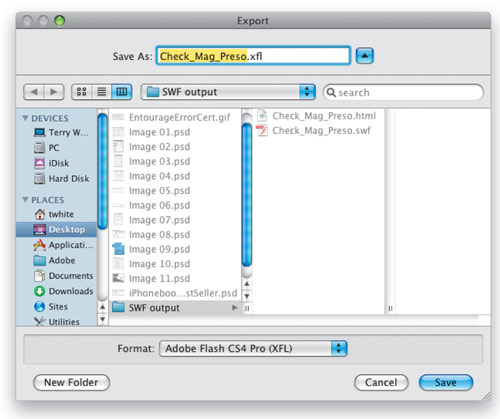
We could stop here and be happy; however, if we want to do more with Flash, then we’ll need to export our InDesign document in a format that Flash can actually open. InDesign CS4 supports exporting to a new document type called XFL, which can be opened directly in Flash CS4. Choose File>Export, select Adobe Flash CS4 Pro (XFL) from the Format pop-up menu, and then click Save. You can accept the defaults on the next dialog as well and click OK.
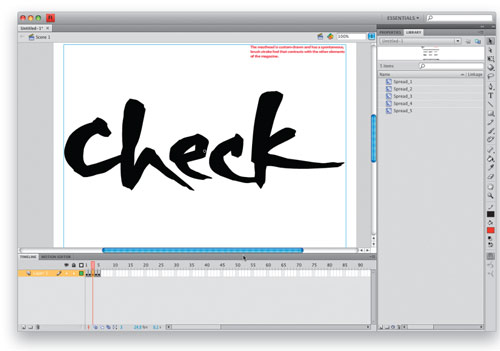
13 ADD FLASH CS4 ANIMATION
Once the export is complete, you’ll be able to double-click on your XFL document to open it in Flash CS4 Professional. Each of your pages will appear as keyframes on the Timeline. Also each spread will appear in your Library as movie clips. At this point you’ll need to know how to use Flash to go further; however, you should now be able to animate your pages, add more interactive elements, and create full-blown interactive magazines, resumes, brochures, etc.—all starting with an InDesign CS4 document.