

As WWII photographer Eugene Smith said, “Negatives are the notebooks, the jottings, the false starts. A proper print…is the completed photograph.” There’s something special about a print. And in many ways, printing can be the most satisfying aspect of your workflow. In this tutorial, we’ll walk through various printing tips that will help you get the most out of the Print Module in Lightroom 2.
1 CREATING PRINT COLLECTIONS
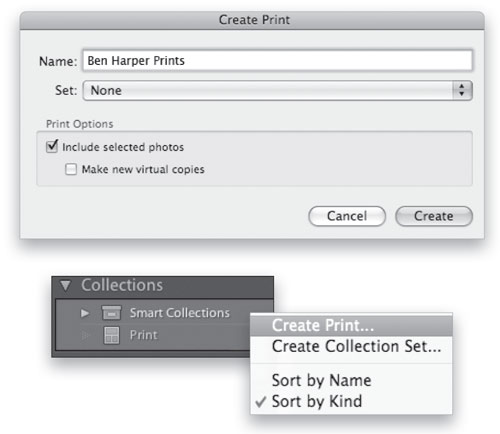
Photos that you select to print are typically the best of the best and a print collection lets you create a group of photos based on your print needs. To create a print collection, navigate to the Print module then select from the Filmstrip the photos you want to add to the collection. Next, click on the plus icon (+) in the Collections panel header and choose Create Print. In the dialog that appears, name your collection, check the Include Selected Photos box, click Create, and a distinct icon appears next to your collection in the panel.
2 USING PRINT TEMPLATES
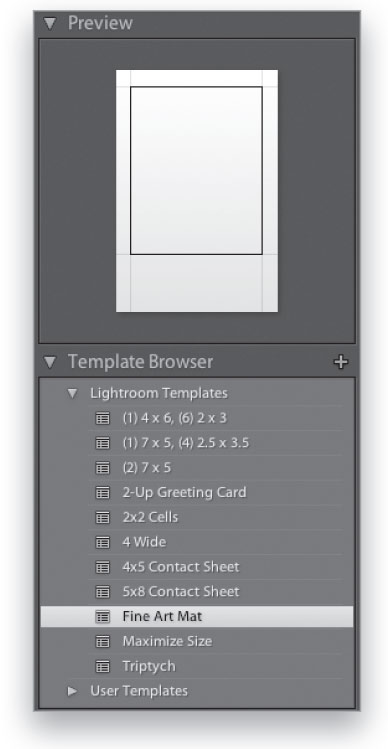
Creating prints and print layouts in Lightroom requires making prints over and over again at specific sizes or configurations. Therefore, using a predetermined template (or creating your own template) can drastically increase workflow productivity.
To use a Print Template, select one or more photos in the Filmstrip. Then, in the Print module, open the Preview and Template Browser panels. Hover your cursor over one of the Lightroom templates and you’ll see the layout appear in the Preview panel above. When you’ve found the template that will work best, click on the template name to select it.
3 CREATE A CONTACT SHEET
A contact sheet is a printed “grid” of many small thumbnails on one page. Photographers frequently use these to review or create a visual catalog of images on a CD, DVD, or drive. This visual catalog lets you see the images without having to browse the media storage device. Creating contact sheets is an integral step in most workflows and it’s simple to do in Lightroom. Just select multiple images in the Library module or Filmstrip, choose one of the two Contact Sheet templates in the Template Browser panel, and you’ll see the layout ready for printing in the main window.

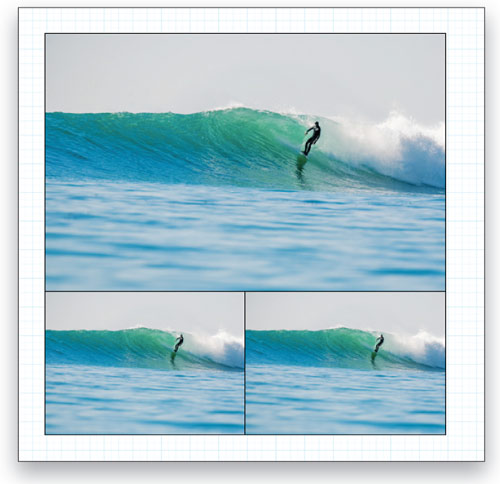
4 CONTACT SHEET/GRID, PART 1
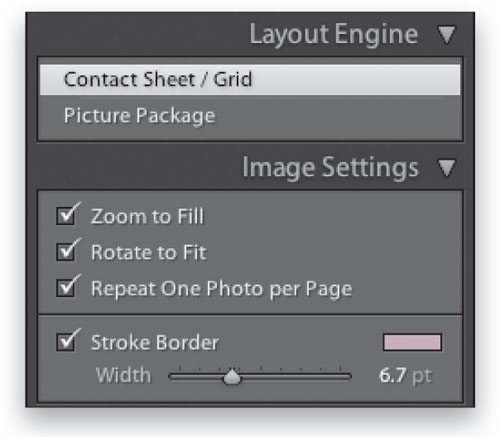
To create or customize a grid layout, click on the Contact Sheet/Grid option in the Layout Engine panel. In the Image Settings panel, choose Zoom to Fill to fill the entire cell—click-and-drag the cursor over the image to position the image. Select Rotate to Fit to view the largest image that fits in the image cell. Check Repeat One Photo Per Page to create a contact sheet with one image per page. Next, choose Stroke Border to add a border, click on the color swatch to choose a new color for the border and drag the Width slider to change its size.
5 CONTACT SHEET/GRID, PART 2
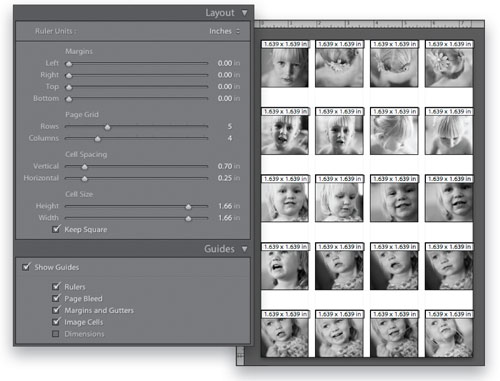
To customize the Grid, use the Guides and Layout panels. In the Guides panel, click Show Guides on/off to see how each guide affects the display. Then in the Layout panel, make specific adjustments. If you’ve chosen to show the Rulers in the Guides panel, select a Ruler Unit, then drag the various controls to make any layout modifications.
Or you can position the cursor over the Margins, Cell Spacing, or the Cell Size in the layout and when the cursor changes into a line with two arrows, click-and-drag to resize that aspect of the layout.
6 PICTURE PACKAGE CELLS
The Picture Package allows you to create a layout that prints one photo on one or more pages—this is especially helpful when you need to print one image in multiple sizes for a client. First, in the Library module or Filmstrip, select the image that you’d like to use. Next, in the Print module, select a Picture Package template in the Template Browser or click on the Picture Package option in the Layout Engine panel. Then use the Image Settings and Rulers, Grid & Guides panels to customize the layout.
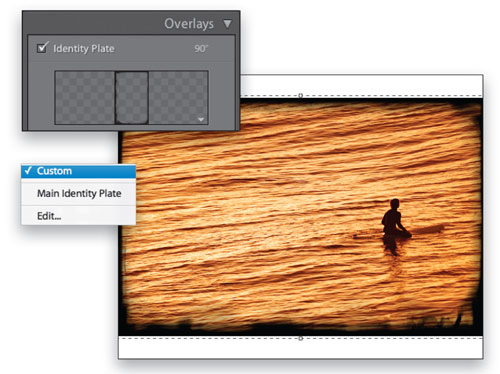
7 ADDING OVERLAYS
The Overlays panel can be used to add creative or technical information to your print layout. In both the Contact Sheet/Grid or Picture Package layouts, you can add your Identity Plate, which can be customized with regard to position, rotation, color, and opacity.
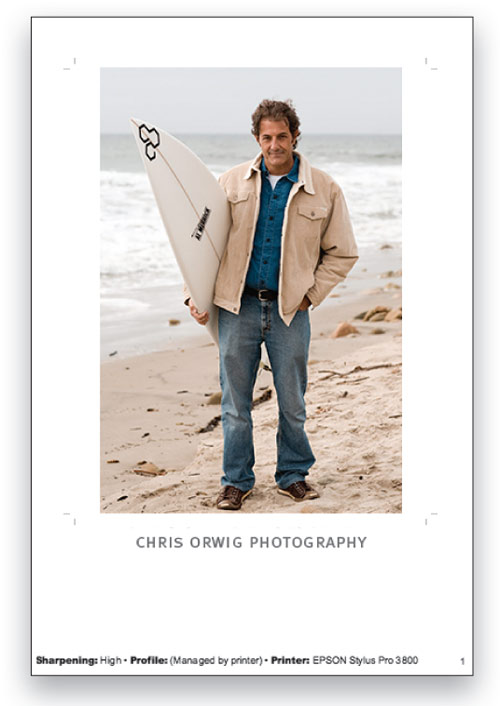
In the Contact Sheet/Grid layout, you can also add Page Options—Page Numbers, Page Info, and Crop Marks—and Photo Info, including any of the following: Caption, Custom Text, Date, Equipment, Exposure, Filename, Sequence, or Title.
8 ADD A CREATIVE BORDER
As mentioned above, the Overlays panel can be used to add creative information to your images. Here’s an idea, thanks to Sean McCormack. First, create a border file in Photoshop with semi-transparent edges and nothing inside the border. Save the file as a PNG file, then click in the Identity Plate preview, and choose the border.png file. Next, click on the triangle in the lower-right corner of the Identity Plate preview and select Custom (your border identity plate), then modify the positioning and scale of the border to fit over the photo.
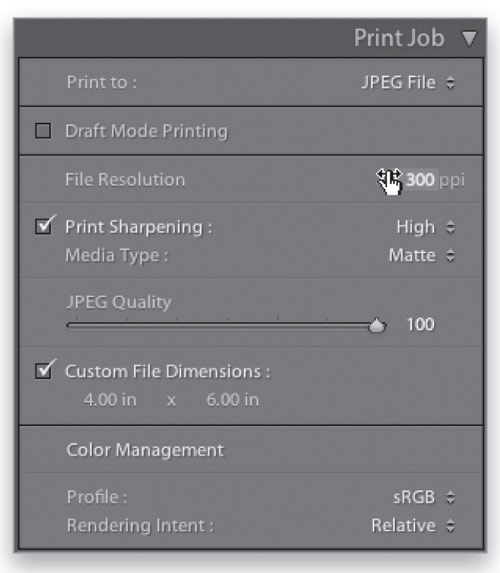
9 PRINTING TO JPEG
When sending images to a lab, you’ll need to convert the files to JPEG. So, in the Print Job panel, choose Print to: JPEG File, then make your print selections: File Resolution; Print Sharpening—Standard typically works best; Media Type (Matte or Glossy) for the type of paper; and JPEG Quality. Turn on the Custom File Dimensions box, hover your cursor over the file dimension numbers, then click-and-drag left or right to decrease or increase them. Finally, choose a color Profile and Rendering Intent by clicking on the menu options.
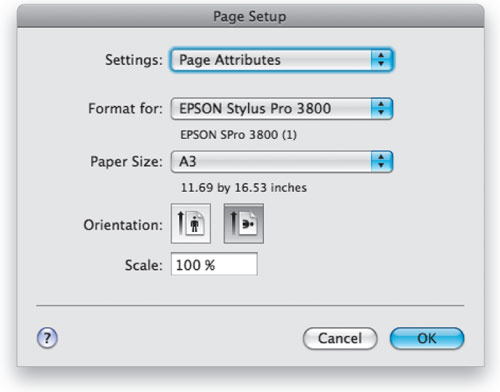
10 DESKTOP PRINTING: PAGE SETUP
Before you send a photo to your desktop printer you’ll want to set up the page dimensions and orientation. Press Command-Shift-P (PC: Ctrl-Shift-P) or click the Page Setup button located at the bottom of the left-side panels area. This will open the Page Setup dialog where you need to first select your printer (Format for), the Paper Size, and the Orientation (vertical or horizontal). As a side note, it’s typically best to leave the Scale set to 100%.
11 PRINT TO PRINTER, PART 1
In the Print Job panel, select Print to: Printer, then choose the Print Resolution. Add Print Sharpening based on the file’s output resolution and media type. Keep in mind that this Print Sharpening is added to any sharpening that you may have already done in the Develop module. In most cases, you’ll find that Standard Sharpening will work best.
Note: If your printer is capable of printing in 16-Bit Output, then select that option; however, if you’re printer doesn’t print in 16-bit output, selecting this option will slow the creation of the print.
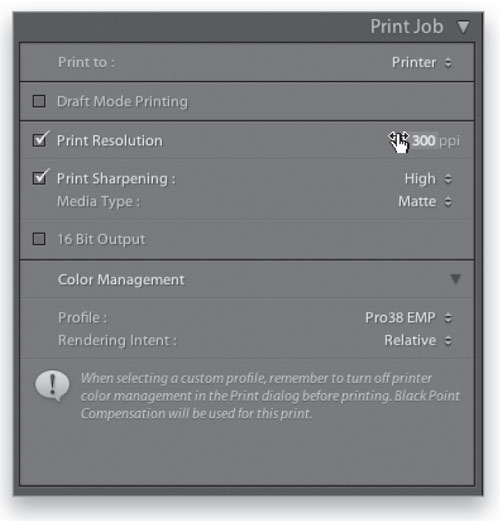
12 PRINT TO PRINTER, PART 2
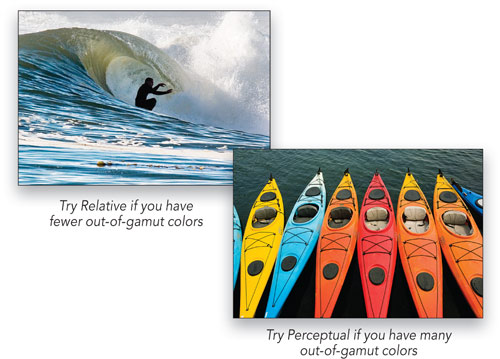
In the Color Management section, first select the Profile for the printer. Next, choose either Perceptual or Relative Rendering Intent. Select Relative when you have fewer colors that are out of gamut, as Relative rendering preserves all of the in-gamut color, and shifts out-of-gamut colors to what it determines as the closest reproducible color. Choose Perceptual if you have many out-of-gamut colors, as it tries to preserve the visual relationship between colors, and shifts out-of-gamut colors to colors that can be printed.
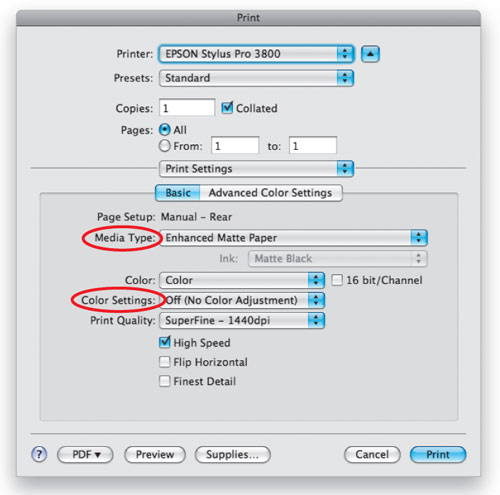
13 PRINT TO PRINTER , PART 3
Finally, we’ll open the printer’s dialog to finalize the print settings. Press Command-P (PC: Ctrl-P) or click on the Print button (at the bottom of the right-side panels area). Note: Your printer’s Print dialog may be different.
In the Print dialog, you’ll want to select the media (paper) type and turn off color management. Both of these steps are equally important, but it’s especially critical that the printer color management is turned off because we’re printing with a custom profile. Now click OK and, if you’re like me, wait with excitement as you printer creates the final print.
ALL IMAGES BY CHRIS ORWIG
