
Flash: How to Use Small Flash for Group Photos
The group photo. Photographers from just about every genre will inevitably encounter a dreaded grouping of smiling faces and compositional nightmares. If you’re a wedding photographer, then a formal portrait that includes the entire wedding party might be your moment of technical weakness. Or, for the headshot photographer, it might be having to photograph the whole office staff with the same quality of light you painstakingly constructed for their individual photos. Another occasion that you can count on is when covering an event; the organizer will often request an impromptu group photo before the night is out. One subject is easy enough to wrap your head, and your light, around, but when you multiply the number of subjects, new techniques are required. With the help of a wonderful family, we’ll walk through the whole process of lighting a group photo, from bad to better to the best-case scenario.
Step One
Many times we already have a flash handy when it comes time to take a group photo. Unfortunately, that flash is usually unmodified and right on top of the camera. This first photo is an example of what you get when using an on-camera flash to illuminate a group. Not the most flattering look, right? This is due to the hard, flat nature of the light. With the light coming from the same axis as the camera lens, all of the shadows fall behind our subjects, leaving them evenly exposed, but very flat and 2D looking. If confronted with this situation, try to bounce your flash off of a neutral-colored ceiling or wall. This will enlarge the perceived size of the light source and change its direction.
Step Two
If you have the time and resources, your goal should always be to get that flash off of the camera. We want to avoid that flat “snapshot” look, and the first step is to angle the light source and get some of these defining shadows back. This next photo was taken with the flash off of the camera, on a light stand, just off of the right side of the frame. We certainly got those shadows back! We created a few problems though, with too much shadow and a very uneven exposure. This is because a small light source—our external flash—produces very hard light, causing shadows to pop up very quickly. Light also falls off extremely fast the closer you get to the light source. This is due to the Inverse Square Law, which simply states that as you double the distance from your light source, you’re left with only a quarter of the light’s output. This means that the light is most efficient up close and very quickly falls off as your subject moves away. Let’s move on and start repairing the damage we caused.
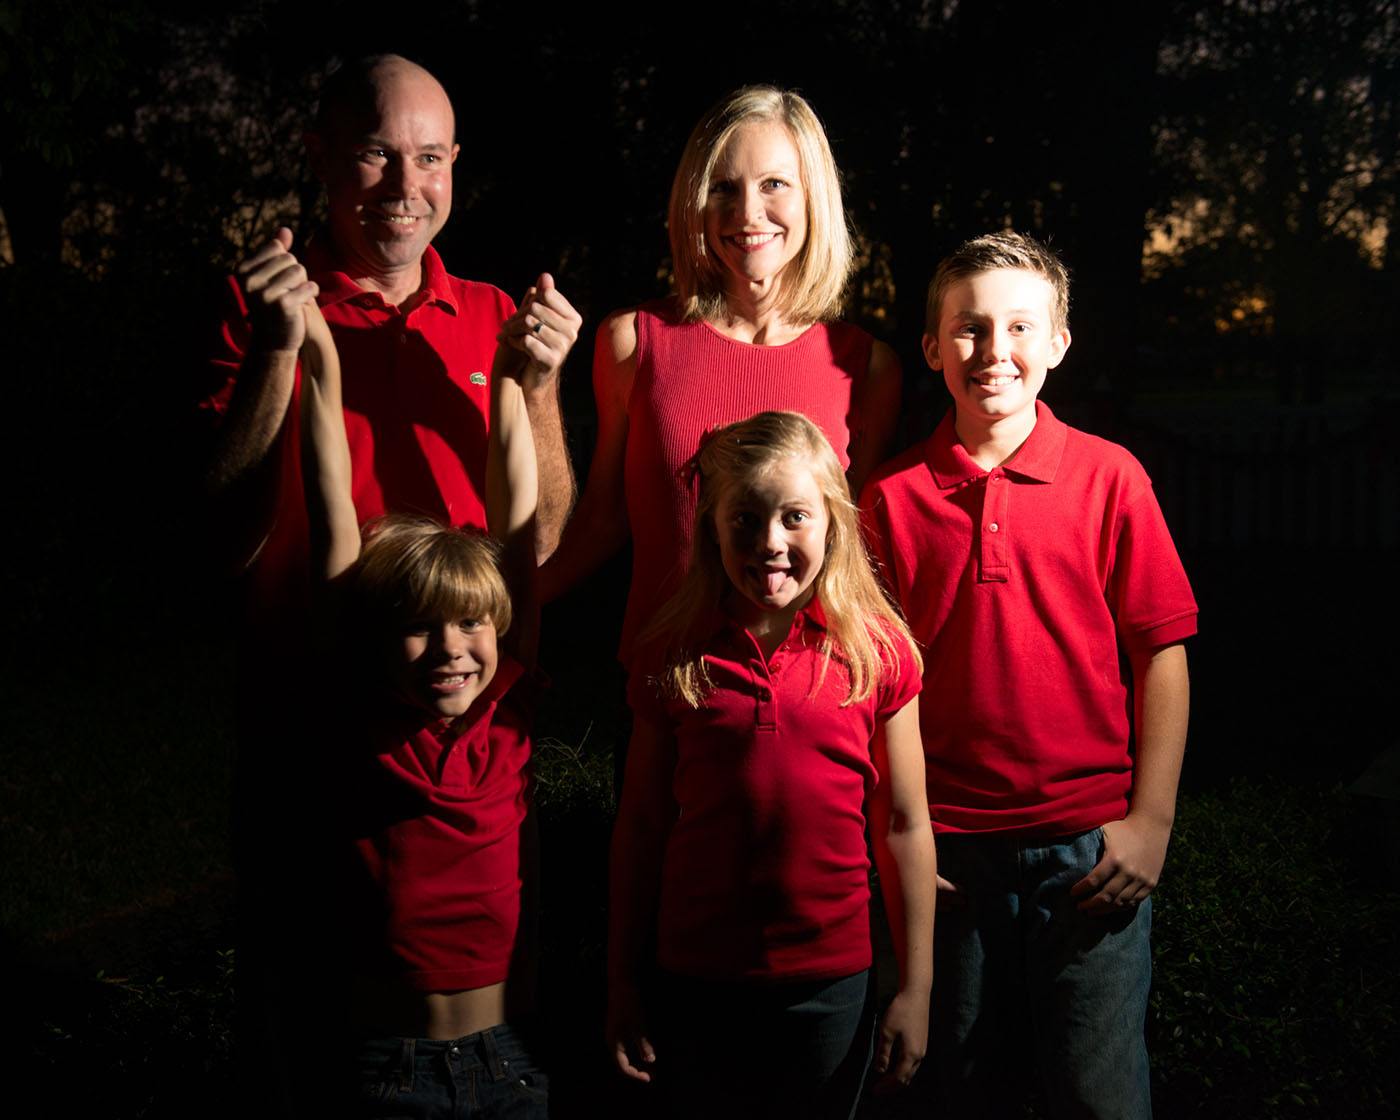
Step Three
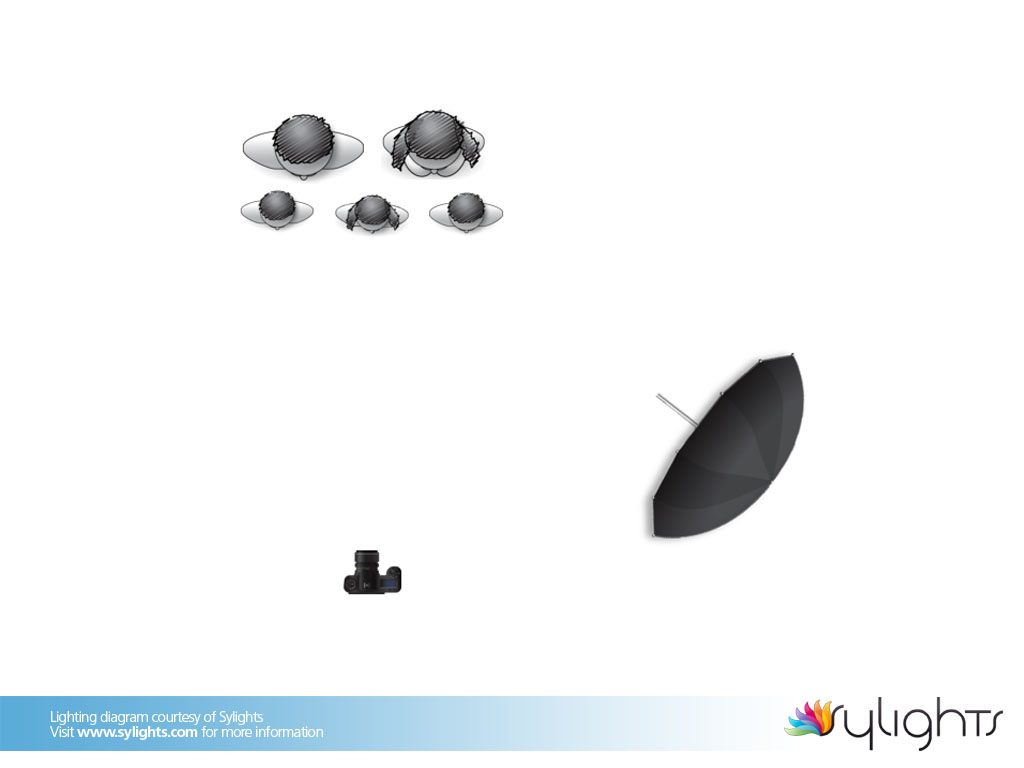
First, let’s address the uneven exposure. The young man on the right was very close to the flash and receiving a ton of light, which very quickly fell off, leaving the dad on the other side of the group 2–3 stops underexposed by comparison. The Inverse Square Law is crucial for group photos. Although light falls off quickly up close, creating issues like this, it produces a very gradual falloff the farther away you place your subject from the light source. By backing the light stand up a good distance, we place the entire group within the same exposure range.
Now, the second problem to address was that harsh quality of light. To enlarge our light source, we bounced it into a 60″ silver umbrella. This bigger spread of light allows for a smoother transition from highlight to shadow on each subject’s face, which is much more flattering when photographing people.

Step Four
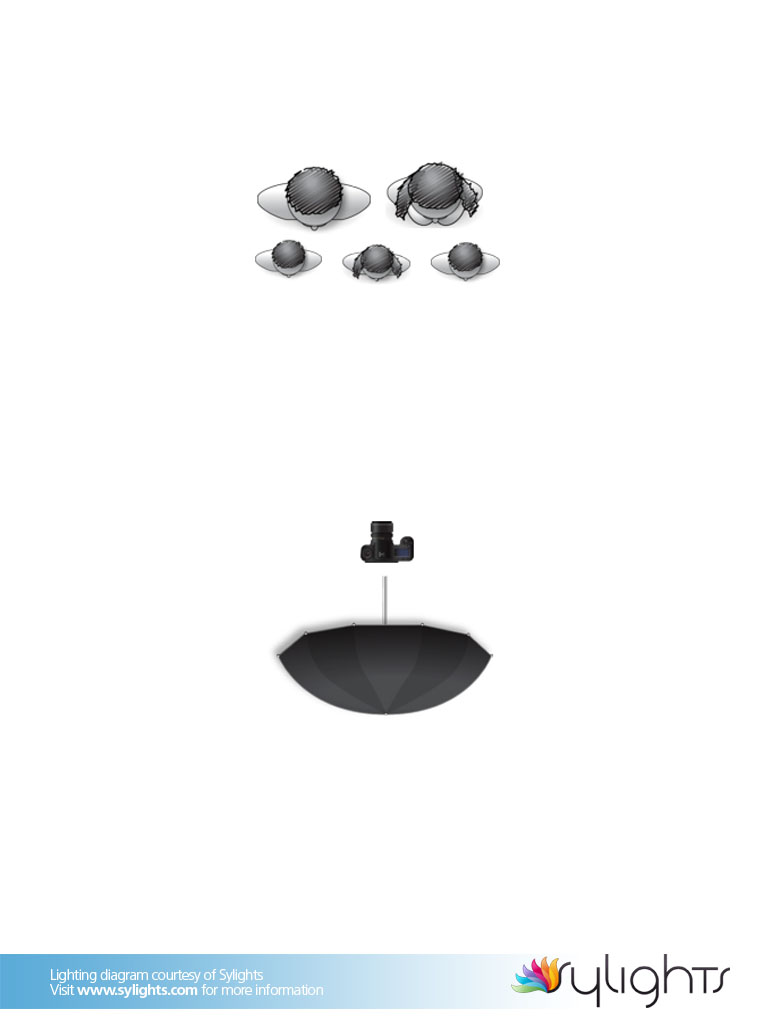
For a small group, like a family photo, we now have a usable shot. If you’re working with a much larger group of people, placing your light to the side may not give you enough coverage. The larger the group, the farther back you have to place your light to take advantage of that broad exposure range. With the limited power output of an external flash, you can quickly find yourself without enough juice to light the scene. To solve this we just need to move the light again. Rather than farther away, we place the light above and behind the photographer. This is near the camera axis where we began, but with the elevation and larger size from the umbrella, you get even coverage of a larger group without the cringeworthy flat light from an on-camera flash.

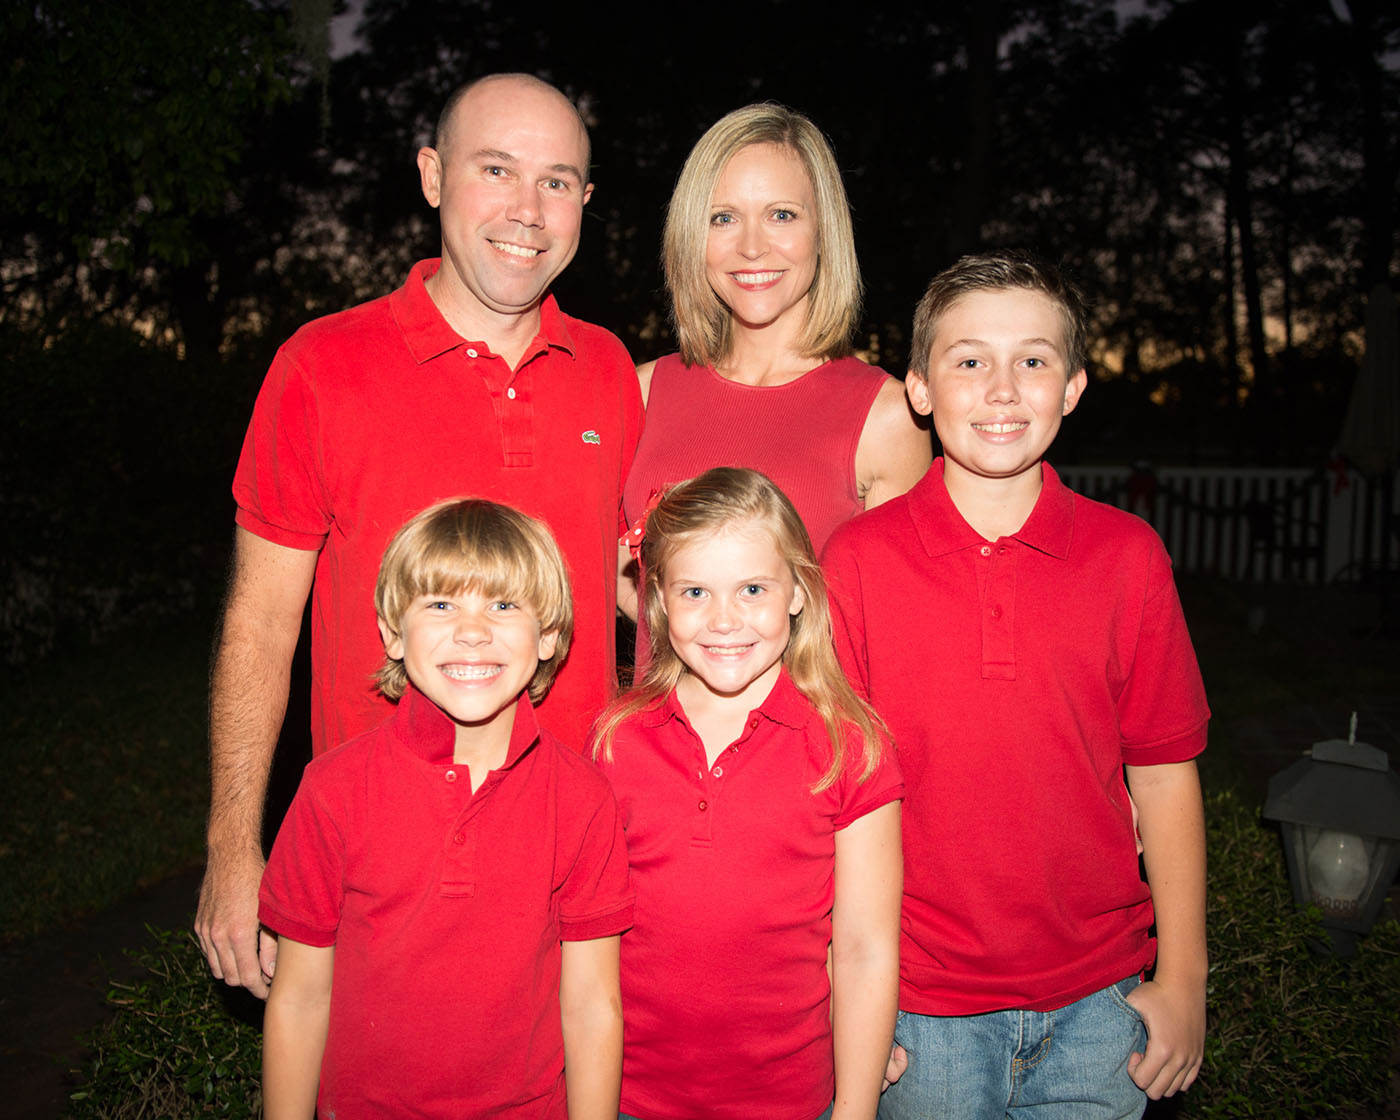
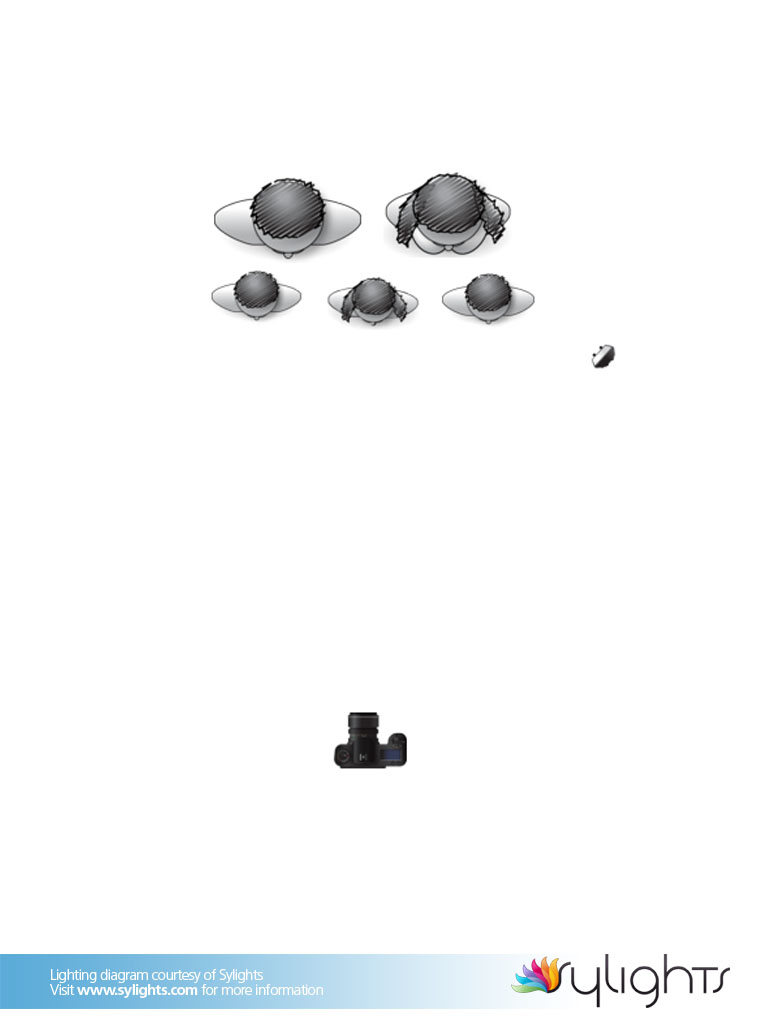
Step Five
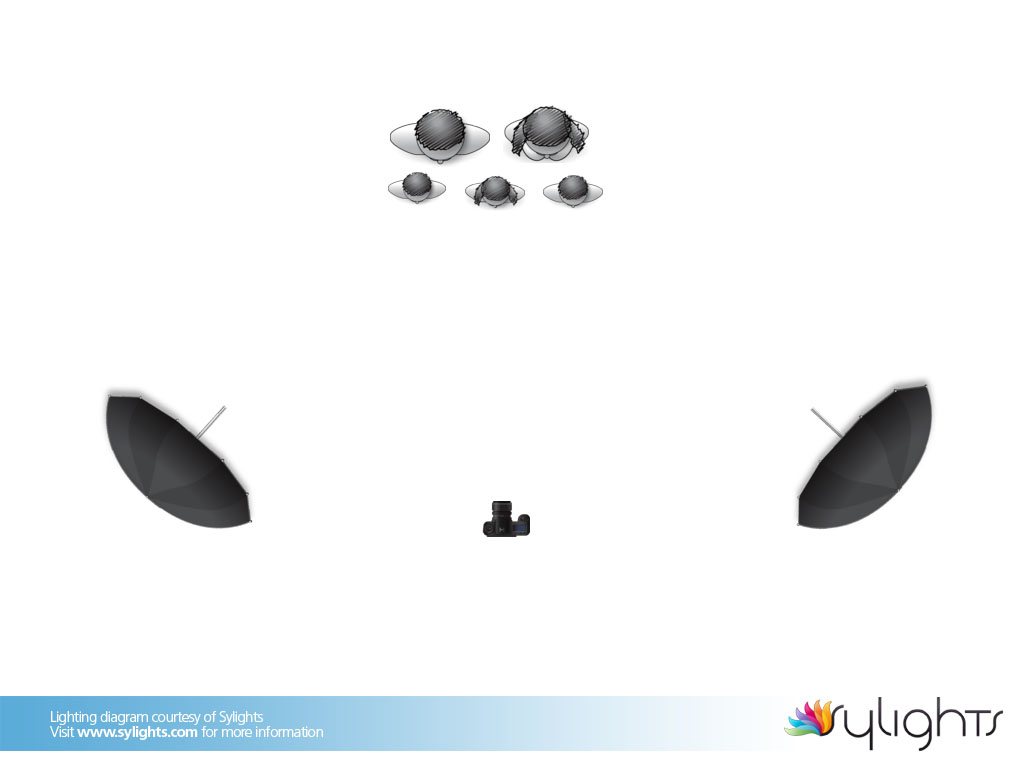
The ideal way to light a group photo—large or small—is achieved by adding a second light to the scenario. This will give us the ability to shape our subjects with shadow, but still evenly light the whole crowd. To do this, we added another external flash and 60″ umbrella. We then moved the lights out from behind the photographer and positioned them at a 45° angle to either side of the group. If you set both lights to the same power, you will have a perfectly even wash of light across the entire group. Alternatively, you can lower the power a few stops on one light as if you were photographing a single-person portrait. As seen in this photo, the light on the right is the main light and the light on the left is acting as a fill light to brighten up those shadows. This approach pleasantly renders the subjects as 3D and evenly lights everyone in the photo.

Step Six
Now that the lighting is right, we can tweak the rest of the shot. By switching from a normal lens (Nikon 24–70mm) to a telephoto lens (Nikon 70–200mm), you’ll get a different perspective and the ability to compress the scene. This compression brings everything together in the photo and is often more flattering when photographing people.

By this time, the sun had set and there was a bit of afterglow in the trees, so we slowed down the shutter speed to allow more of that ambient light to bleed in. In the end, we got a great family photo in a matter of minutes, even after the sun had gone for the day!
Once you have your images, try this tutorial for Removing Eye Veins on LayersMagazine or this article on PlanetPhotoshop for Removing Objects.
