
Dreamweaver Code and File Tips
Even though Dreamweaver was intended to prevent people from having to hand-code, it provides some pretty powerful features for those of us who prefer to code ourselves. Dreamweaver’s Code view, combined with the File manager, can become a great tool for the people who like to get their hands “dirty.” These are just a few simple tips to get you started.
Code View Tips
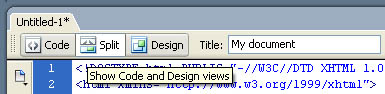
To get to Code View, click on the [Code View] button at the top of your document, or go to [View > Code].
Tip 1: Code + Design View
You can work in both Code and Design views at the same time. This is a great way for beginner’s to see quickly how the code affects your presentation. Just go to [View > Code and Design] or click the [Split] button. One of the quirks is that changes in Code window don’t appear instantly in the Design window, and Design window changes don’t appear instantly in the Code window. To show the changes for either, press the [F5] key to refresh.
Tip 2: Tag Wrap
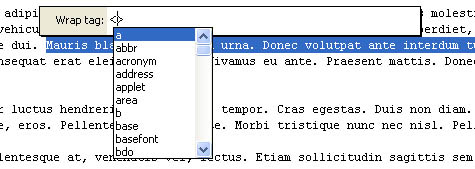
I work pretty much exclusively in Code view and I love this tip. While Dreamweaver’s Code View easily provides auto tag closing (you type the “<a>” and just press “</” to close the tag), it also allows you to easily wrap a block of text by selecting it and pressing [Ctrl + T / Mac: Command + T] this will bring up the “Wrap Tag” dialog and even a list of available tags. Fill in your tag and its properties then press [Enter] to wrap your selected text.

Tip 3: Code Highlighting
Sometimes you need to select very large blocks of code. Instead of clicking-and-dragging, and dragging, and dragging, just highlight the first line of code, then scroll until you find the last line. Hold the [Shift] key and highlight the last line of code you want.
Tip 4: Special Characters
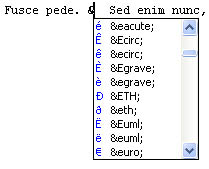
Special characters are usually the main “error” in Code Validation with Dreamweaver. Dreamweaver will usually automatically fill in a Special Character code when you type the character in the Design window, but if it doesn’t, you can easily find that Special Character in the Code window. Just press the [&] key [Shift + 7] and a list of the available Special Characters and their codes will appear. Find your character and click to fill it in.
Tip 5: Find and Replace
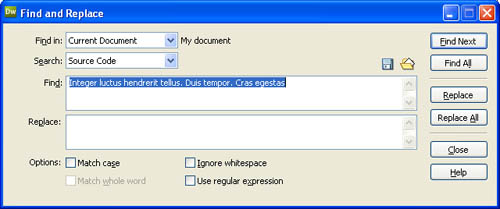
Find and Replace has saved me lots and lots of time. It’s one of my favorite features in Dreamweaver (exciting, right?) that I use when just dealing with any kind of document. To bring up Find and Replace, just press [Ctrl + F / Mac: Command + F]. The first option you have is “Find In:”. Be sure you pay attention to this, you can replace text in the current document, or accidentally replace text in your entire website! (Well, Dreamweaver will pop-up a dialog before you can do that). The next option is your “Search” type. This will let you find specific Source Code, Text in your document, or Specific Tags. I’m not going to go into detail here, but the Specific Tag search can be really powerful. I suggest exploring through that a bit.
Another great feature of Find and Replace is the ability to use Regular Expressions. Regular expressions are very powerful, but can be pretty complicated too. Master Regular Expressions and you’ll be able to find anything.
Another quick tip: if you highlight some text and press [Ctrl/Command + F], your highlighted text will automatically appear in the “Find:” field.
File Manager Tips
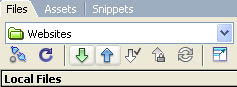
One of the main reasons I still use Dreamweaver, even though I’m a hand-coder, is the File Browser/Manager. I’m used to it and it’s still one of the more powerful file managers I have used. If your Files window isn’t open, press [F8] or go to [Window > Files]. If your website is setup correctly, you should be able to view both your Local and Remote files by clicking on the “Expand” button.
Tip 1: Get/Put Shortcuts
One of the first Dreamweaver shortcuts I learned was the “Put” command. This will upload whatever file you’re working on, or files you have selected, quickly. The shortcut is [Ctrl + Shift + U / Mac: Command + Shift + U].
In the reverse manner, you can also download a file from the Remote to the Local by pressing [Ctrl + Shift + D / Mac: Command + Shift + D]. Since I work in mostly dynamic/database environments, live testing is usually the only option, so I use the “Put” shortcut a lot. You can also use the “Up” and “Down” arrow buttons at the top of the Files window if you forget the shortcuts, or just right-click on the file and choose “Get” or “Put”.
Tip 2: Open All Folders
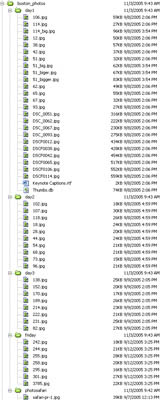
Website directories can get pretty deep and complicated, making it hard to locate specific files. If you hold the [Ctrl] key and click on the “+” next to a folder, it will open that folder, and all the folders within. Be careful though, if there are a lot of files in the directory, you can experience some lag. Just [Ctrl + Click / Mac: Command + Click] again to close all folders.
Tip 3: Locate in Local/Locate in Remote
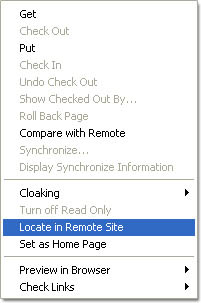
Another one of my favorite Dreamweaver File features is the “Locate in”. Sometimes when you’re browsing your massive directories on the Local side, you’ll find there’s a file you want to find on the Remote site. Instead of traversing through the whole Remote site, just [right-click / Mac: Command + Click] on the file and choose “Locate in Remote”. This will snap right to the file in your Remote site. It will also tell you if the file exists remotely or not. In the same sense, you can browse to a file remotely, [right-click / Mac: Command + Click], and choose “Locate in Local”. Very cool, time-saving feature.
Tip 4: Compare Files
When working with a large number files, you may not remember if the file on your Web server is the same as it is on your Local server. That’s where “File Compare” comes in. There is a great free program called “WinMerge” that can cure a lot of your overwrite headaches. Just download and install WinMerge. Then, in Dreamweaver, go to [Edit > Preferences] or press [Ctrl / Command + U], select “File Compare” and browse to your install of WinMerge. Click OK to save your changes.

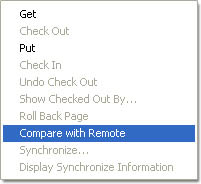
Now, in Remote or Local file view, right-click on a file and choose “Compare with…”. WinMerge will open up and highlight the code differences or let you know if they’re identical!
Tip 5: File Types
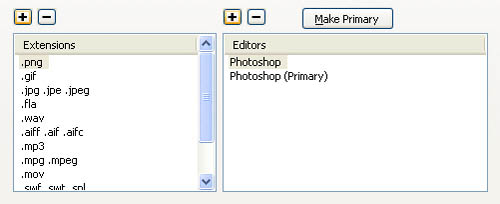
Usually when you double-click on a file in your Files window and it isn’t Dreamweaver native, an annoying error message will pop-up. This is especially true for most image files. To get around these errors, go to [Edit > Preferences] or press [Ctrl / Command + U] and choose “File Types / Editors”. If you want something to open in Dreamweaver by default, like a “.htaccess” or “.inc” file type, just add it to the list of extensions in the “Open in Code View” field box.

If you want Dreamweaver to open the file in another program, like a “.png” file in Photoshop, add the extension (if it’s not available) by clicking on the “+”. Once the file extension is added, click on the “+” above Editors and browse to the program you want to use. Now, every time you double-click on that file type in your Files window, it will automatically open the program and that file.
That’s it. Hopefully, some of you WYSIWYG users can see that the Code View isn’t all that intimidating and some of you hand-coders won’t view Dreamweaver as the “enemy.”
