
Creating a Quick and Easy Glass Bowl in Illustrator
With just a circle, a few ovals and the Inner Glow effect, you can create a quick and very useful glass bowl image in Illustrator. And once you master this technique, it can be easily adapted for many different uses.
1
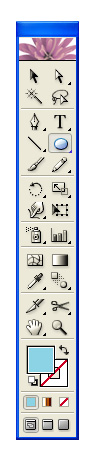
Create a circle with the Ellipse tool. Hold down the Shift key while dragging open your circle to keep it perfectly round. Change the Fill to blue and Stroke to None (/).

2
Again using the Ellipse tool, create an oval that slightly overlaps the edges of your initial circle as shown here.

3
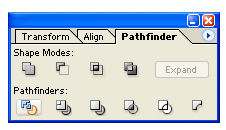
With both the circle and the overlapping oval selected with the Selection tool (Shift-click each or drag a selection around them), go to the Pathfinder menu (Window>Pathfinder if it’s not already open) and click the Divide button.
4
Go to Object>Ungroup to separate the newly divided shapes.

5
With the Selection tool, select the top of the circle and the oval (and any other small pieces that may have been created in the division process) and press Delete (PC: Backspace). This should leave only the main bowl shape.

6
Now with the bowl shape still selected, go to Effect>Stylize>Inner Glow. In the Inner Glow menu, double-click on the color square and choose a medium blue from the Color Picker (write this color name down; for example, 09B1CC; we’ll need it later). Set the Mode to Normal, the Opacity at 35%, and Blur at 35 pt. Make sure the Edge button at the bottom of the Inner Glow menu, not the Center button, is selected, and click OK.


7
To make the bowl’s rim, first make an oval with the Ellipse tool that fits right on top of the main bowl shape like shown here. Then change the oval’s Fill and Stroke color to White if it is not already. With this oval selected, go to Effect>Stylize>Inner Glow. In the Inner Glow menu set the Mode to Normal, the Opacity at 20%, and the Blur at 11 pt. The color should be the same blue you used for the main bowl shape.


8
Create one more oval; this one goes in the middle of the one created in Step Seven. Select this oval, change its Fill and Stroke to White if it’s not already, and then go to Effect>Stylize>Inner Glow. Set the Mode to Normal, the Opacity at 35% and the Blur at 20pt.


9
Hold down Option (PC: Alt) and click-and-drag this new oval and move it to the bottom of the bowl shape. This duplicates it. While holding down the Shift key to maintain its proportions, scale down the oval till it sits comfortably at the bottom of the bowl.

10
Add some shine to your new bowl with white circles placed in the top left and bottom right of the bowl.

11
I’ve added a few fish using the Pen tool.

