InDesign has always supported the use of layers, but layers don’t always cut it when working with text. You can put a text frame on a layer and turn that layer on and off as needed, but it’s an all or nothing approach. What if you want to show and hide individual words or paragraphs and have the text automatically rewrap when you show or hide those words? With conditional text, it’s a breeze.
1 [FIRST, WE’LL NEED A NEW DOCUMENT]
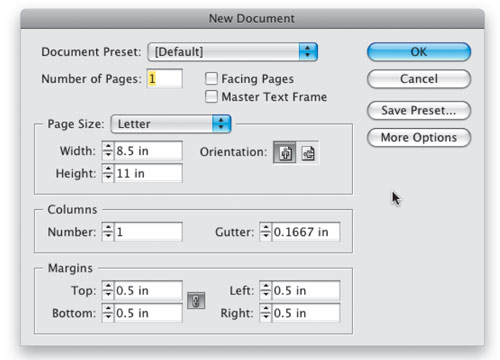
You can certainly use one of your existing documents for this, but if you’re going to follow along, you might want to go ahead and create a new document. Choose New>Document from the File menu. One page should be fine.
2 [CREATE A LARGE TEXT FRAME]
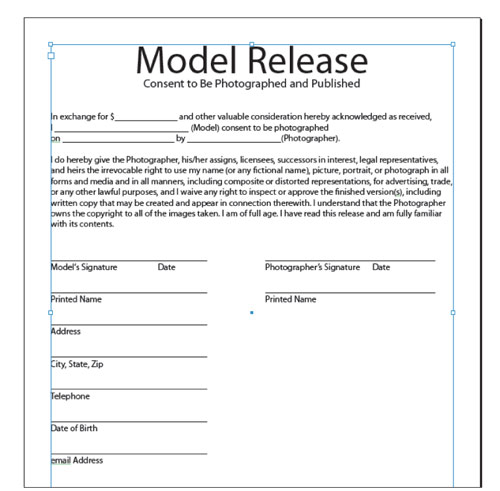
In this example, we’re going to lay the foundation for a model release form that will vary depending on whether the model is an adult or a minor. So create a large text frame using the Rectangle Frame tool (F).

3 [KEY IN TEXT FOR YOUR FIRST CONDITION]
Choose the Type tool (T), and at this point you can key in all of your text that will be a part of your first condition. For this example, we’re going to key in the bulk of the text for the release form as if it were for an adult model.
4 [OPEN THE CONDITIONAL TEXT PANEL]
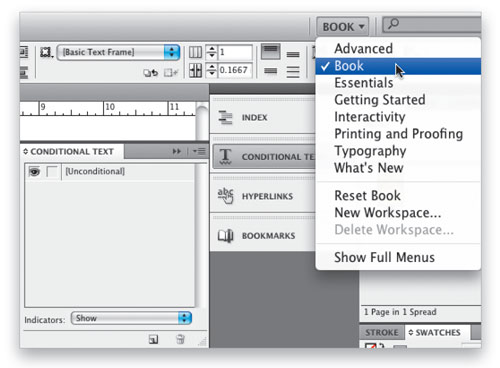
Conditional text is a new feature in InDesign CS4, and it has its own panel. You can open it a couple of ways: you can simply choose it from the Window>Type & Tables menu or you can select the built-in Book workspace from the drop-down menu at the right side of the Application Bar.
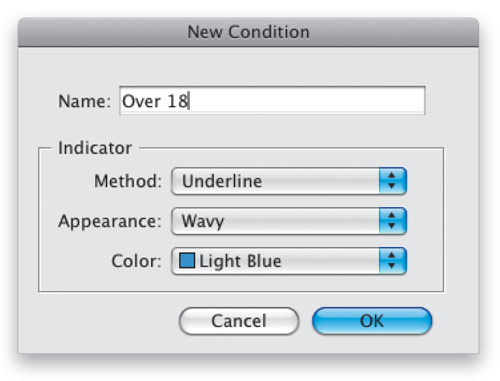
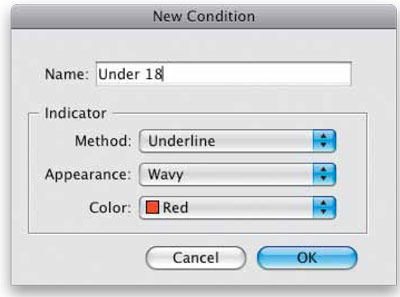
5 [CREATE A NEW CONDITION]
You can set up as many conditions as you need. Think of conditions as layers for your text within a text frame. So our first condition will be for models 18 and over. This will be the language in the agreement that states that the model is at least 18 years old and doesn’t need parental consent to sign. Click the New Condition icon at the bottom of the Conditional Text panel. Name your condition in the resulting dialog and click OK.
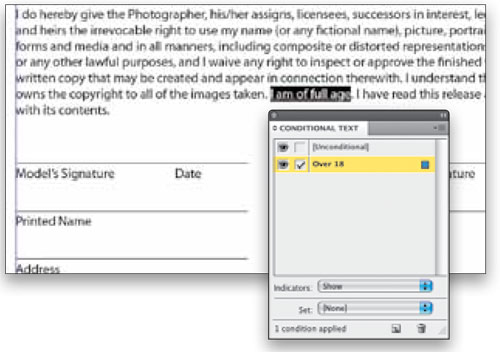
6 [APPLY YOUR NEW CONDITION TO YOUR TEXT]
With your new condition created, the next thing you need to do is apply it to all of your text that matches that condition. Don’t worry about the text that you want to remain the same for all versions of the document, as it automatically defaults to Unconditional. You only need to apply the condition to the text that you want to show and hide. So in this example, we’ll highlight “I’m of full age” and then click the Over 18 condition to apply it. We’ll also repeat this with “Model’s Signature.” You should see a wavy blue line under any text you applied the condition to.
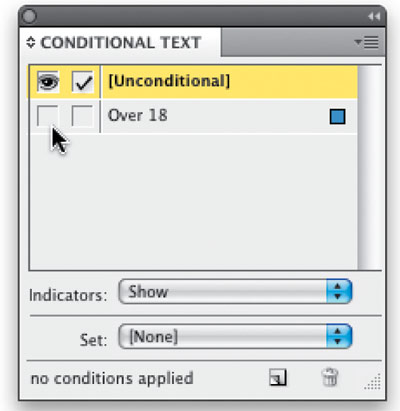
7 [HIDE YOUR FIRST CONDITION]
After you’ve highlighted each instance of your first condition and applied it in the Conditional Text panel, you’re ready to key in the text for your second condition. However, it would be much less confusing if the first condition’s text wasn’t showing. So click the Eye icon in front of your first condition to hide all the text matching that condition. This will also help you find anything you may have missed.
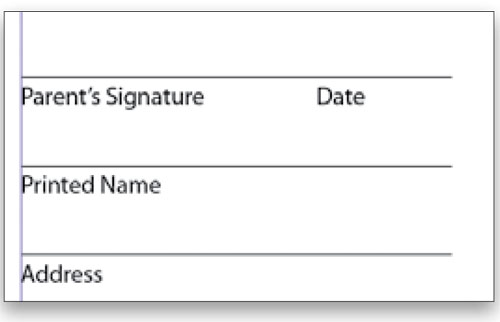
8 [KEY IN THE TEXT FOR YOUR SECOND CONDITION]
Now that you’ve hidden the text for your first condition, it’s time to key in the text that will be used for your second condition. In this case where it originally said, “I am of full age,” we’re going to key in the text “I’m under the age of 18 and therefore my parent or legal guardian will sign.” We’ll also type “Parent’s Signature” where “Model’s Signature” originally appeared.
9 [CREATE YOUR SECOND CONDITION]
Now that your text is in place for your second condition, let’s create it. Go to the Conditional Text panel, click the New Condition icon, name your second condition (in this case “Under 18”), and click OK.
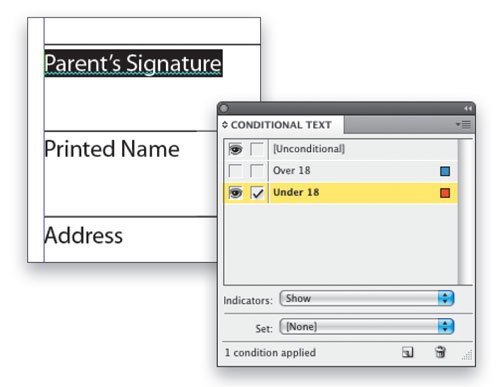
10 [APPLY THE SECOND CONDITION TO YOUR TEXT]
Just like you did in Step 6, you’re now going to apply your second condition (Under 18) to the new text. Using the Type tool (T), highlight each instance of text matching your second condition, and then click your second condition in the Conditional Text panel to apply it. You should see a red wavy line this time. (Note: When you’re creating a new condition, you can change how it’s going to be highlighted in your document by changing the settings in the Indicators section of the New Condition dialog. Or you can double-click an existing condition in the Conditional Text panel to change those options.)
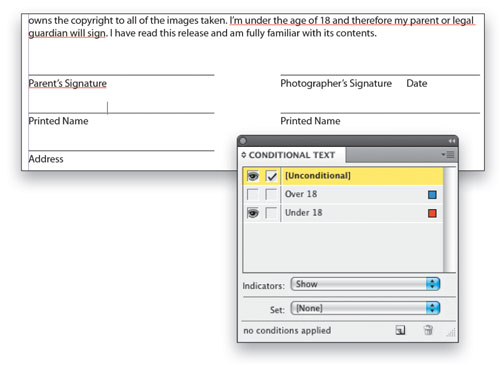
11 [SHOW AND HIDE YOUR CONDITIONS TO TEST]
At this point you have an InDesign document working with Conditional Text. You can show and hide either condition to allow for printing and exporting. You can use this technique for a variety of situations, not the least being price lists. The beauty here is that your text will automatically rewrap based on which condition is showing.
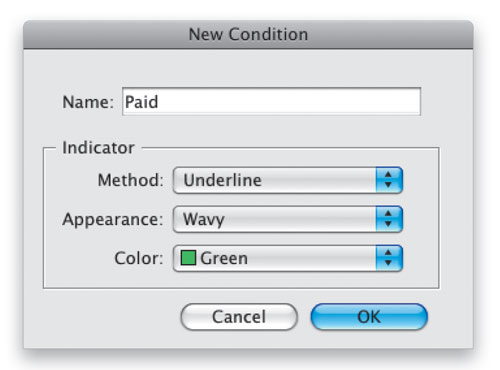
12 [CREATE MORE CONDITIONS AND APPLY THEM]
Now that you know how to create conditions and apply them, it’s time to make it a little more interesting. Let’s say it’s a paid shoot versus a trade. Either of those conditions could apply to either of the previous two conditions. So it could be an over 18 model doing a trade or an under 18 model doing paid work, or vice versa. Create two new conditions revolving around the first line that talks about pay.
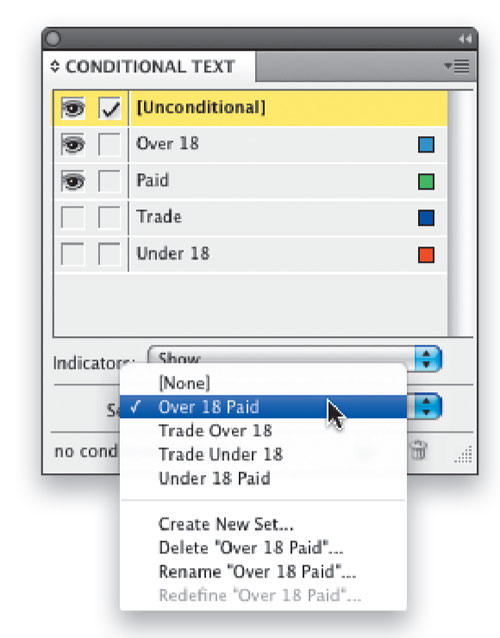
13 [USE CONDITIONAL TEXT SETS]
When you have two or more conditions that could be used together, then it’s time to break out conditional text sets. A conditional text set is a group of conditions that can be turned on all at once. Choose Show Options from the Conditional Text panel flyout menu. Then turn on the conditions that will apply to your new set. Example: Paid and Over 18. Then from the Set drop-down menu, choose Create New Set. Now you’ll have a set to choose that will automatically turn on those two conditions and turn off the others. You can make as many sets as you need.