
Taking Aim

Finding perfect photographic composition in your viewfinder
For anyone following a creative pursuit, the notion of obeying rules that determine proper aesthetics for an image seems nothing short of ludicrous; however, such rules can prove incredibly helpful as you work to improve your photography. Just remember, rules are made to be broken. It’s important to understand some key rules of photographic composition, but equally important that the final image is what really matters, so don’t hesitate to break the rules if you feel it will improve the photo.
Say More with Less
Perhaps the best thing you can do to improve the composition of your photographs is to include less in the frame. It’s only natural to try to include too much in a photographic image. After all, you’re in a wonderful place having an incredible experience taking in a beautiful sight, and you want to capture a photo that will convey your emotions. This often leads to a photo with so much going on that the viewer feels overwhelmed and doesn’t know where to look.

Practice simplifying the composition for every photograph. As you compose a scene, think about how you might be able to zoom in or move closer to the subject to effectively crop out unnecessary elements. Also, think about how you might be able to move to view the subject from a different angle to provide a less cluttered background. You’ll quickly discover that when it comes to photography, quite often less is more.
No Points for a Bull’s Eye
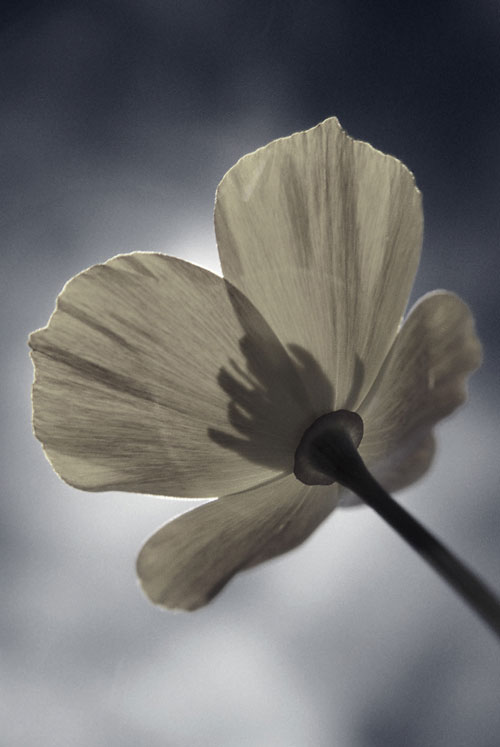
The rule of thirds is one of the best-known tenets in photography, but being well-known doesn’t mean it should always be followed. Quite simply, you should generally not place the main subject of a photograph in the very center of the frame. It may seem that the most important element of a photograph belongs at the prominent center of the image so nobody will mistake the reason you took the photo, but in most cases you should resist that urge.

The idea of the rule of thirds is that you should place the key subject one-third of the way in from the edge of the photo, rather than at the center. Imagine the photo divided into thirds horizontally and vertically. Align your subject with one of the dividing lines, possibly even at the intersection of two of those lines.
Of course, placing the subject off-center shouldn’t be done without giving it some thought. For example, if you’re photographing a sunset, you might arbitrarily lower the camera so the horizon falls at the upper third. But if part of the reason you’re photographing the sunset is the incredible clouds in the sky, you should favor the sky and instead raise the camera so the horizon is at the bottom third. The point is that you want to think about how to follow the rule of thirds (and when to ignore it) so you’re producing the best result in the final image.
Room to Move
When you follow the rule of thirds, the key subject is naturally going to be off-center in the frame. I mentioned that it’s important to consider where in the frame you’re going to place the subject, and this is particularly important when there’s a directional element to the subject. For example, if you’re photographing moving subjects, such as cars, surfers, or cyclists, leave some room in front of them so they appear to have somewhere to go.

In the case of a portrait, that means giving the subject somewhere to look. When following the rule of thirds, this will become obvious to you but it’s worth thinking about. Generally speaking, when you break this rule, it will create a certain sense of tension within the image. That might be a good thing—just make sure you’re doing it intentionally.
Get Some Perspective
When you present a subject in a unique and interesting way, you’ll have a better chance of gaining the viewer’s attention. The trick is to find a unique perspective that actually makes a better photo, not just a photo with a weird perspective. Think about how you can get higher or lower, or find a unique angle. Lens choice can be key here as well. With a wide-angle lens, for example, you can get very close to the subject but still have a strong sense of place with the background information that gets included. Or you can compress a scene in an interesting way by backing up and using a longer lens, including only a couple of key elements in the frame
Don’t be afraid to experiment, as that’s how you’ll learn what works and what doesn’t. Look around you and see what you can get on top of, duck under, stand beside, or otherwise put to use to create a new way of looking at a subject.
Get Angular
Everywhere you look, it seems there are lines. Sometimes those lines are the reason you decided to take a photo; other times they seem to get in the way. Regardless, they can always be used to great effect in a photographic composition. Horizontal or vertical lines tend to convey stability. Sometimes that’s what you’re aiming for, but more often you’re looking for a dynamic energy. Diagonal lines are very effective at providing that energy, so see if you can put strong lines on the diagonal. Also, thinking about perspective, see if there’s a way to get the lines in your image to lead into the primary subject. Lines can be a powerful part of your photos, so leverage them in your compositions.

Cropping
While it’s best to get the image perfect in camera, don’t forget there’s much you can do after the fact to greatly improve many photos. Cropping an image in Photoshop after the capture allows you to apply some of the rules of composition presented here, even if you didn’t get it quite right in the camera. For example, a cluttered scene can be cleaned up by cropping out unnecessary elements. A subject placed in the center of the frame can be magically moved off center by cropping the image accordingly.
Part of the beauty of digital photography is that you can continue to improve your images with tremendous control, even after the picture has been taken. And doing so will help give you a better understanding of what you might want to do differently the next time you’re out taking pictures.
ALL IMAGES BY TIM GREY
