
How to Visualize Lighting for Compositing Images
The magic of compositing images together is that when you become proficient with the technical aspects, the sky is the limit and the only thing governing your imagery is your own imagination. I approach image compositing just like I would a more traditional type of image and focus on the composition. A little more homework is required when compositing than just showing up on location and positioning a model and props into something visually aesthetic. Usually, a backdrop has been shot and assembled and the model is being photographed in a studio setting. If possible, I try to have the background image on set. It’s a great tool to reaffirm how you’re going to light your subjects, and it also serves as a visual reference for your models. If you’re going to have someone playing guitar for baby gazelles, it doesn’t hurt to be able to show a rough version of the scene.
The next step is where you have to make the creative decision on whether or not the image is going to be something photo-
realistic or maybe more interpretive with greater creative latitude. If the image is a personal project, I’ll make the decision; otherwise, it’s decided by a client’s concept. The results of that decision are mainly, if not completely, created by the lighting setup.
For this article, I’ll break down my lighting setups for three different scenarios: photorealistic, semi-interpreted hybrid, and what some might refer to as hyper-real. A little more homework is required when compositing than just showing up on location and positioning a model and props into something visually aesthetic.
Photorealistic
I interpret a photorealistic composite as one that appears unlit, as if you’re simply taking a snapshot of a scene. Now this scene can have a crazy concept but where the lighting is concerned, it has to be consistent with the backdrop. Two general examples are an outdoor image where the only light source is the sun, and an indoor image where you’ll focus on the ambient light sources. On the flipside are shadows, and they have to match, as well, to round out the effect of realism.
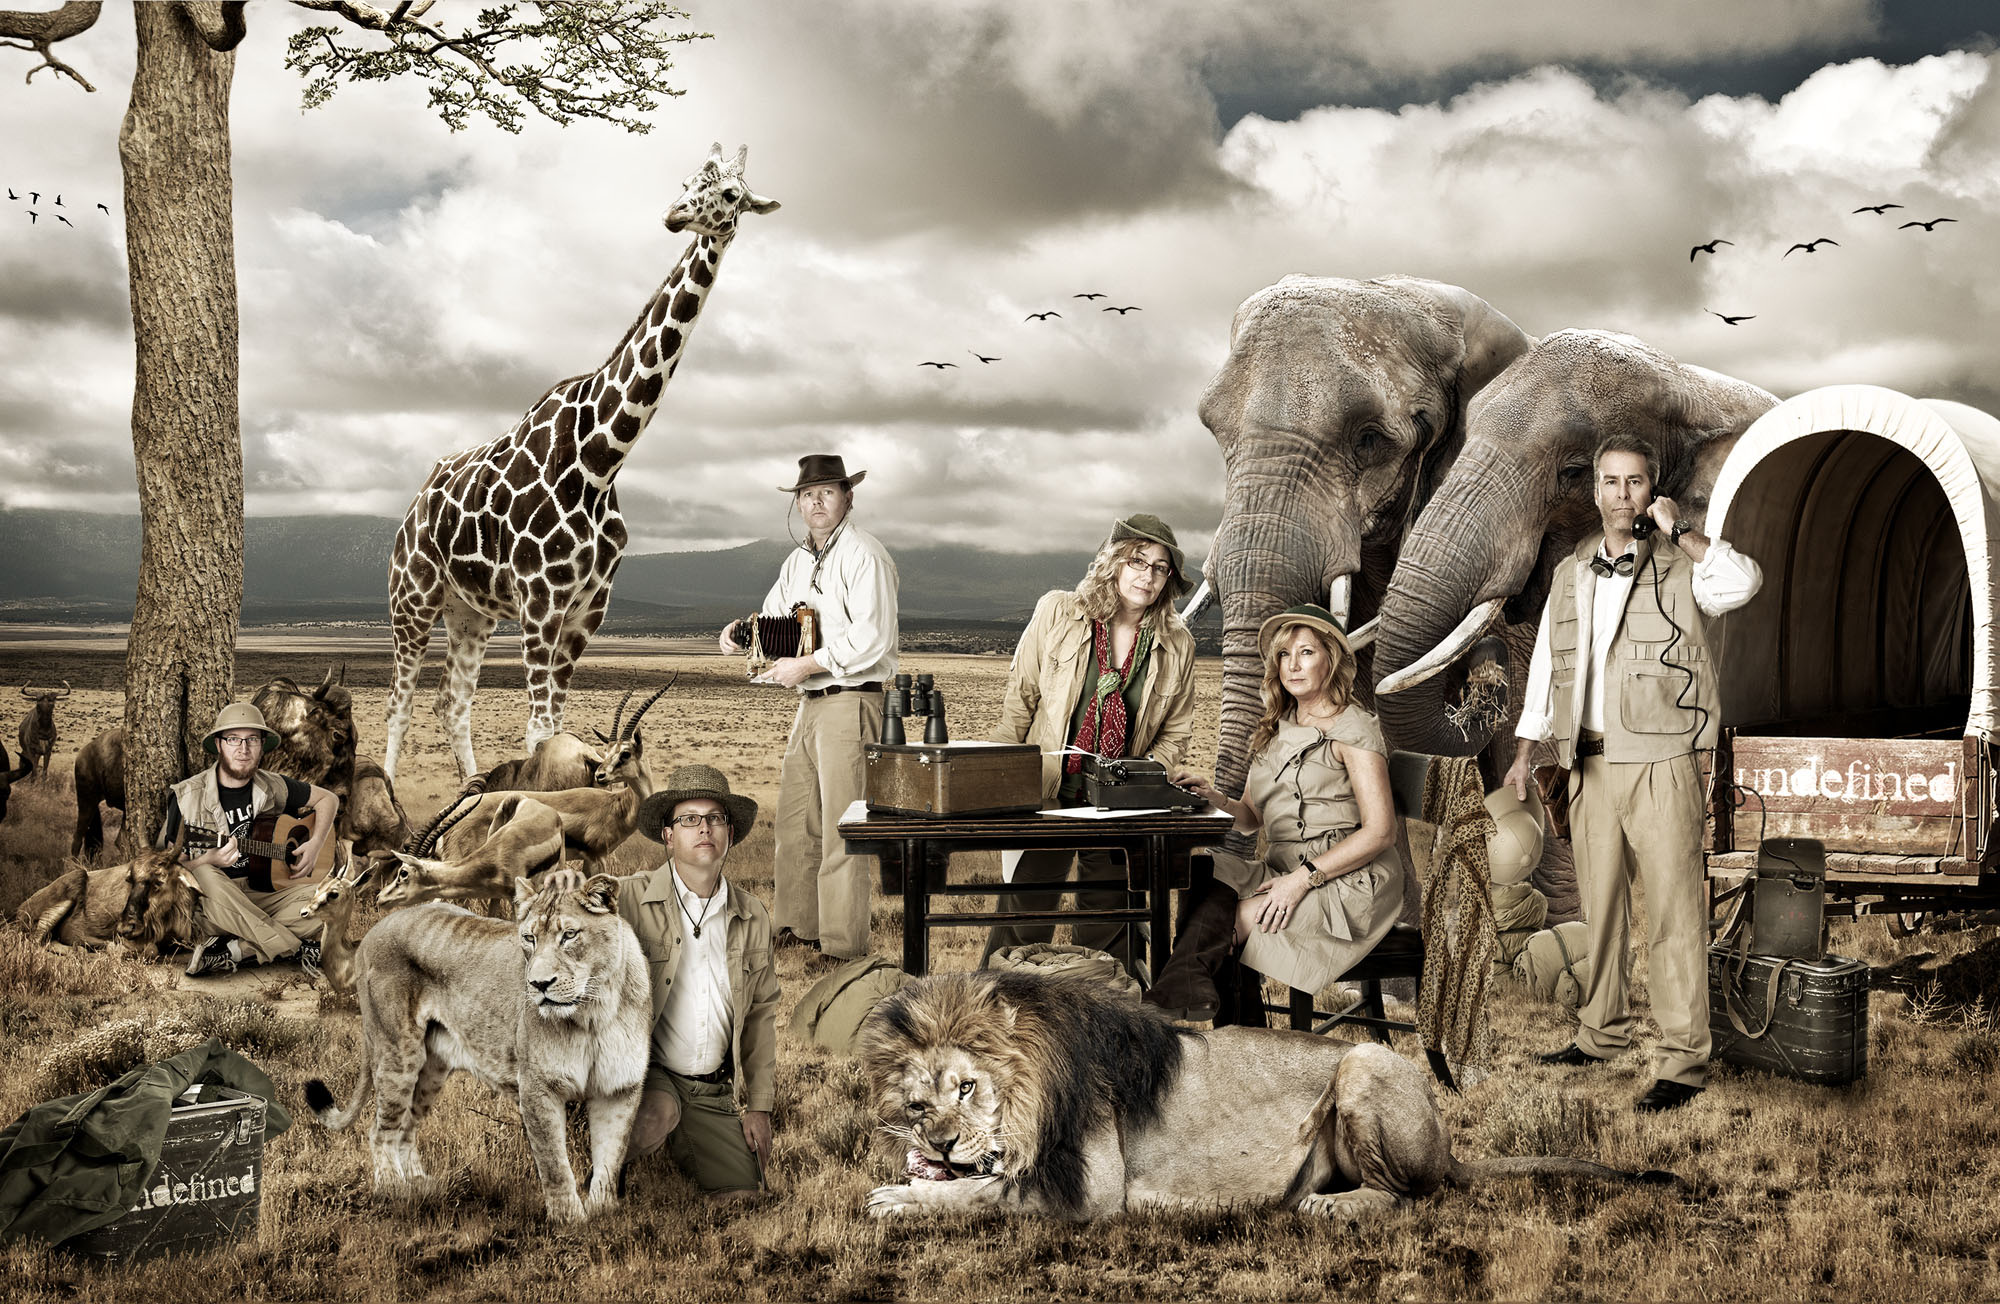
So let’s take a look at an example from my portfolio. Here’s an ensemble piece created for a magazine’s editorial staff. The concept was to create a group portrait in a safari setting. As you can see, the backdrop is partly cloudy, which allows me to choose between direct sun or a cloudy, flatter light as the light source. Knowing that I’ll include a wide variety of animals whose lighting will have to match the models, I decided, for my sanity, to go with a flatter lighting situation.

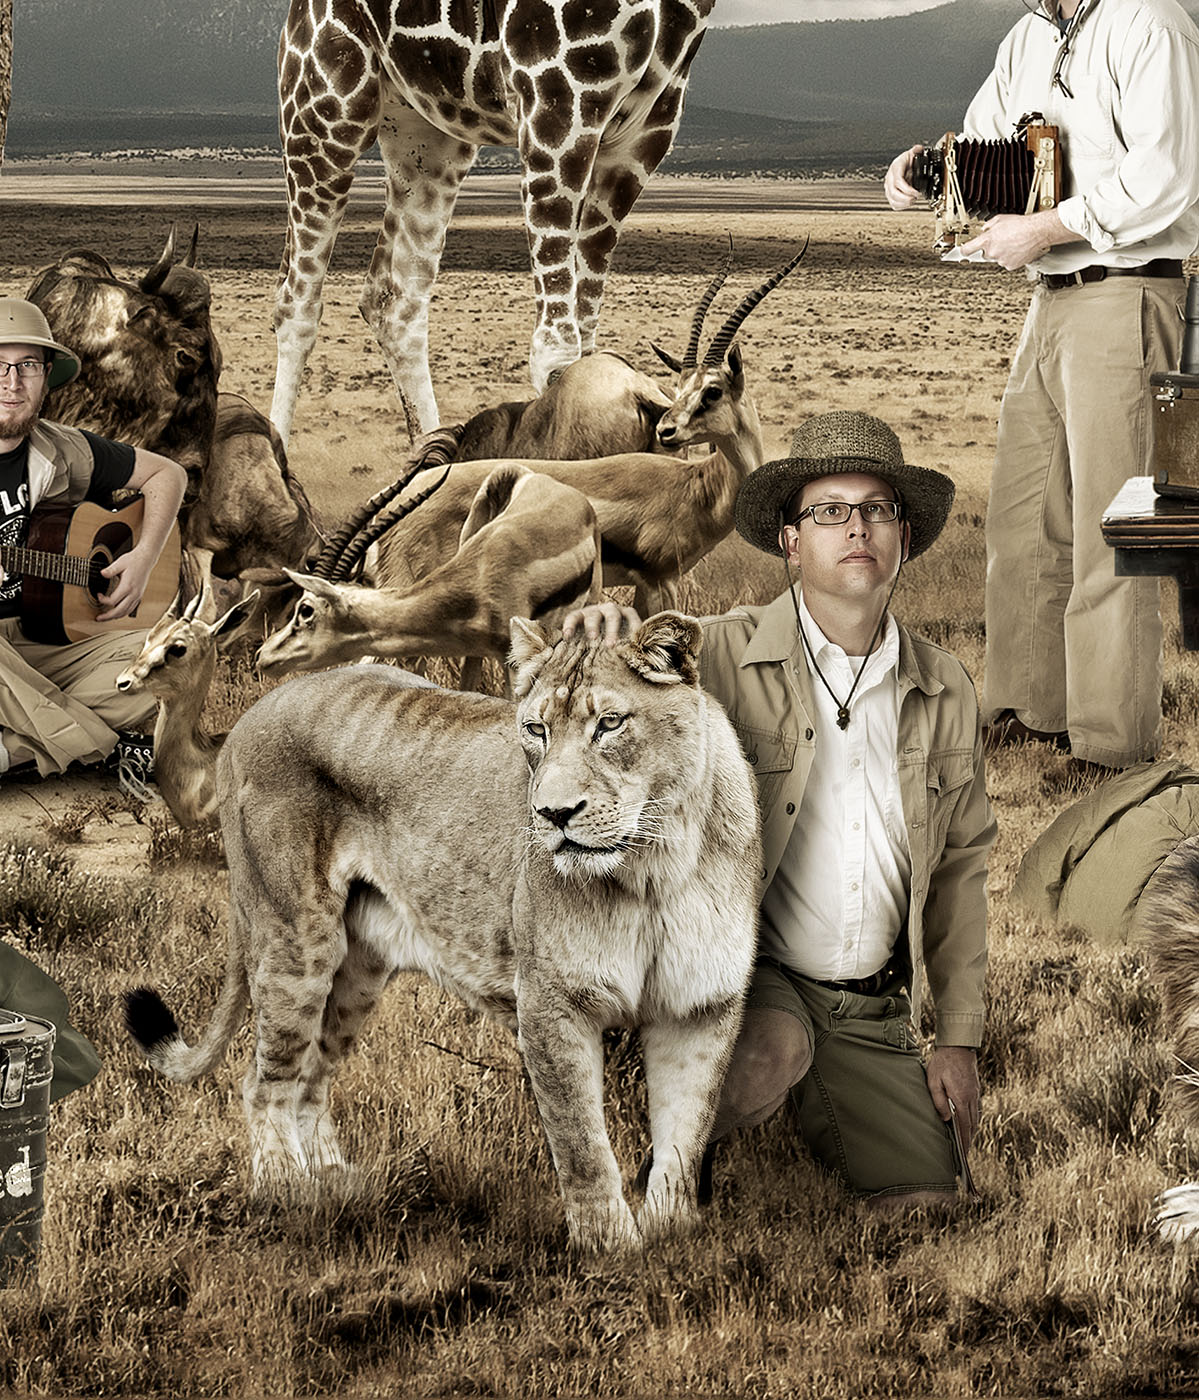
To create the style of light for this scene, I actually only used two lights on the models: one main light, which was a 5′ octabox camera left, and a 4′ strip box for fill positioned camera right. The fill light was only a stop lower, so there isn’t much of a drop off, preventing any harsh shadows, but it does provide some dimension. Now for a little separation from the background, I pumped up the light on the white backdrop, which created a touch of rim light on the models. You can see what I’m referencing on the edge of Ed’s left cheek. This might not be something that would actually happen within this backdrop but I usually can’t help myself from adding a little creative flair and, let’s face it, he is petting a lion.
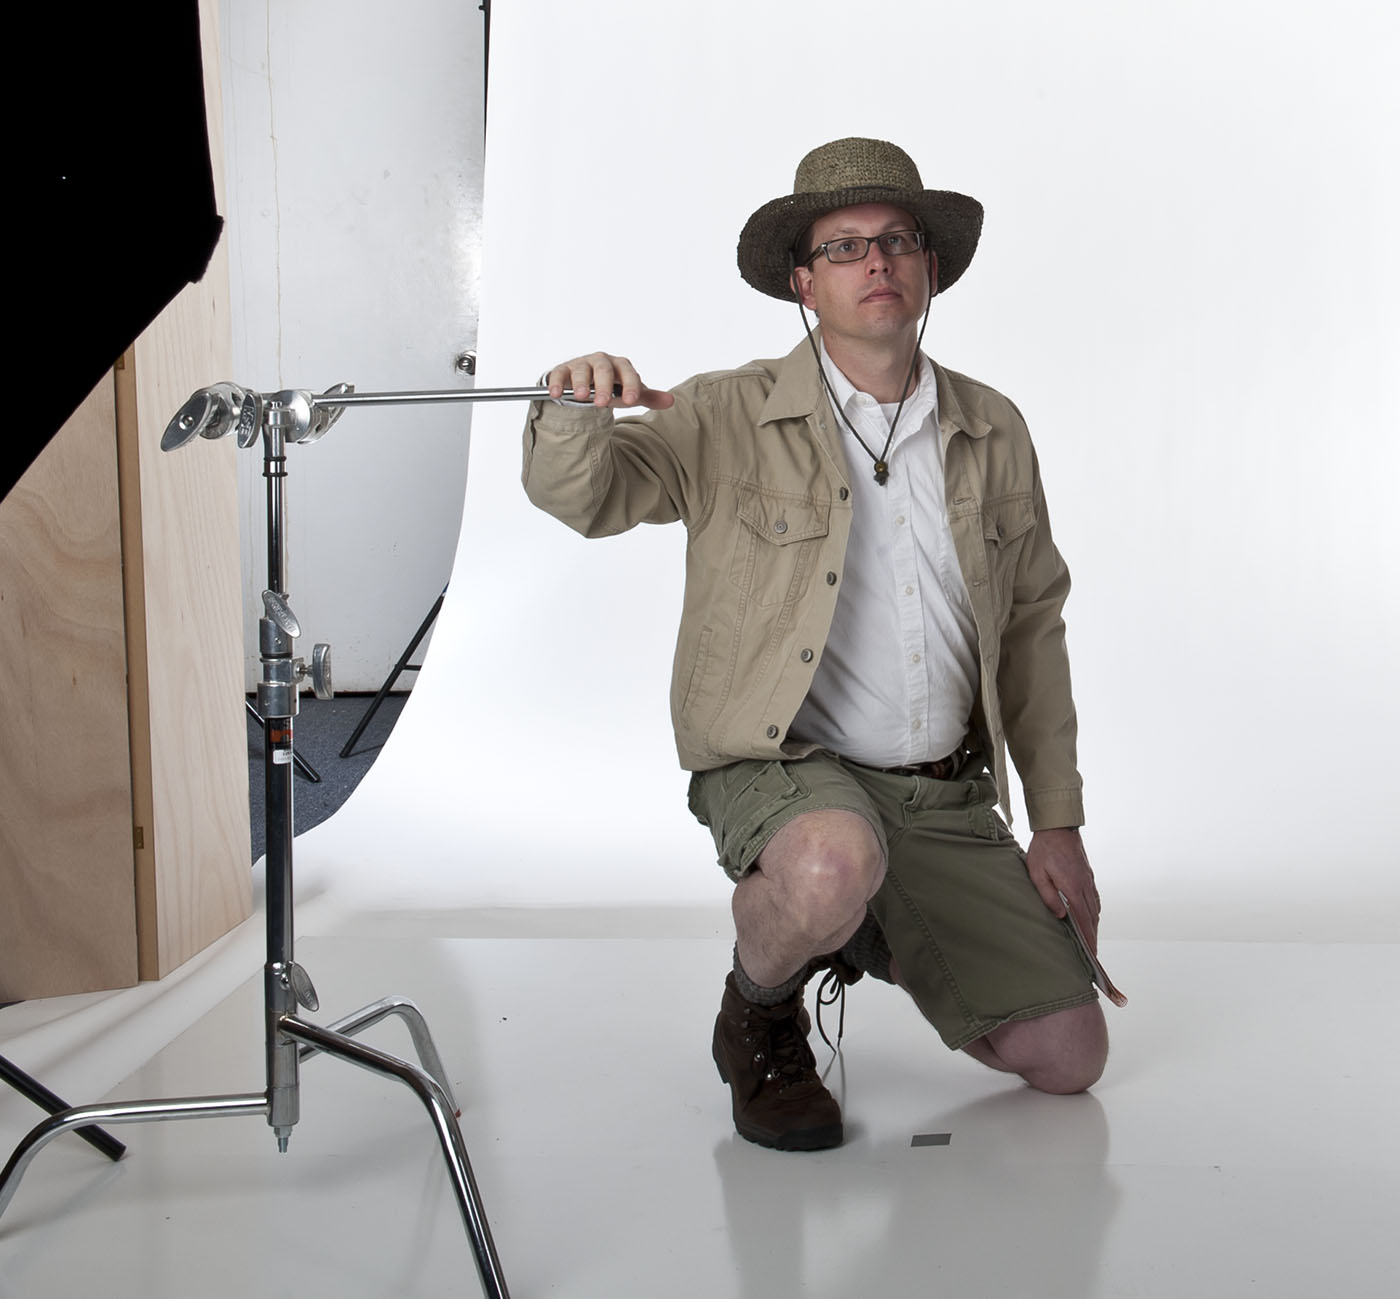
One other note: He was positioned in a crouch, so I knew there would be some light falloff toward his legs. Setting the lights up from the floor created this effect right in studio. This effect could have easily been handled in Photo-
shop but I try my best to get most everything as close as possible in camera. You’ll also note that the shadow cast by the lion further enhances the falloff, and this was something that had to be handled in Photoshop.
Knowing that I’ll include a wide variety of animals whose lighting will have to match the models, I decided, for my sanity, to go with a flatter lighting situation.
Semi-interpreted Hybrid
Please know there aren’t official names for these different setups and I merely concocted something for this article. Semi-interpreted hybrid is what I came up with to describe the situation where you want the light in the scene to have some basis with your studio setup, but at the same time some creative liberties are taken to hopefully enhance the overall image. So what does that mean? It means the main light is definitely coming from somewhere but there are other lights, without clear basis, subtly influencing the subject and adding drama.
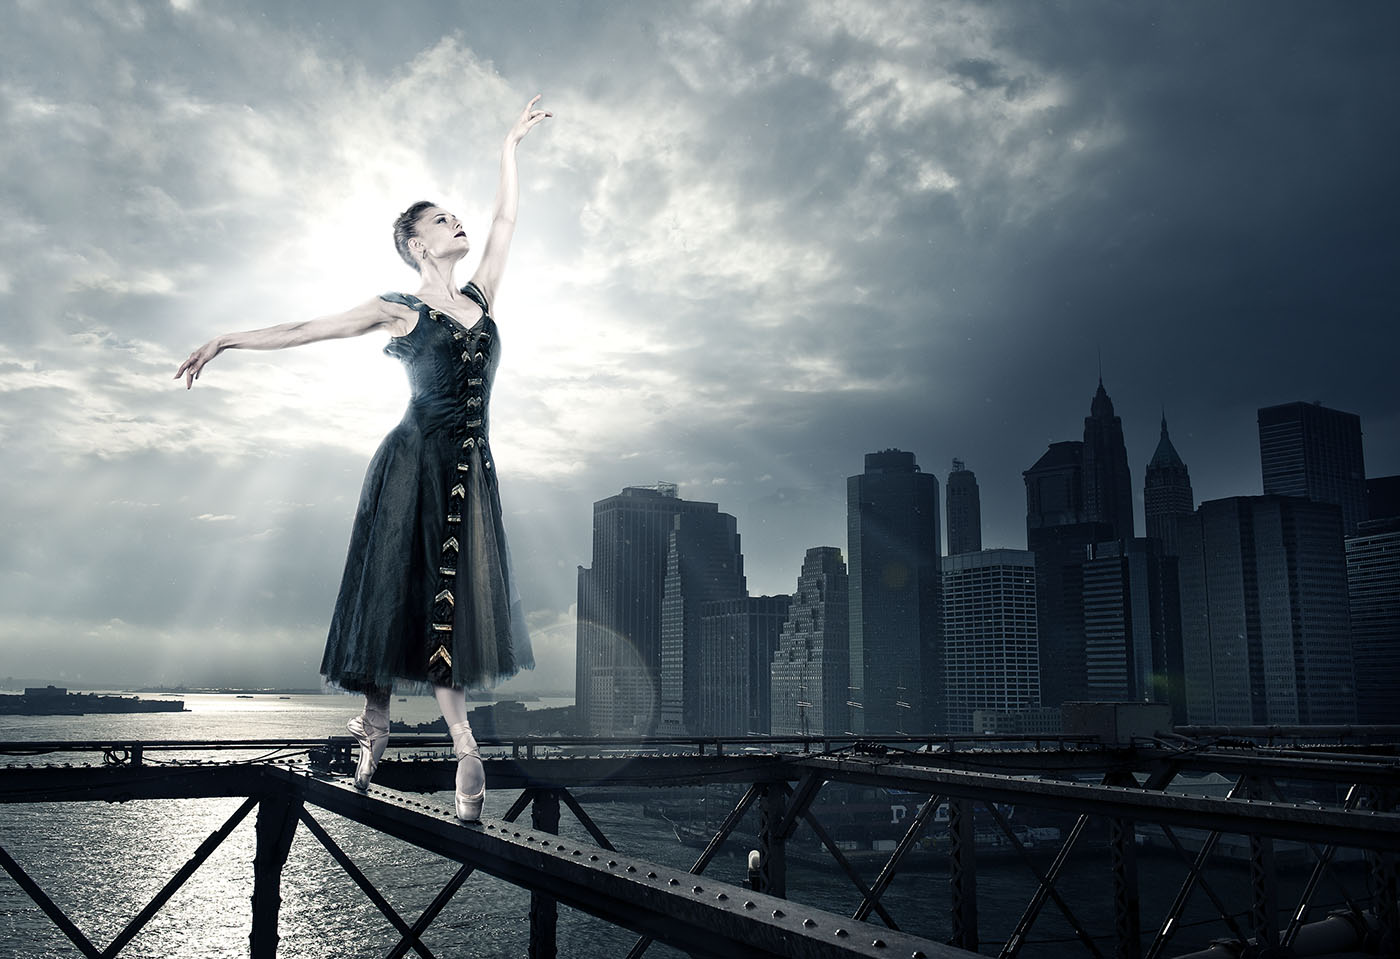
So let’s take a look at Sara, a dancer for the New York City Ballet. The concept was to photograph her on a set and place her on the steel framework of the Brooklyn Bridge. The backdrop by itself is fairly dramatic with the sun breaking from behind the clouds during a rainstorm, and yes, shortly thereafter I was soaking wet.

The goal was to build on that drama while lighting her. To do so, I’d need to create a more complex lighting scenario than what was used in the first example. Two lights wouldn’t give the effect we were after; therefore, I used two 4′ strip boxes placed at about a 45° angle behind either side of her. Above her, I used a beauty dish to light her face and upper torso, and employed a 5′ octabox for general fill. I used a pop-up screen behind her to aid in the extraction process, but in hindsight, I probably could have used one or two more lights on that backdrop to increase the backlighting and flare effect. This shows that I still try and continually learn from each shooting experience.

The strip boxes were set at a level where I’d have a general glow rimming the dancer and not a hot highlight rim. She’s a ballet dancer and I wanted to interpret the scene softer than I would with someone along the lines of a football player, as we’ll discuss next.
Bathing her in a glow seemed more appealing, and the beauty dish was also used in the same respect. Once again, I had the backdrop image available on set for her to view. That way we knew the angle for her feet and she showed me a few poses based on her positioning. When we decided on what would work, I knew the general proximity of her face to position the dish to continue the lighting. The octabox was used as a fill and set level to bring out some detail in her dress.

the main light is definitely coming from somewhere but there are other lights, without clear basis, subtly influencing the subject and adding drama.
Hyper-Real
A hyper-real setup is where we take things to another level. We amp up the light using multiple strobes and usually remove light-softening modifiers. We can throw our worries to the wind when it comes to the care of light direction in reference to the backdrop. Okay, don’t get too carried away. We’ll rely on other aspects of compositing to maintain a sense of realism, such as color casts, textures, selective sharpening, and contrast, to name a few. Overall, the image just needs to make sense so the viewer can place the subject in its environment.
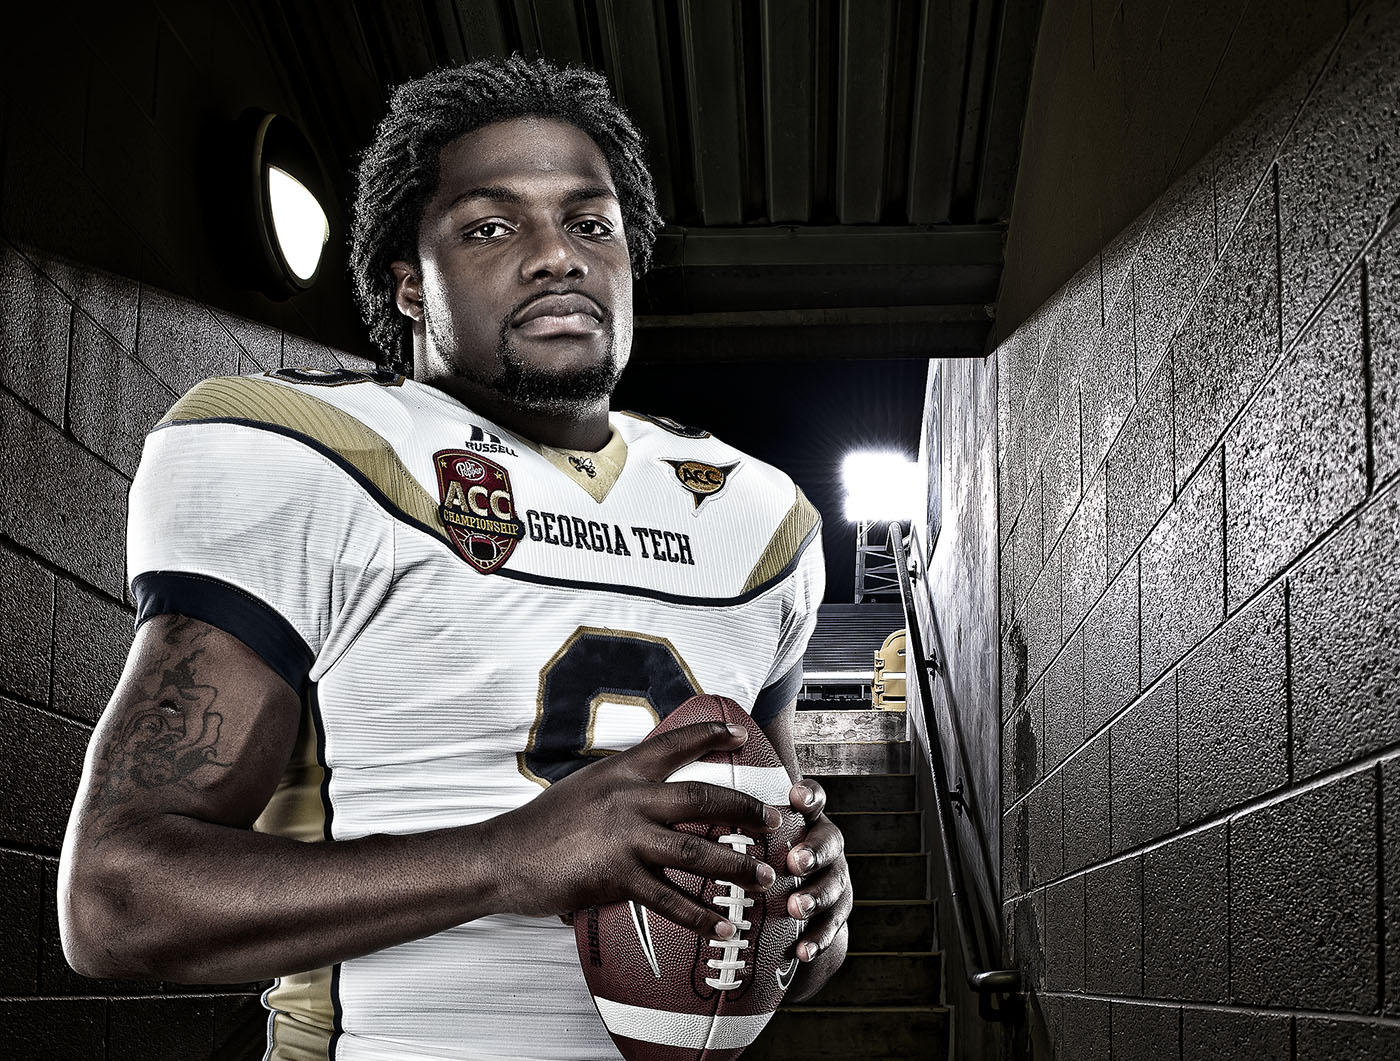
Let’s take a look at a sports portrait I did for Georgia Tech’s football yearbook. Due to time constraints, we were going to photograph the player in the players’ lounge and then walk to the stadium to capture a suitable backdrop. So this was already working in reverse of what I normally prefer; however, since there’s no interaction between the subject and the background, it didn’t really matter. As this is a football portrait, there’s no need for softness like the previous example, and our lighting would reflect that aspect.
Overall, this was a six-light setup: two 4′ strip boxes, two strobes with reflectors, a beauty dish, and a 5′ octabox. To create the hard rim light, I used a combination of the two strip boxes and reflectors set at close to 45° angles to either side of the player. The beauty dish was set to the front above his head and used to light his face, and the octabox was used as a fill to bring out detail in the player’s jersey. To prevent lens flare from the reflectors, I used flags camera right and camera left. Since I shot this image, I’ve enhanced this particular lighting setup by adding an additional light in a gridded, 3′ strip box that’s boomed above from behind. This light will add just a little more detail to the top of the head and shoulders.
When creating this type of light, the main thing you have to watch for is the intensity of light on the edges of your subject.

When creating this type of light, the main thing you have to watch for is the intensity of light on the edges of your subject. There’s a balance to be struck from all of the sources and it takes some time to dial in correctly after setting everything in place. The easiest way is to have an assistant or friend stand in before the model arrives on set. Here, I was mindful of trying to keep some detail in the highlights and not completely blow them out. Remember, if you blow out the highlights in camera, you can’t recover the details in post, but you can always use Photoshop to increase the exposure to meet your needs. Knowing this, I typically set my aperture (here f/14) to make sure everything will be in focus and start with those edges. Once I have those lights where I like them, I’ll turn on the others and work back from there. When using so many lights, it’s much easier to build them up piece by piece than to just turn everything on and wing it.
xs
Editor’s Note: More of James’ work can be seen over on his blog, quantzphoto.com – we highly recommend you check it out. We have a great free tutorial over on PlanetPhotoshop about compositing. If you want even more in-depth training on compositing, we have a number of classes on KelbyOne. A good one to start with would be this course by Pete Collins.
