
Using the Dreamweaver 3D Wall Extension
Create an online slide show with the 3D Wall Extension and your visitors can zoom, pan, and drag your images around your Web pages with Interactive ease.
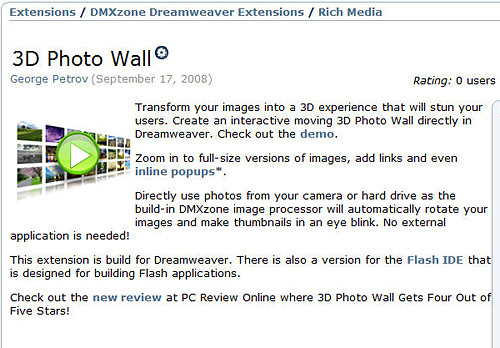
If you’re looking for a more distinctive look for your photo galleries, you may be pleased to discover the 3D Photo Wall from the DMXZone.com. Priced over $100 this is one of the most expensive extensions featured on the Adobe Exchange site, but it does have a high coolness factor.
Using this program, you can automatically generate a wall of photos to add interactivity and flair to your galleries. In this Web tutorial, you find detailed instructions for how to use this advanced extension.
STEP 1 Download and Install the Extension
You can find many great Dreamweaver extensions on the Adobe Web site at www.Adobe.com/exchange. Many of the popular options were created by DMXZone. Follow the link to the site from Adobe, or go directly to DMXZone.com and download and install the 3D Wall extension.
You’ll find more detailed instructions for downloading and installing extensions in my Web tutorial, “Enhancing Dreamweaver with New Extensions,” on the LayersMagazine.com site (http://www.layersmagazine.com/dreamweaver-new-extensions.html). The installation steps are the same in versions 8, CS3, and CS4 of Dreamweaver, but the Extensions Manager has a new look in CS4.
Janine Warner
STEP 2 Insert a New 3D Wall
Create a new page or open an existing one and make sure you’ve defined the site in Dreamweaver (see Web tutorial, “Defining a Site in Dreamweaver,” if you need more help with this step (http://www.layersmagazine.com/defining-site-dreamweaver.html).
Place your cursor where you want the 3D wall to appear in your Web page and choose Insert > DMXzone and then select the extension. Although the extension is called 3D Wall, the item is listed as Fish Eye Menu in the version shown in this screenshot. When you select Fish Eye Menu, the 3D Photo Wall dialog opens.

STEP 3 Name the Slideshow and Select Images
In the 3D Photo Wall dialog, first enter a name in the Object Name field. Then click the small folder icon just above the Title bar in the main area of the dialog (as shown in the screenshot) to select a folder of images.

STEP 4 Select a Folder of Images
Click the browse button and then click to select the folder that contains the images you want to appear in the photo wall. (Tip: gather only the images you want in the photo wall into its own folder, but don’t worry about sizing the images, as you’ll see in the next step the extension will take care of that for you.)

STEP 5 Specify Image Sizes
In the Image Resize Options section, click to select a folder where you want the extension to save the images generated as the wall is created.
Resize to fit: enter the height and width you want to use for the largest version of the images in the photo wall. In the Thumbnails section, you guessed it, enter the size you want for the thumbnail versions. The extension will create optimized copies of the images in the sized you specify automatically. You can also use the drop-down to choose an image format. Check the crop box to crop images automatically to fit the specified size. Click the sharpen check box to automatically sharpen the images after they are resized. When you have the settings the way you want, click OK to import the images and close the dialog.

STEP 6 Add Titles
You can add titles to any or all of your images by first clicking to the select the file name and then entering a title in the Title field at the bottom of the dialog. Repeat this step for each image you want to have a title. The titles appear to the right of the file names in the dialog.

STEP 7 Use Advanced Settings
Click the Advanced Tab to open the advanced settings dialog. Here you can change many display options, including the distance between images in the photo wall, interface and text colors, and the strength of the reflection. Here’s a tip: leave all of these options at their defaults when you create your first 3D Wall. After you finish and preview it to see how it looks, you can return to this dialog to make changes and refinements.

STEP 8 Create Slideshow
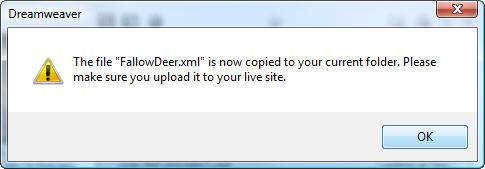
When you finish with all the settings, click OK and the 3D Wall is automatically generated. Note the warning messages that appear as you create the wall are reminders that you need to upload all of the related files to your Web server when you publish the page with the photo wall for it to work properly. When the process is complete, you should see a gray box in the Dreamweaver workspace representing the photo Wall.
STEP 9 Preview the 3D Photo Wall
To preview the photo wall in Dreamweaver, first click to select the gray box in the workspace and then click on the Preview button in the Property inspector at the bottom of the page. You can also view the photo wall when you preview the page in any Web browser. To do so, click the Preview button at the top of the workspace or choose File>Preview in Browser and then select any browser you have associated with Dreamweaver. (Note: you must have the Flash plug-in installed to view this Flash file.)

STEP 10 Interact with the 3D Photo Wall
One of the cool things about the 3D Photo Wall is that you can interact with it in many ways. When you preview the photo wall, you can click and drag to move around the wall, or select any individual image to view it in a larger size.

STEP 11 Edit the 3D Photo Wall
To make changes to the photo wall after it is inserted into Dreamweaver, click to select the photo wall in the Dreamweaver workspace and then use the Property inspector at the bottom of the screen to make changes. To change the advanced settings, click on the Advanced button.

