
Studio Techniques: Working with White Backgrounds
Everyone has worked with white backgrounds at one time or another. A few years ago, they were so popular, you couldn’t open a magazine without seeing images against white backgrounds and, in fact, some photographers even made an entire career with this look.
Before we go on, let’s make one thing clear: Some people call the white background a high-key look but, although you can use this background for great high-key photography, I always say that a white background is just that, a white background. The model or subject light determines if it’s a high-key shot. If everything is lit 100% correctly, we just need to talk about a white background and not a high-key shot.
So how much is there to say about white backgrounds? Well, it can present several problems, such as: How do you light it perfectly, and how do you bring back the shadows? And we’ve all seen images where it went wrong; for example, details in the hairs of the models are gone, or there’s so much reflection from the background that all contrast is gone, or greatly diminished.
Okay, let’s get to work.
Measuring the Background
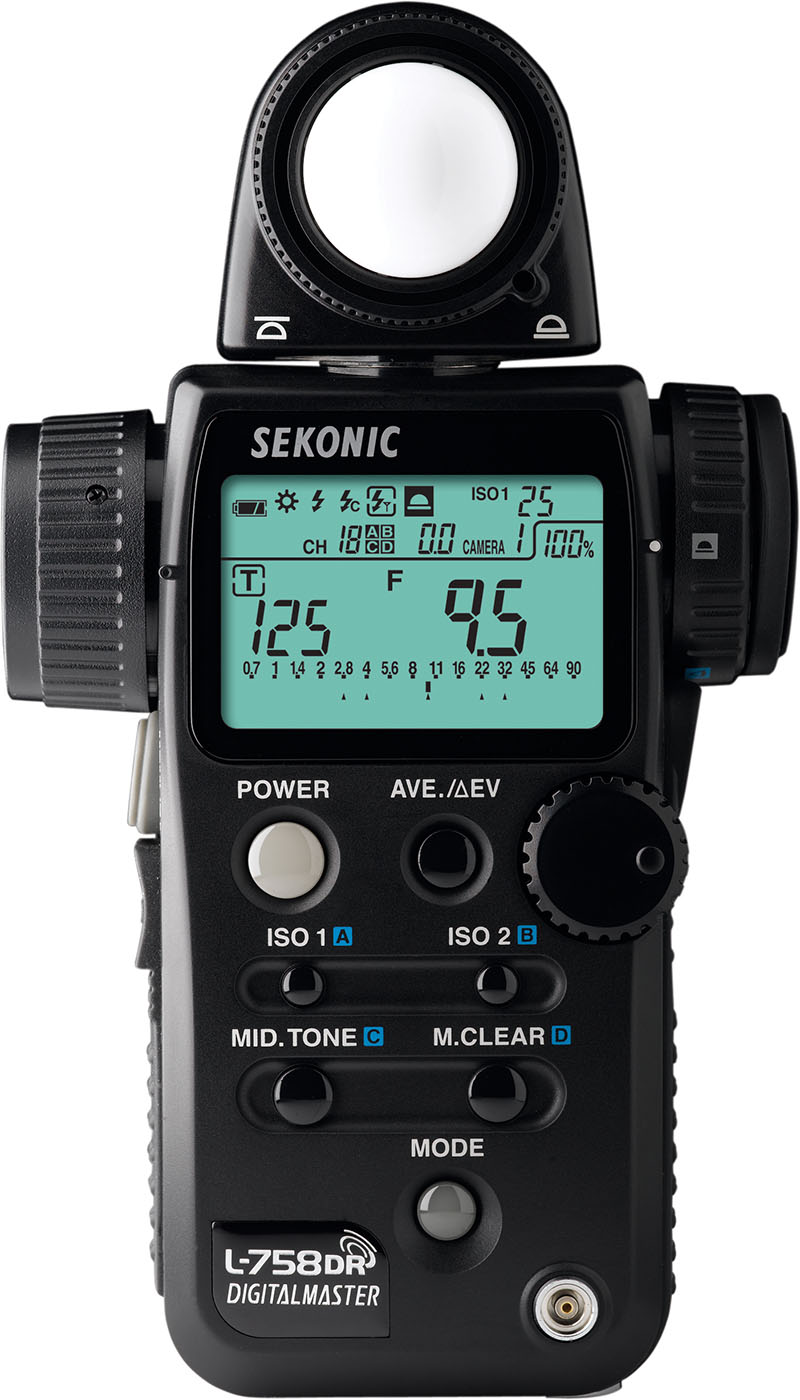
As many of you may know, I’m a big advocate of using a light meter. If you want to maximize your options when using a meter, one very important question you must ask yourself is, “Which light meter should I buy?”In short, there are two kinds of meters today: Incident-only meters and incident/reflective meters. Incident-only meters are great for measuring the light hitting your model or subject. To measure (the right way, of course), aim under the model’s chin toward the light source. Then enter this value in the camera and you’ll have a proper exposure. If you buy an incident/reflective meter (one that can also measure reflective light)—and I really advise you to do so—make sure you get a meter with a spot option (or attachment). These meters are more expensive, but remember that a good meter will be with you for many years.
Making a White Background
We bought a nice white seamless background and our model is ready. To make sure that the background is uniformly lit, I usually use two strobes, placed as far away as possible, aimed at the background so that the background is hit with the widest possible beam of light from two sides. I often place the strobes slightly behind my model to maximize the distance. I love to use wide reflectors, which are cheap and work flawlessly to light the whole background even from a shorter distance.
For this example, let’s assume we’re using one strobe on the model that measures f/8 on incident. Now, let’s look at how to make the background pure white.
THE WRONG WAY: Here’s how some people do it: They’ll fire a lot of light on the background, check the back of the camera to see if the background blinks (blown-out highlights), and if it does, it must be right. Right?
Well…no (sorry). First of all, the back of the camera doesn’t show you the correct exposure because it’s based on a thumbnail using the camera settings and not the RAW file. So, when you light very close to perfect, it could very well be that in the RAW file your image isn’t white enough; there could be too much contrast in your camera settings that’s blowing out the whites in the preview.
Most of the time, that’s not the biggest problem: You may be able see that the white is blown out, but not by how much. When you put too much light on the background, the background will act like a new light source and reflect light back on your model and studio, washing out shadows, but more problematically, destroying detail in hair, clothing, skin, etc. That’s a situation we really don’t want.
THE RIGHT WAY: So the best way—and you probably expected this—is to measure the background. And we can do this with two different methods, incident or spot metering (both work with white backgrounds).
Incident
If you know your background is white, use an incident meter. Hold it close to the background aimed toward the light sources and measure the light hitting the background. Also, make one “mix” measurement, aimed toward the back of the model from the center of the background. Because you’re measuring incident and using a white background, in theory, the meter should read f/8 to render the background white. This might come as a surprise to some of you (see next step), but it really is the right way to measure this. Tip: To make sure I don’t have problems with wrinkles etc., I always add 1/3 stop of light to blow out the background 100%.
Spot Metering
Without a doubt, spot metering is a much better way to measure the background. When you use reflective, you don’t measure right next to the background; you measure with the light meter next to the lens of the camera aimed at the background—the smaller the spot, the better.
With reflective metering, you get an 18% gray value, which means that if you shoot the camera on the settings provided by the light meter, the background will be rendered 18% (middle) gray. To make sure it’s white, you have to add 2.5 stops of light to the background. In short, every stop of light is approximately double the amount of light, so if you want to go white, you have to go from 18% to 36% to 72% to 100%—approximately 2.5 stops. I also add 1/3 stop of extra light to make sure that my background is uniformly white.
Note: With the incident technique (mentioned earlier), if you use a non-white background, such as light gray, you won’t be able to measure it 100% correctly, because that method only gives you the value for a correct exposure of that background (which isn’t white).
How About the Floor?
One of the most-asked questions is about the floor. The background is usually fairly easy but the floor can cause a lot of problems; for example, the model is standing on it so when you blast it with light, no doubt it will infect the model or her feet, making them too light. When you shoot with huge light sources, it’s not really a problem because, when aimed correctly, the light will take the floor to white easily. But with more concentrated light sources (with which I love to work), there are a few options to make sure this works.
One thing you can do is use a small white podium (coated wood that you can buy from the DIY store) for the model to stand on. I position the podium a bit away from the white seamless background material (seamless paper), and let the material fall to the floor and back up to the top of the podium. Behind the podium, the material is out of sight, so there’s no light falloff from that point on. Now you only have to take care of the podium. Coated wood often reflects a bit more than paper, but adding a gloss to it can greatly enhance this effect.
What is more commonly used (and better in my opinion) is Plexiglas. In my studio, I place two sheets of thin, clear Plexiglas on the seamless paper and my model stands on that. The great thing about this method is that it reflects a lot of light back up, making the floor pure white and adding very nice, cool, shadow effects on your subject.
High Contrast Against White
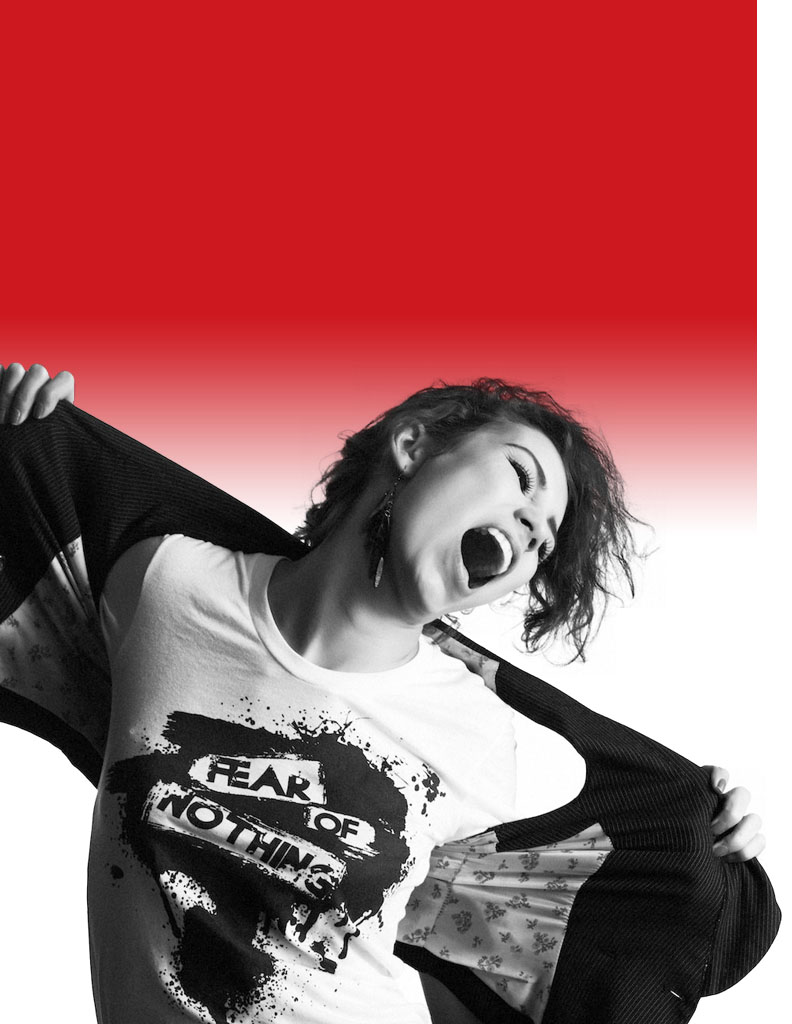
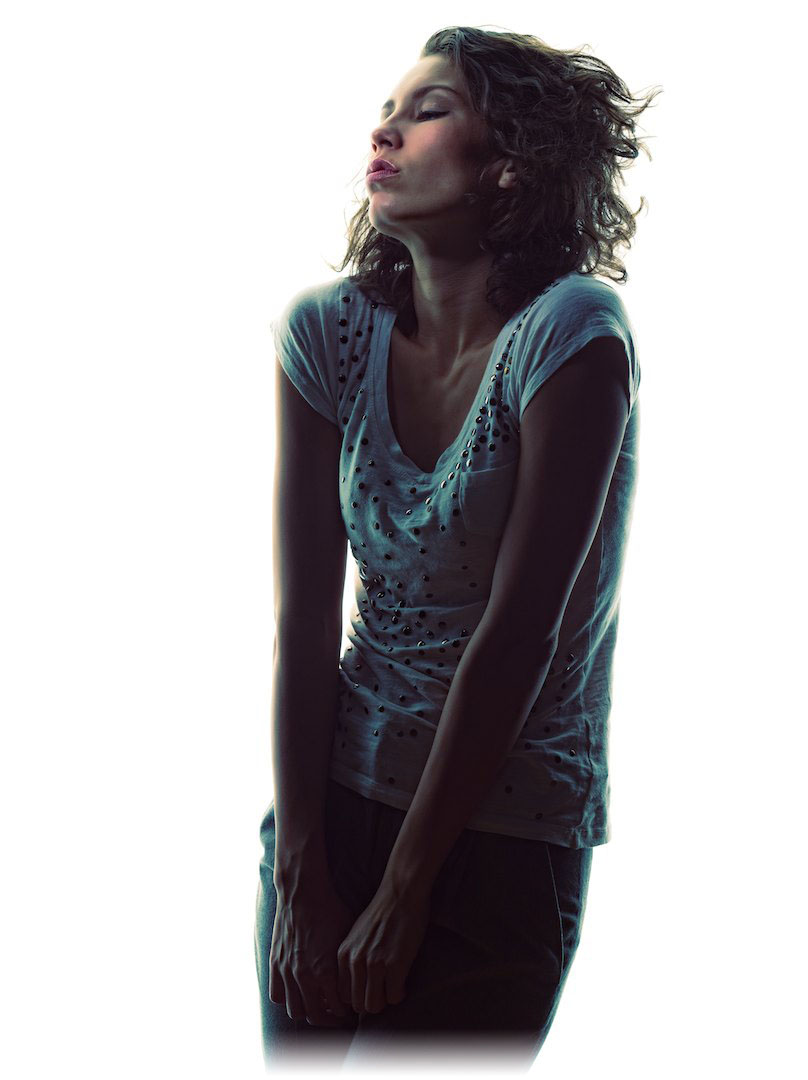
Working with white backgrounds often renders an effect that customers love. Personally, I think it’s fun to play around with it, to create shots that have a high-contrast look; for example, in this image of Stephanie.
For this shot, I used the standard method to light the background but I added two black flags next to the model to make sure that there was no lightspill hitting her from the sides. As main light, I used a spot aimed at Stephanie’s face. Because of the light falloff, the rest of the body would be too dark, so I used an Elinchrom Rotalux Softbox Deep Octa to lighten up the shadows. This created a very high-contrast effect with deep shadows against a pure white background (a very nice look, I think).
The Wraparound Effect
But Frank, you say, “I don’t have a meter. I don’t have a lot of strobes. But I love to use a white background. What do I do?”
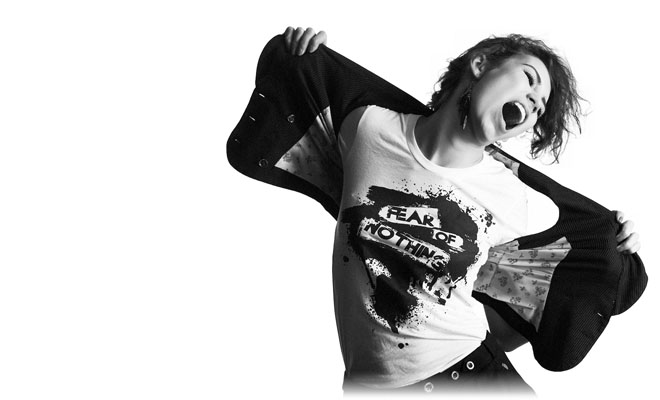
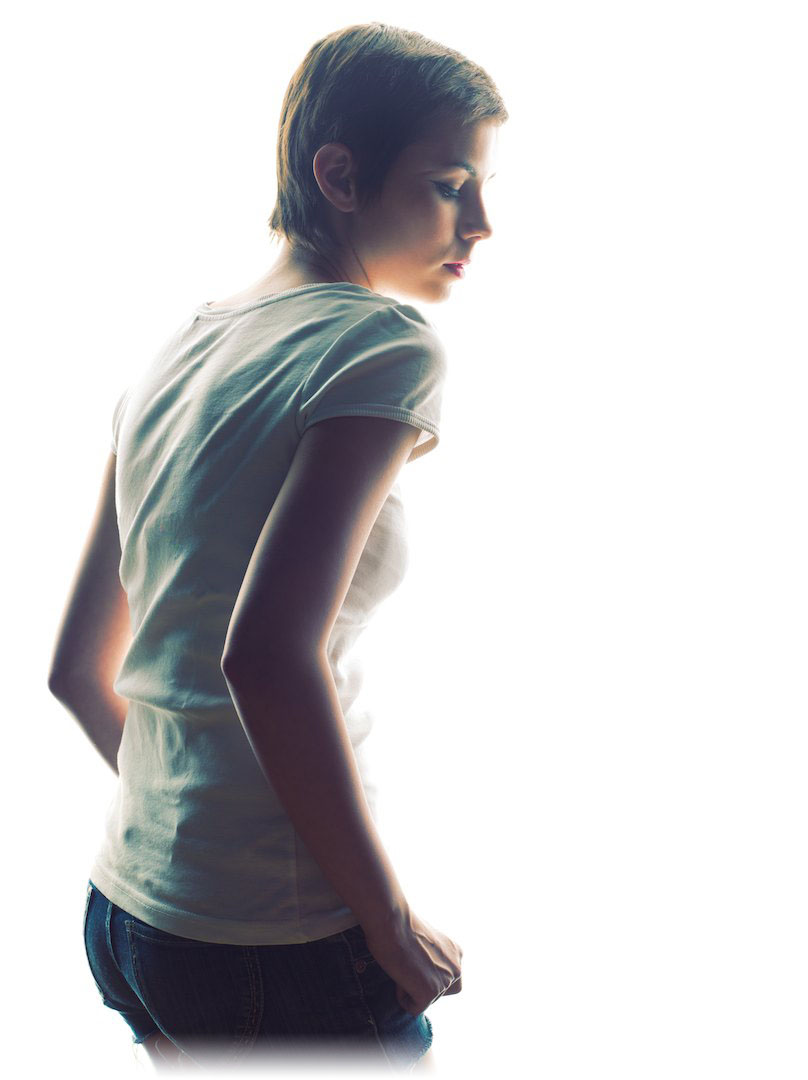
Well, don’t worry. There are alternatives and, to be honest, they can be just as awesome. Whatever your budget, you too could make an image like this without much difficulty.
Here, I used one light source, the Elinchrom Lightbank Octa 74″ (a huge softbox), but you could also use a large bedsheet and fire a strobe from a distance at it. The trick with this kind of shot is to place the model very close to the white background (here the model is actually pressing the material with her body and face). This technique gives you an instant accentlight, suggesting that more lights were used. Because you’re shooting so close to the light source, the light falloff is very quick so you have to experiment with the model’s position and your position, as well. Shooting straight on won’t give you the best results; however, if you shoot at a slight angle, this setup rocks.
An added benefit from this setup is the wraparound effect, which gives it a really nice natural look—great for glamour and portrait shots.
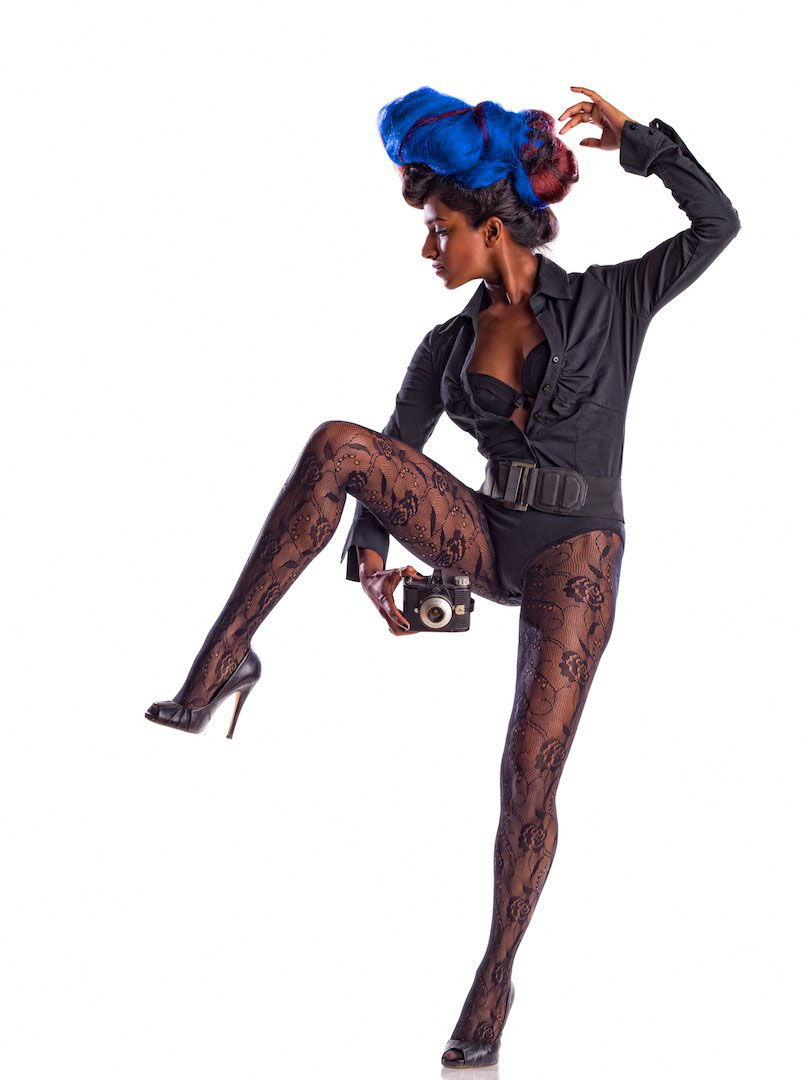
Quick (Last) Tip
When shooting against white backgrounds, makesure you place your model some distance from the background and use a long lens. Using a longer lens limits your field of view, making it easier to light the background evenly. If you use a wider lens, you’ll see more of the background and it will be harder to make sure it’s all pure white.
