
On Location: Dramatic Half Pipe Skateboard Photography
I grew up skateboarding, spending lazy summer days riding a creaky plywood ramp in my driveway—run after run, day after day, year after year. But eventually, my dream of being a professional skateboarder faded. The same cannot be said about Shea Donovan, a rising star in the skateboard world. Shea has a massive half pipe built in his backyard, and trains daily, working on new tricks. I went to southern Colorado to photograph Shea, and my mission was simple: create dramatic half pipe skateboard shots that he might use later for promotion. I knew adding strobes would look great, but I also had another idea for adding some star power. Read on!
Step One
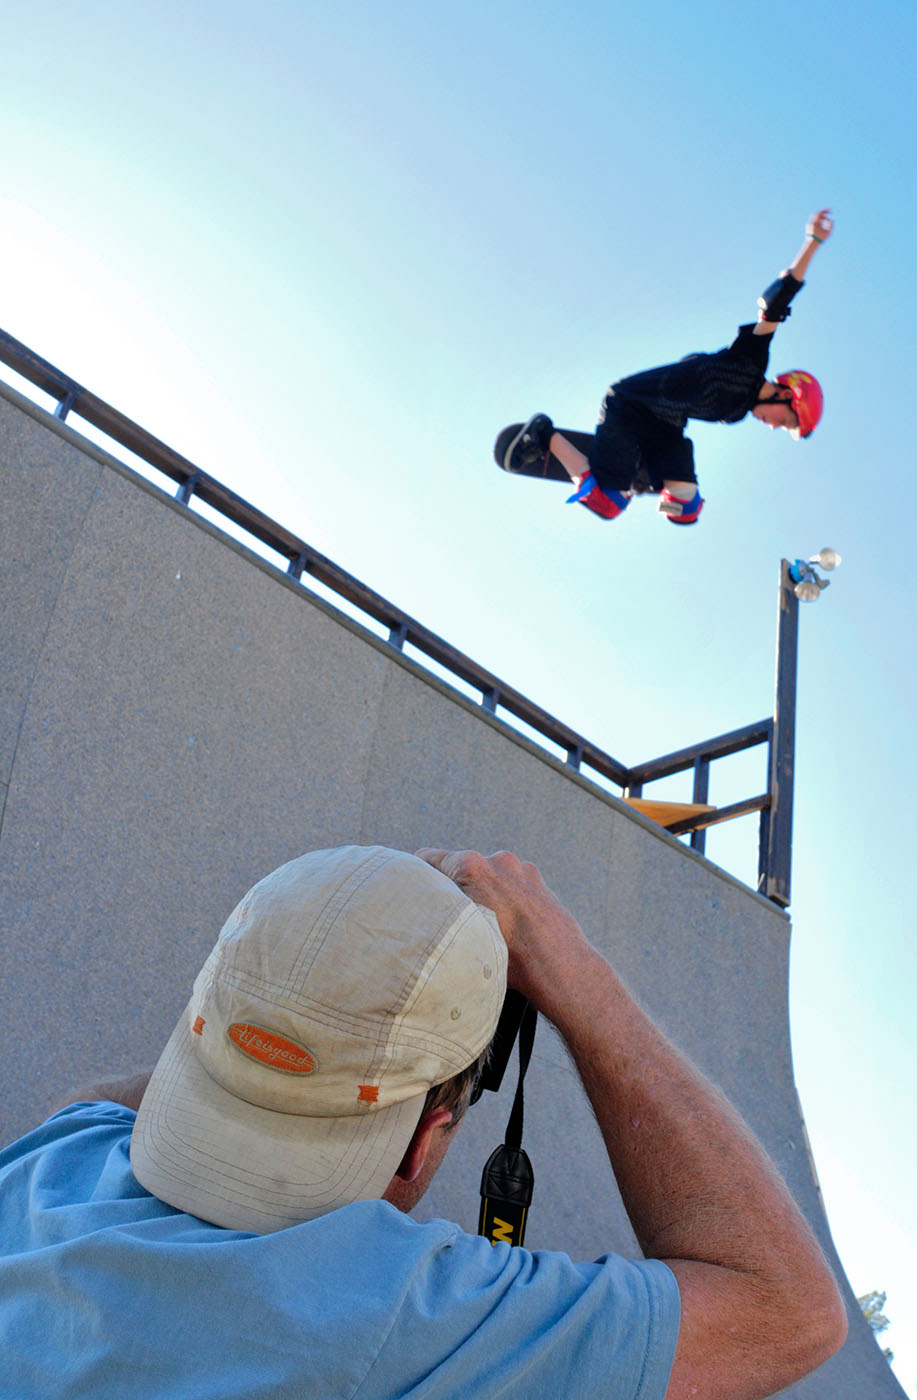
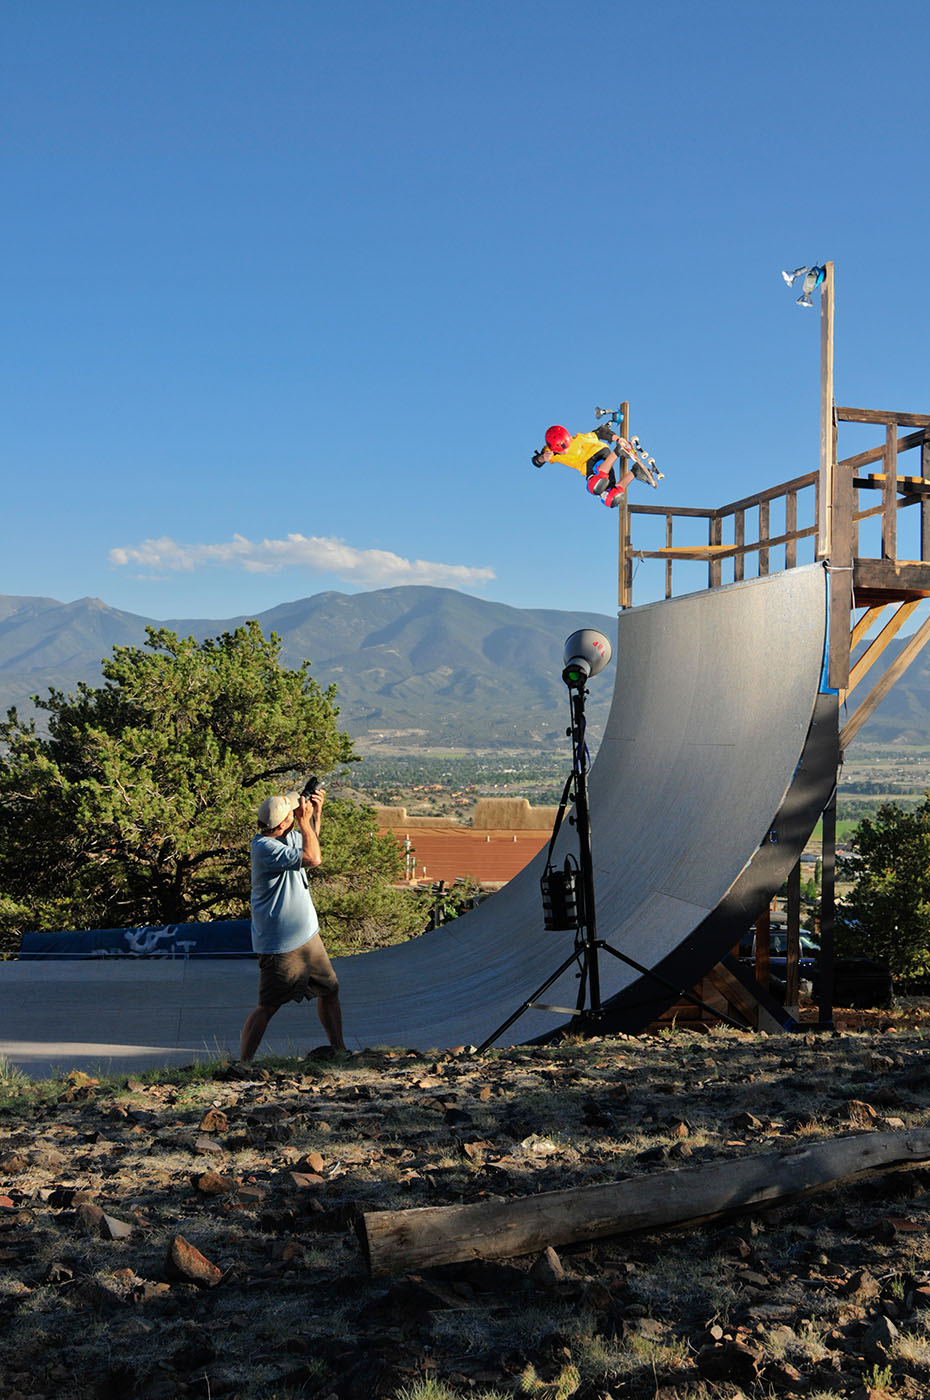
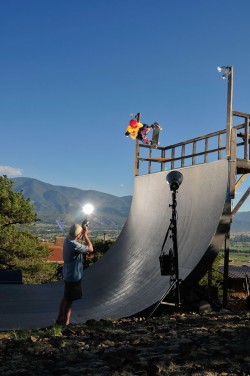
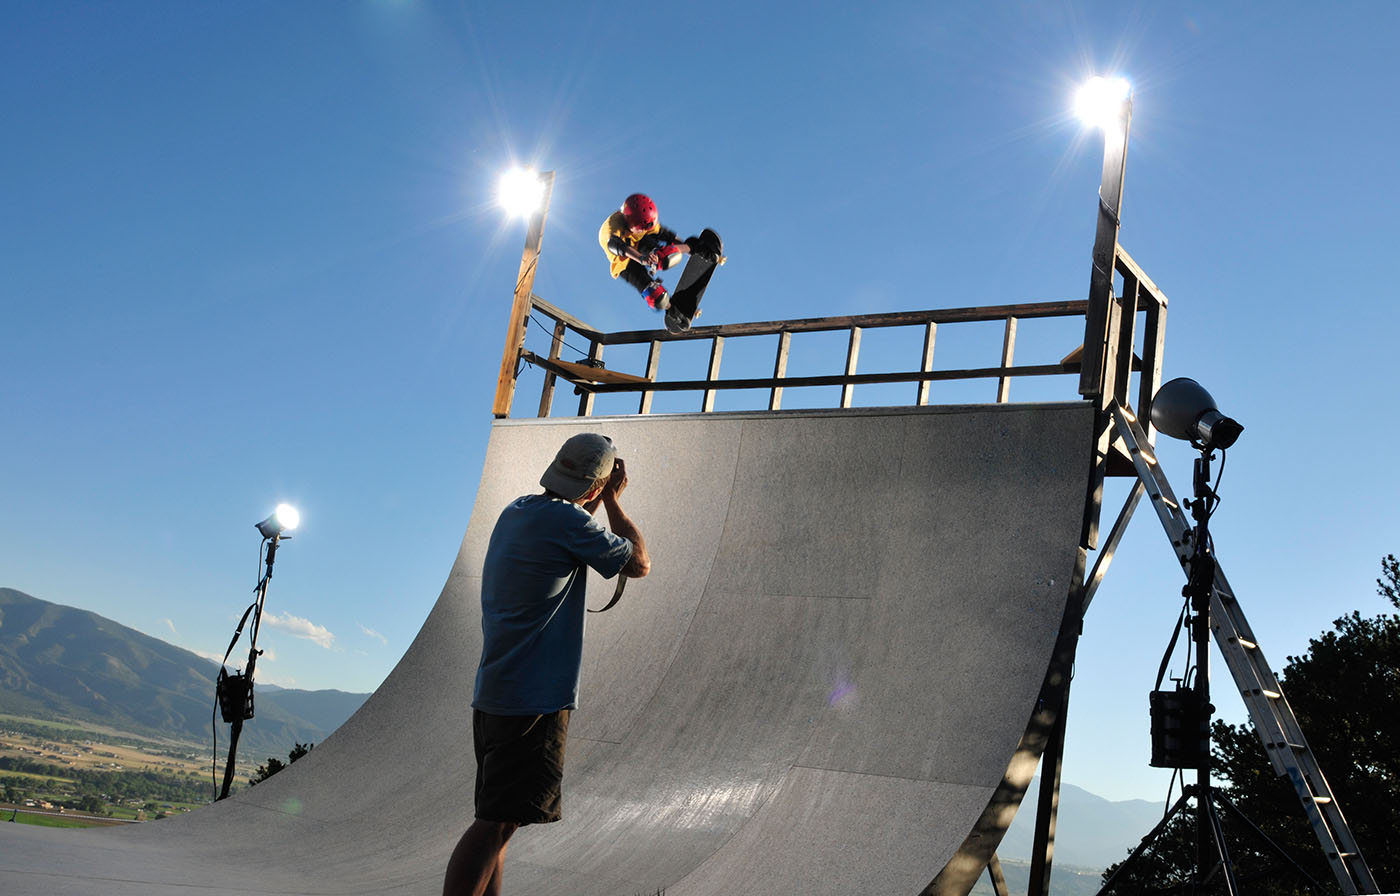
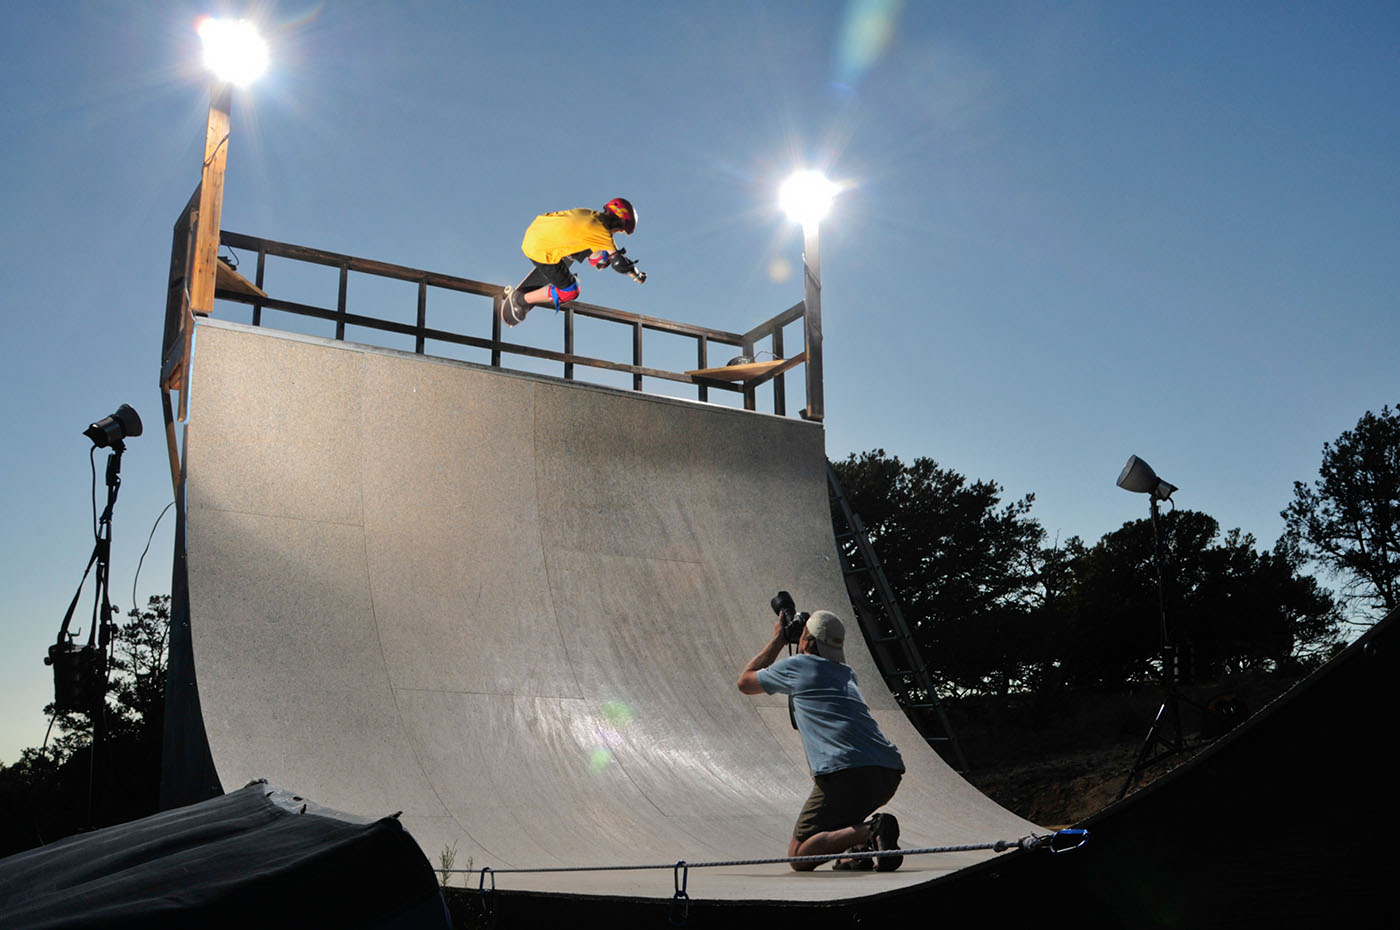
The first step on this shoot was establishing safe shooting zones. I wanted to be on the ramp and close to where Shea was catching air, but not where he was going to land. I debated shooting from the rim, but for the final shot I had in mind, I needed to be below Shea when he caught air.
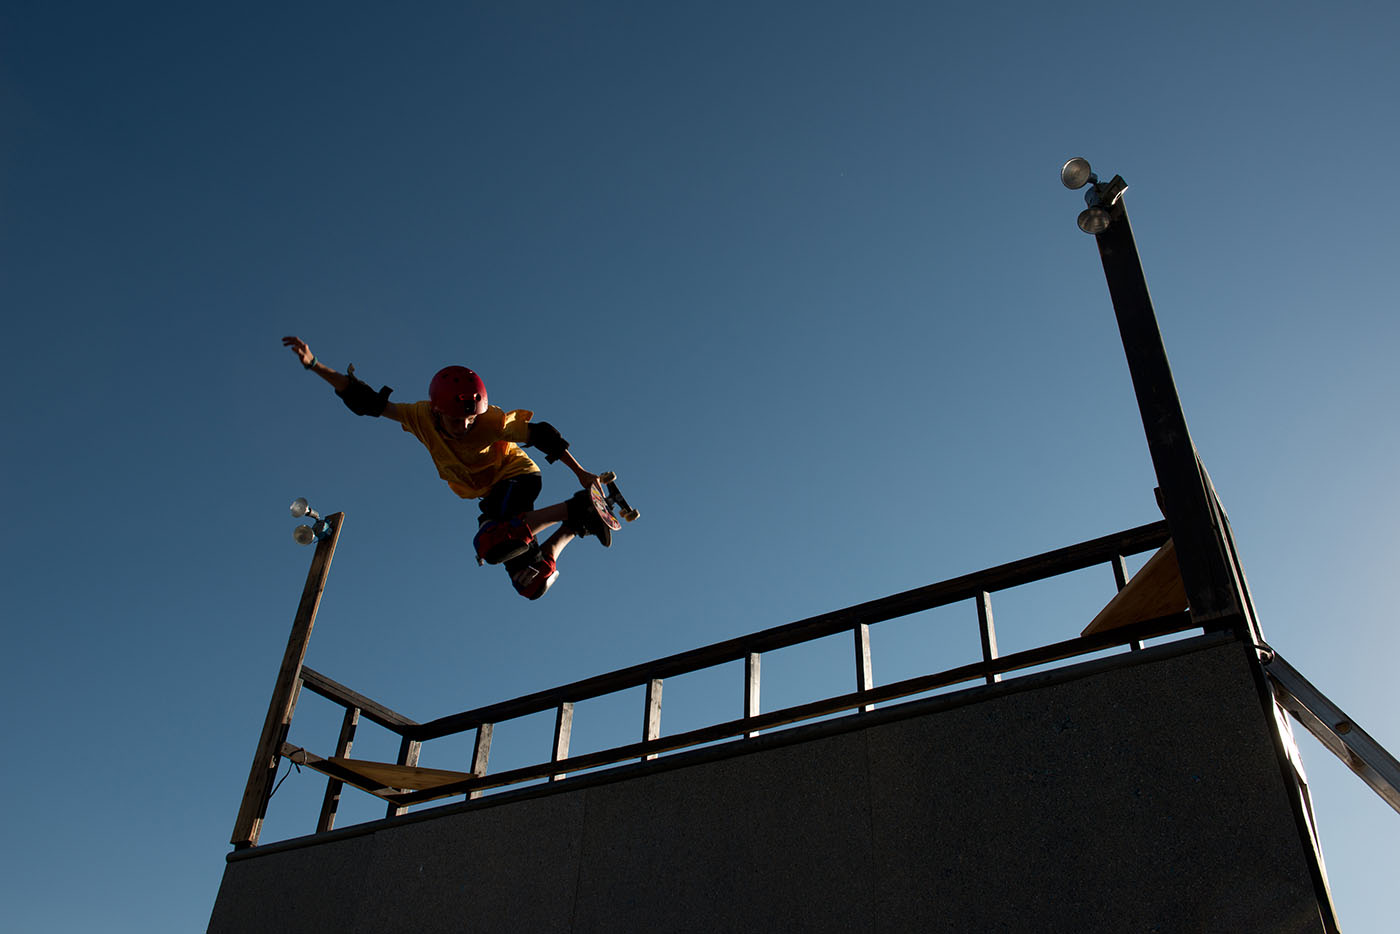
I took a couple of available light shots, and I have to say that I liked the silhouette image. But Shea needed a dramatic, edgy shot for promotional uses, so out came my Elinchrom Rangers. The 1,100 W Rangers would have plenty of power to allow me to shoot at small apertures and darken the ambient exposure. Underexposing the background two stops would make my strobes the main light illuminating Shea. I used Elinchrom Free Lite A Heads on the Rangers because these heads have a very fast flash duration and will freeze the action midair.

Step Two
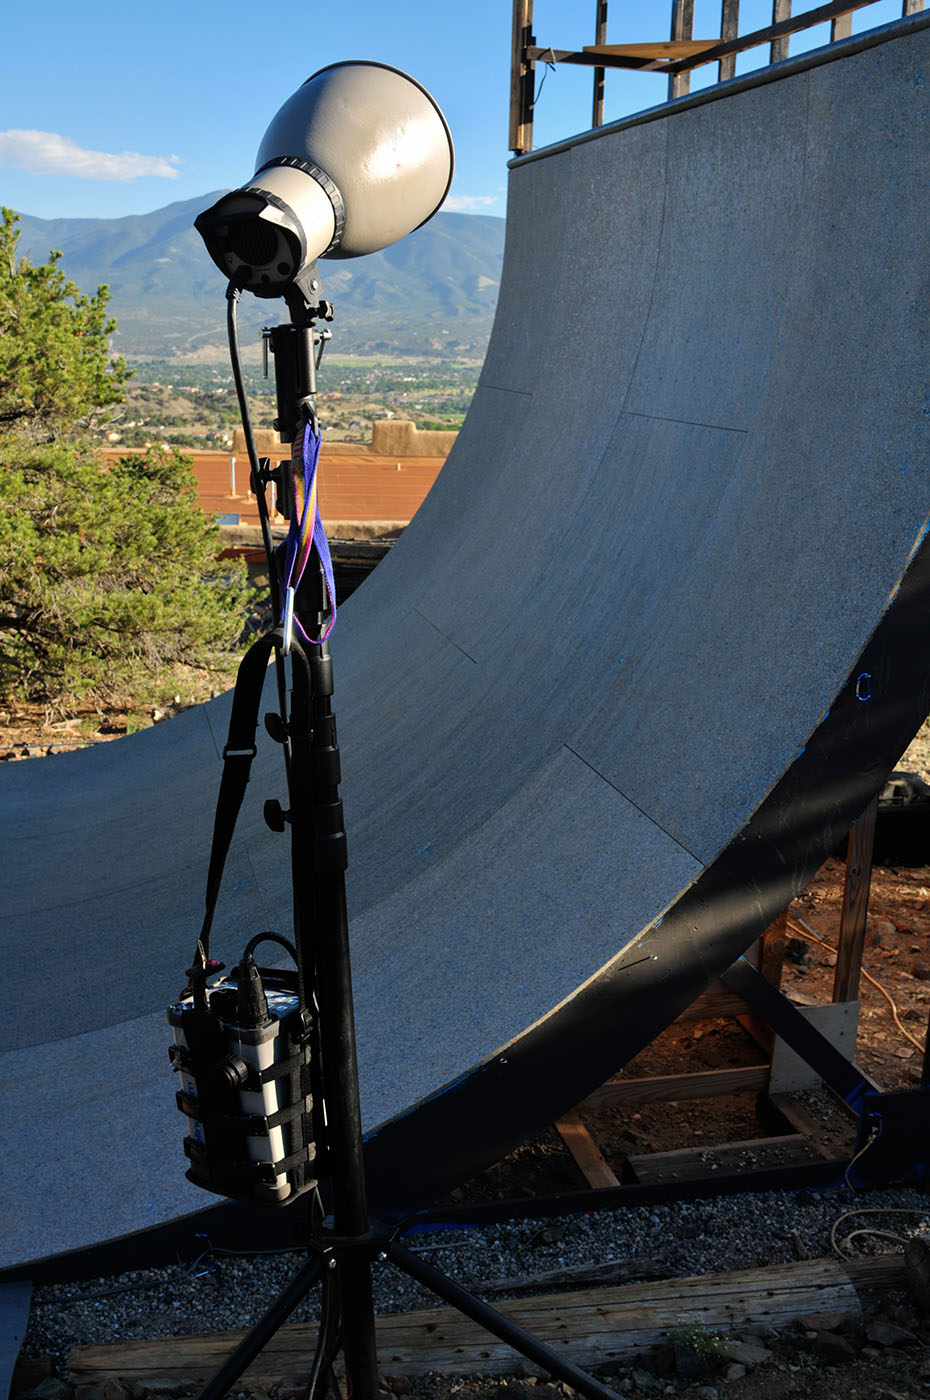
After a few trial runs to make sure I wasn’t in Shea’s path, I added my first Ranger and head to the image. Since Shea was doing tricks turning toward the right, I set up a Ranger with an A Head and sports reflector on the right side. This head was aimed where Shea would be in midair, turning back into the pipe. The sports reflector focused my light for more reach, and added an edgy look to the shot. I clipped the pack to an 11′ Manfrotto light stand, which stabilized the light. (I always bring sandbags on a shoot, but I often use my power pack as a sandbag to be more efficient.) To control and adjust the flash output, I used an Elinchrom Skyport Transmitter on my camera. Skyports allow me to control my lights without ever moving, which is really helpful when you’re in precarious shooting positions.
Step Three
Adding one light made the scene transform from silhouette to lit skater, but we needed more lights to increase the edgy look and add more drama to the shot. The obvious choice was to add another Ranger and A Head to the left of the ramp, creating cross- lighting on Shea. I used a standard reflector on the second light to spread light across more of the scene. This light clipped the top part of the ramp, which filled in some shadows for a better shot.
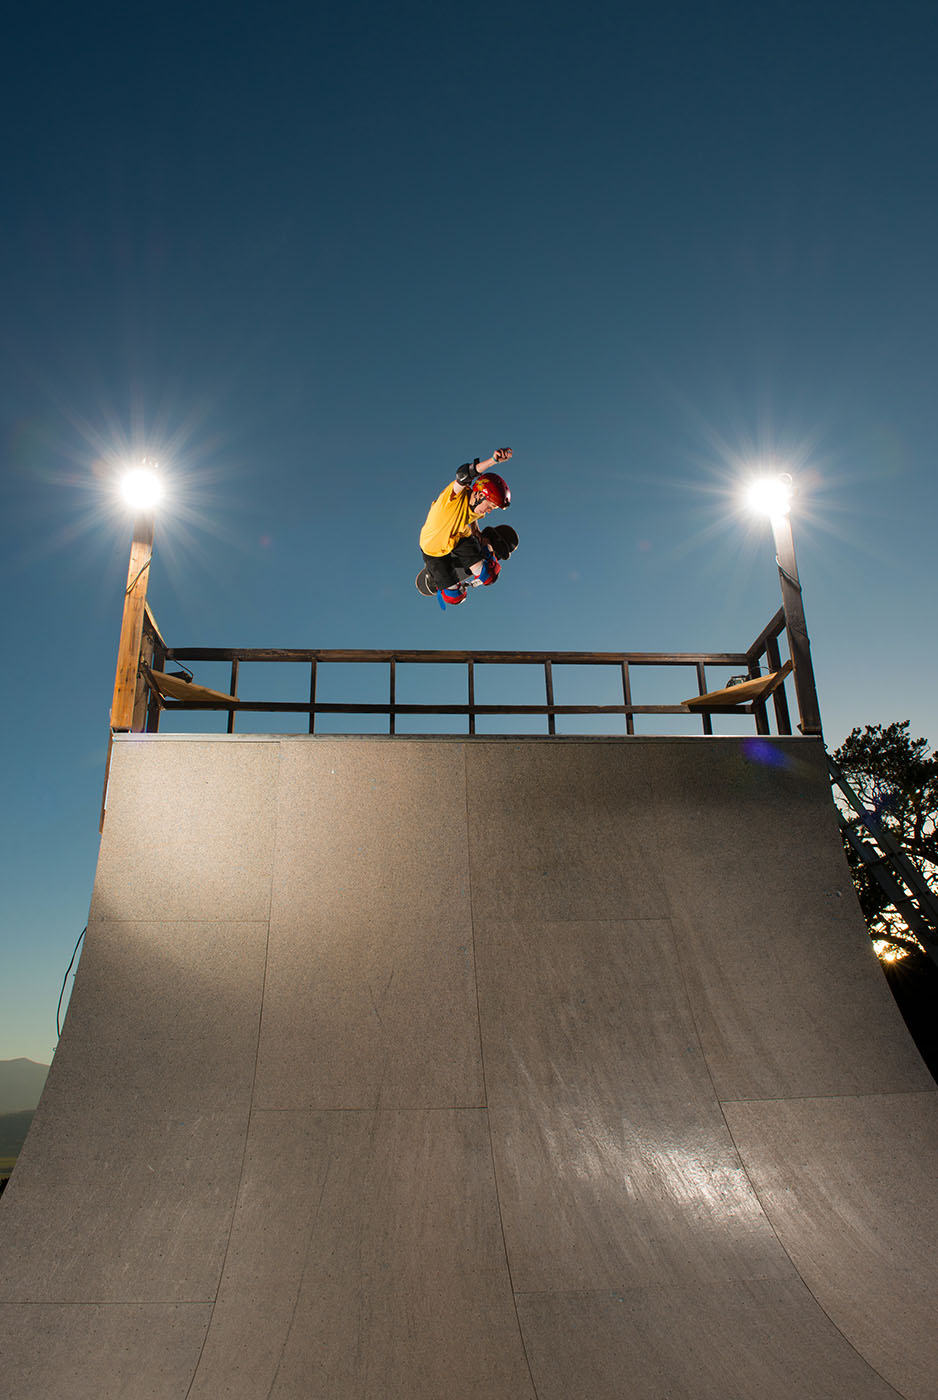
I was shooting in Manual mode, consistently underexposing the daylight two stops. The underexposed sky looked deep blue: a perfect backdrop for capturing Shea midair. At this point, things were looking fine for taking a good shot. But before I could add my final star element, the shoot took a slight detour.
Step Four
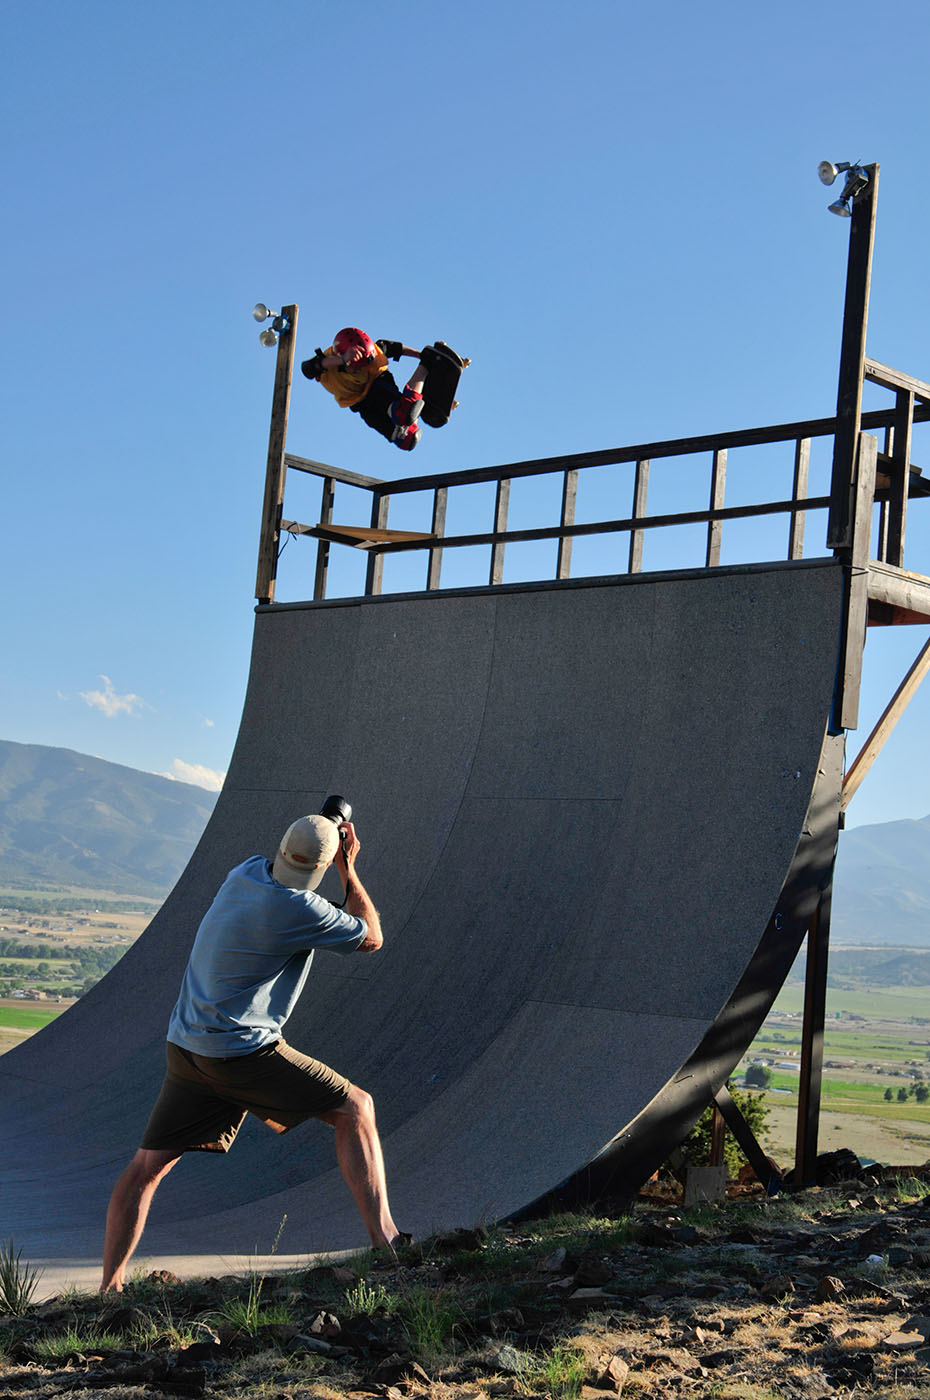
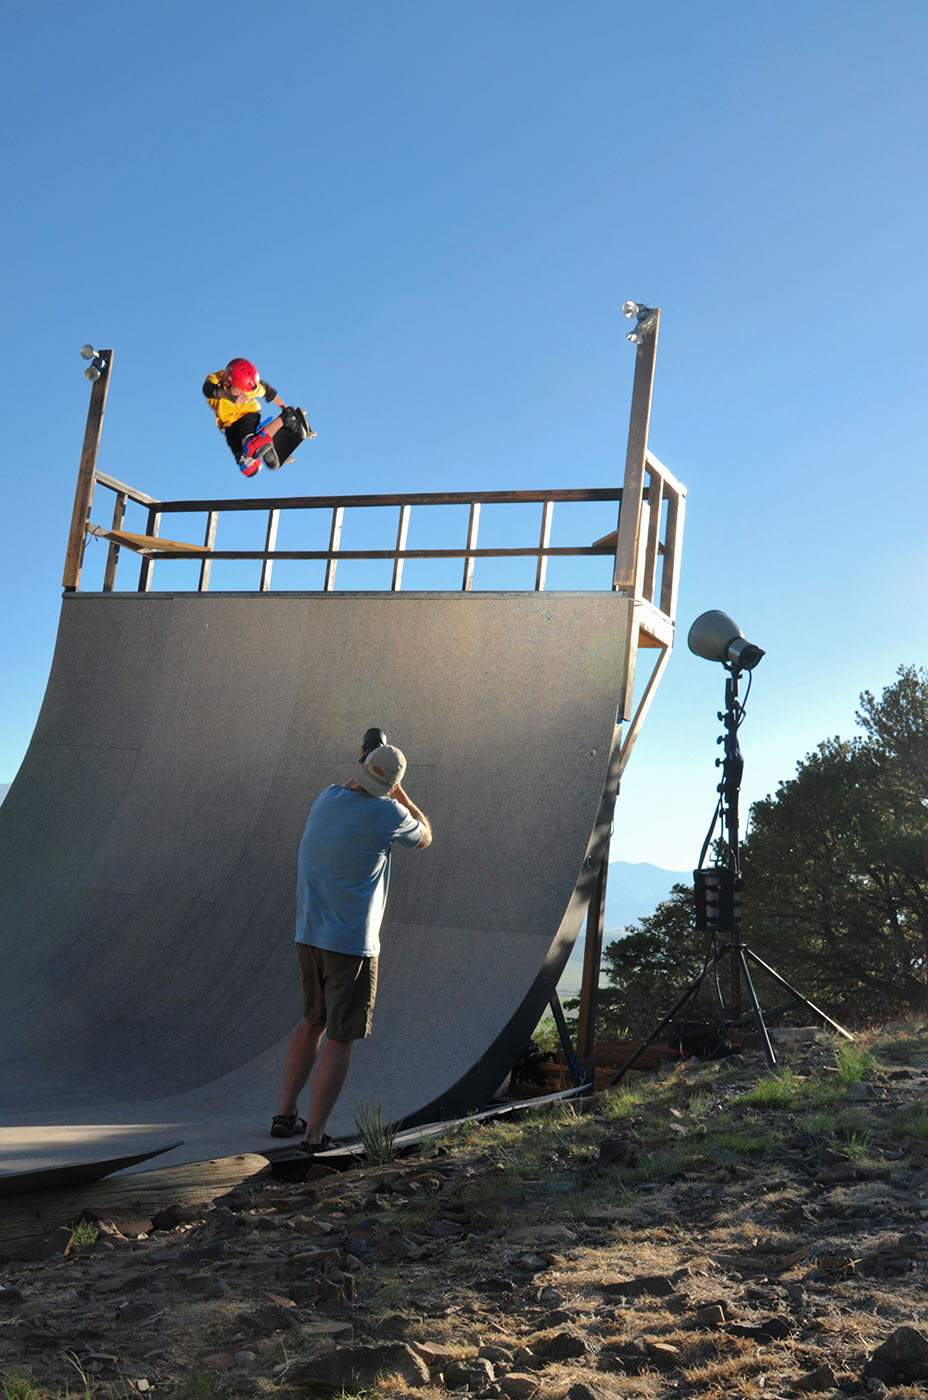
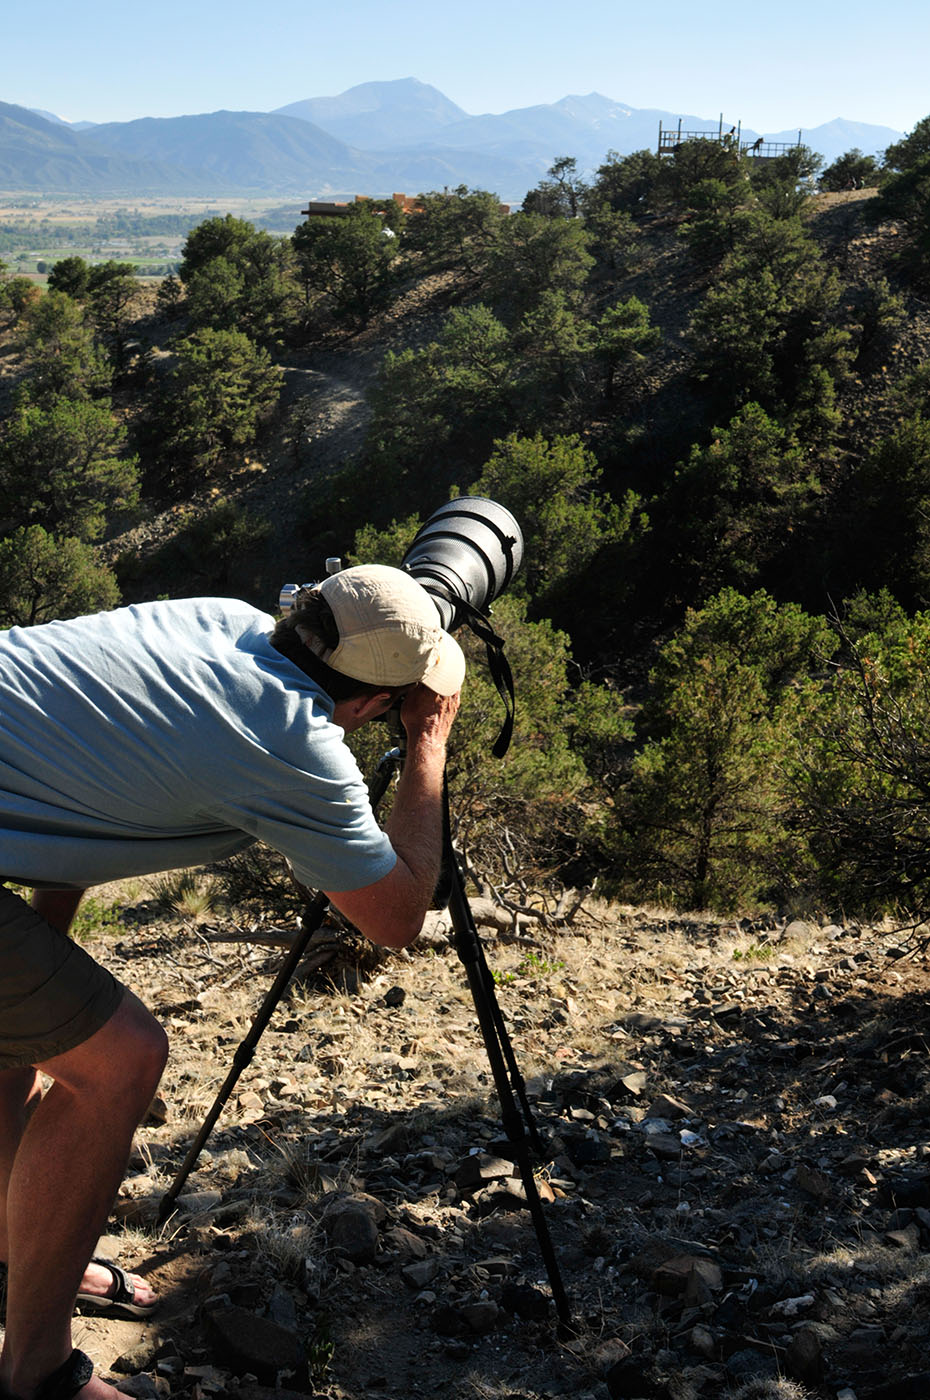
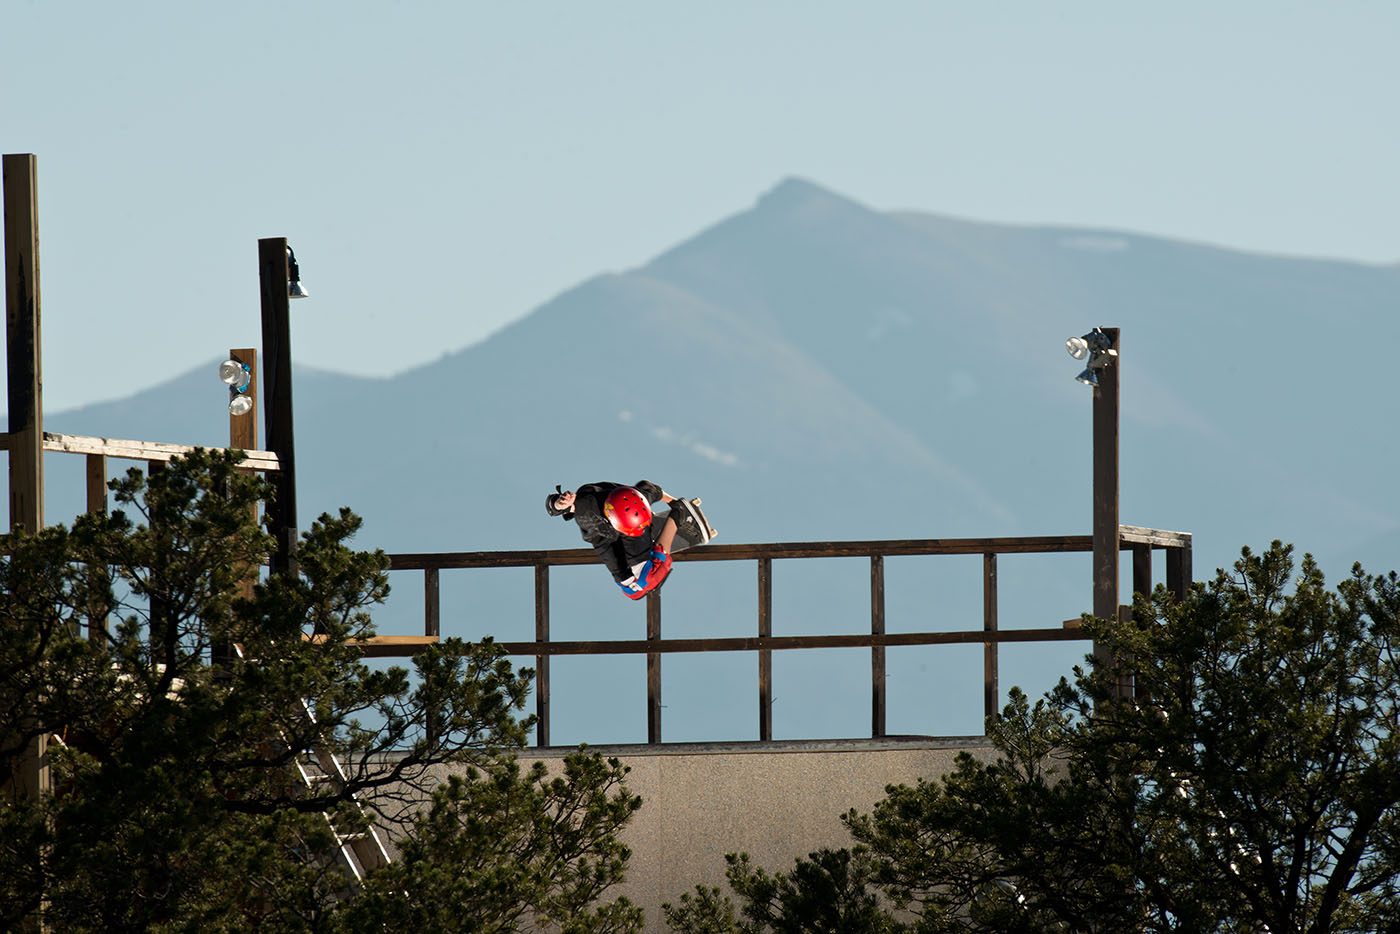
Shea’s half pipe was built high on a hillside, with 14,000′ peaks off in the distance, and what Shea really wanted was an image of him catching air on his ramp with those huge peaks towering behind. To create this image, I put on a 600mm lens and walked about a quarter mile away. The 600mm would compress the scene for the right effect; however, the problem was how to trigger the flashes from that far away. To solve this, we used standard PocketWizard transmitters and receivers, which had enough range to trigger the flashes.
The hardest part of this shot was timing the exposure when Shea was airborne above the ramp. From a distance, it was hard to calculate when he would do the jump. We shot a few images that Shea really liked; but now we needed to finish our original shot.
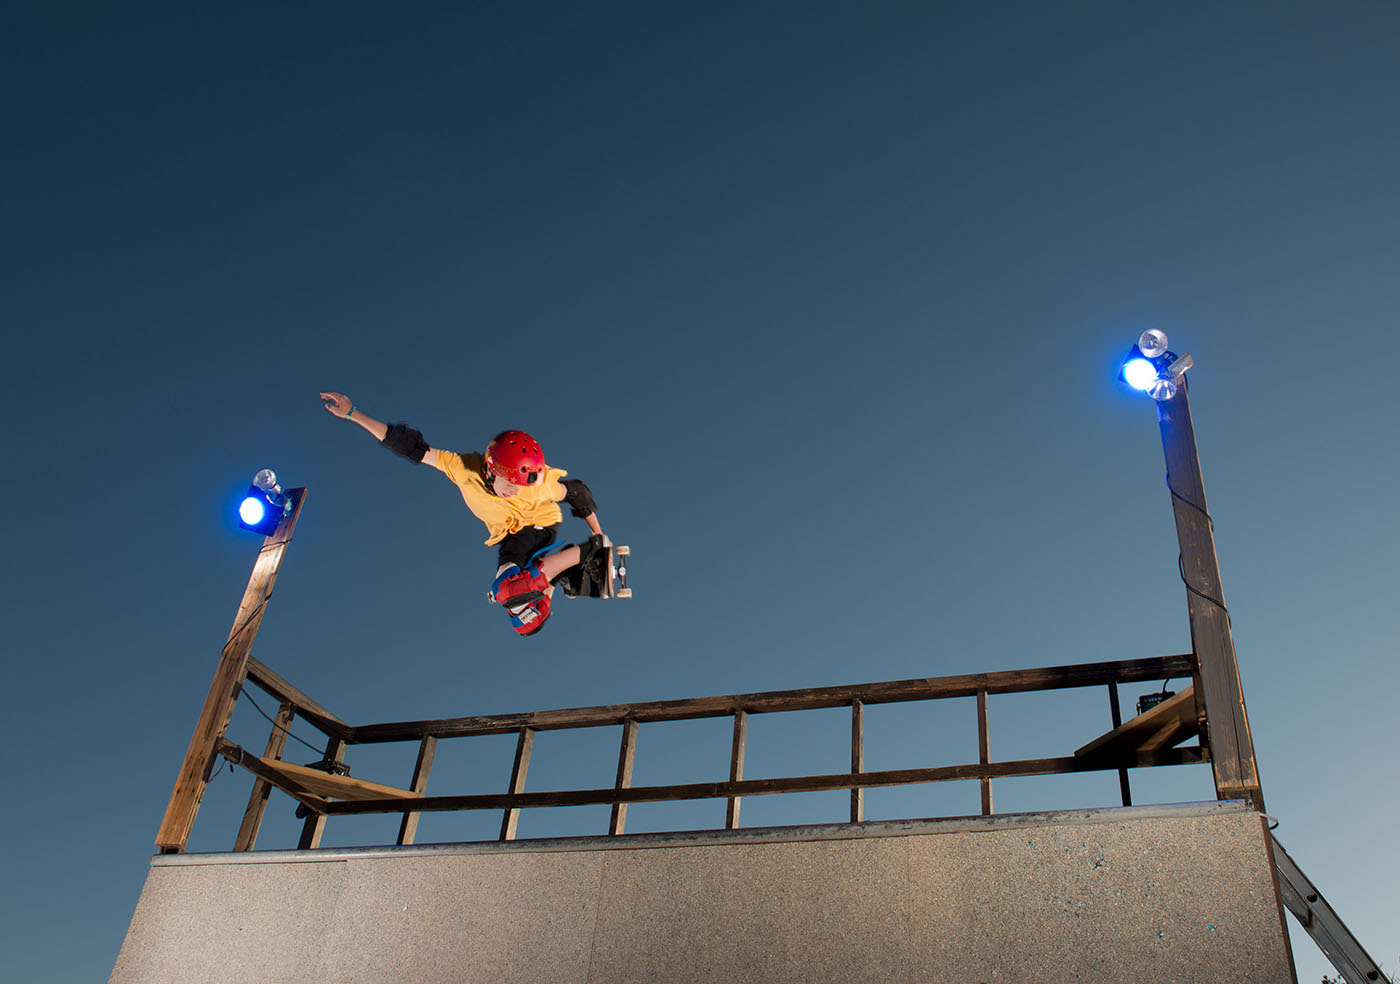
Step Five
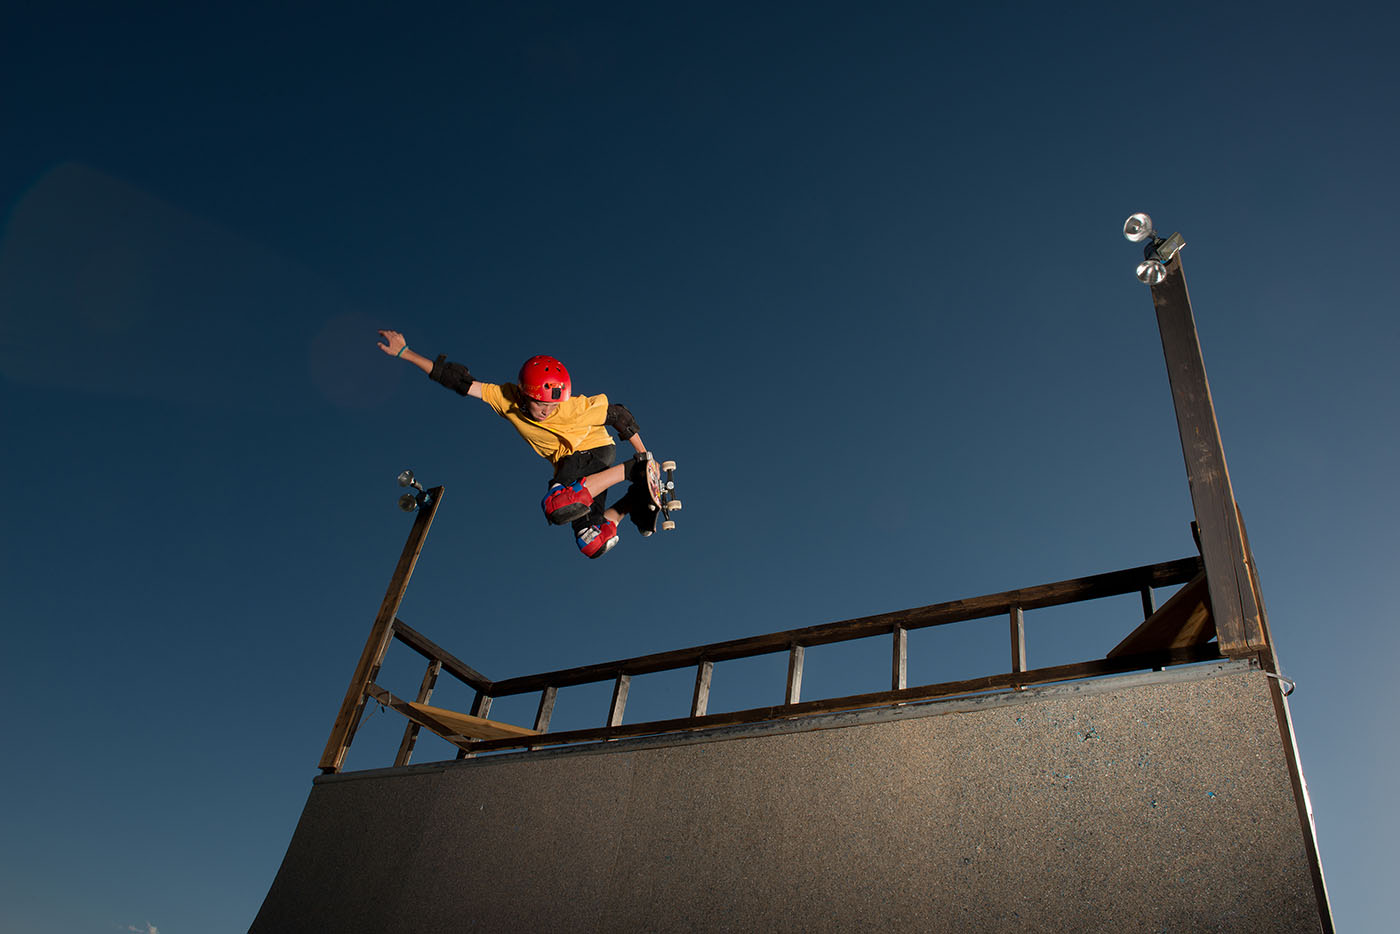
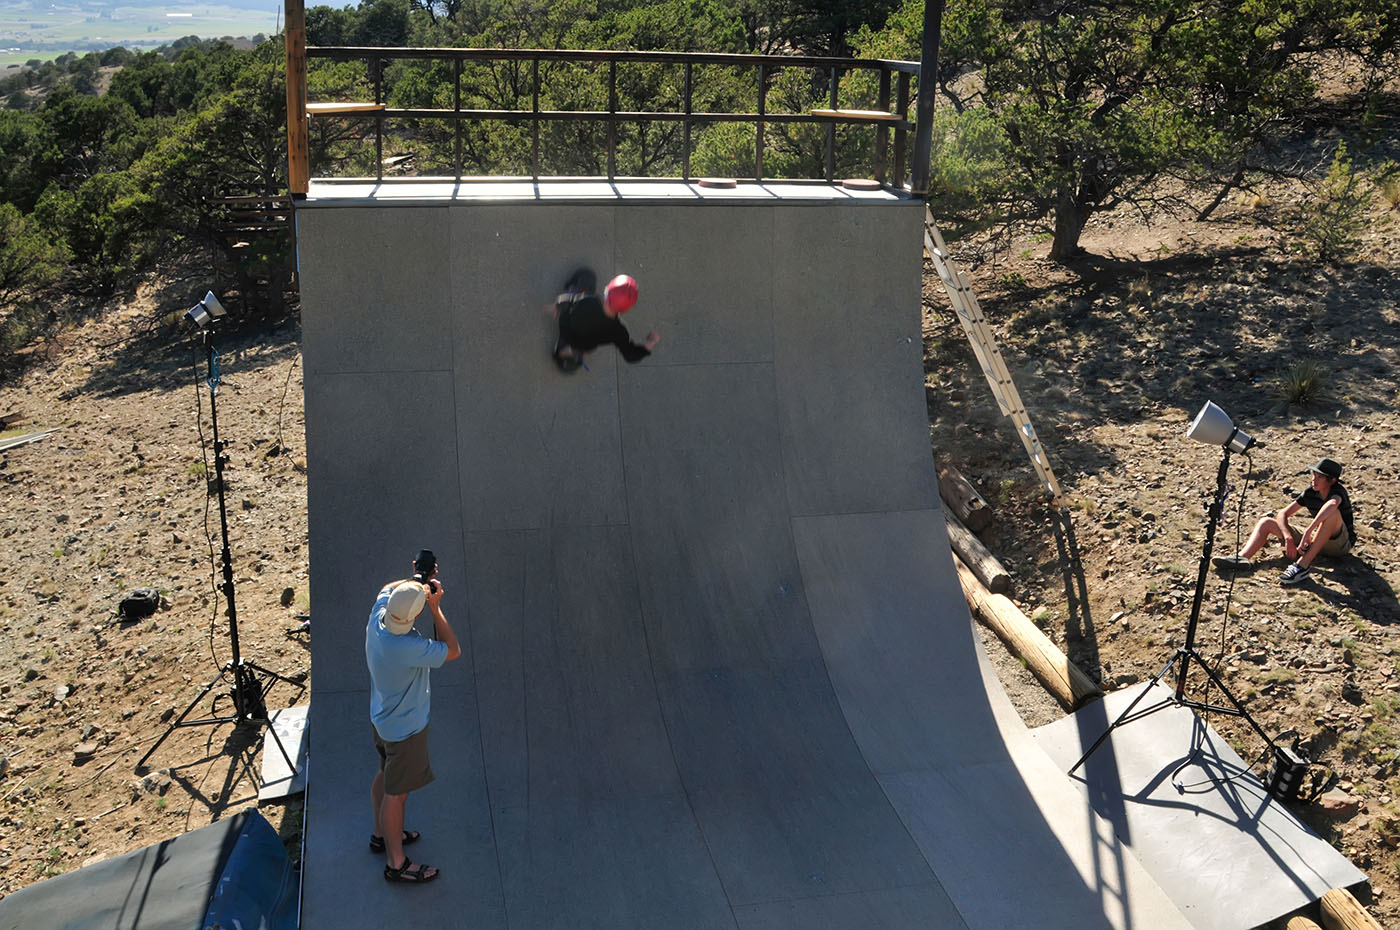
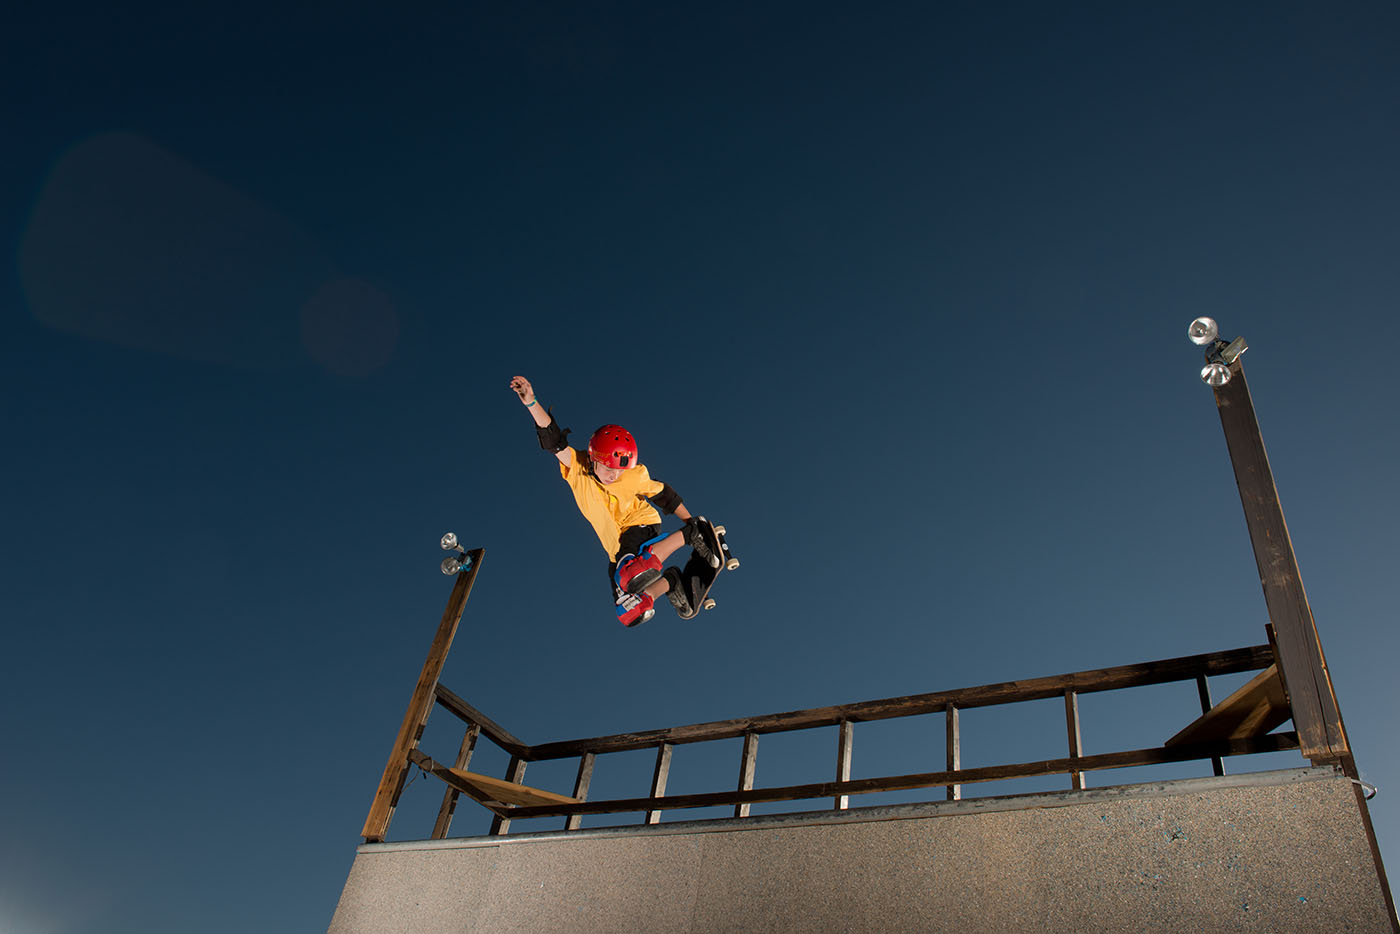
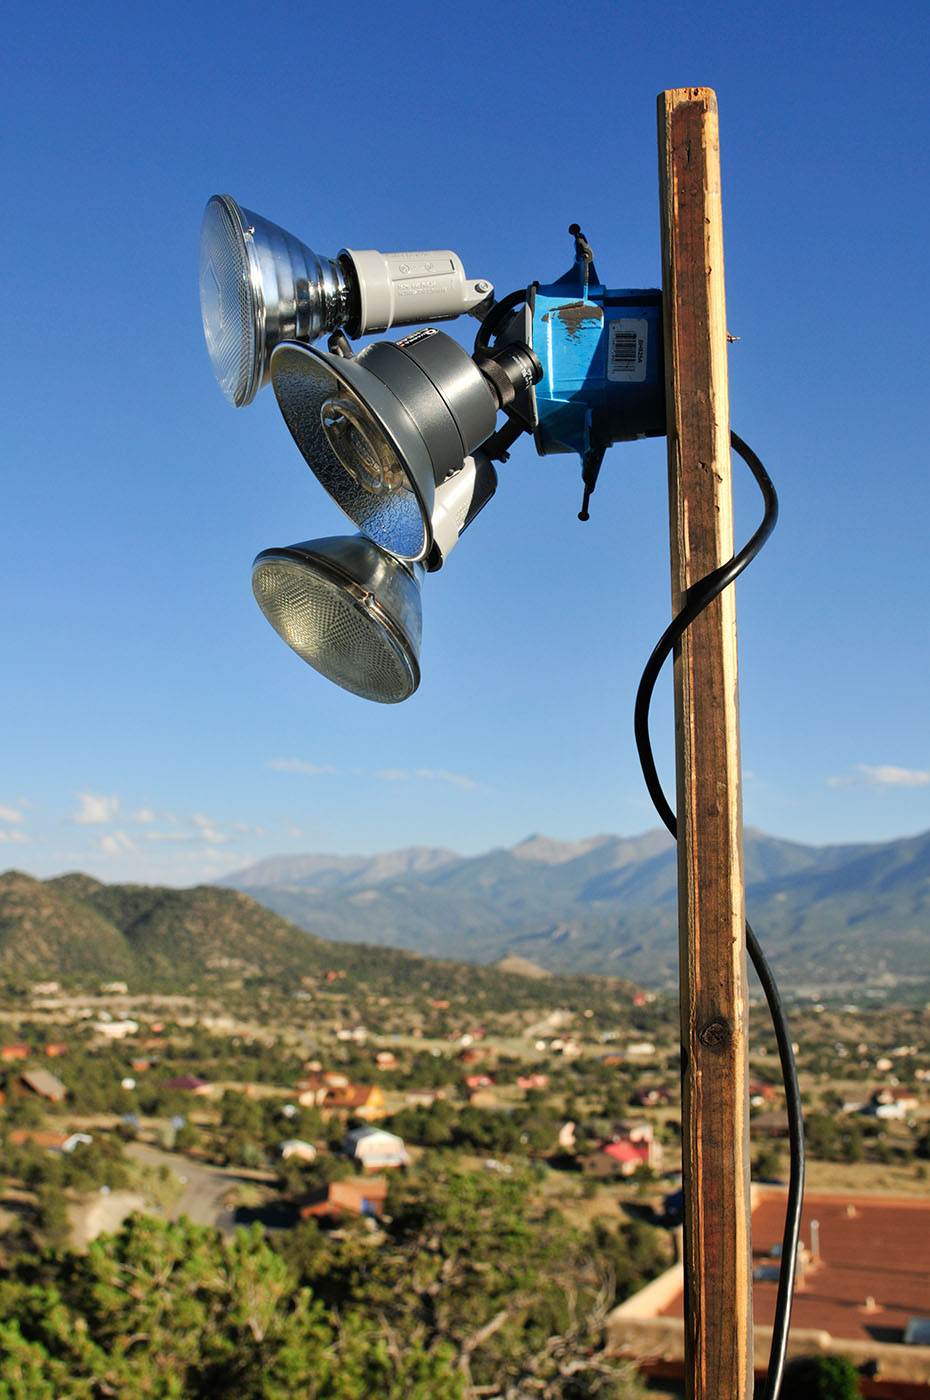
Back on the ramp, I knew what we needed to do next. I wanted to create a rock star stadium feel to the shot. How could I create overhead arena lighting in my outdoor setting? Simple: Add a few smaller lights aimed directly into the scene from above. The ramp had posts on the edges that were perfect for attaching lights, and for these accent lights, I used Elinchrom Quadras—6 lb, 400 W lights with standard reflectors attached. The Quadras work on the same channel as the Rangers, so one Skyport would trigger all the lights. We were also able to hide the packs so the overhead lights looked like standard spotlights. Time for the money shot!
Step Six
With four strobes firing, we were lighting up the hillside like a Fourth of July fireworks display. The sun was setting, which added a nice deep blue tone to the sky. The cross-lighting made Shea look good, and the overhead Quadras added a star effect to the image. I was getting a little flare from the overhead lights, but decided to leave this in for effect (taking off any filters on your lens also reduces flare). For a few images, I added some blue gels to the Quadras, which added some color but eliminated the dramatic flare; however, I decided the flare was more important in the final shot.
By this time, Shea had caught more air than I thought was possible. He cranked out a few more tricks, and we had our shot!
Tom Bols
Tom Bols
Try this free video tutorial by Franklin McMahon and learn about the function and ease of Premiere Pro CS5′s Ultra Key option. In this online tutorial, see how to use Photoshop’s Replace Color adjustment filter.
