
Self Assignment in Photography: Unleashing Your Creative Side
In commercial photography, the client (art buyer) usually knows what to expect from a photographer, and our task is to implement their vision. When it comes to self-assignments, as with any creative shot, we always start from the idea and then work toward its implementation. This is one of the reasons I like self-assignments more than commercial work.
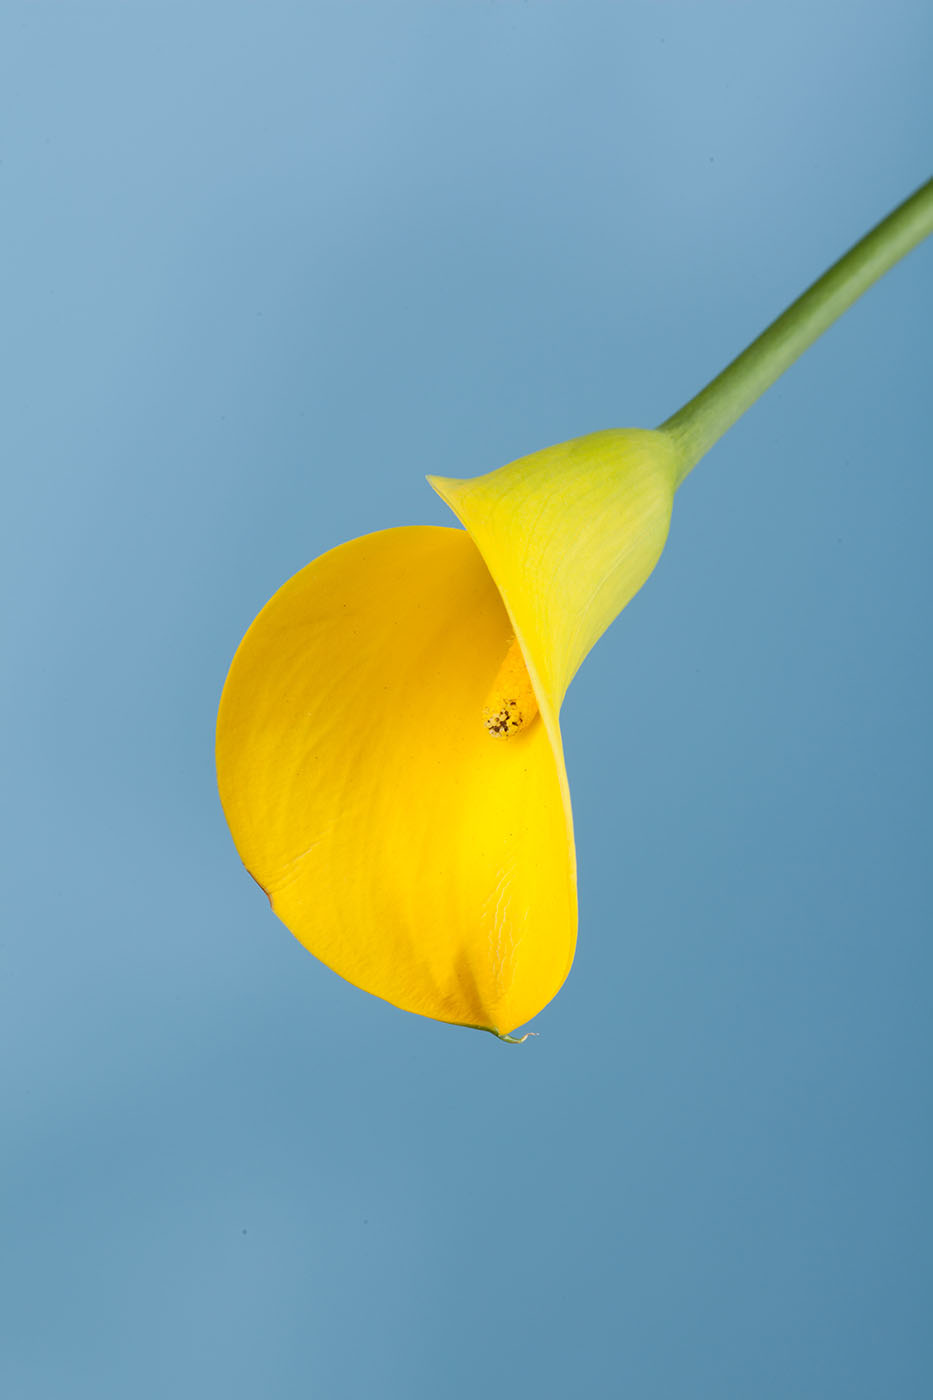
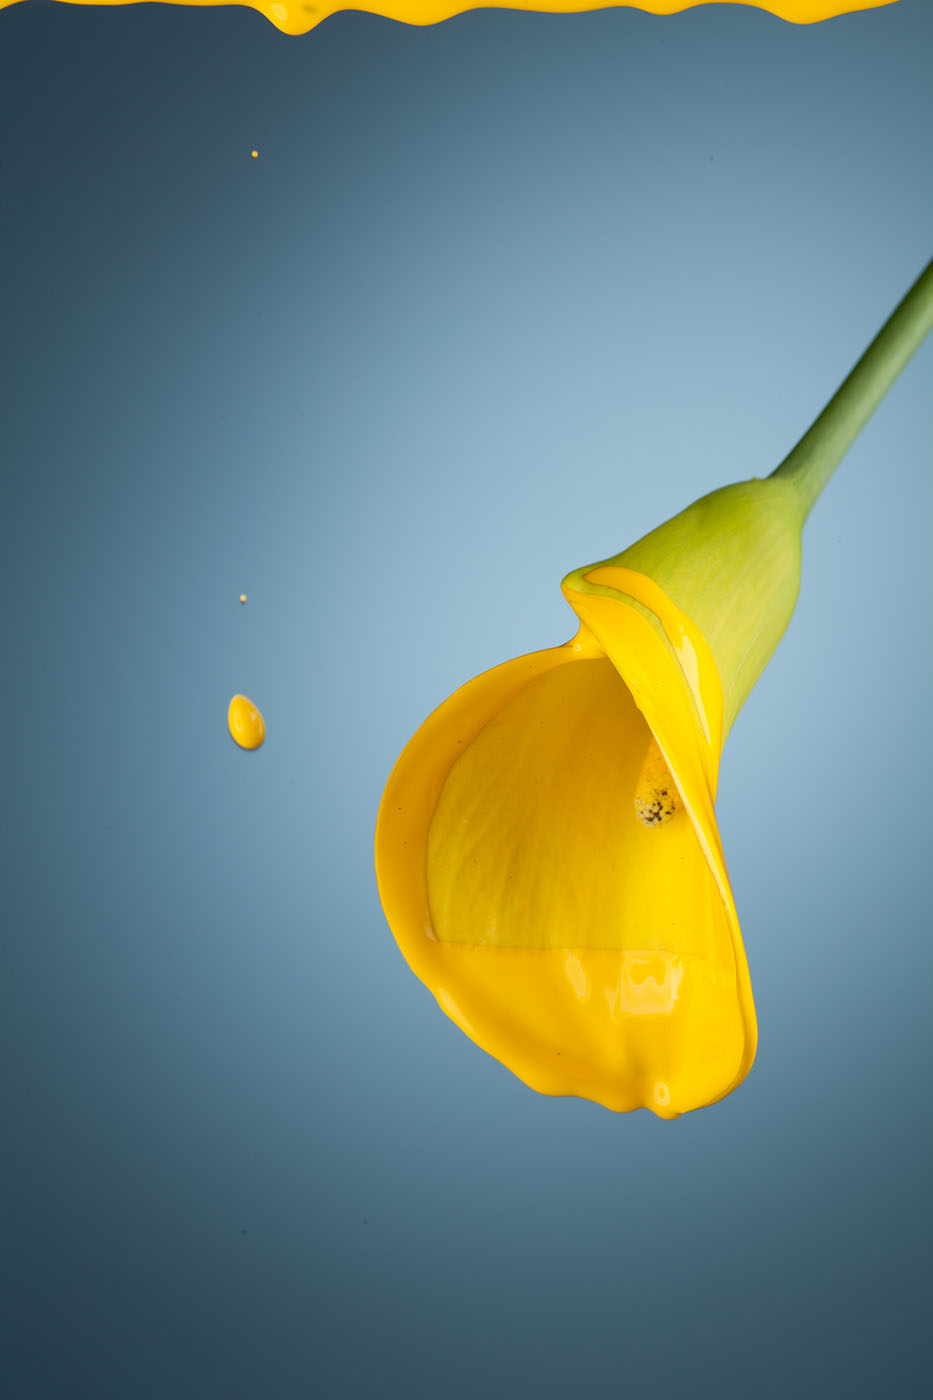
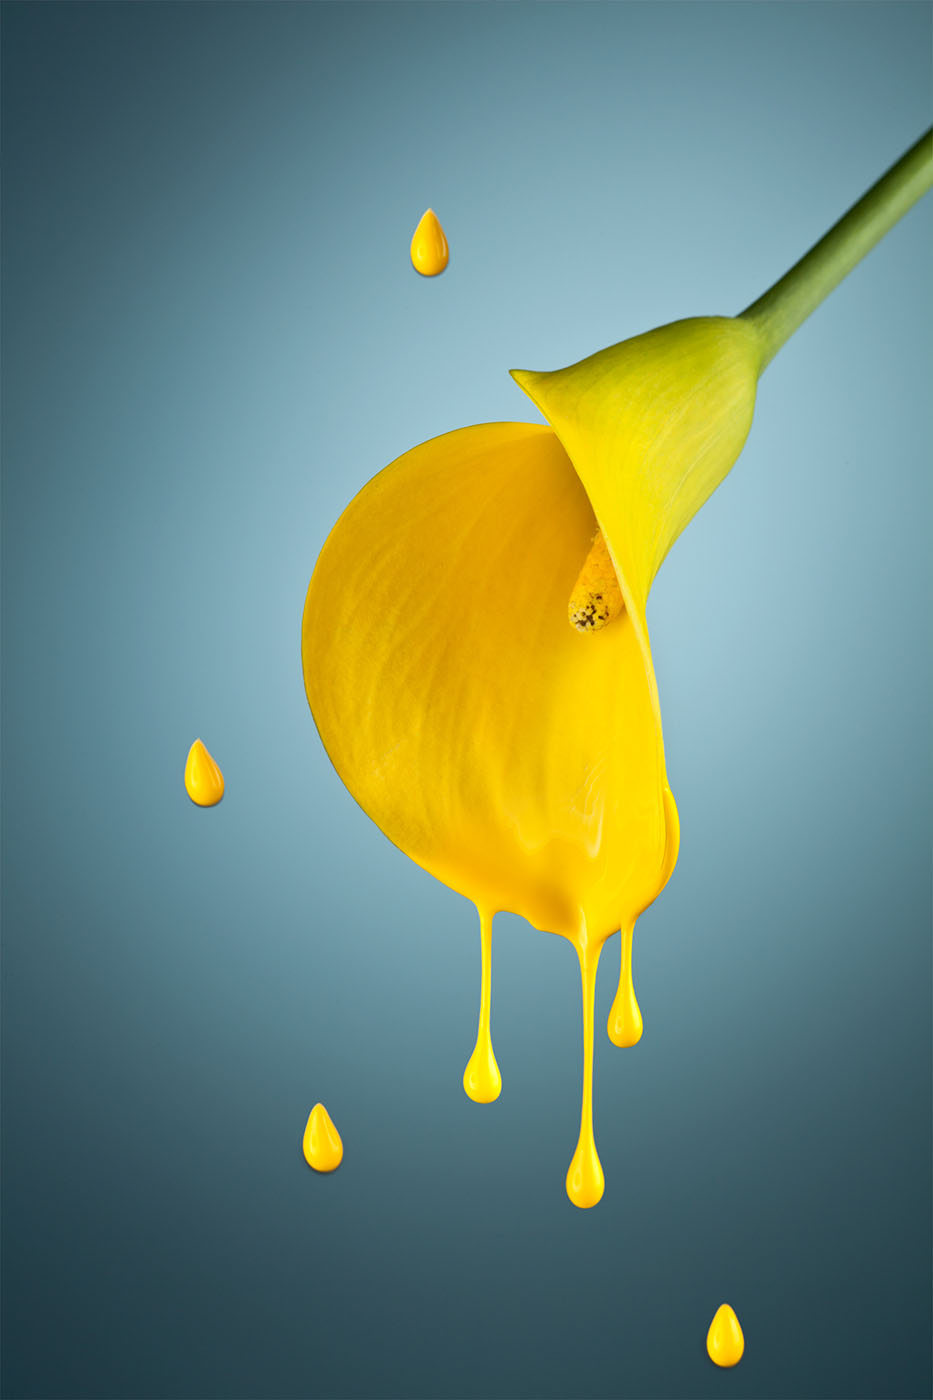
For this shoot we had the idea of a flower melting into a liquid-like substance and dripping down. I went to a store and found a yellow calla flower. Then I got a latex paint that’s close to our flower color. In this post, I’ll show you the whole process of shooting, with all the wrong and right moves, so you’ll get an idea of how the shot progressed. This will be more interesting than showing you a straight way to a result.
Part One:
Preparation and Building the Lighting Setup
When we work with any liquids, the first step is to set correct lighting for the still subjects, and only after this may we begin experimenting with liquids to see if any adjustments need to be made to the lighting.
For this shoot, the lighting was relatively simple. I started with two softboxes (labeled 1 and 2 in the photo) for the subject and one unmodified bare wide-angle reflector for the backdrop (labeled 3). The number 1 stripbox was positioned at the left-front of the flower, aiming directly at the center of it. This was our main light. The number 2 square softbox was on the right, slightly behind the flower, and it acted as a hair light, highlighting the flower from behind. Number 3 was to highlight the background (light blue seamless paper).

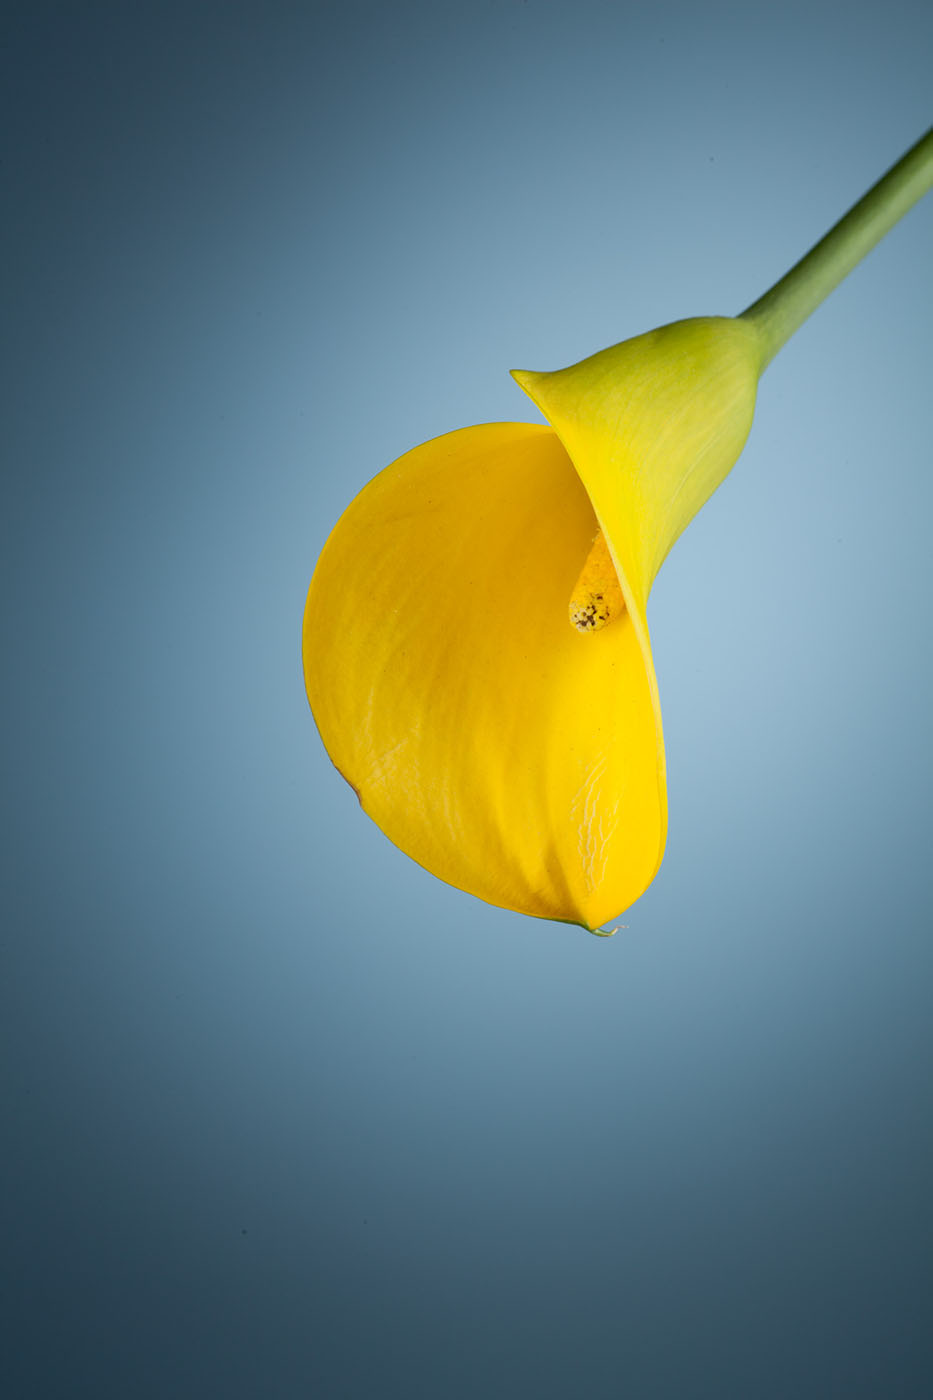
Here’s the result of our initial setup (below). While it’s not bad at all, this is a pretty plain image and I have to add some drama to it. Two simple ways to make any plain image more dramatic are to add a gradient to the background and add contrast to the subject by using less diffused light. The first task can be easily accomplished by using a spotlight for the background, while the second can be done by using more directional light.
Alex Koloskov
The only way to create sharper light without changing the distance between the light and subject is to reduce the size of the light itself (the stripbox in our case) and/or to use more directional light, such as a silver reflector instead of a white one. So I replaced the background light with a spot (using a 15° honeycomb grid on a standard Paul C. Buff reflector) and replaced the stripbox in front with a white beauty dish. As you also may notice, I moved our back light (softbox 2) a little bit toward the camera so it was more from the right than from behind the subject.
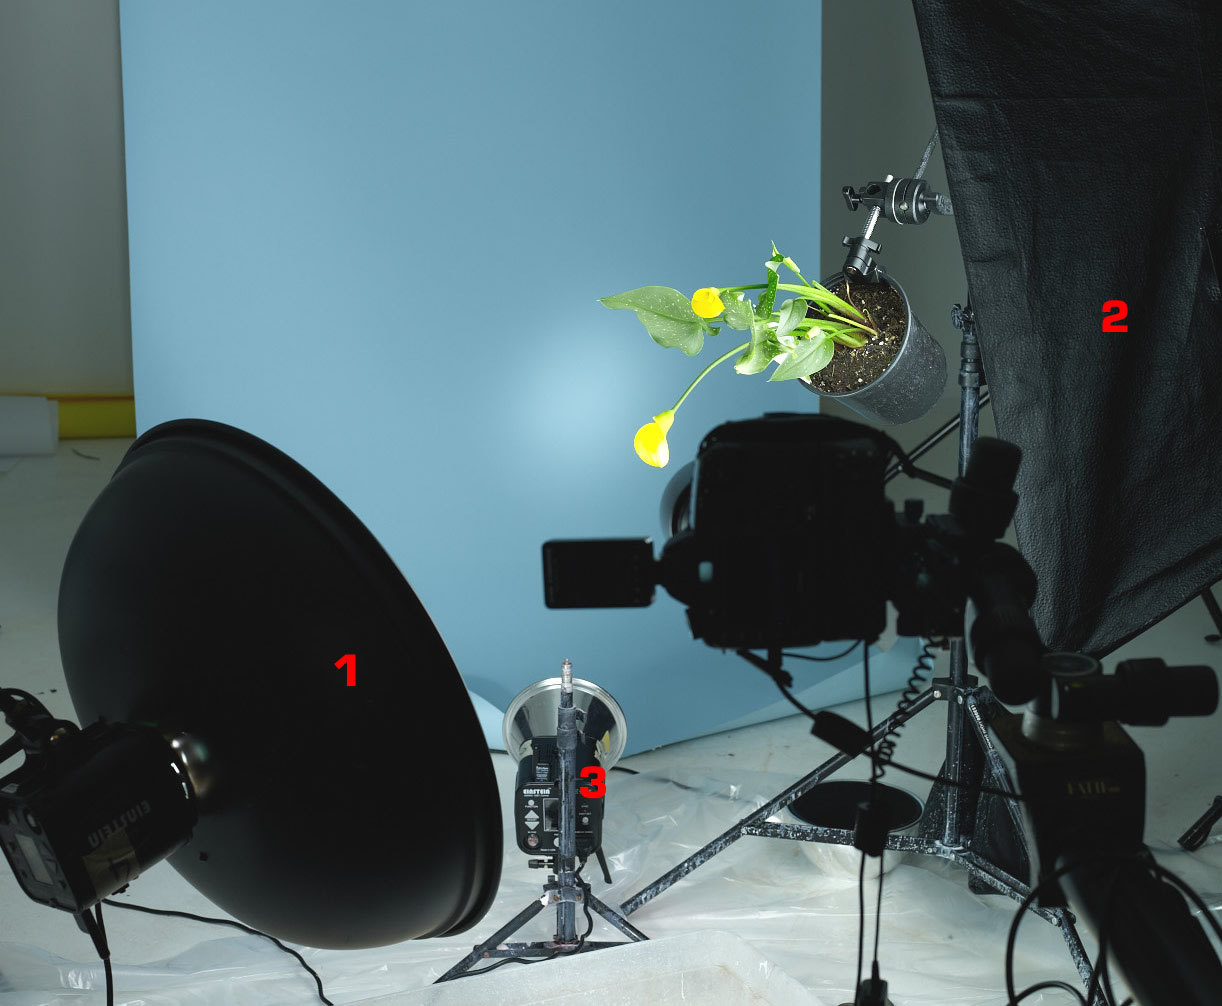
This was almost what I had in mind. The only thing I wanted is to have a deeper gradient on the background. After quick consideration, I added a black screen to limit spill onto the background from the beauty dish. You may notice how much darker the background became and how much brighter the spot is on it. More directional light from the left added texture to the flower, while the sharper angle from the light on the right added volume to the flower by creating a more visible gradient from bright to dark on the flower’s stem and back of the petal. I left softbox 2 on the right unmasked, as I didn’t want to get too deep of a shadow around the spot on the background, and spill from it was softening the background gradient.
After we got our initial shot ready, it was time to add the moving part—the liquid. As I mentioned, we selected latex semigloss paint for this. For the last check on how it will look in our lighting setup, we snapped the flower with a cup of our paint. The colors matched perfectly and we were ready for the fun part.
Color Checker Shot
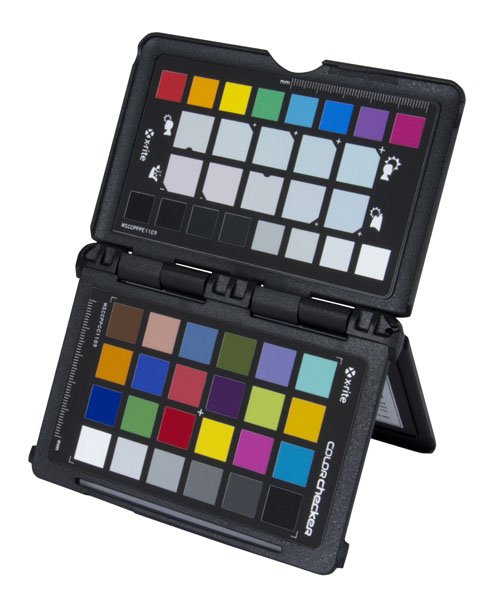
It’s important to have a correct color profile for any shot, especially when shooting on a colored (nongray) background. I used the X-Rite ColorChecker Passport with the X-Rite Lightroom plug-in to create a color profile for this shot. It was applied to all the images we took during the shoot.
X-Rite ColorChecker Passport
Part Two:
Photographing Liquid
Truly, this is where the fun begins for a photographer. Shooting liquids is the most dynamic and, in many cases, the most unpredictable part of studio photography, and I love it. In our shot, however, almost everything was predictable: we had only drops of paint flying directly down, and the only variable was the position of where I caught the drops in the air.
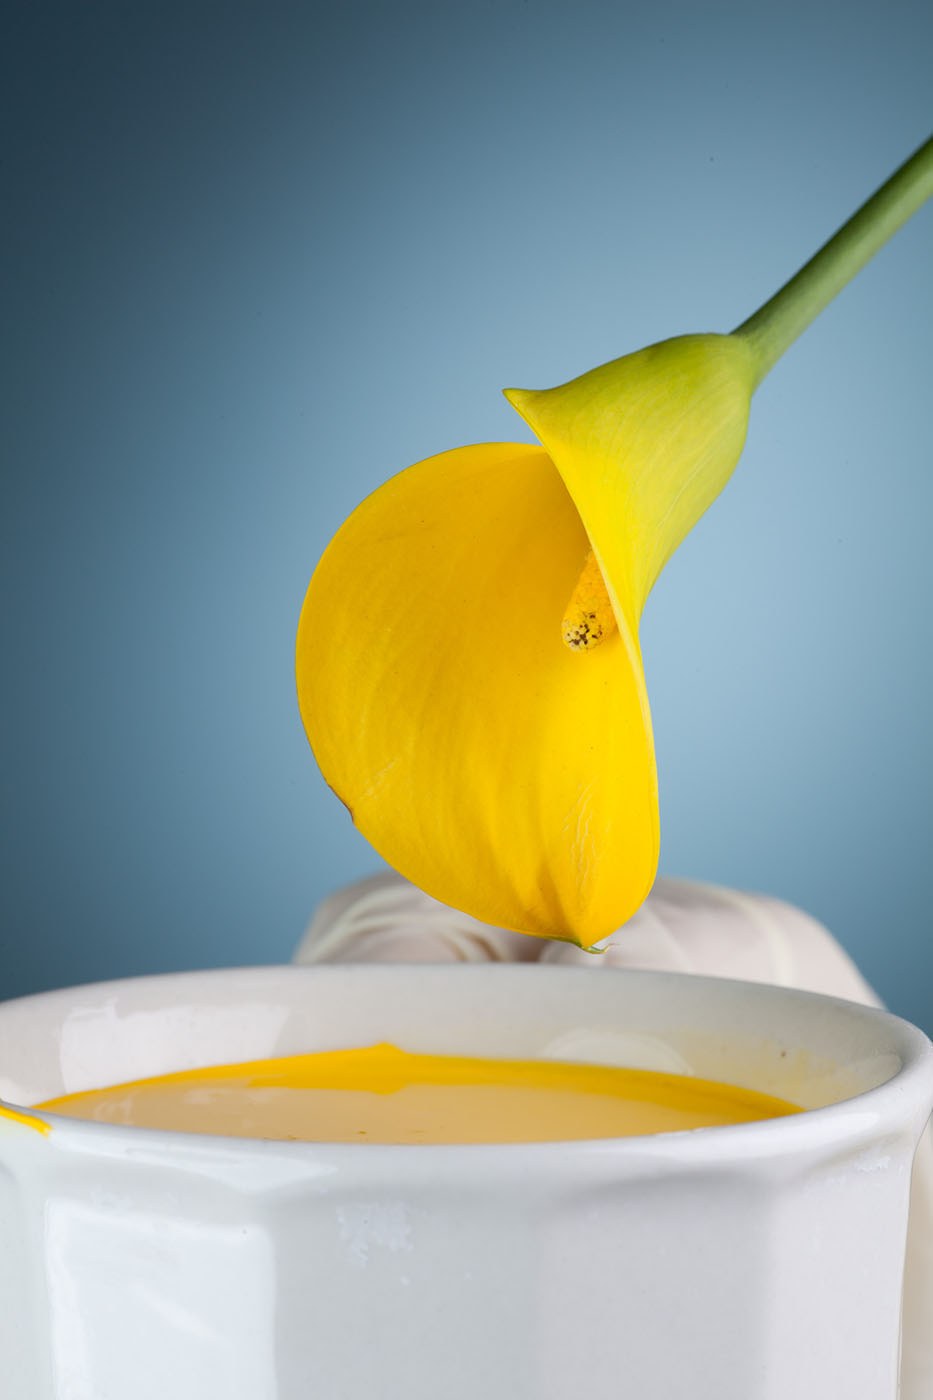
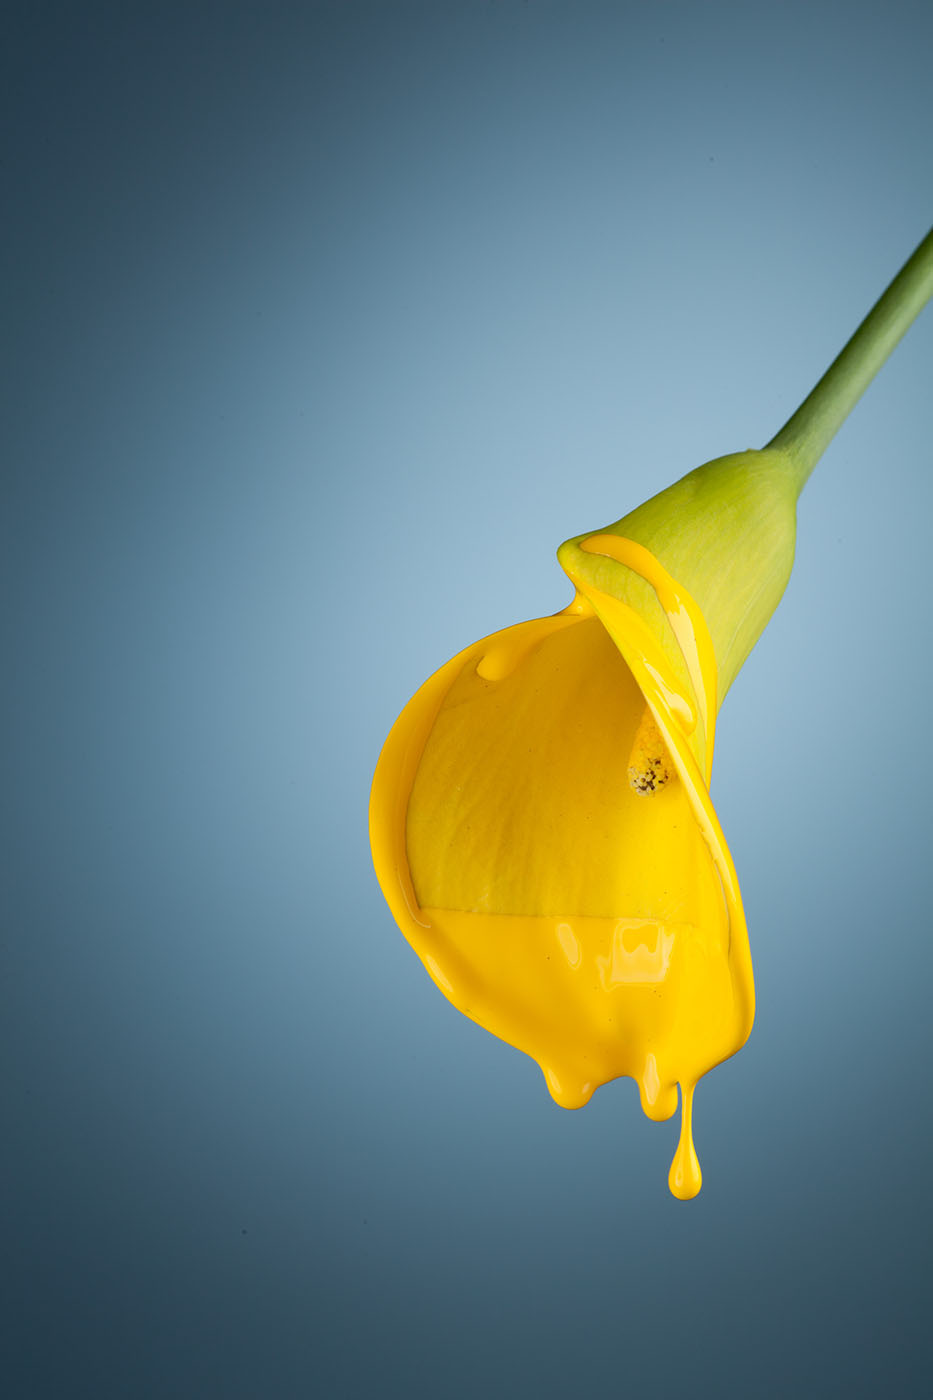
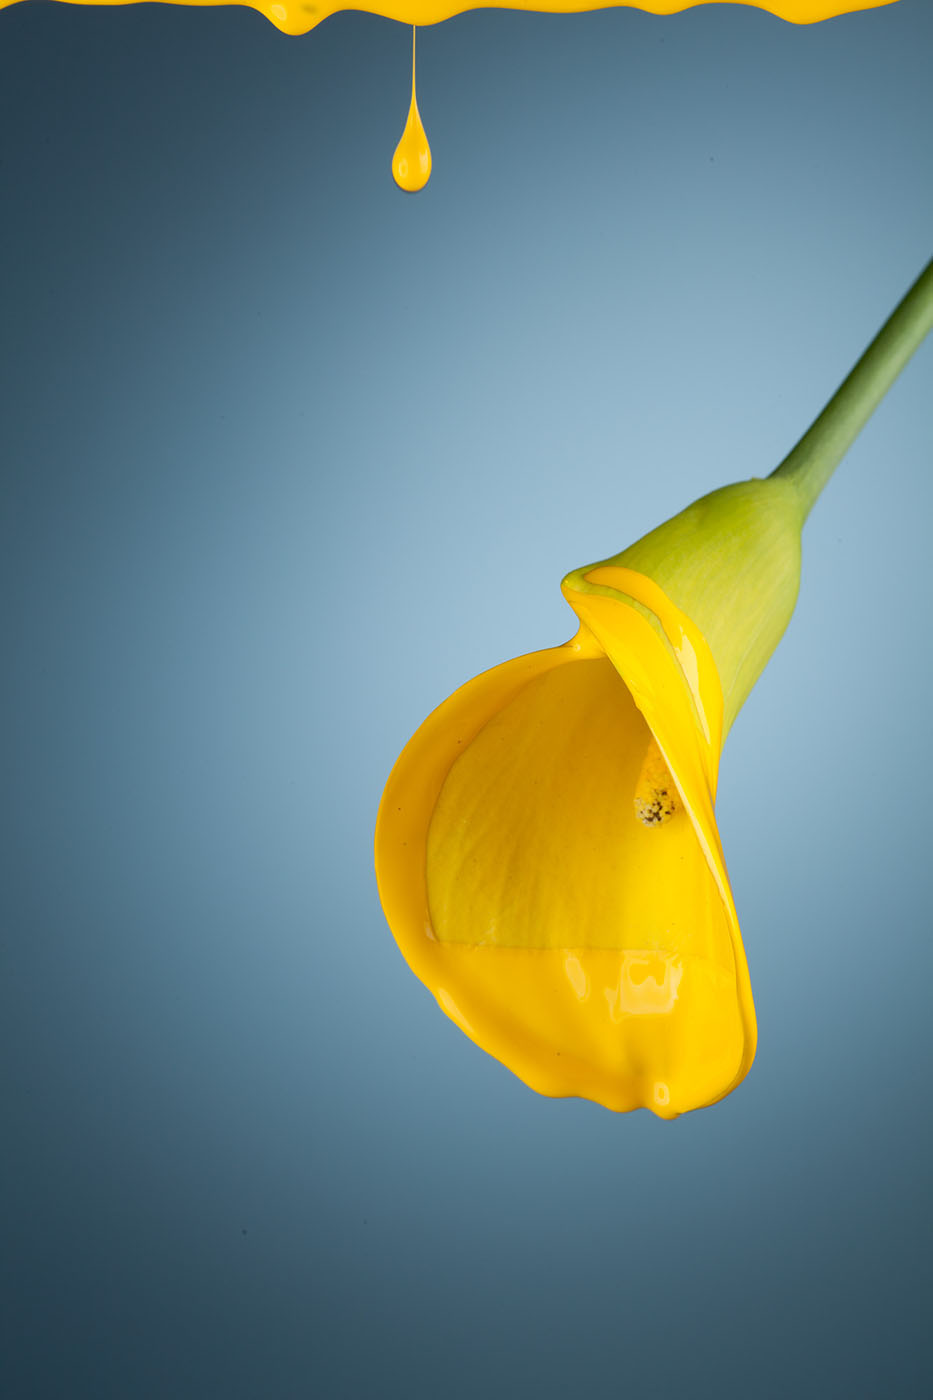
We did the first set of shots by dipping the bottom of the flower into the paint and then photographing the drops. This is where we got several shots with a drop leaving the flower with the flower partially covered with paint. One of these shots and a “clean” one were selected to be the main source for our composite shot (more on that later).
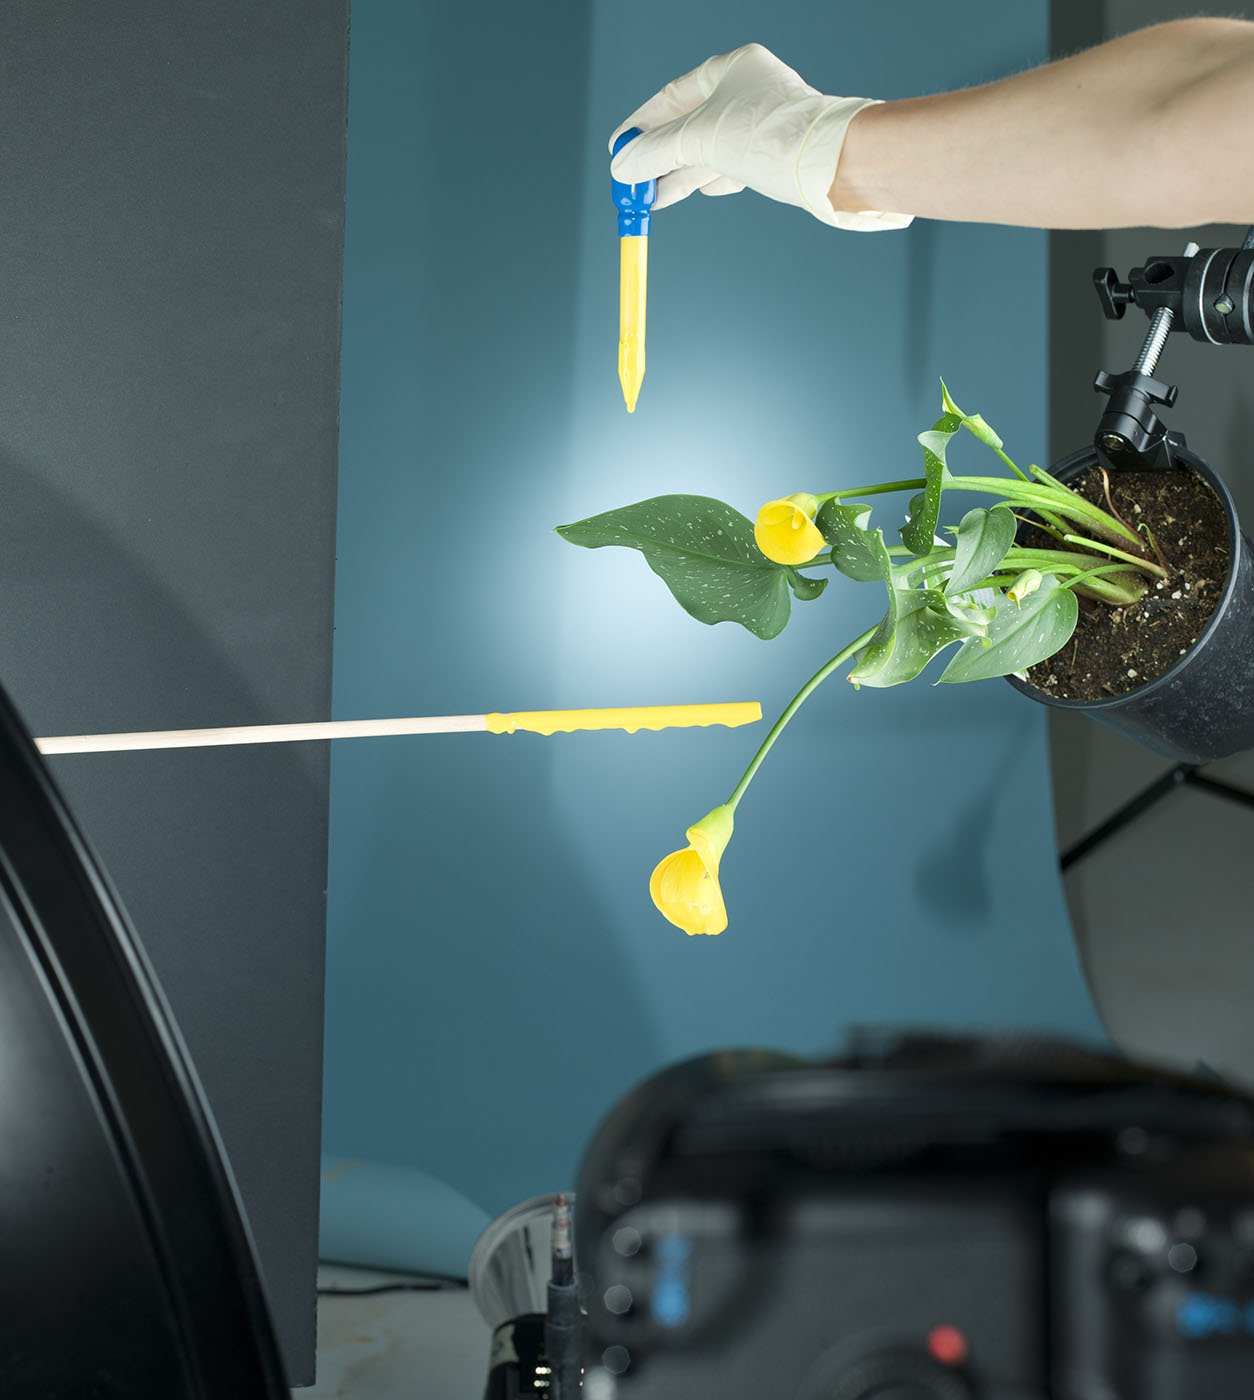
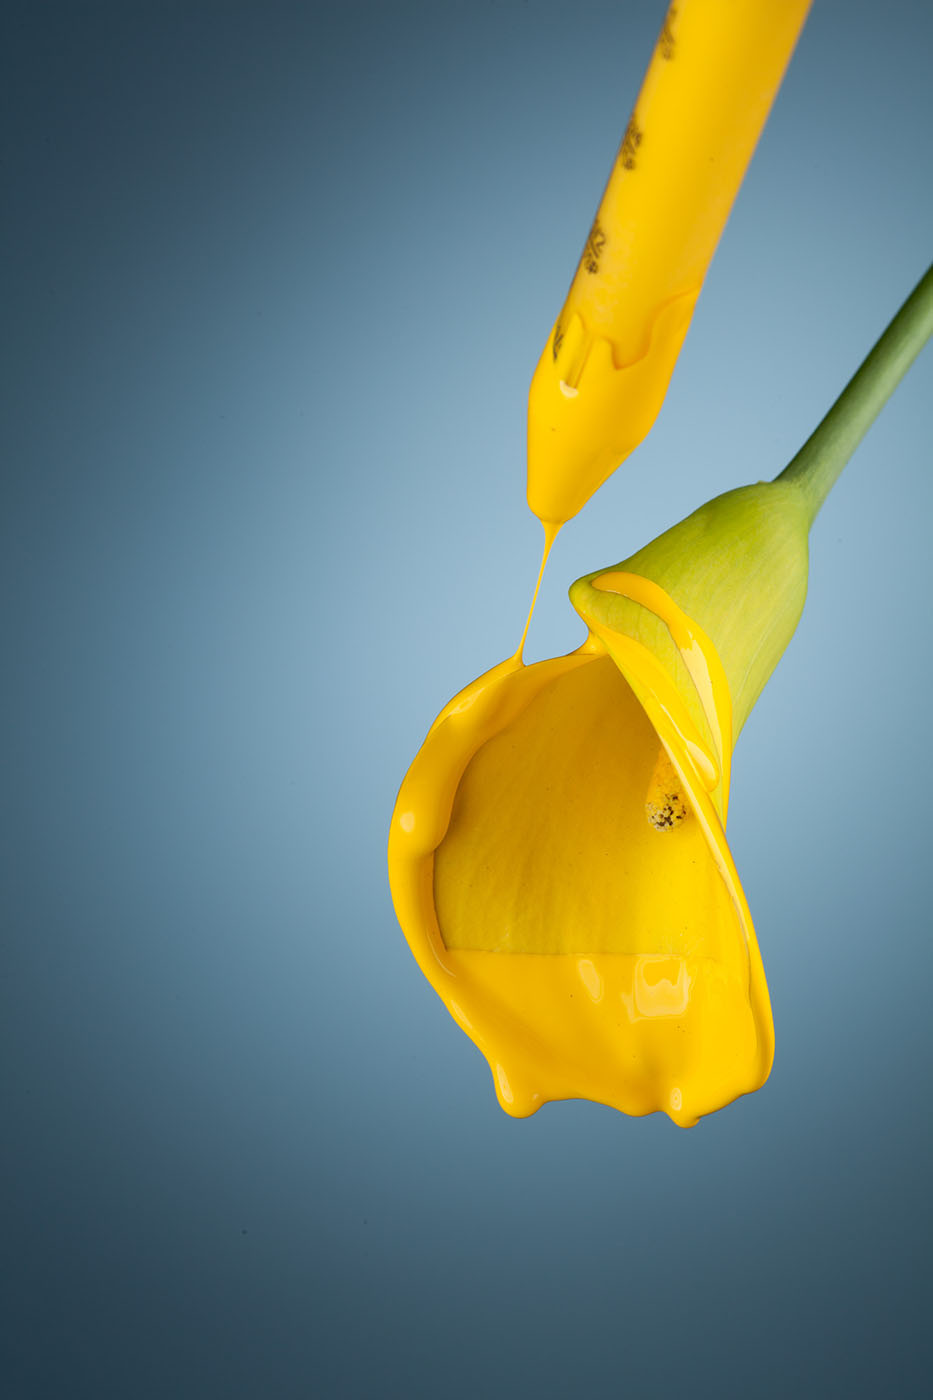
…pouring paint directly on the flower and around the flower using a dropper and a narrow, rounded bar, to get as many variations of the drops as possible.
Self Assignment in Photography Creative Fun:

Tech Tip:
The Triggering Device
I never use any triggering devices other than my eyes and a wired remote shutter release. Working with a skilled assistant makes it easier to get the desired result. Even working alone, I’m pretty good at catching a splash on the fly. Once trained, our reflexes can do wonders for us. I work mostly with large splashes, where manual triggering gives more flexibility on where to stop a splash. Plus, a large amount of liquid moves slower and is easier to catch by eye. But catching single drops can be much easier with a laser trigger. Get one if you plan to do action shots of small stuff on a regular basis.
Part Three:
Postproduction
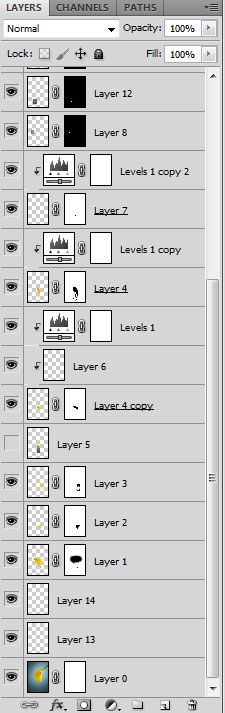
During postproduction, we combined several drops around our main shot. We used Adobe Photoshop CS5.5, but any version of Photoshop or other graphic editor that supports layers and masking will work. We clipped out the drops we wanted to use coming off the bottom of the flower and put them on the main shot as layers. We used a shot of the flower without any paint with one where the bottom part of the flower was dipped into the paint to make a seamless transition between the flower surface and paint. This is how a melting effect was created.

The final step was adding various drops around the flower.
Now we’re done. As you can see, there’s nothing really tricky in this shot; it’s just a good combination of an idea and its realization. Yes, it took me many years to get to the level where I can do such shots seamlessly and easily like this, but time isn’t an issue when you do stuff you love.
Alex Koloskov
Technical Info
Let’s talk about the technical requirements of the camera and lighting for an action photograph like this. As you may already know, to shoot fast-moving stuff in studio, you don’t need a fast shutter speed. Because the lighting is under full control, instead of high shutter speed we use short flash duration to freeze the action. In most cases the shutter is set to camera X-sync (in our case, 1/200 with a Canon 5D Mark II), while effective exposure time is determined by the time the subject gets exposed to strobe lighting, which is flash duration.
I use Paul C. Buff Einstein E640 strobes. When stopping power isn’t needed, I use them in Constant Color mode to preserve color accuracy. I use them in Action mode for liquids and other high-velocity moving stuff, where having short flash duration is more critical than color consistency.
Hint: Even in Action mode, I can have the same color temperature of all strobes if I set them to the same power level. I can modify the amount of light that hits the subject by using modifiers instead.
In Action mode, the E640 provides up to 1/13,000 t.1 of flash duration on the lowest power output (just a few Ws). The ideal working range is about 100–150Ws with effective flash duration around 1/6,000–1/4,000 t.1. This is enough to stop most types of liquid splashes that I’m dealing with.
Hint: Any battery-powered strobe, such as Canon, Nikon, Vivitar, and many other flashes provide extremely short flash duration at 1/8 or lower power. So it isn’t always necessary to get expensive lights to stop action. Use your existing flash at 1/8 power, raise your camera ISO to compensate for the lack of power, and you’ll be good to go.
For more tutorials from Alex, check out his other tutorials about studio high-speed photography at www.MasteringSplash.com, as well as “Technical Secrets of Studio Photography” blog www.AKELstudio.com/blog. There are a few tests of the E640 vs. Speedlites vs. other studio strobes, as well.
