Photography Techniques: Shooting Great Silhouettes in the Studio

Excerpted from Frank Doorhof’s Mastering the Model Shoot: Everything a Photographer Needs to Know Before, During, and After the Shoot.
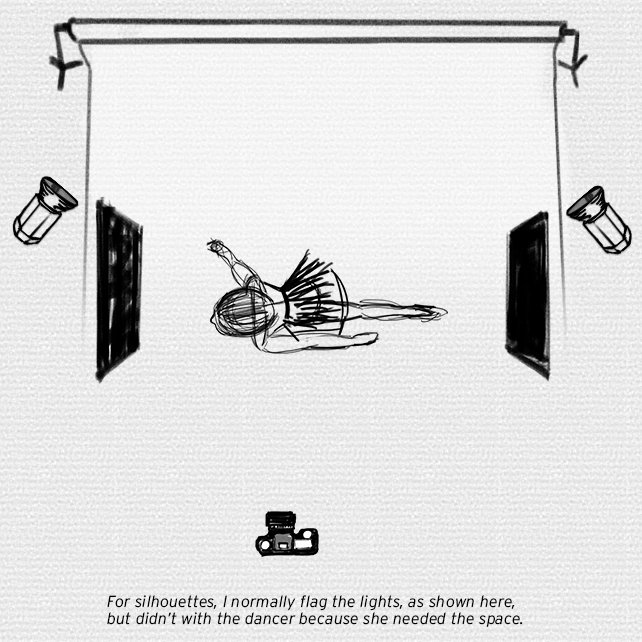
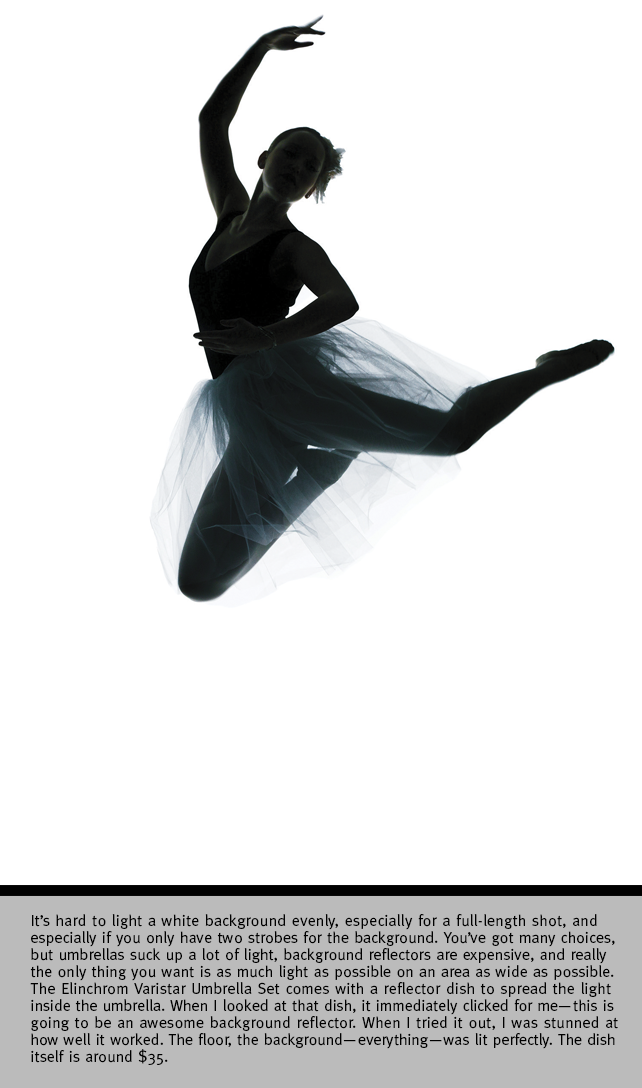
Regarding silhouettes, the first thing people always ask is: “How was the light set up?” So, let’s get that out of the way first. I always tell people to not overthink the light setup. Often, people think that if an image is nice, it is crazy difficult to light. Well, the reality is totally different—most images you see that you really, really love are, in fact, not that hard to shoot. For example, for this setup, I used a white seamless background and added two strobes fitted with Elinchrom Varistar wide-angle reflectors. I love these reflectors, because they give you a tremendous amount of light spread and are great to light a white background without any problem.
There was no front light used, meaning my model gets silhouetted. Well, actually, it’s not that easy. When you really want a silhouette, you must make sure that there is no light hitting your model, and normally I do this by placing two flags next to the model, blocking the light and making her dark. However, in this case, there was a lot of motion and the model (as shown in the diagram below) had to be able to move freely, so placing flags was not really an option.
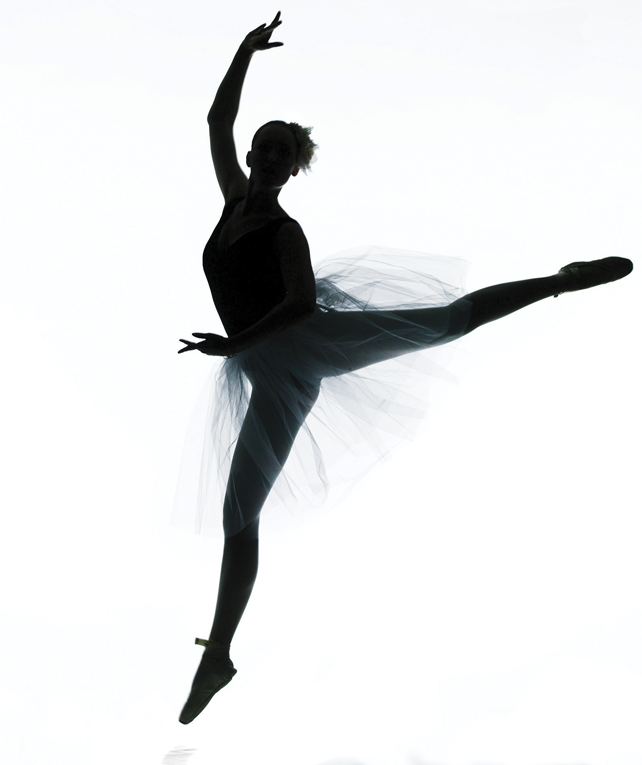
Instead, I had to use some Photoshop to make it work. The first thing I did in Photoshop was to make sure that the contrast was raised in the images. At that time, the model already was almost completely black, however in the images here you can see that there were small accent lights on her legs, face, and arms. This is intentional. I didn’t want my model to completely disappear and look like a cutout, so during the shoot, I asked Susanne to make her action point a spot just in front of the strobes aimed at the background. This way, her body picked up just a little bit of the strobes, and the rest was added by the spill light in the studio. It’s not very easy to do or control, but with practice, you can find the balance between too much and just enough. Then, just ask your model to stay in that area and, if you’re lucky and coach your model correctly, you’ll have little to no work in Photoshop.
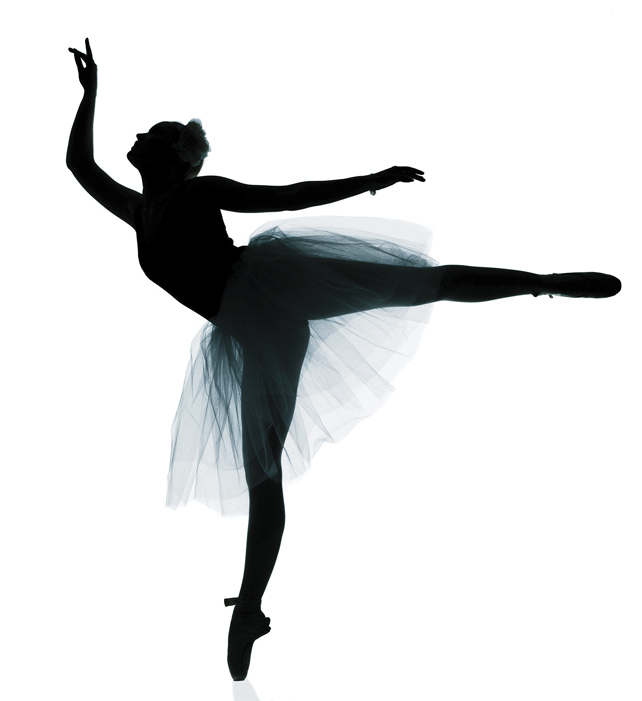
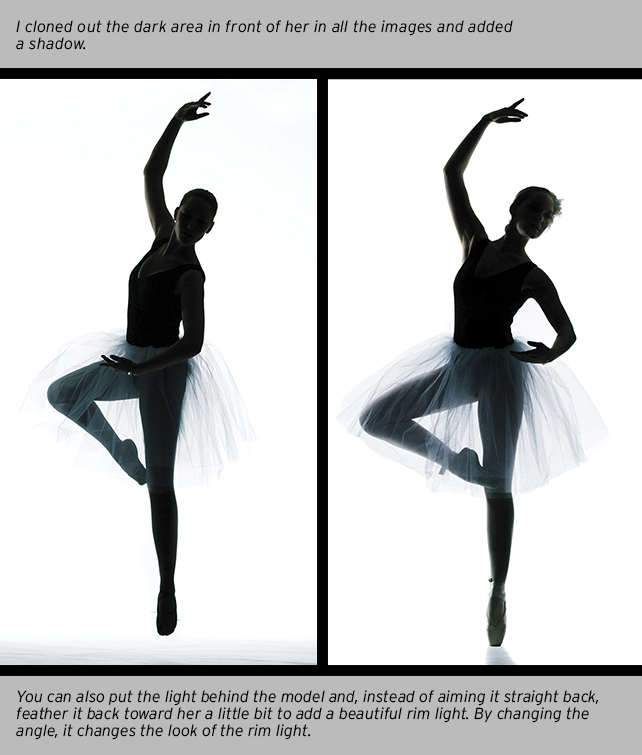
In fact, most of the Photoshop work on these images was spent on the floor. Normally, when shooting with white backgrounds, I use Plexiglas on the floor. It’s very shiny and can be bought in different colors and thicknesses (although, because I love the effect it gives in both black-and-white and color images, I always use the transparent version), and it gives your model a nice reflection (shadow) on the floor (make sure that the floor is a pure white). However, in this case, Plexiglas was out of the question. Because of the shoes and movement, it would be very dangerous to let her make jumps and poses on a slippery floor, so I ended up with a nasty dark area on the floor. In Photoshop, I cloned out the dark area and re-created the shadows. In the image below, on the left, you can see the original floor.
One could argue, “Why not leave the shadows out?” For me, that doesn’t work. If there is light, there will be shadows, so it would look very unnatural to me if a model was just floating there on a white seamless background when at least one foot is touching the ground. The shadow makes the connection with the real world, and suggests that the model is really there. So, never forget this, it will really make your shots stand out.
Posing is always a challenge when you are shooting silhouettes. Although I hardly ever do series like this, it’s comparable to shoots with edge lights. You have to make sure that the pose itself is, as much as possible, aimed toward the silhouette. I know this may sound obvious, but a lot of people forget and let the model pose like she normally would, only to find out in the final shots that they can’t see the details they’re expecting, and they end up with images that look awkward because you can’t see an arm or facial features. This is solved quite easily by coaching your model to choose the right angles, but it takes some practice.
I’m a big fan of shooting tethered and, in this kind of setup, you can really benefit from this. The immediate feedback on the screen is priceless and gives you a good idea of what’s going on. When you’re using a program like Phase One’s Capture One, Adobe’s Lightroom, or Apple’s Aperture, you can apply settings to the images coming in, meaning you can already see about 80% of the final look while shooting (never forget to reset this when switching to the next set, by the way).
For many more tips like this, see Mastering the Model Shoot by Frank Doorhof.