
Lighting Recipes: Mountain Biker Location Shoot
This post talks about how to take one flash on location so we’re doing a location shoot using a very simple setup: just one flash (a Nikon Speedlight SB-900) and a shoot-through umbrella. For location work like this, I generally prefer a small softbox, such as Lastolite’s EzyBox Hotshoe, because it controls the spread of the light and makes it easy to create light fall-off (where your subject’s face is well-lit, and then the light falls off to darkness as it moves down the body). With a shoot-through umbrella, such as the Westcott 43″ white shoot-through we’re using here, the light tends to spread a lot more, which can make the job tougher. (I joke that umbrellas create “light grenades” with light blasting all over, but that’s an exaggeration.)
So, if I prefer to use an EzyBox, why would I ever use an umbrella? Three reasons: (1) Portability. The collapsible umbrella folds up really small and weighs practically nothing. (2) The umbrella sets up faster and easier than the EzyBox—you’re ready to shoot in just seconds. (3) At around $20, it costs a fraction of the price of an EzyBox and hot-shoe bracket. While I still prefer the EzyBox (I think it creates better-looking, more focused light), the umbrella has its benefits, mainly low cost. For this shoot, I was traveling to Moab, Utah, and wanted a lightweight setup I could set up in seconds, so I went with this fast, easy, inexpensive rig.
Shooting outdoors in daylight with a flash takes more than just working with the flash—there’s a very specific technique for your camera settings that makes the whole thing work, and we’ll cover these settings below.
Figure One
Here’s the final image of our mountain biker, shot in the middle of the day during a hands-on landscape workshop I was teaching along with my buddy, Bill Fortney. One day during the week, I wanted to show the class how to shoot portraits with a flash on location, so we hired a mountain biker to pose for the class (and do some cool jumps and stuff as well—he was awesome!).
Scott Kelby
Figure Two
When I’m shooting outdoors in daylight with a flash, I generally put the sun behind the subject. This capture gives you an idea of what the image would look like without the use of a flash: The rider’s almost a silhouette. Of course, he doesn’t look like that when you’re standing in front of him. The human eye adjusts wonderfully to extremes of light like this. As sophisticated as our DSLRs are today, they can’t reproduce that range of light.
This is exactly what we’re looking for—we want our subject to pretty much be a silhouette, so the sun gives us a rim-light effect behind our subject, and the flash does all the work of actually lighting our biker. Because we’re shooting outdoors in direct sunlight, and we need our subject to be a dark silhouette, just putting the sun behind him won’t do the trick. We’ll need to darken the sky behind him, which, in turn, darkens the entire scene by about two or three full f-stops. That’s the key to shooting in sunlight: You intentionally underexpose the image by at least two stops. Here’s how:
Step One
Switch your camera to Manual mode and set the shutter speed to 1/250 (the highest standard flash sync speed most cameras will do without switching to high-speed sync). Now, with your flash unit turned off (it must be off for this step), you’ll need to use the meter that appears in your camera’s viewfinder to find the proper exposure. As you move the aperture (f-stop) dial on your camera, you’ll see the meter move. Your first job is to get the number to 0, or the center point on the scale, which is the proper exposure. In my case, that meant setting the exposure to f/11, which yielded the shot you see below.
Step Two
Now you need to intentionally darken the scene—underexpose it—by at least two stops. If you’re at f/11, making it one stop darker will take you to f/16, and making it two stops darker will take it to f/22—pretty easy when you think about it. So, set your camera to f/22. Use your camera’s built-in meter to find the proper exposure, and then change the f-stop so the sky and your subject are intentionally much darker. That’s the camera technique.
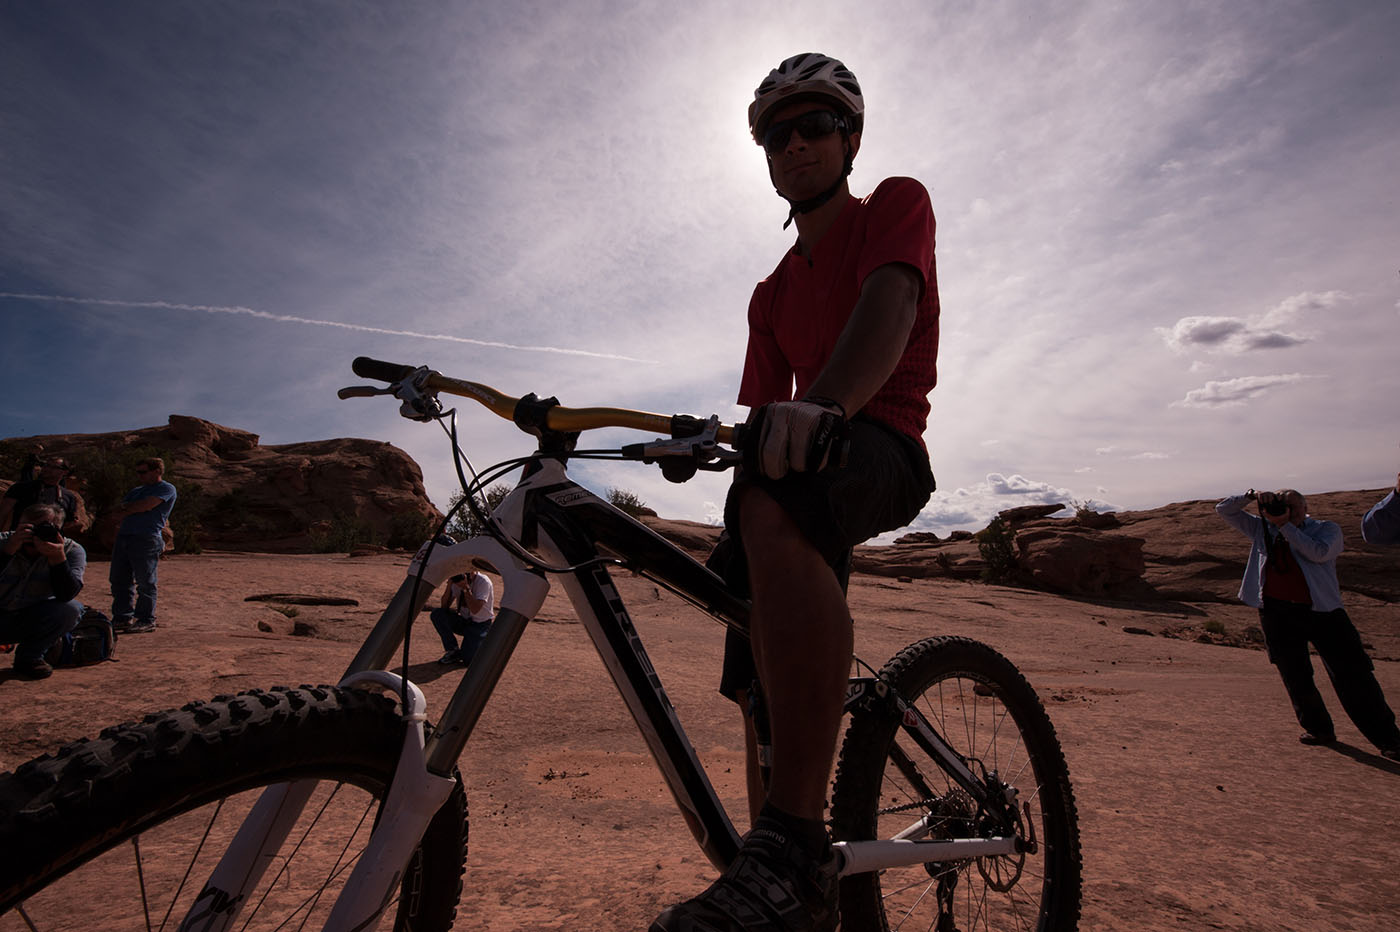
Figure Three
Here’s a behind-the-scenes shot so you can see the simple lighting setup we’re using. We have a 7′ collapsible light stand (very lightweight and inexpensive) with a tilt-swivel head on top of the stand that lets you slide a hot-shoe flash right on top of it. It also has a hole for you to slide the umbrella right into it, and you tilt the entire head up or down. Tip: I keep this tilt-swivel attached to the light stand so I don’t have to mess with putting it on each time. It makes the setup that much faster and, because it’s so small—just a few inches tall—keeping it on there doesn’t add any appreciable height or weight. Also, notice that the flash is firing through the umbrella directly at my subject, and that I leave the diffusion cap on to spread the light into the umbrella to make it softer.
I’m triggering the flash using a PocketWizard Plus II wireless remote. If your camera has a built-in pop-up flash, you can trigger your off-camera flash using that pop-up flash, but change your flash setting so it doesn’t really light the scene; instead, it just sends out a small pulse of light that triggers the flash. I use a wireless trigger, like the PocketWizard or RadioPopper, for one simple reason: It works consistently. When using the pop-up flash, “line-of-sight” triggering, you constantly have to move the flash head so the sensor on the flash is aiming back at your camera—a major pain.
Now, I know what you’re thinking, “But I see Joe McNally using pop-up flash to fire his flashes all the time.” Here’s the thing: Joe McNally is the magical unicorn of hot-shoe flash, and I believe his flashes fire consistently just out of sheer respect, fear, or both. So, while it does work really well for Joe, the rest of us won’t experience that level of consistency and will eventually pull our hair out. Instead, save yourself countless hours of frustration by using wireless radio triggers.
Tip: When you order your wireless trigger, make sure you also order the small accessory cable that connects your wireless trigger to the input on your flash unit. (If you order from B&H Photo, they’ll know what you need.)
By the way, do you know why I have an assistant holding that stand? It’s because the downside of umbrellas is that they tend to fly away with the slightest breeze (much more so than the EzyBox Hotshoe), so it helps to have someone keeping a hand on it so you don’t watch the whole rig crash over—as has happened to me more than once.
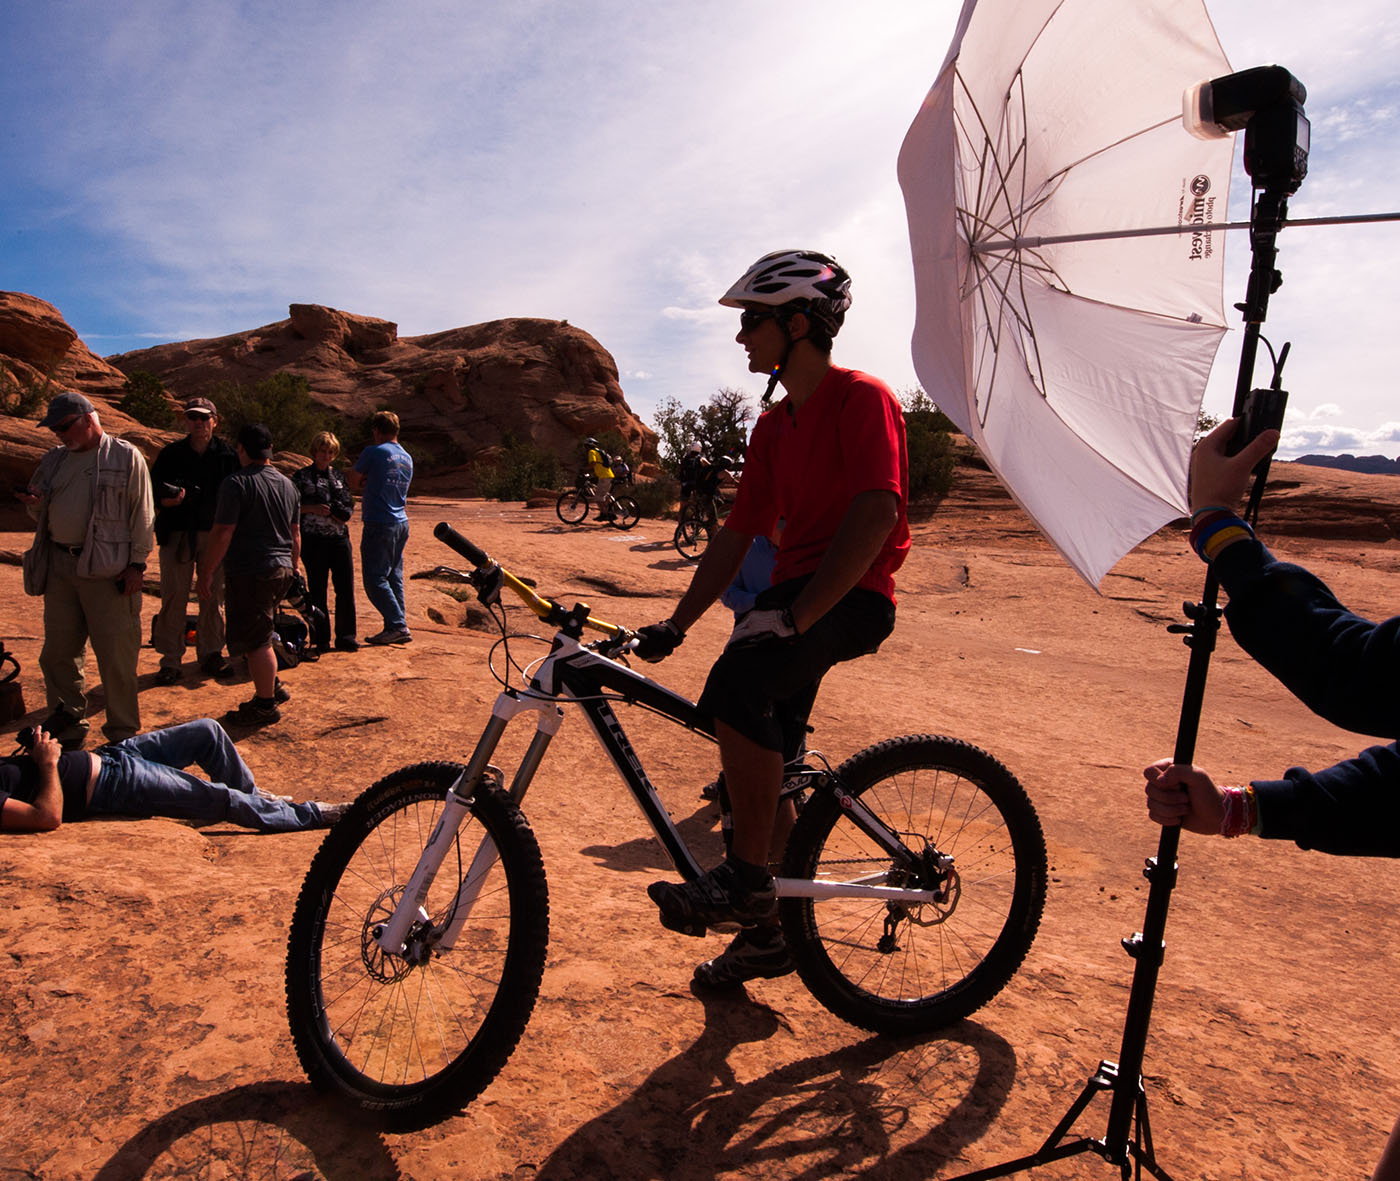
Figure Four
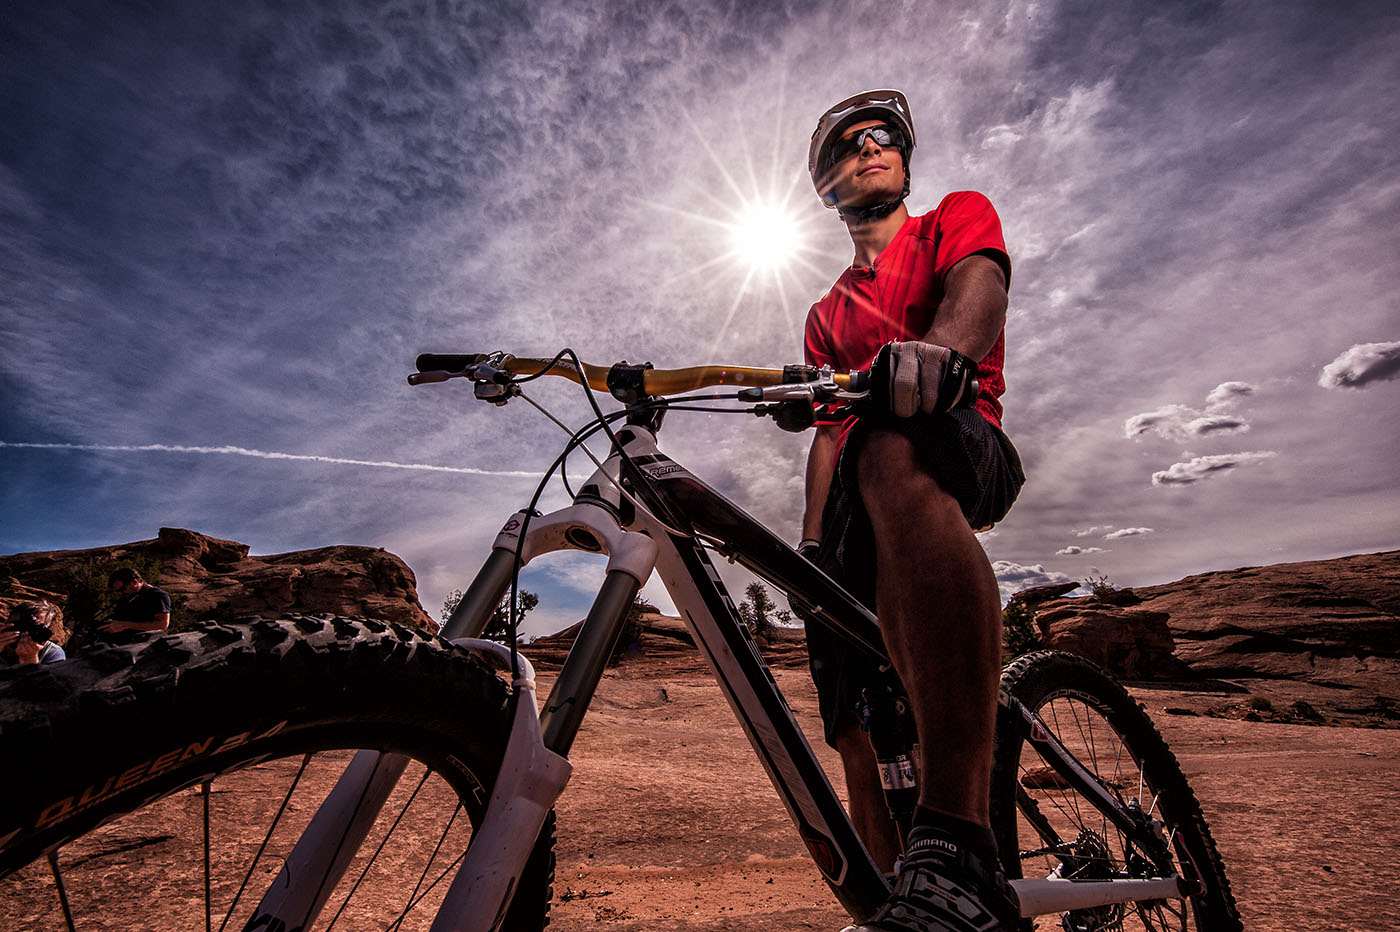
Now turn on the flash. I usually start with my flash set to 1/2 power. (Note: I use my flash only in Manual mode, where I set the power of the flash on the back of the unit myself.) As you can see here, 1/2 power doesn’t provide enough light on a sunny day like this. To get the larger-than-life perspective, I got down on one knee and shot up at the rider with a wide-angle, 14mm lens.
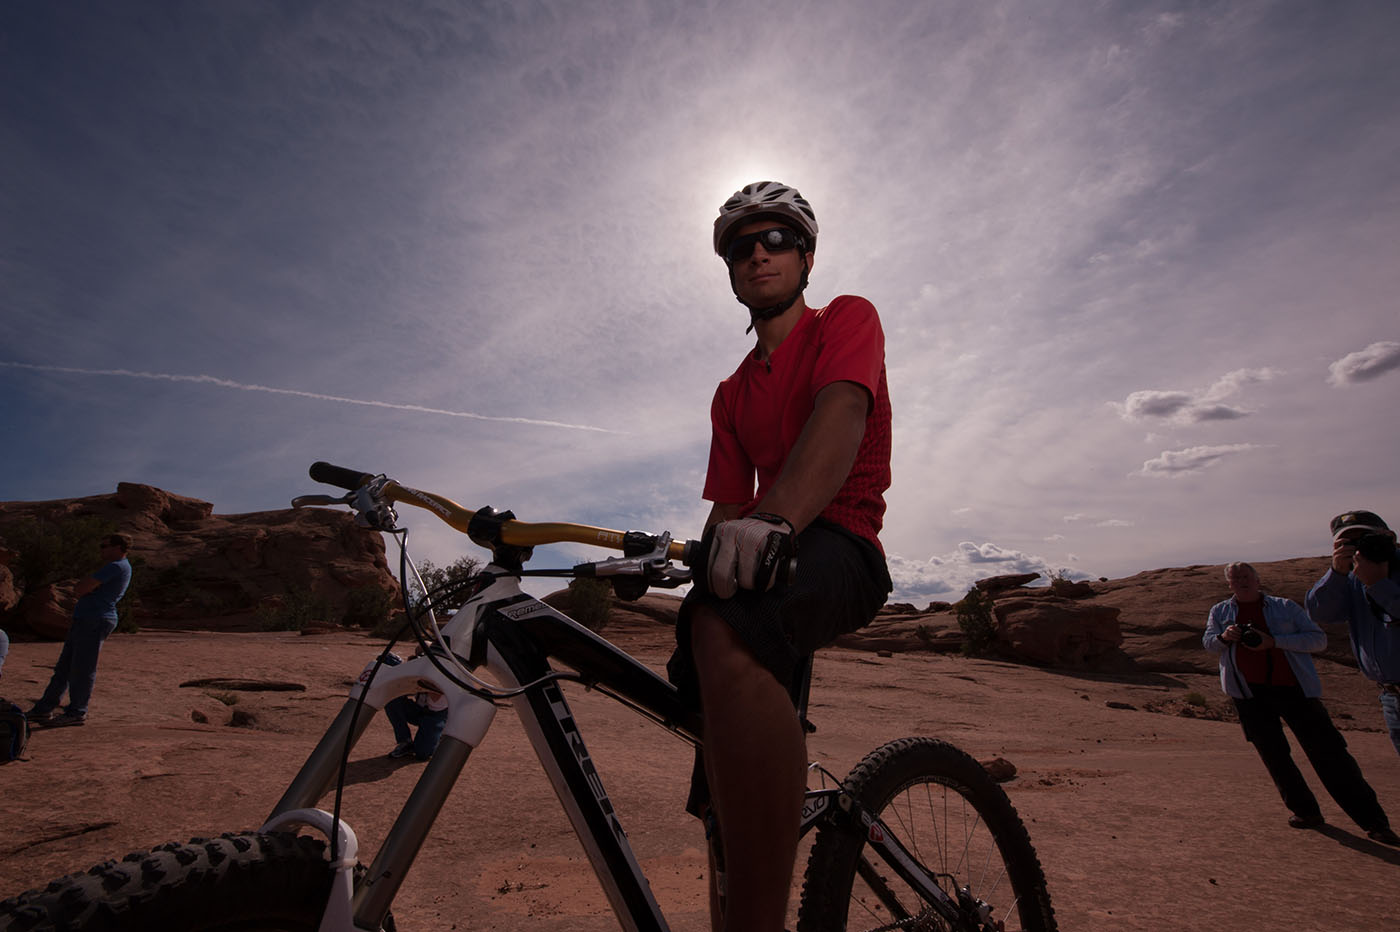
Figure Five
Here, I cranked up the power on the flash to full power, which looks much better. Also notice how the light actually falls off pretty well (his face is well-lit, and then the light falls off). The trick to creating a faster light fall-off is to move the light as close to the subject as possible without actually seeing the umbrella in your shot. You don’t have to do this as much with the EzyBox Hotshoe, but with an umbrella, you need to get it as close as possible to get the fall-off you want.
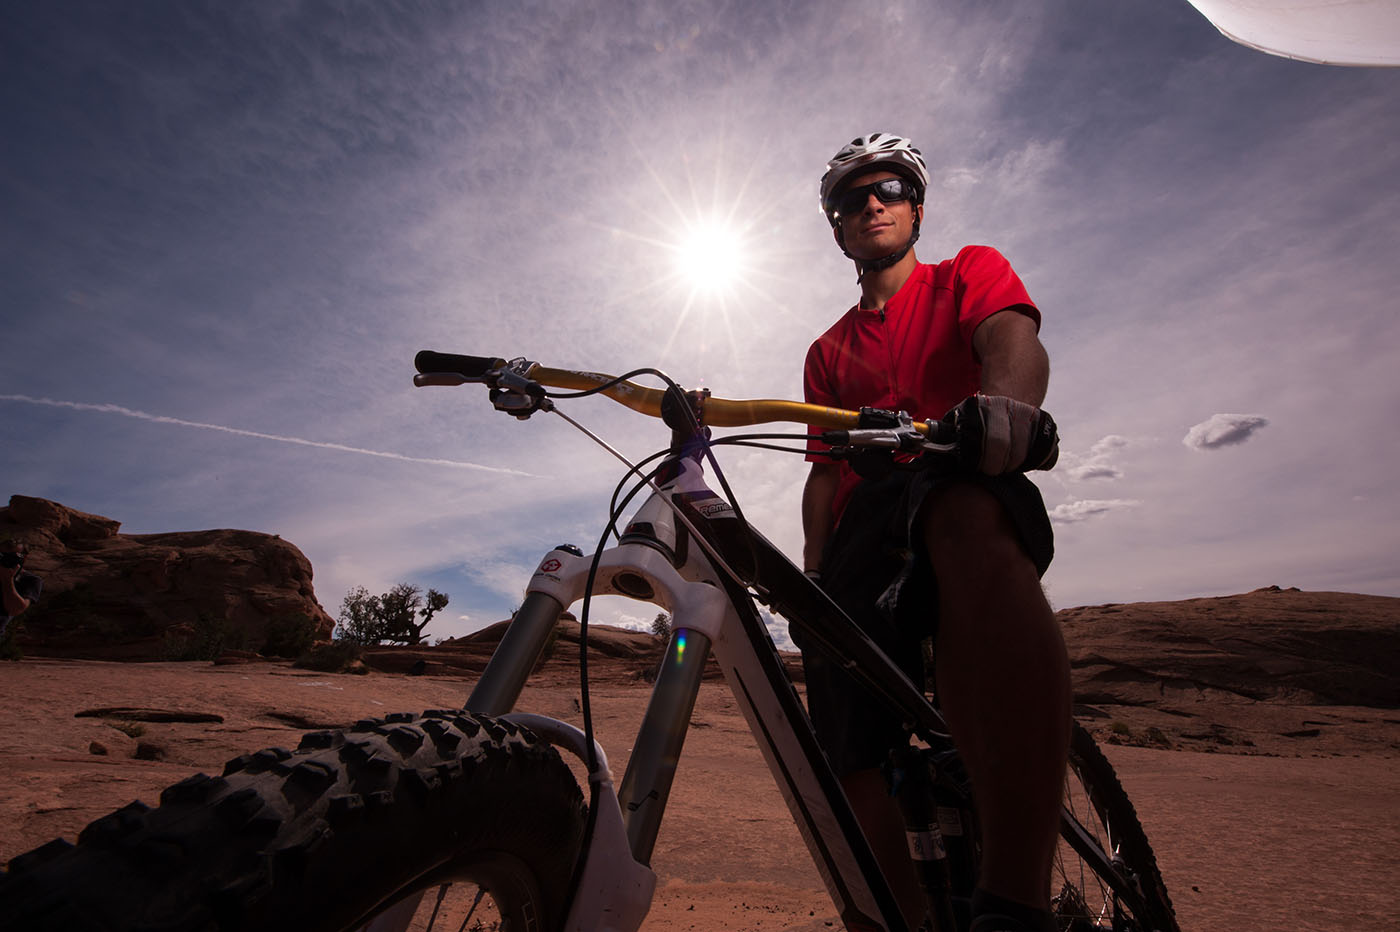
Figure Six
We’re getting close, but the right side of his face is pretty dark. We have an easy fix for the shadow problem on our subject: I simply asked him to look toward the light, which gave us the image you see here. I included the Camera Raw settings so you can see how I tweaked the image in Photoshop.
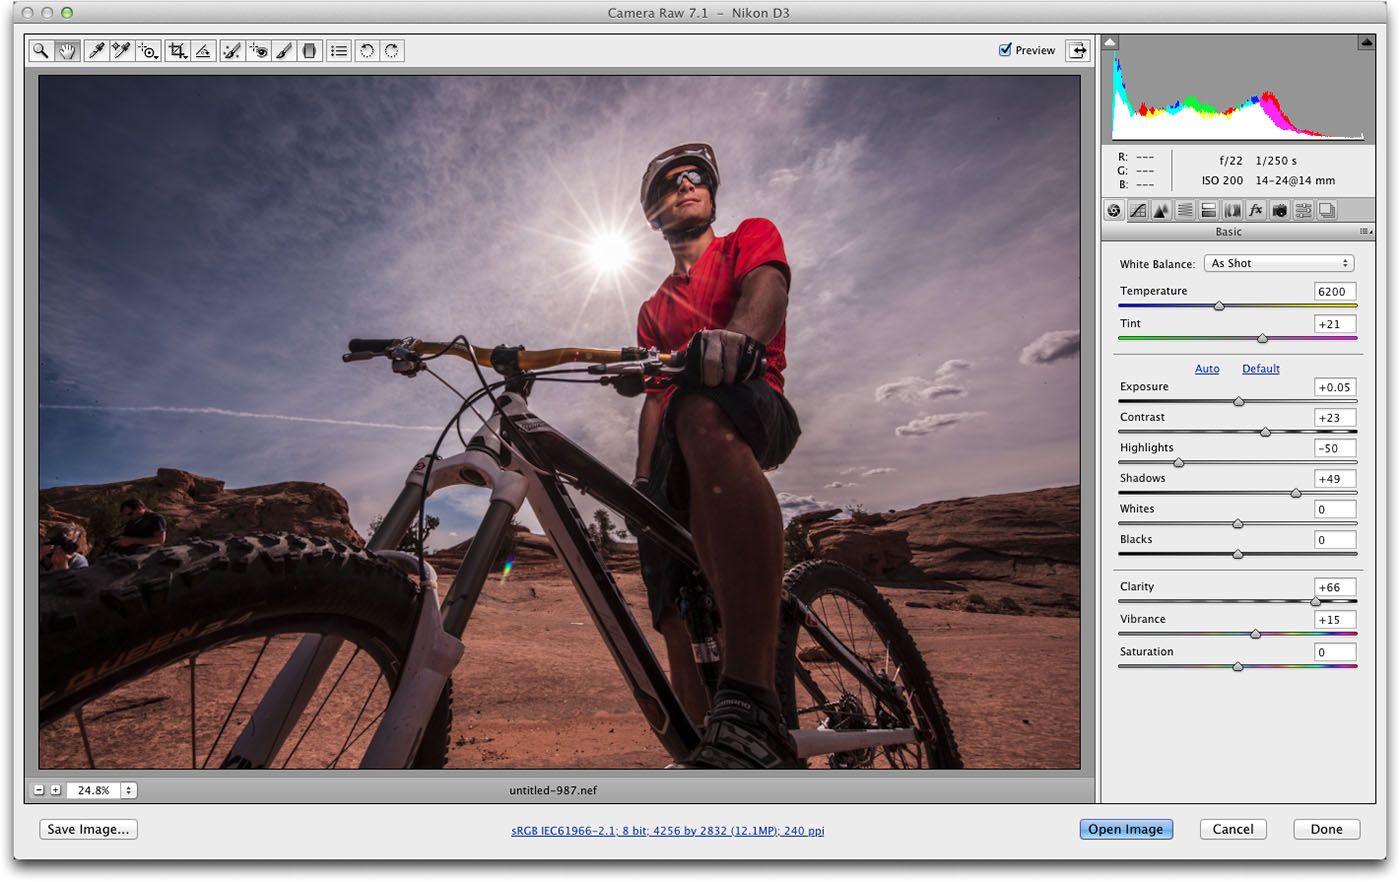
Figure Seven
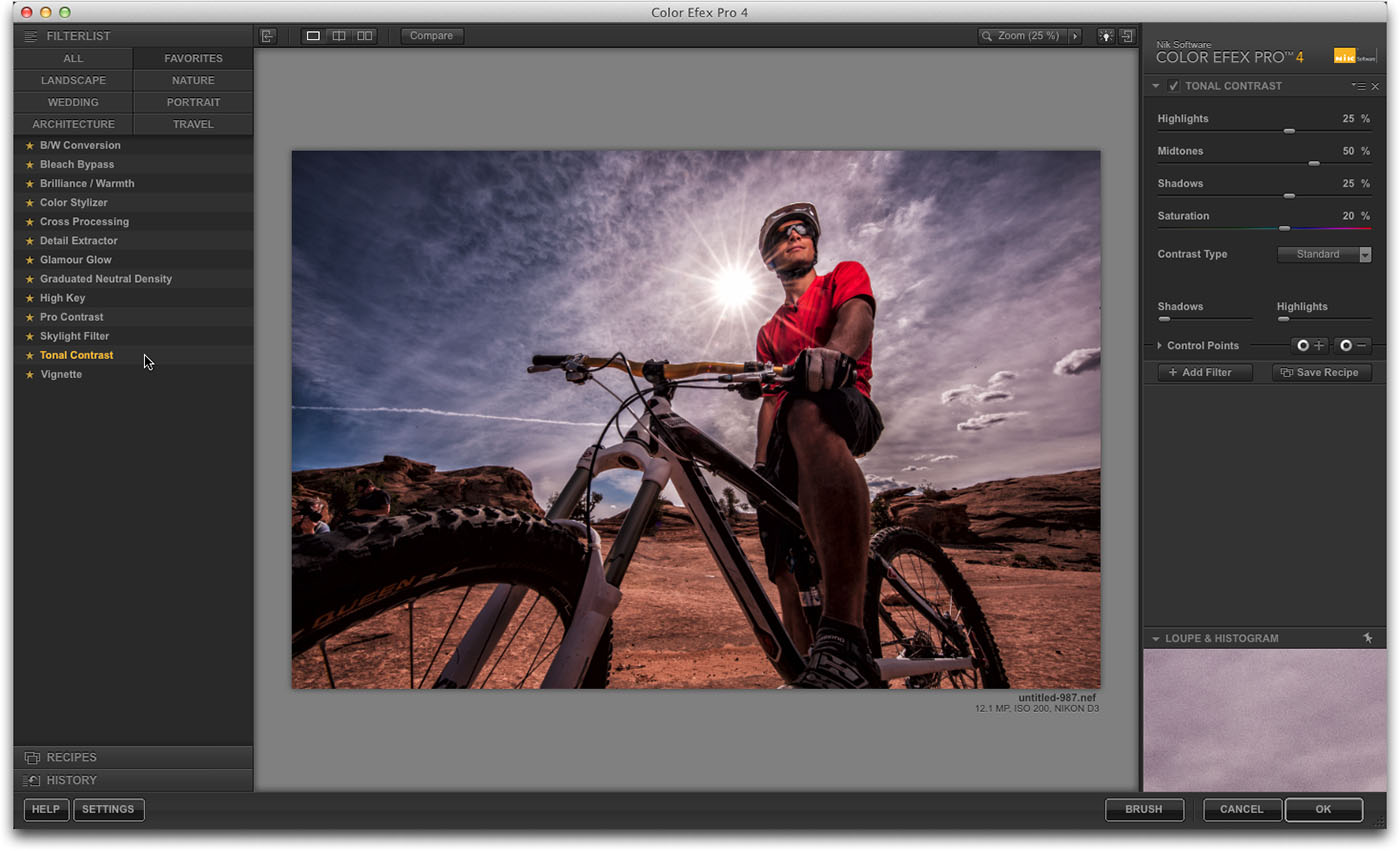
The final move was to apply Nik Software’s Color Efex Pro 4 (a Photoshop plug-in) using their Tonal Contrast filter and its default settings (shown here).
Learn more about Automating in Photoshop with these time saving times. See more about Scott on his blog.
