
Natural Lighting and Vintage Cars

Ever since the advent of digital photography, the landscape of every niche photo market has changed drastically. I always joke that I was lucky to be born at just the right time, so that as I went through school and into a career in photography, I got to evolve as the media evolved. It would be easy to state that the transition from slide film to digital was a breeze for me, but I fought it to the end. When I graduated from college and became an automotive photojournalist, I was shooting slide film because that’s what print media was using at the time. This forced me to understand natural light and how to use it to make my images stand out among the crowd.
Josh Mishler
When I finally made the switch to digital in 2005, it didn’t change the way I shot my subject, but digital did influence the automotive images you saw in print. Today there are a number of automotive photographers who are doing some amazing things with artificial light on location, and with Photoshop in postproduction. But I’ve always had a love affair with natural light, and I always will. Since I used slide film and had to count on someone in the magazine’s art department to make the images look great in print, I essentially had to nail the images when I shot them.
Josh Mishler
Conversely, I love many aspects of digital photography and the marriage it has created with Photoshop. A number of things I worried about with regards to slide film can be fixed with the click of a mouse in Photoshop. When shooting with slide film, I used to tote around a bag full of warming filters and a reflector. Today, almost all warming is done in camera and tweaked on the computer. This means when I go out to shoot today, I am down to my two camera bodies, three lenses, a reflector, and my tripod. Due to the fact that I still use natural light, this usually makes my images fairly recognizable in print. In this article, I’m going to show you how I use natural light to create my automotive images. Hopefully after reading it, you’ll feel comfortable enough to create similar images yourself. After all, you only need your camera, a tripod, and the sun.
Josh Mishler
Step One
The lengthiest part of this process for me is scouting the location. When shooting an old car, some people think they need to find a park or old gas station as their setting. There are a number of reasons why these types of places are not ideal sites. For starters, most parks are cluttered with trees, posts, and benches. I try to stay away from situations like this because cars are very reflective, and the best way to prevent nasty reflections is to shoot in a wide-open area. I’m not saying this is the only way to shoot a car, but I find this to be the best approach when creating my images.
Josh Mishler
Most of the time I find my best locations outside of the city limits. Another reason I usually stay away from backdrops like old gas stations or really interesting scenes is because they’re too interesting. When I photograph a car, I want a background that disappears behind the car. The car is front and center and the focus of the image. Simple backgrounds like golden fields, consistent tree lines in the distance, and solid tones work best.
Josh Mishler
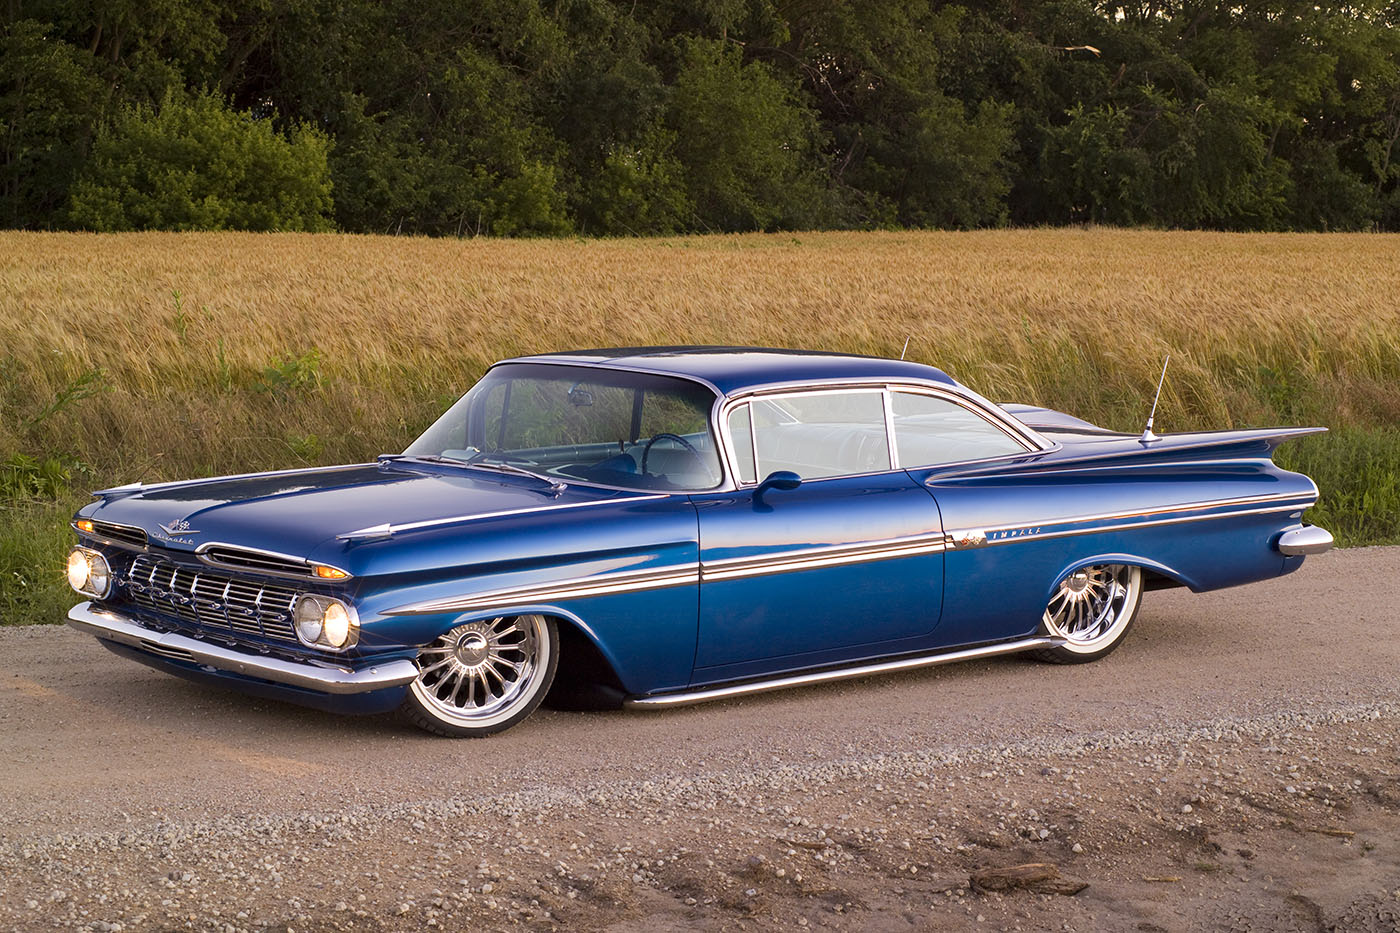
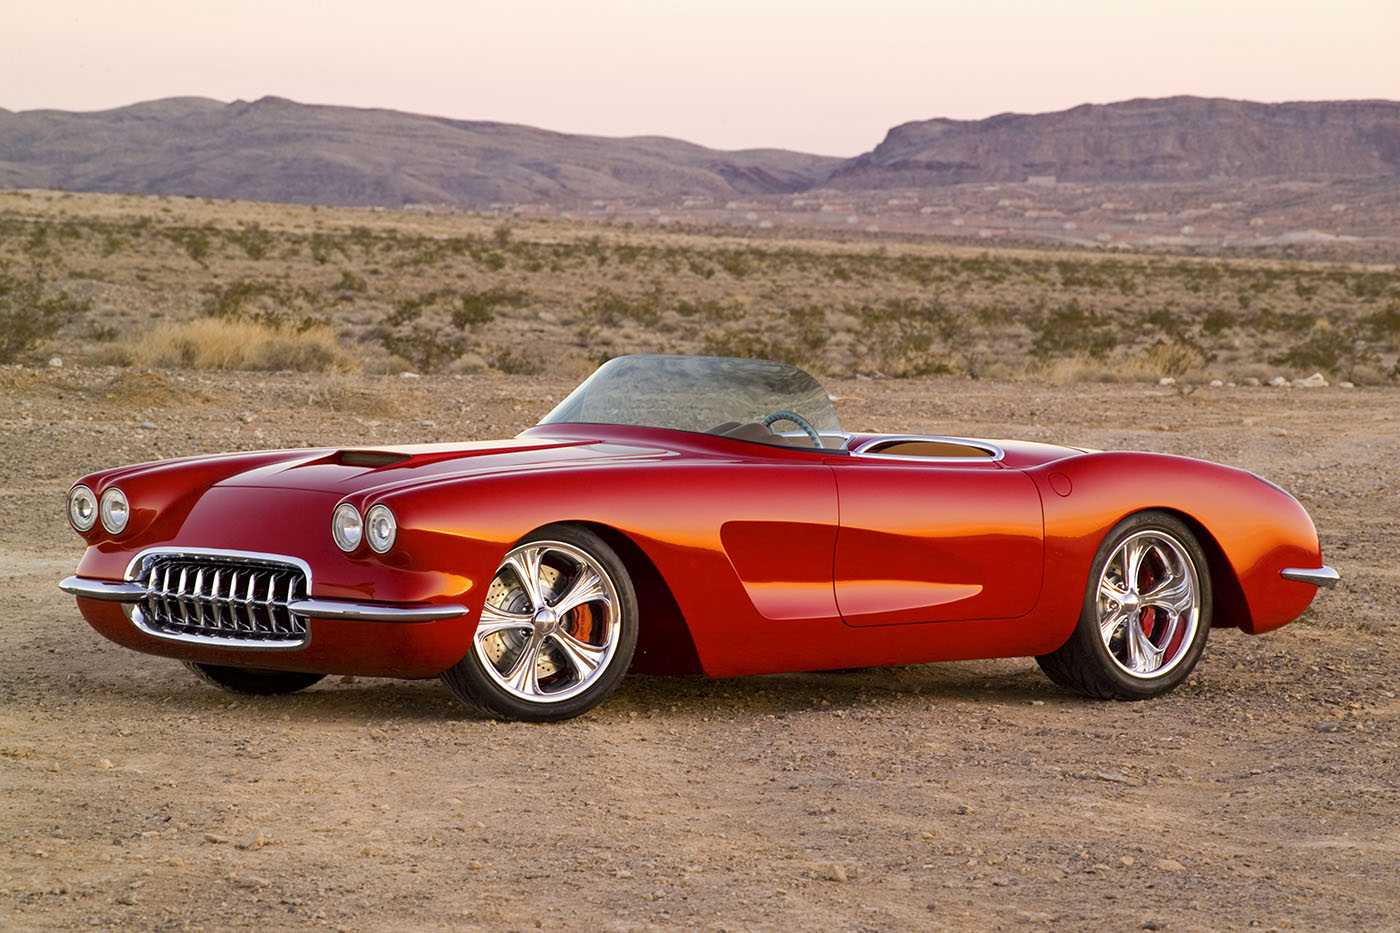
Consider the color wheel, too. I prefer shooting a blue car with a yellow or golden tone behind it, and a red car in front of a green tree line. This creates contrast and adds to the dynamics of the overall image. Additionally, you can find backgrounds in unusual locales. Piles of gravel at a rock quarry, construction sites, and decaying buildings can aid in creating great images.
Step Two
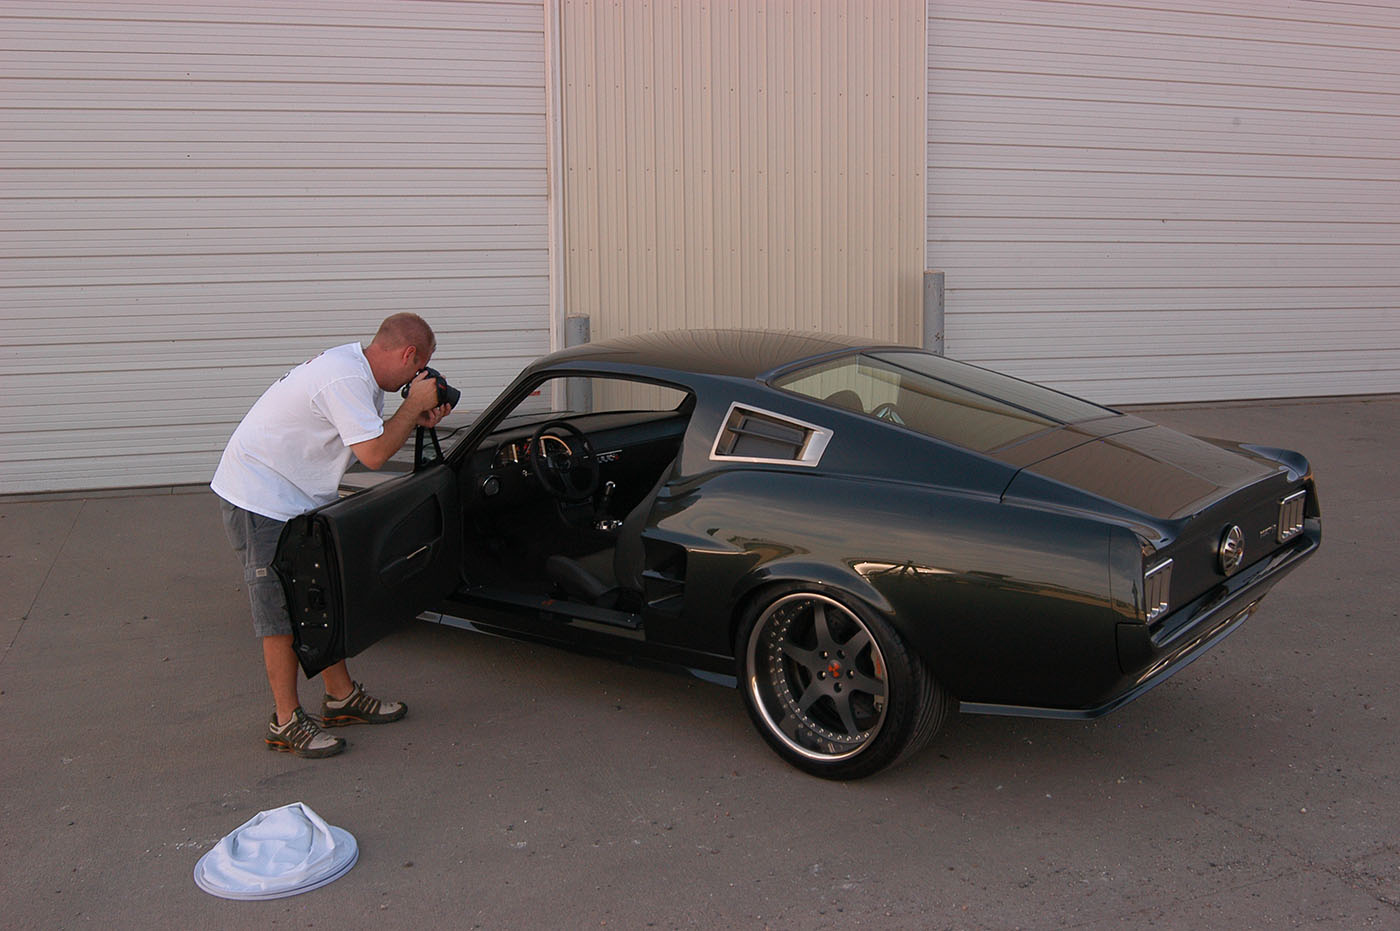
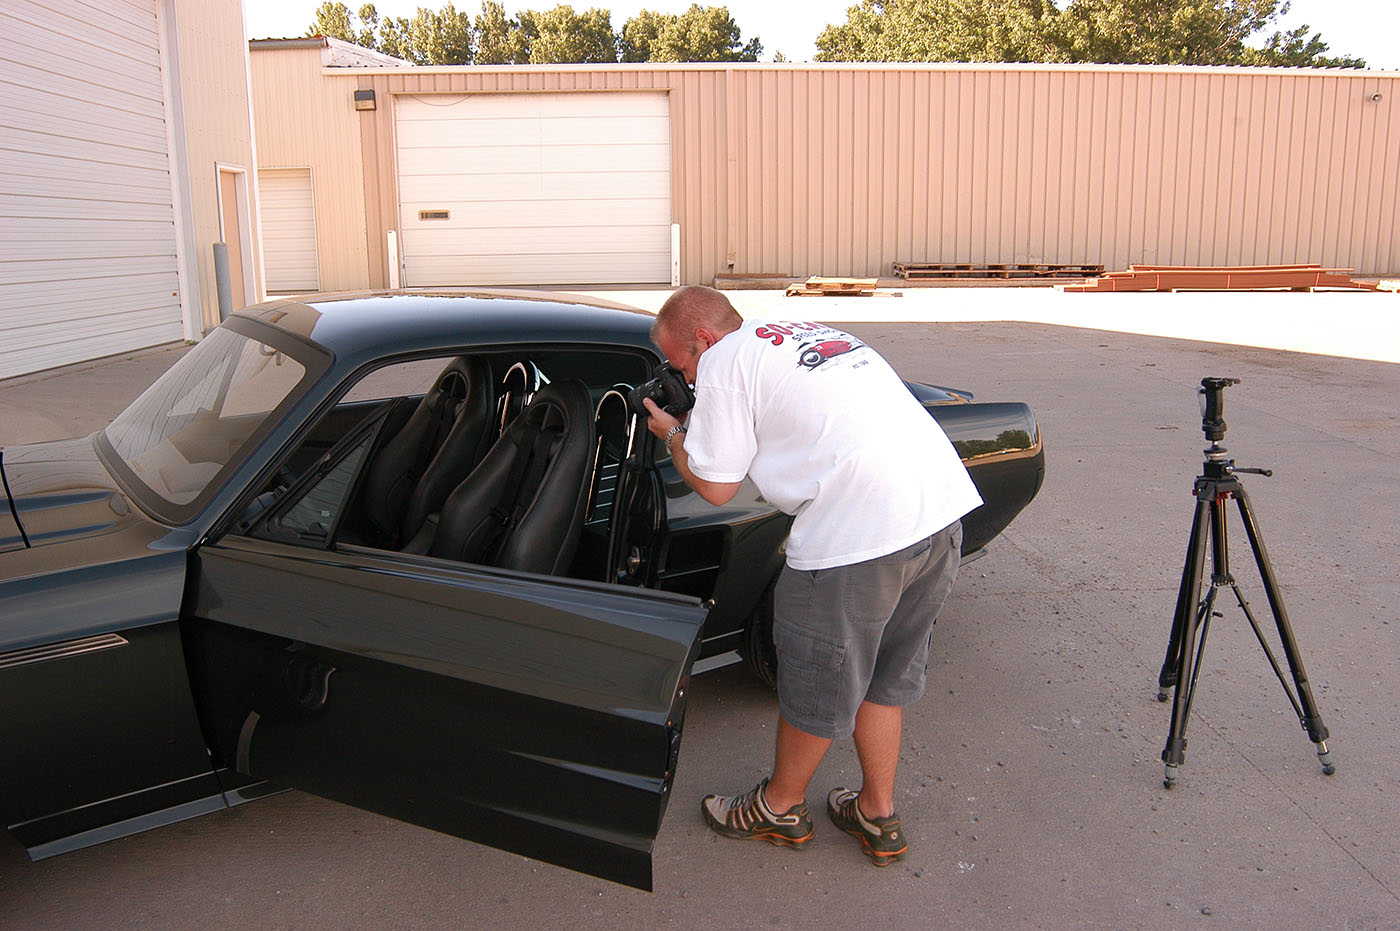
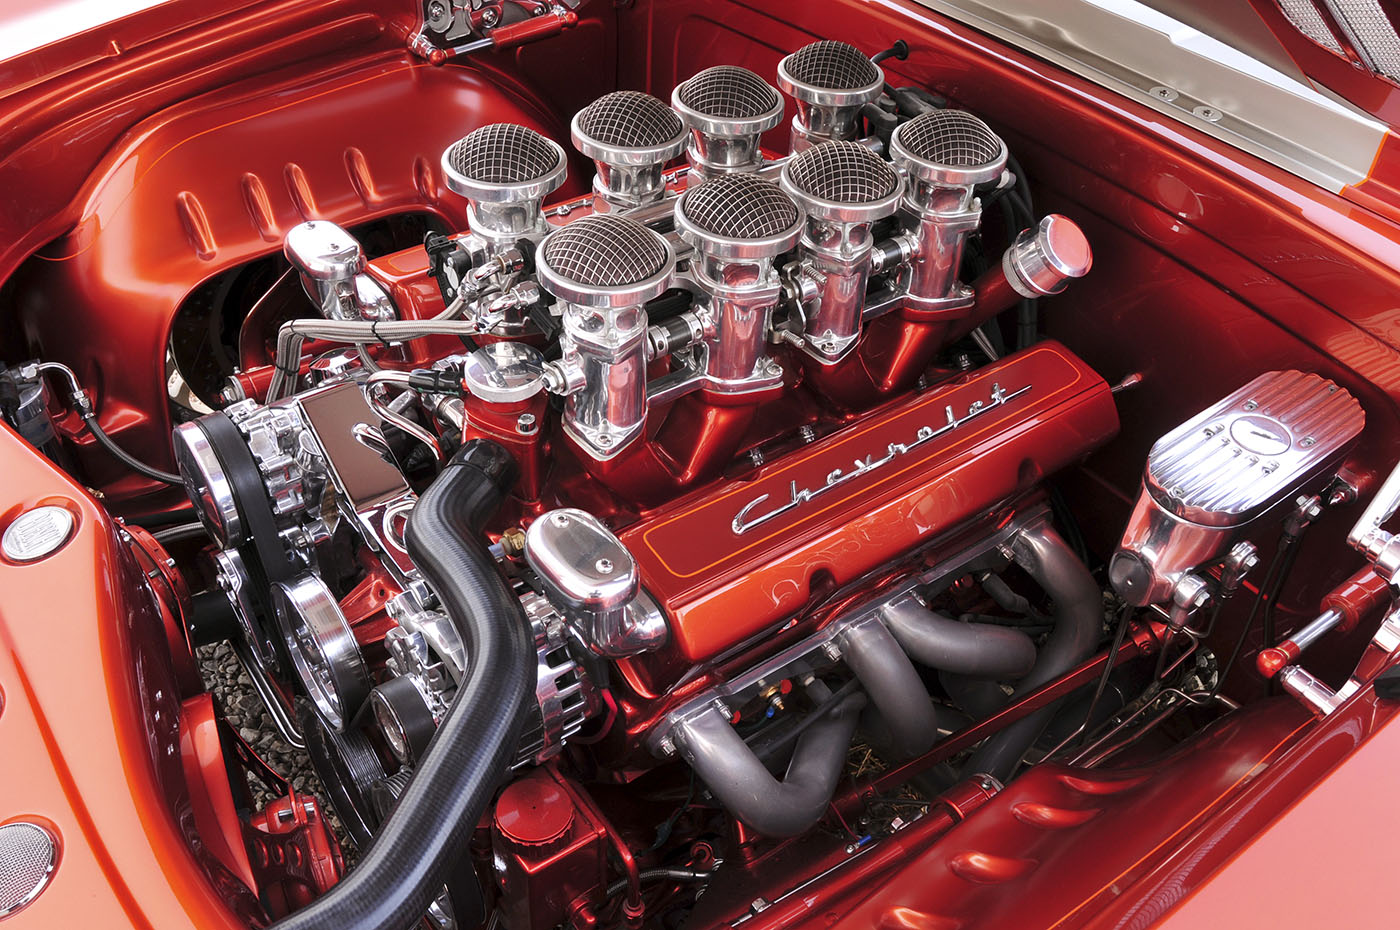
After I’ve decided upon a shoot location, I try to find a solid-tone building with open shade to shoot the detail images. This is where I’ll shoot the engine, interior, and miscellaneous details of the car a couple hours before sunset.
Doug Hoppe
The term open shade refers to an area that is blanketed by a cast shadow. Tall buildings in industrial parks are often some of the best providers of open shade. Other places that offer open shade are the backsides of strip malls and large retail outlets. These areas typically have large parking lots for semitruck access, and the buildings are almost always painted a muted, solid tone. The reason the solid tone is beneficial is because when you shoot the exterior details, the reflective surfaces pick up only one tone. Likewise, when you shoot the interior, the background visible through the windows is a nice, even, single tone.
Doug Hoppe
So you may be asking why I shoot these images in open shade. Open shade creates even light under the hood and on the car’s interior. If you have the opportunity, take your car to a parking lot on a sunny day, and shoot a photo of the interior and the engine. Then take the same photos in open shade. You’ll immediately discover why open shade is the superior way to shoot a car.
Step Three
To set up the photo shoot, I’ll typically position the car 5′ or more away from the shade-producing wall, usually with the nose of the car pointed toward the wall. It may take some maneuvering to find the right angle, so that the solid tone wall is the only background you can see in the photos. I shoot the images with my Nikon D300, usually set at ISO 200, white balance to Shade, and on Large JPEG Fine. The reason I shoot Large JPEGs for detail shots is because magazines typically run those shots at a half-page size or smaller, so a RAW file isn’t necessary.
Josh Mishler
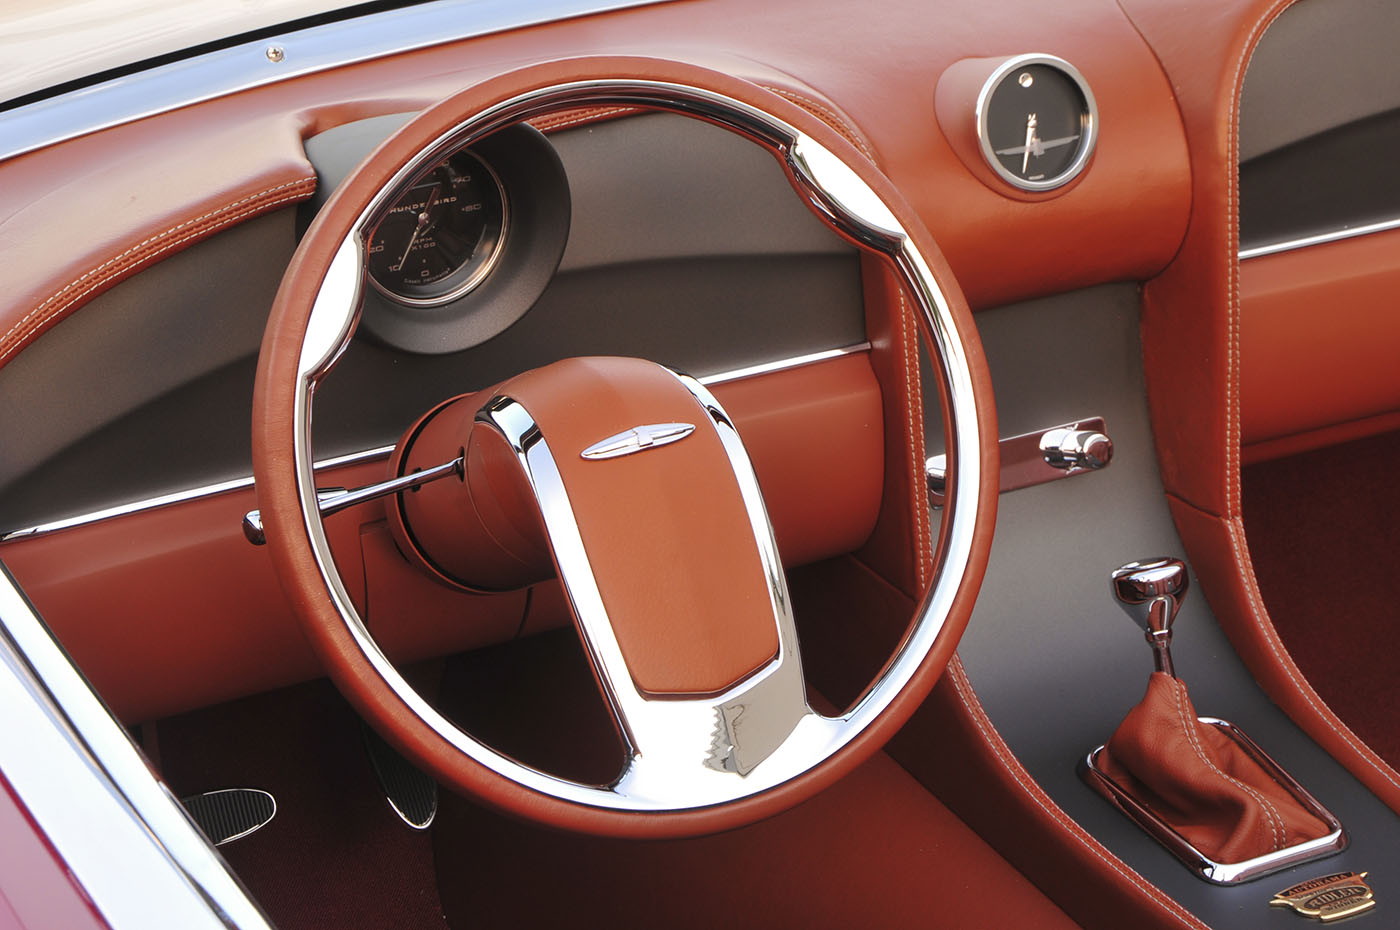
When shooting details, I’ll use all three of my lenses before I’m finished. My lenses consist of an 18–35mm, 24–120mm, and an 80–200mm. The 18–35mm is the one
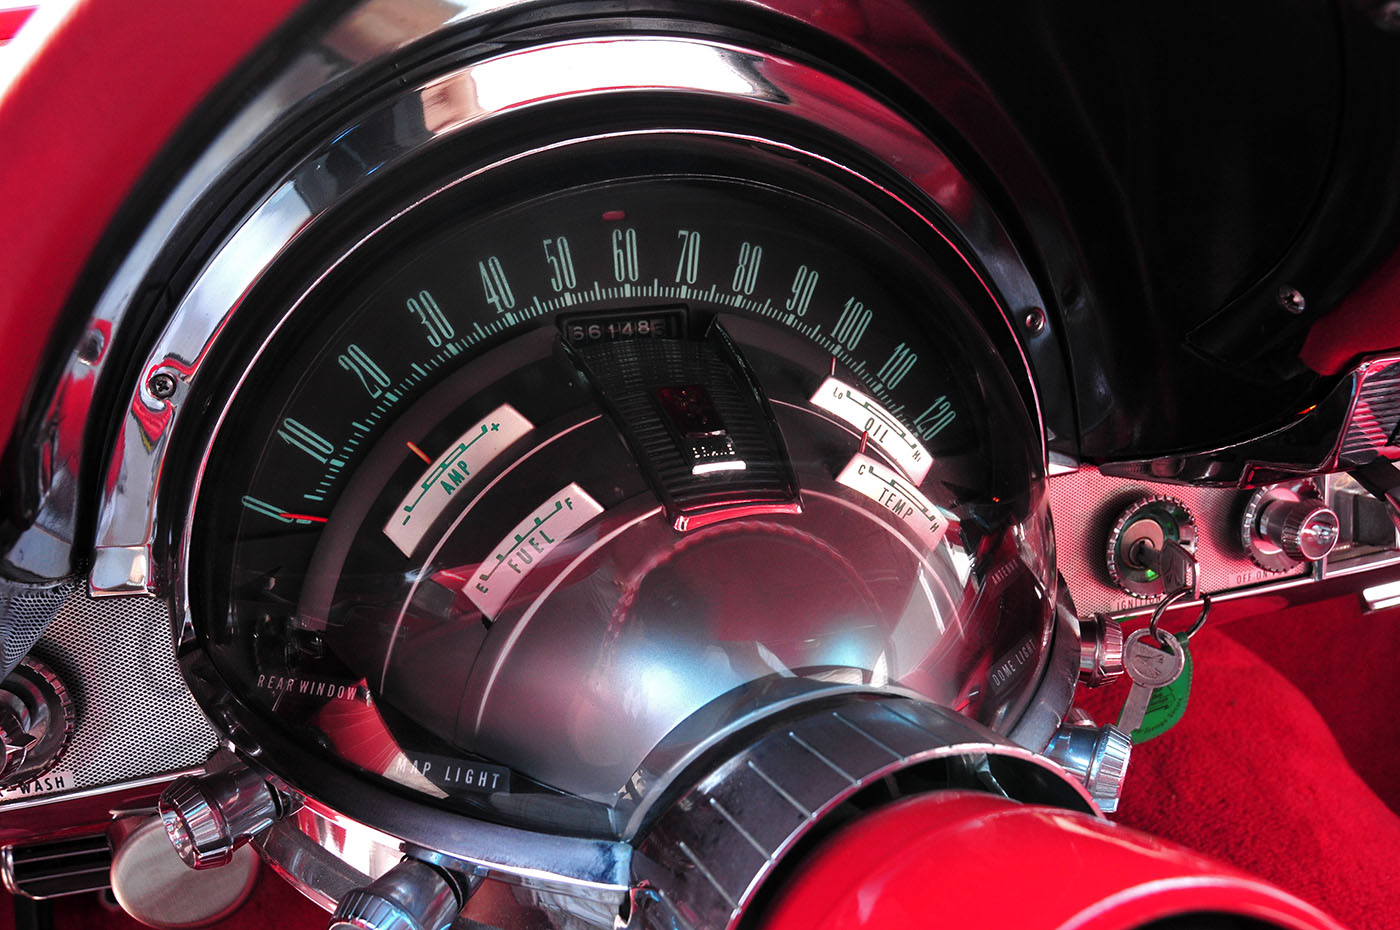
I use most often because I use it to shoot the entire interior. Due to the steering wheel and instrument cluster, I always shoot an interior shot that focuses on the dash from the driver’s side door opening. Then I’ll shoot images of the interior that focus more on the seats from the passenger side. When I shoot close-ups of the interior, I use a reflector to color any chrome items white and to reduce reflections on the gauges in the instrument cluster.
Josh Mishler
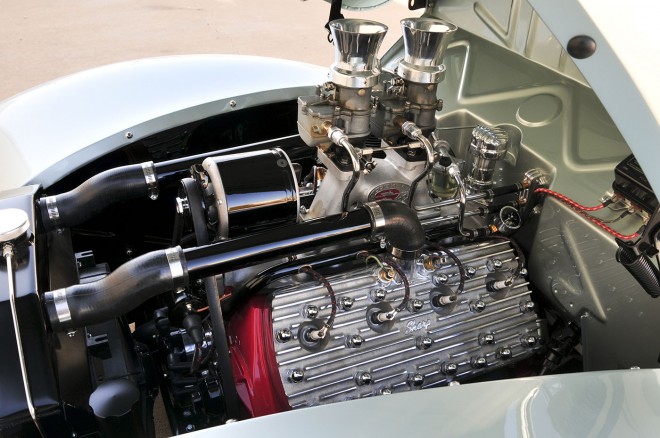
When shooting the engine, I alternate between the 18–35mm and the 24–120mm. The wide angle captures the whole engine compartment, while the 24–120mm is great for capturing the engine alone. Standing back and zooming in keeps the valve covers from having a tapered look, which is one of the downfalls of using a wide-angle lens.
Josh Mishler
Josh Mishler
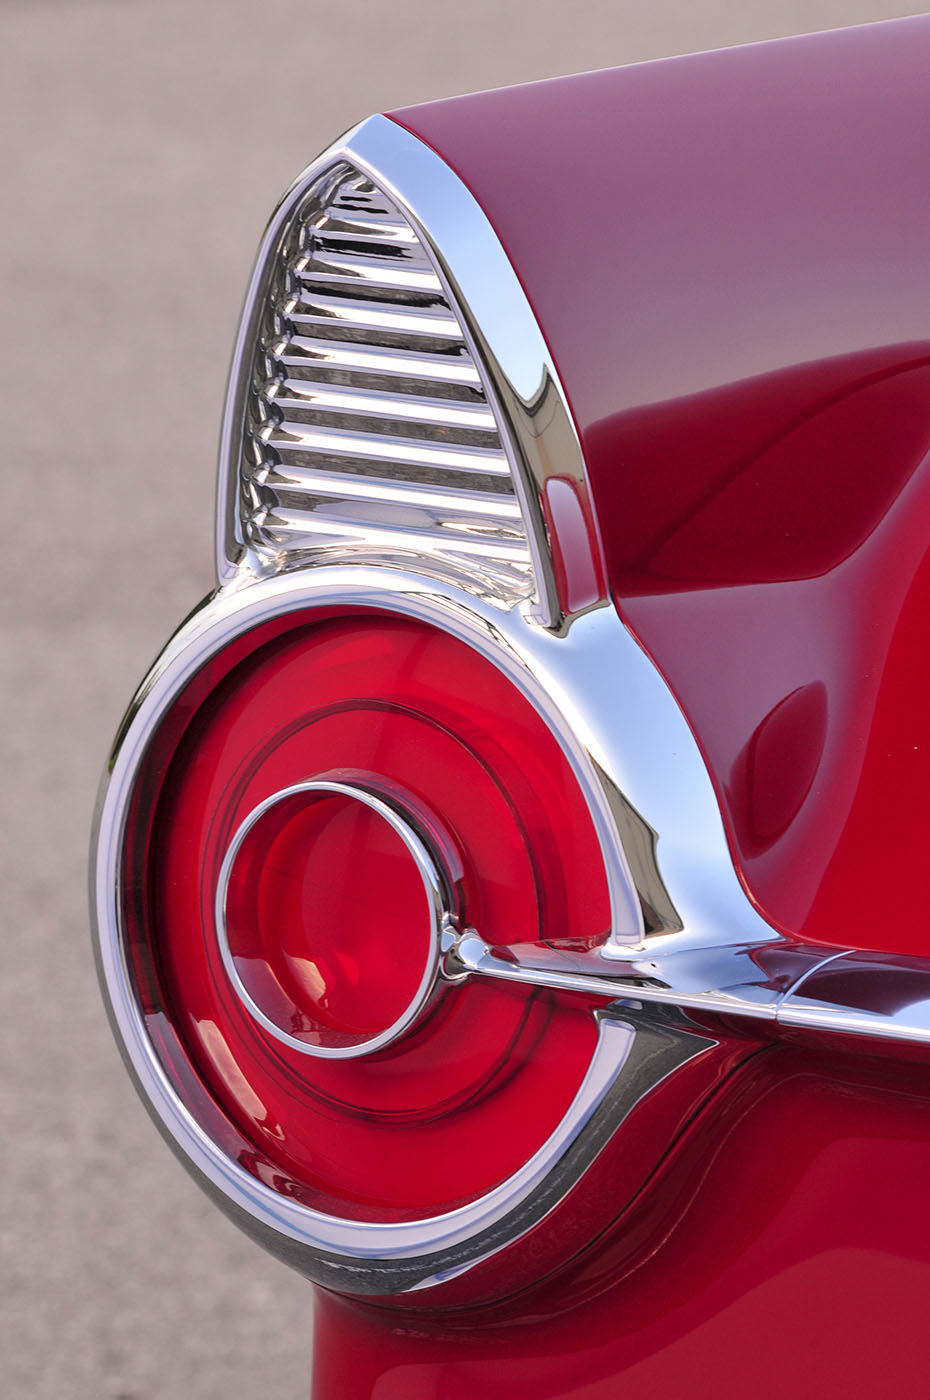
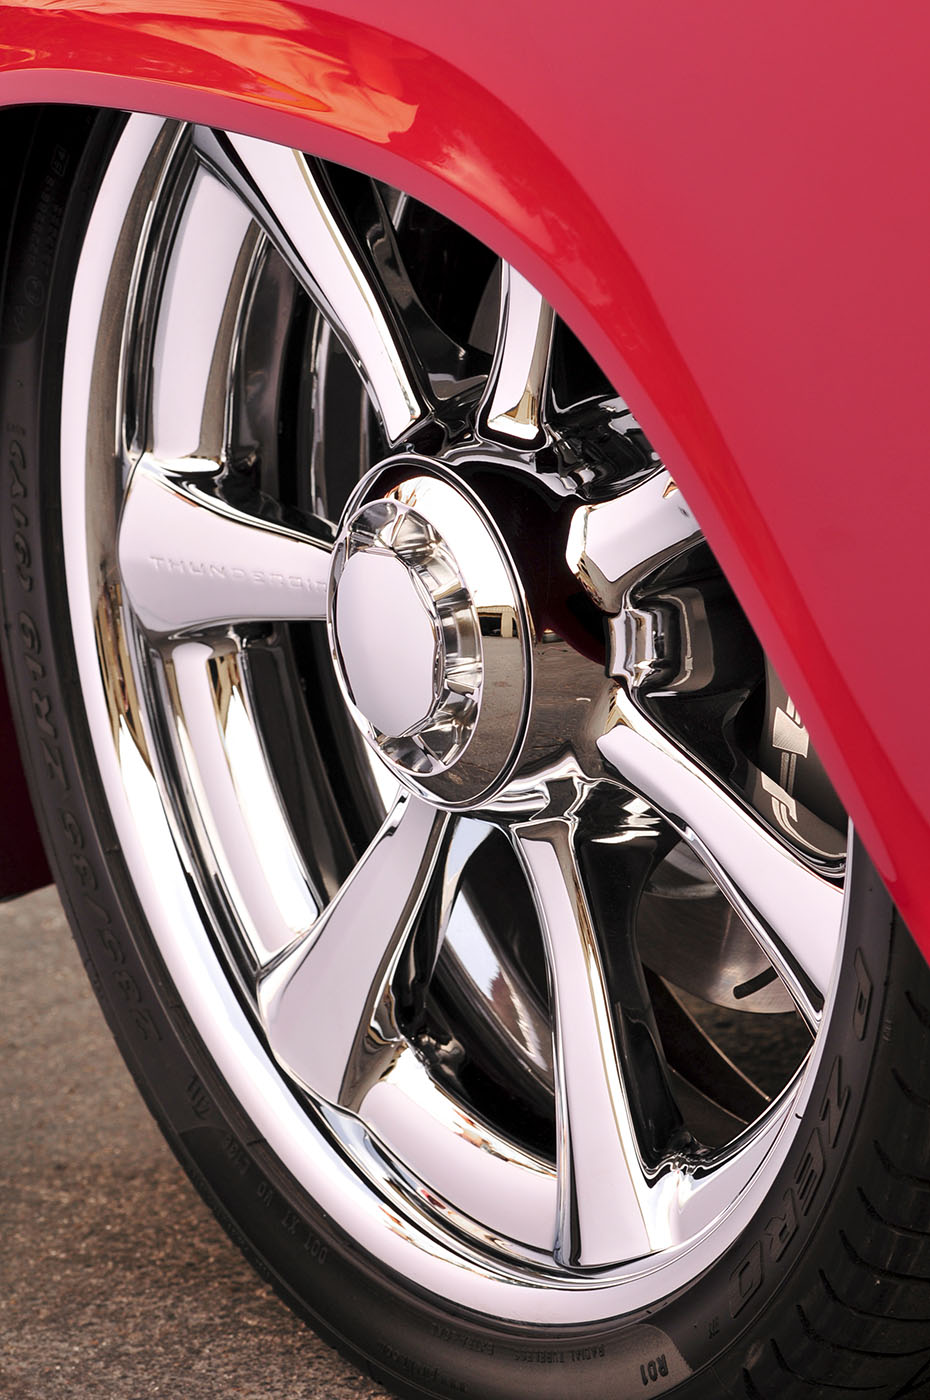
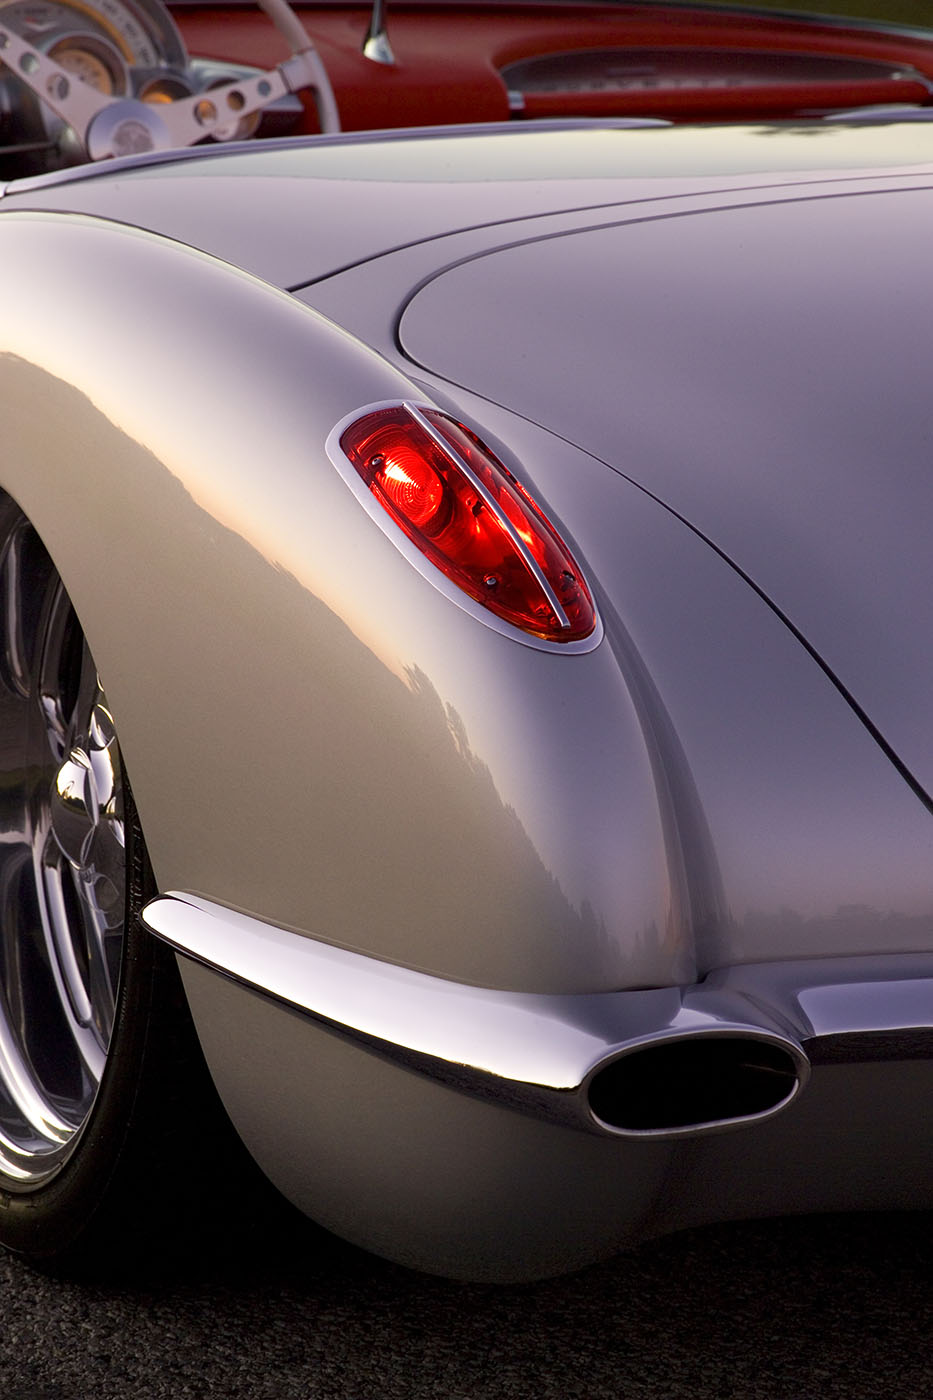
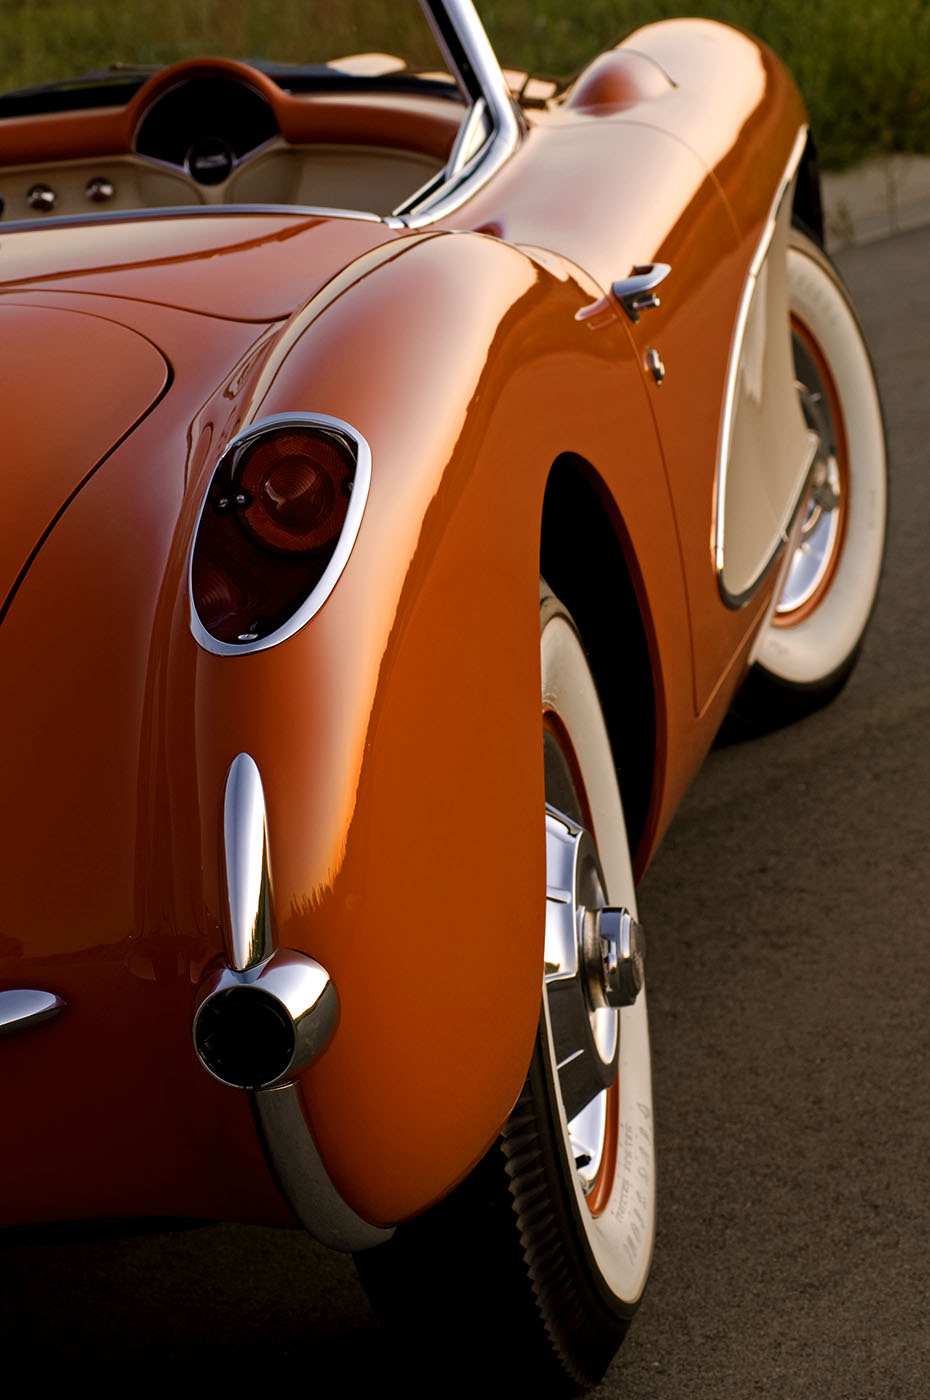
Finally, I use the long lens to capture exterior details such as wheels, taillights, and ornamentation. The reason is if I’m close up using one of the shorter lenses, I’m more likely to be reflecting in the paint or chrome. The long lens allows me to zoom in on the details from a distance and keep myself from showing up in the reflection. The reflector is also used on the exterior for the same reasons it was used on the interior.
Josh Mishler
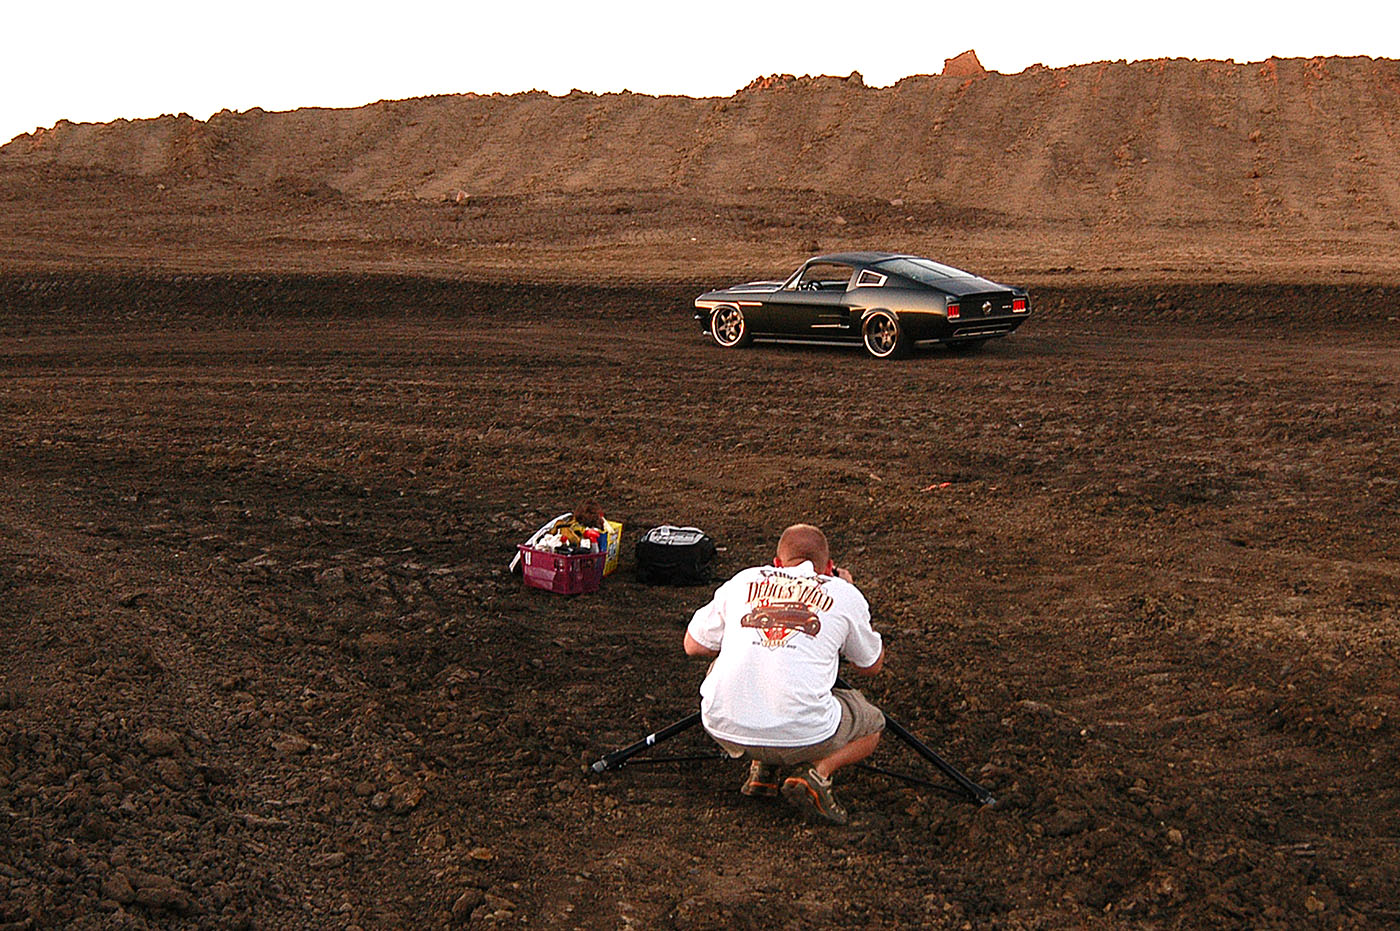
Step Four
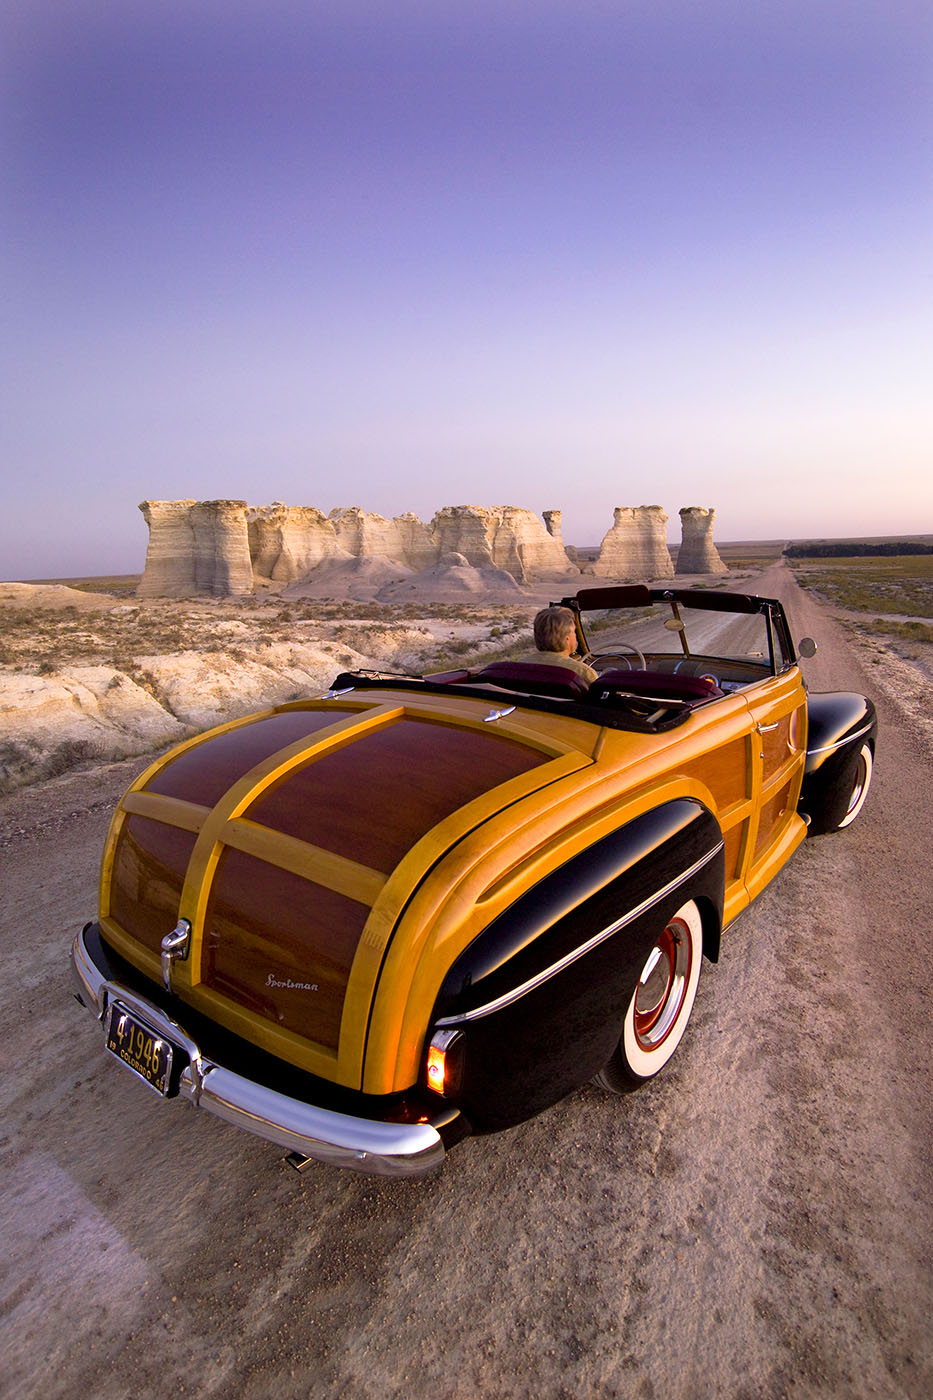
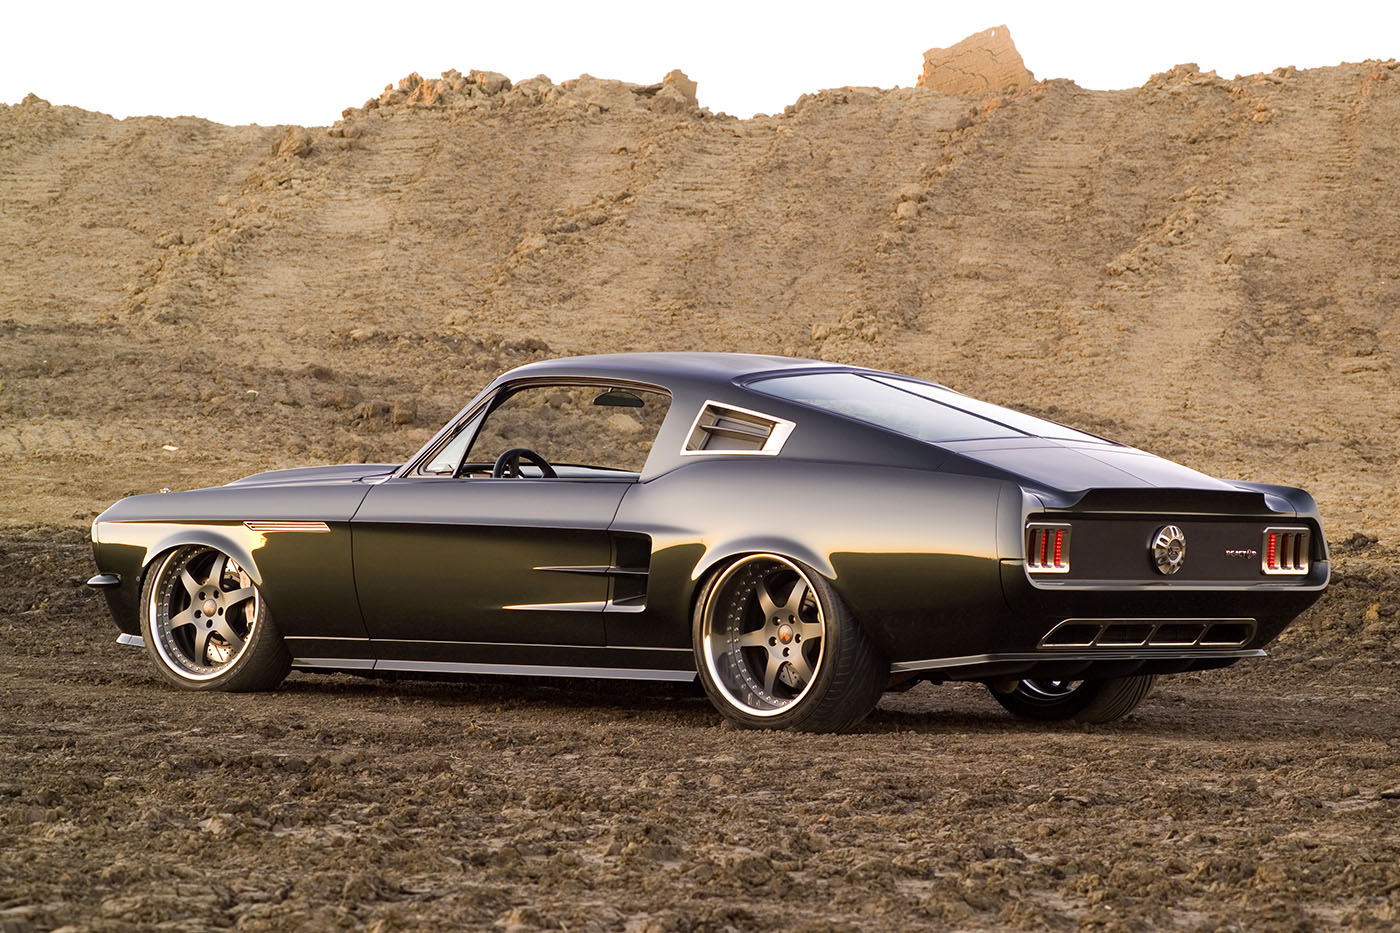
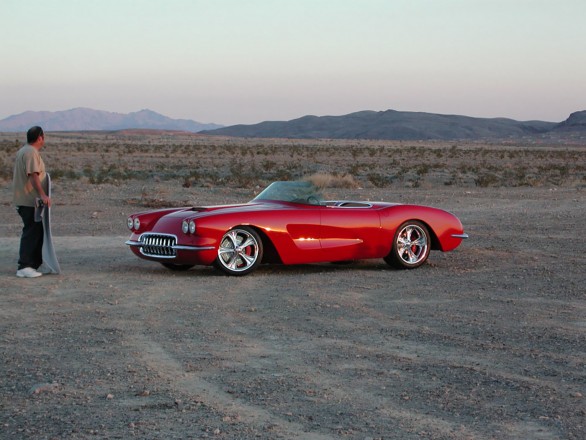
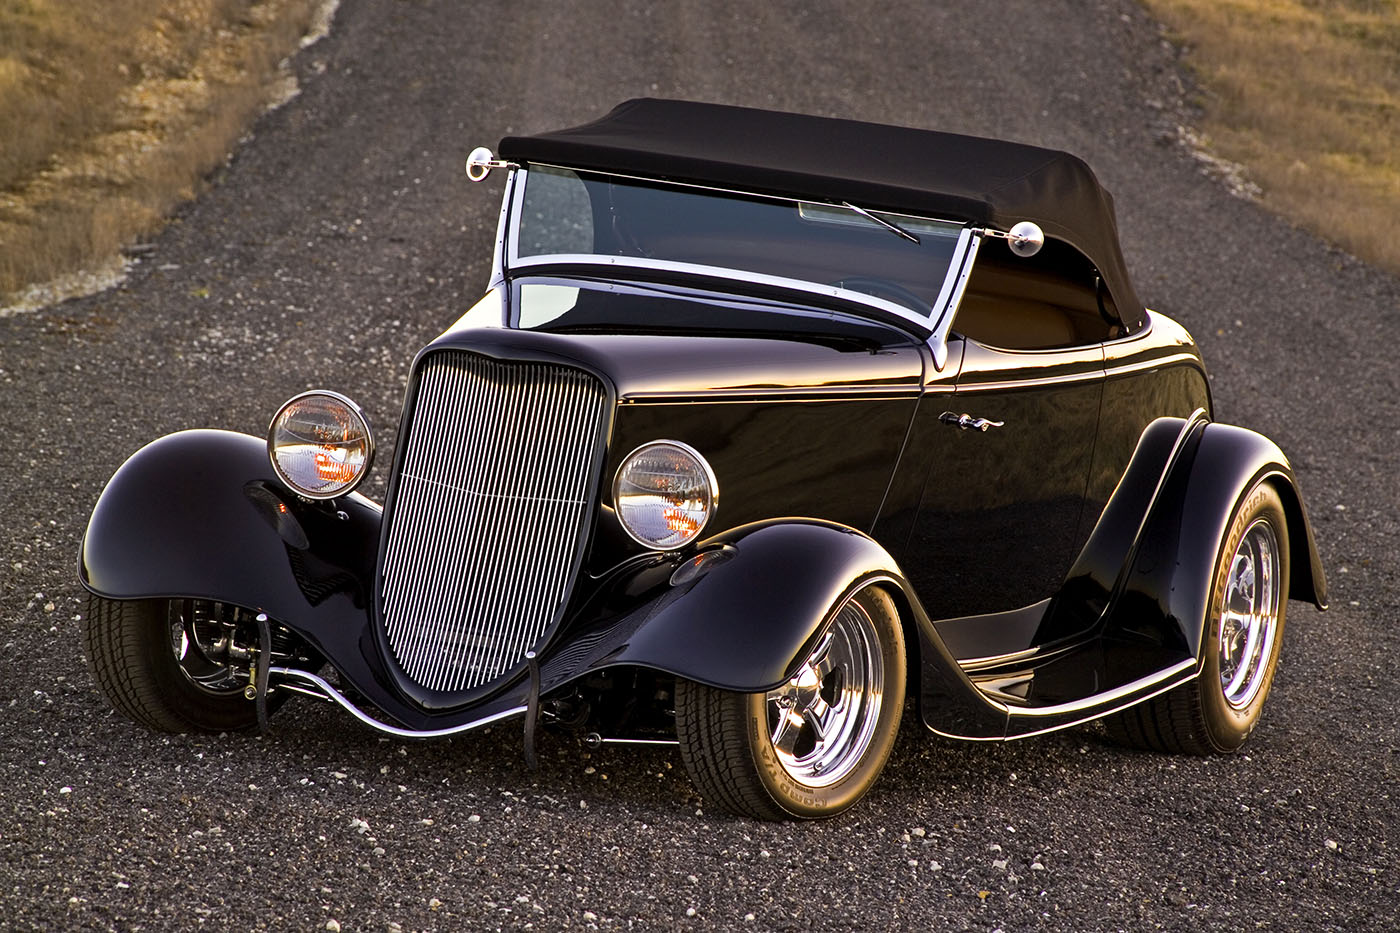
Now that shooting the detail images is complete, we’ll make our way to the selected location for the overall shots. I usually arrive at the location 20–30 minutes before sunset to get the car in position. This allows me time to determine which spot will yield the best lighting. Ideally, I like to face the car (front 3/4 view) with the sun to my right and just behind me. This allows the setting sun to create a nice horizon line down the middle of the car, which adds dimension to the photos. At this time, I also make sure there’s no clutter near the car, including trash, weeds, or anything that will obstruct the view of the car. This could be something as simple as a few blades of grass distracting from the view of the wheels.
Doug Hoppe
This is also a good time to look at the reflections in the paint of the car. Most of the cars I shoot have paint jobs that cost anywhere from $20–100K, so their reflectivity is pronounced. Thus, clean reflections are the ultimate goal. Once in position and with the area clear of distractions, I’ll wait to begin shooting until the sun drops behind the horizon.
Josh Mishler
Josh Mishler
Josh Mishler
Step Five
Now that the sun has dropped, it’s show time! This is the sweet light of the day, but it only lasts for about 30 minutes. To capture these images, I use my Kodak DCS Pro SLR/n and a Nikon MC-30 cable release with the camera set to RAW, and the white balance set to Cool Light.
Josh Mishler
I make sure to get a variety of shots: front and rear views, a profile shot, close-up beauty shots, and vertical cover shots. Not every car I shoot will grace the cover of a magazine, but I always include a cover shot just in case. Most magazines rarely use the close-up beauty shots, but I love to shoot and print them for myself.
Josh Mishler
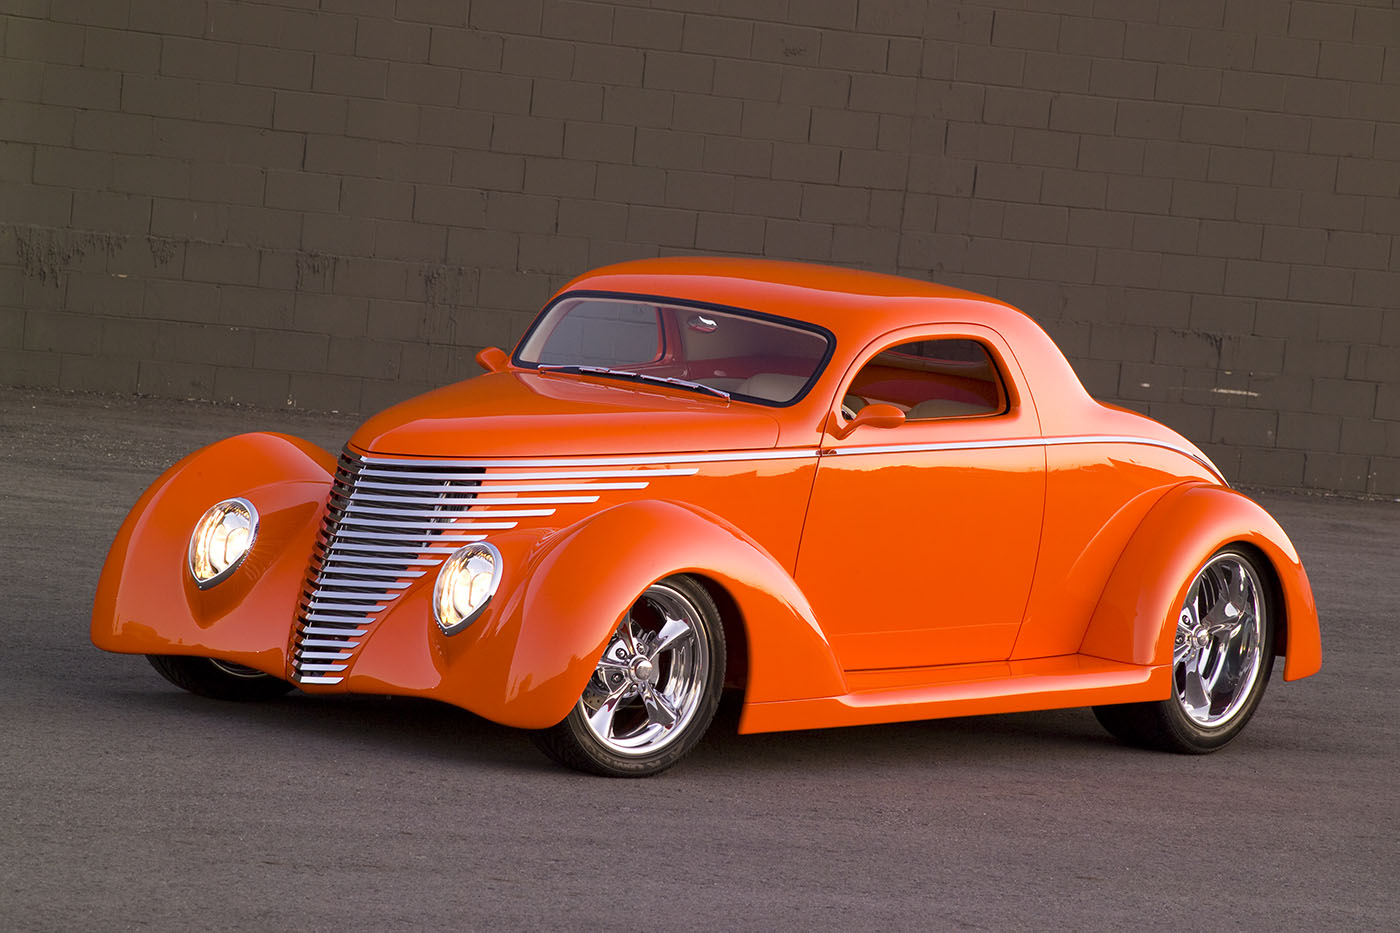
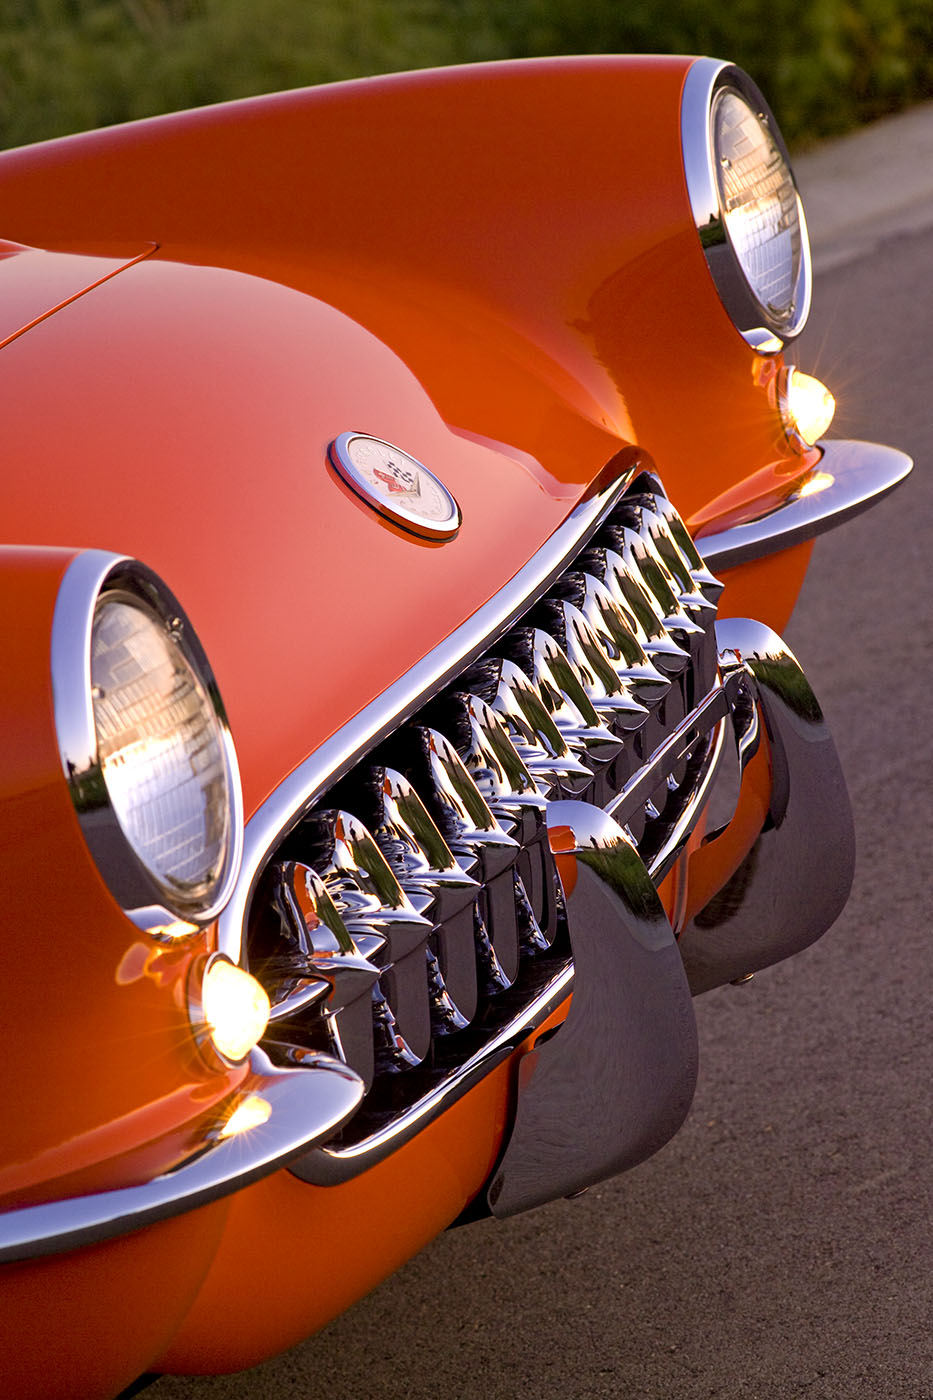
Because I usually shoot these images for a magazine, I typically won’t use a wide-angle lens. Most of my images are shot with the 80–200mm lens at f/11 or f/16. This allows me to stay about 50 yards away from the car, which keeps me out of the reflections. The only thing I’ll do to modify the light during this portion of the shoot is to use the silver side of the reflector to bounce a little light onto the front of the car. I don’t use this on every car, but it can provide a nice pop to narrow grills on 1930’s-era cars.
Josh Mishler
Step Six
It’s getting late, and the daylight is almost entirely gone. Now I’d like to mention a funny quirk about myself when it comes to shooting long exposures. I use the Kodak (virtually a dinosaur by today’s standards) to shoot the overall images. It’s a 14-megapixel camera, but they’re still crisp pixels that look great in print. I use this camera until the exposure time passes 3 seconds. After 3 seconds, the Kodak’s images break down and become very grainy. When the lighting requires more than 3 seconds to capture the images, I’ll switch back to the D300. This camera is much better at long exposures, but I still haven’t built up enough confidence in the D300 to shoot all of my overall images with it. Typically, these images never make it to print, but what they yield is visually stimulating.
Josh Mishler
When shooting 2- to 3-second images of someone’s car, they usually don’t think the photos will turn out very good, but they’re shocked to see how beautiful the lighting is on their car in those 3-second images. In my opinion, most of the images that require 1 second or more of exposure are some of the best.
Josh Mishler
Many of these cars are the pride and joy of the owner and represent the hard work and talents of a team of people who built them. It’s my job to make their car look the absolute best that it can. By following these steps, I’ve had a great deal of success in doing just that.
Josh Mishler
Josh Mishler, the author of this feature, you can see more of his work here at his website. Or check out Scott Kelby’s automotive images here.
