
Strobe and Natural Light Food Photography: Four Setups
Nicole S. Young
If there were a fly on my wall each time I photographed food, it would tell you my dirty little secret: I only use window light. Okay, maybe that’s not 100% true since I do use strobes from time to time, but the truth of the matter is that food looks beautiful with natural light, which is why it’s always my go-to light source. Plus it’s free, fairly reliable, easy to work with, and if you’re lucky enough to have a window with diffused light coming in to your home or studio, then you have the perfect setup for food photography.
But what if there’s no window with beautiful, soft light? Or, what if you need to photograph a large amount of images with the same quality of light, or continue shooting into the evening after the sun has set? There may be situations when you lose control over your shooting environment and have to regain that control by using artificial light. In this article, I’ll walk you through four different lighting setups using both sunlight and strobes to show you that it’s possible to create a natural light look with artificial lights.
Nicole S. Young
Setup One:Natural Light
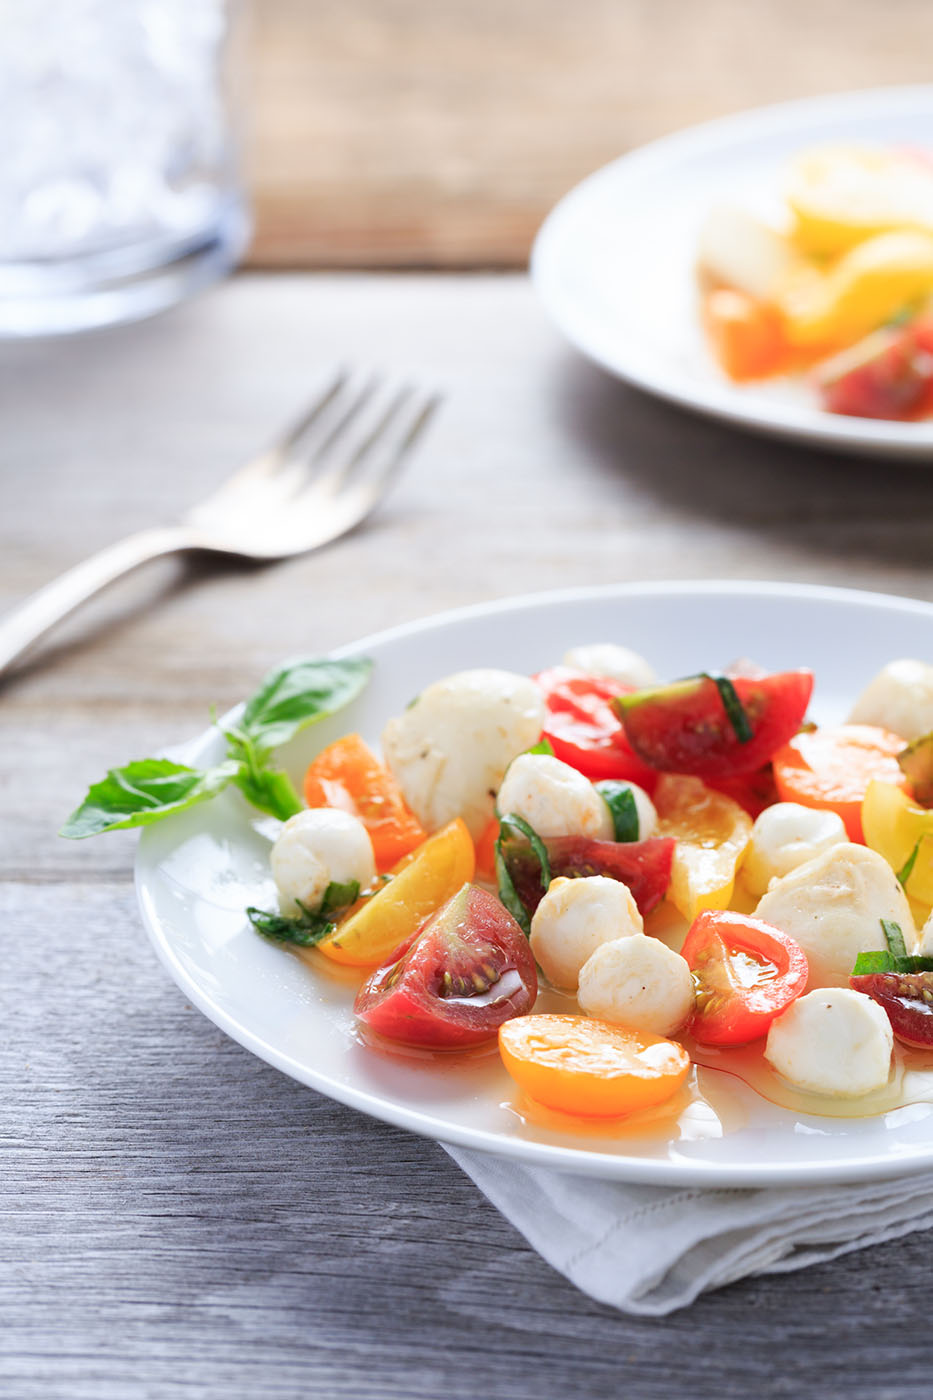
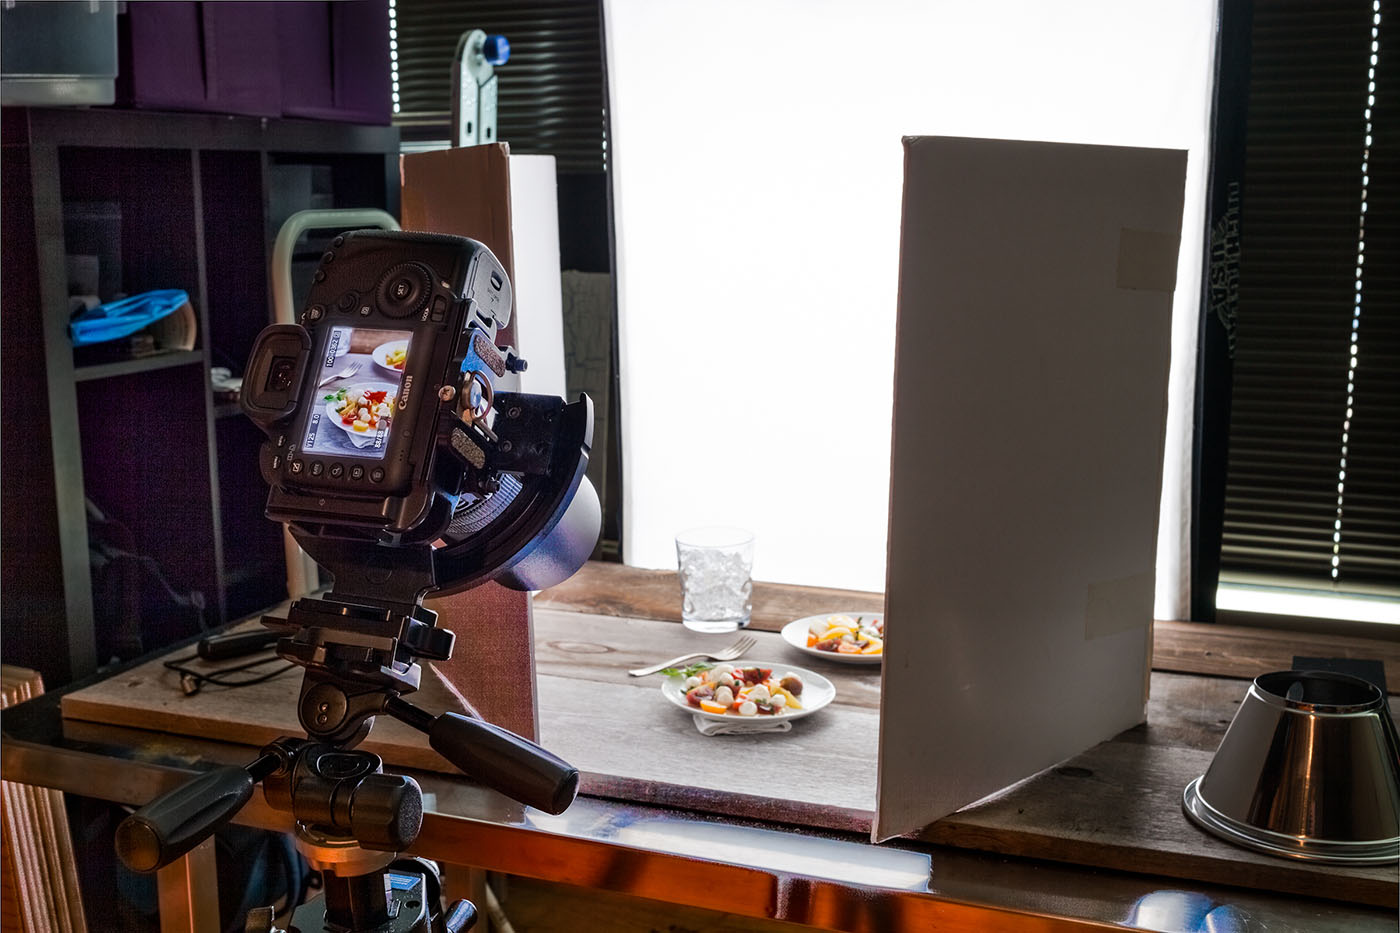
Let’s start with a basic natural light setup, which is a lighting setup I use on a regular basis. My apartment has a large North-facing window and the light coming in is always gorgeous, even on cloudy days (which is a good thing considering I live in Seattle). I have a table set up against the window where I place my food and props, and I photograph the food with the light behind it so that it’s backlit. I usually will also add some more diffusion with a Lastolite TriGrip Diffuser to soften the light a bit more, and because the light is coming in from behind (which creates shadows to the front of the food), I introduce some fill light by placing simple white foam board on both sides of the dish.

Nicole S. Young
Nicole S. Young
This setup results in a very soft light on the food with just enough shadow detail to give the image depth. The great thing about this is that the equipment used is very inexpensive, and you could even replace the diffuser I used with any type of sheer fabric, such as a DIY version from materials found at a craft store. One con of this setup is that you’ll likely have to use a tripod because the light is soft to the point of being too dark for handheld photography. Another con (the most obvious) is that you’re limited to shooting in daylight hours—once the sun is set, your light is gone.
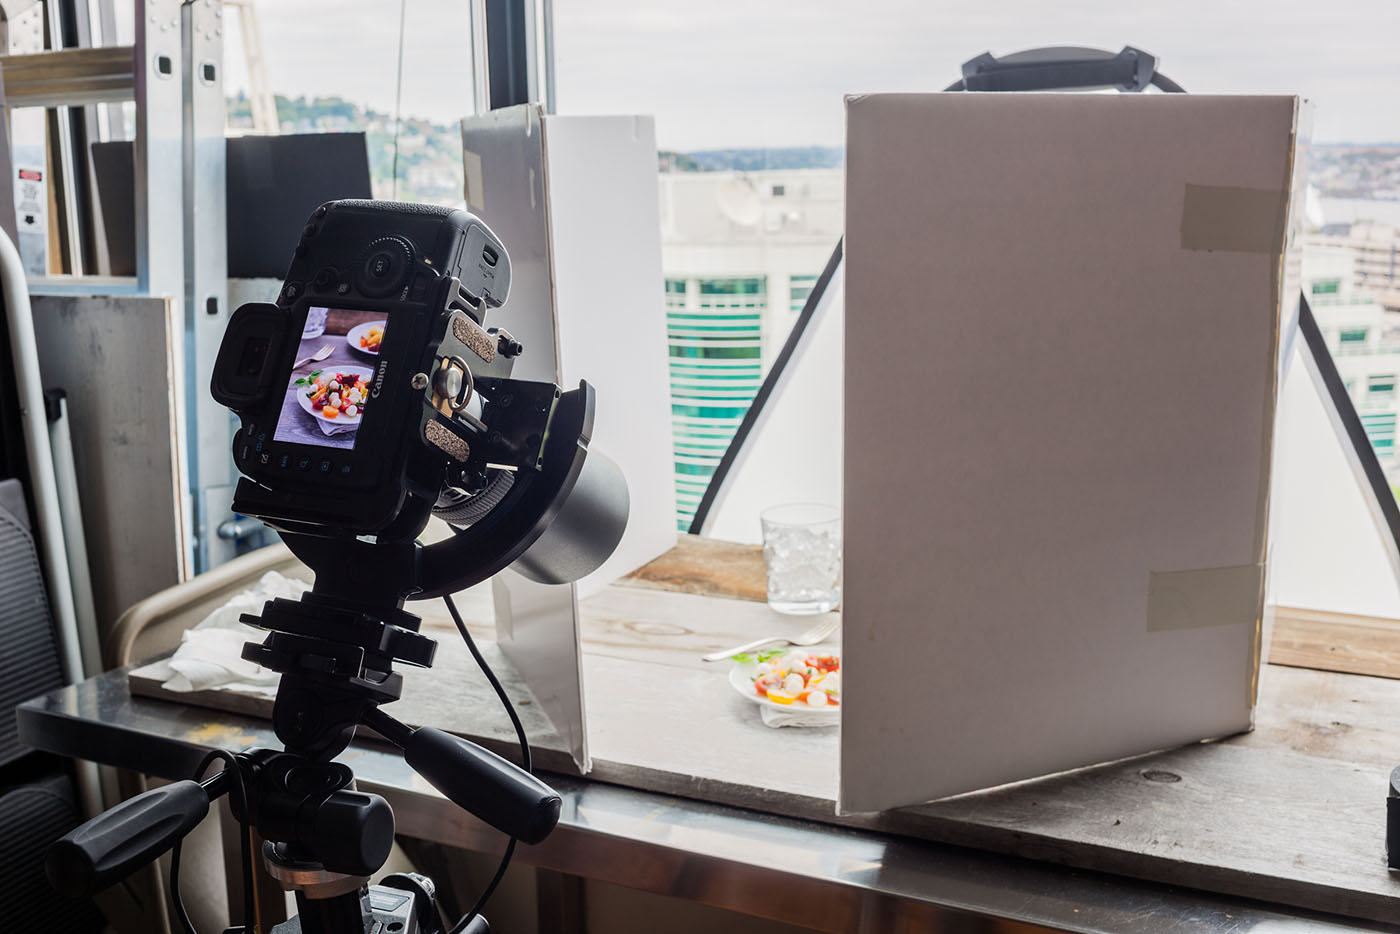
North-facing window; Lastolite TriGrip Diffuser; white foam board
Now, let’s see what happens when we close the blinds and have to create our own light for this image. My goal is to re-create the diffused sunlight look of the first natural light setup as closely as possible. For educational purposes, I’m going to work this image using the same strobe light with three different modifiers: bare bulb, shoot-through umbrella, and a large softbox.
TIP: The best lighting angle for food photography is to place the light behind your subject to backlight it. This brings out the depth and dimension of your food, and can add a pleasing rim light to some items. Just make sure you bounce some of that light into the front or your subject with reflectors. I like to use inexpensive white foam board—you can find it at any craft store, and it adds a beautiful, soft fill light to the food.
Setup Two: Bare Bulb
The next setup I’ll walk you through is the bare-bulb setup. I have an AlienBees B800 flash unit with a standard silver field reflector positioned directly behind and slightly above the food. The rest of the setup was left untouched, including fill light and placement of the food items on the table.
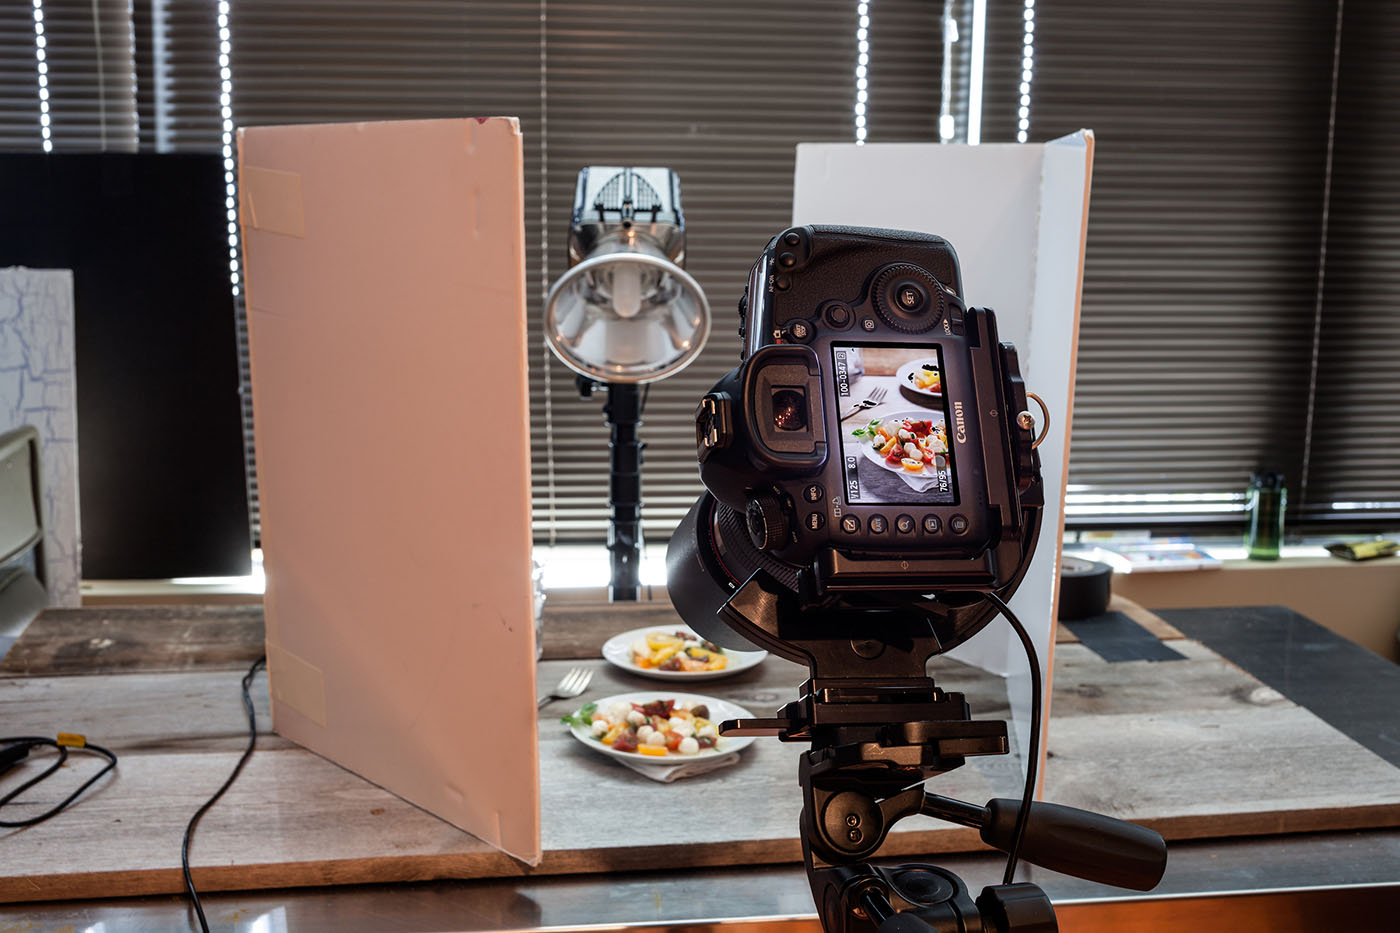
AlienBees B800 flash unit with 7″ silver field reflector; white foam board
As you can see, the light from the first setup is too harsh. The shadows are very strong and it’s also clipping the highlights on the reflection of some of the tomatoes and surfaces of the plate and fork. Adding a diffuser helps soften the light slightly, but there are still some harsh shadows and hot spots. The background is also brighter than the foreground, which is not ideal. To soften the overall scene, I’ll need to add more diffusion to the light.
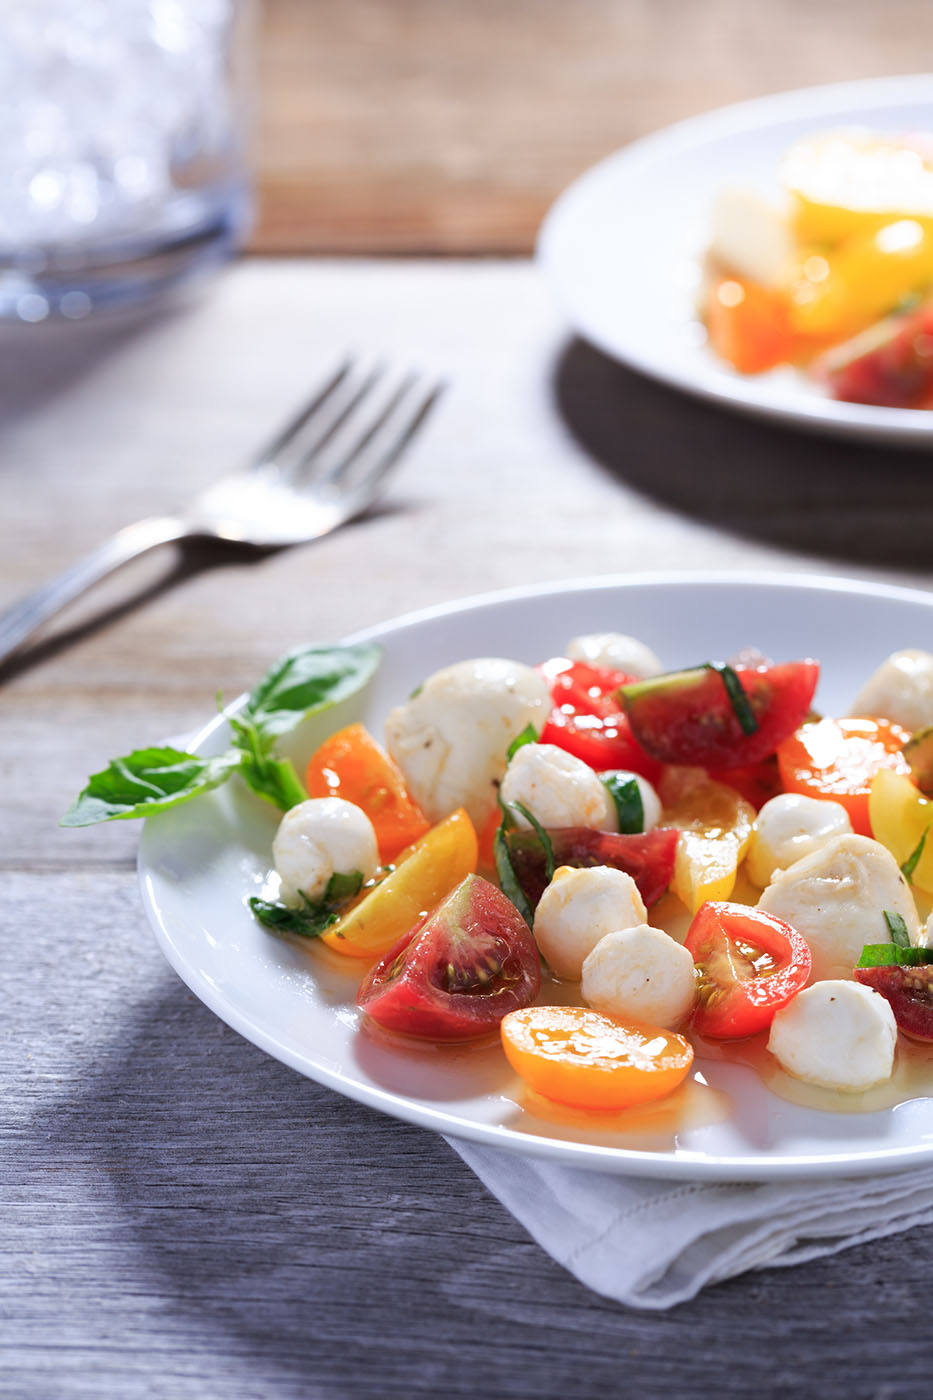
STROBE: silver reflector
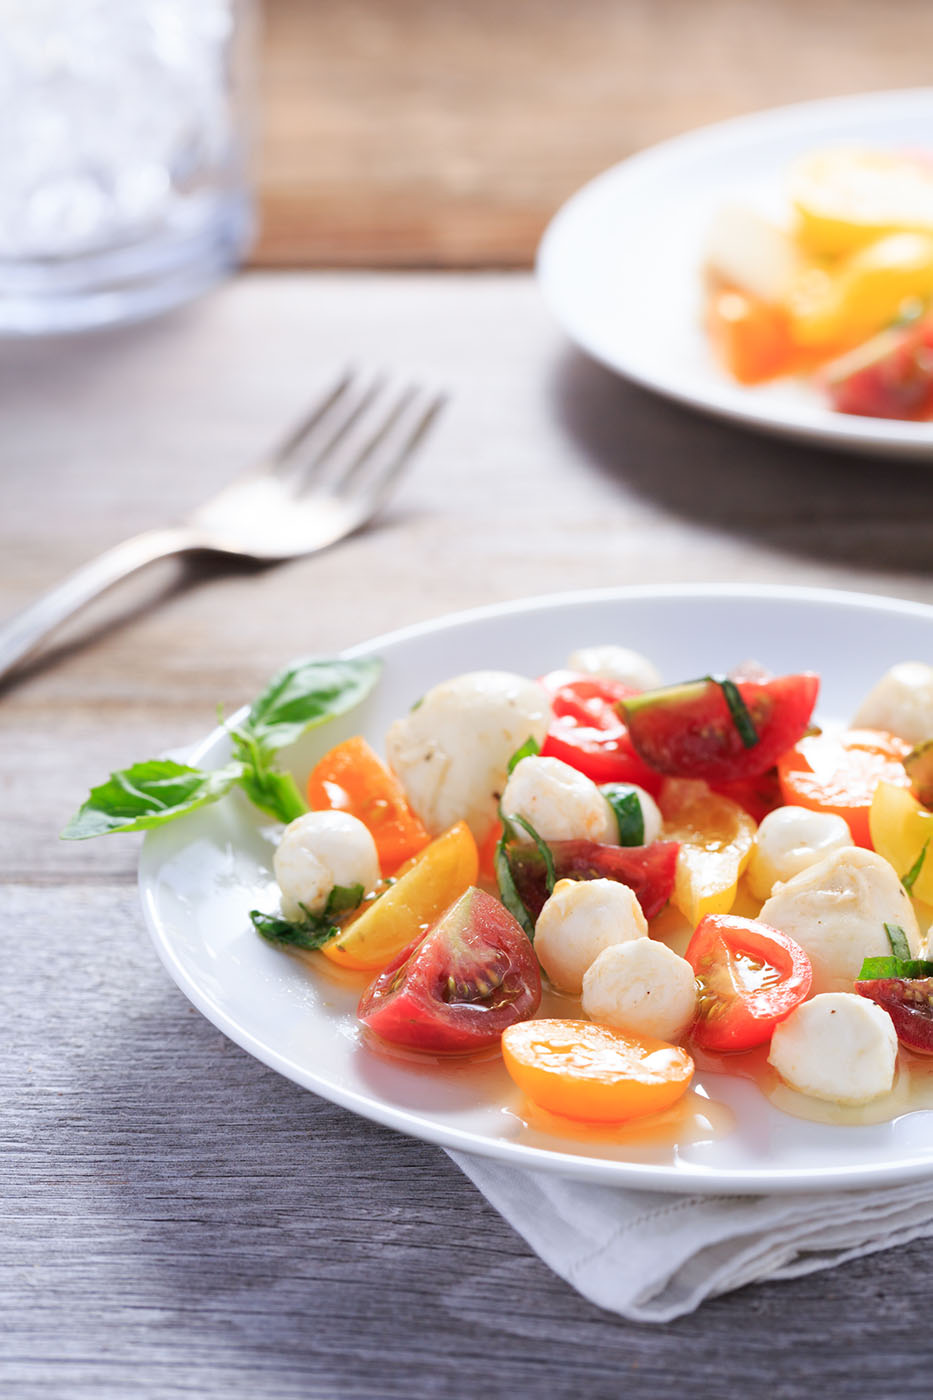
STROBE: silver reflector w/ diffuser
TIP: If you’re considering photographing food with a strobe light, be sure to get a very low-powered unit. Something with too much power, even at the lowest setting, may make it difficult to photograph at wider apertures and will limit the flexibility of your depth of field. For example, if you have a unit with too much power, you may only be able to photograph your food at f/16 and won’t be able to open up the aperture (let’s say, to f/5.6) to create an out-of-focus background.
Setup Three: Shoot-Through Umbrella
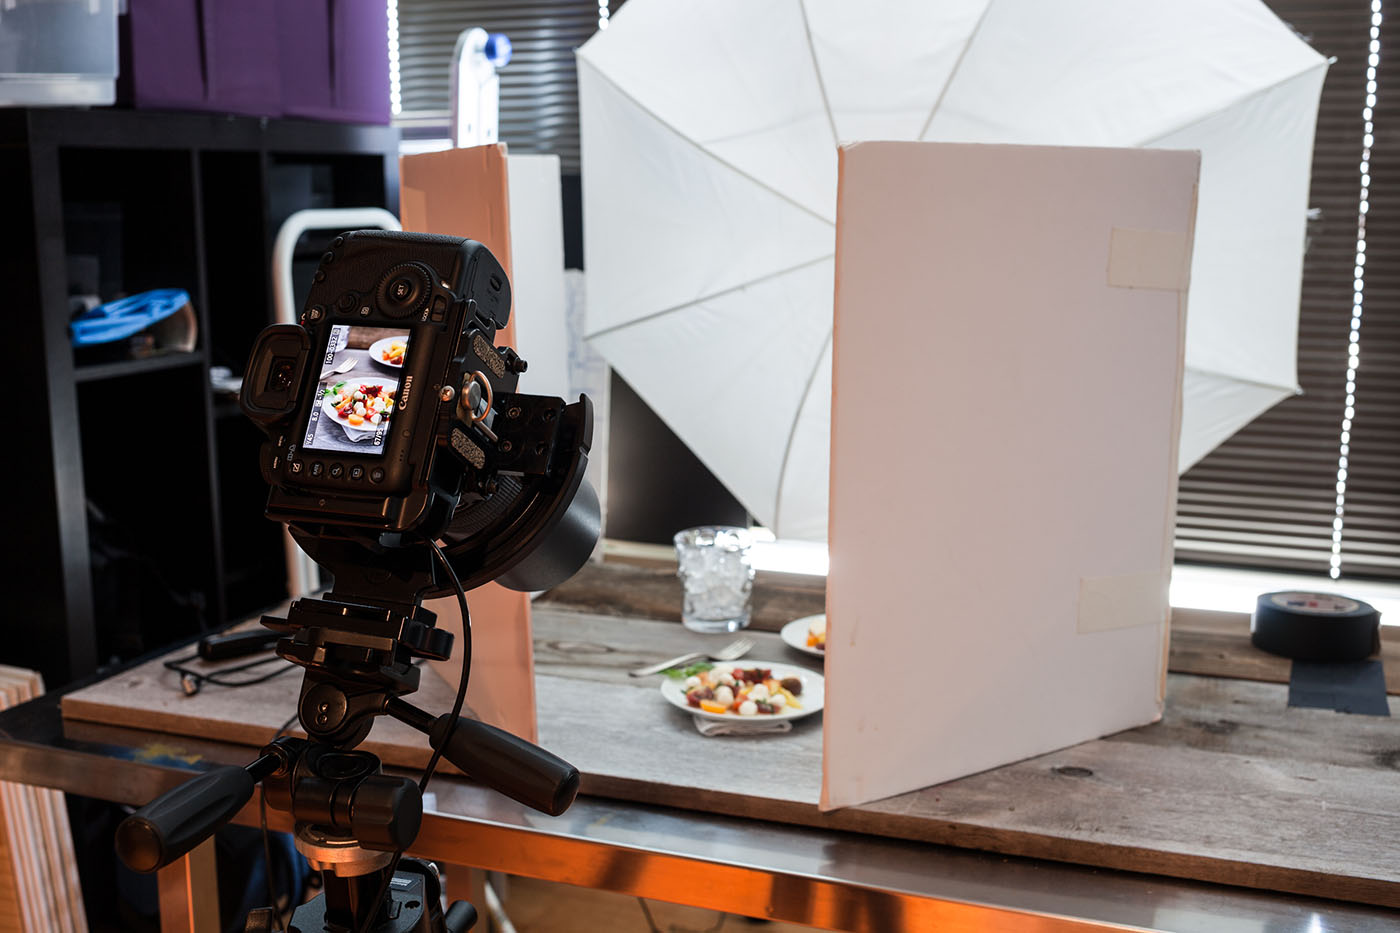
AlienBees B800 with silver field reflector; shoot-through umbrella; white foam board
The next setup is using a shoot-through umbrella. The great thing about using an umbrella is that it’s portable and easy to set up. It’s also a quick way to soften the light and minimize the harsh shadows in your scene. I kept the light and foam board (for the fill light) in the same position—all that’s changed for this scene is the addition of a white shoot-through umbrella connected to the strobe.
Overall, the image isn’t too bad. The umbrella is large enough to spread out the light fairly evenly, but the shadow on the background plate is still much harsher than the foreground (main subject). There’s also a little bit more shine in the tomatoes than I’d like to see. Adding an additional TriGrip Diffuser softened the background slightly, but it doesn’t change much of the foreground and we still have that shine on the food.
Umbrella

Umbrella with Diffuser
TIP: Make sure when using off-camera lights to keep the light as close to your setup as possible; the closer the light is to your subject the softer the light will be.
Setup Four: Large Softbox
The last setup is with the largest modifier I have: a 30×60″ rectangular softbox. Since the key to a soft light is to make the light source as large as possible and get it as close to the subject as I can, I figured that this was the next logical step. As with the previous setups, nothing was changed with the scene aside from replacing the shoot-through umbrella with the new modifier.
AlienBees B800; large rectangular softbox; white foam board
This is the best strobe modifier so far and closest to the natural light setup as I can achieve. The shadows are soft, there are no hot spots, and the light is even across the scene. In fact, when compared to the natural light setup, the light is actually a bit softer than the diffused sunlight I created for that first setup.
While natural light does an amazing job, is easy to use, and often available, it’s important to know how to achieve the same quality results with artificial light. You may not know what your environment will be like, and it’s important to be prepared for any given scenario (especially when working with a client).
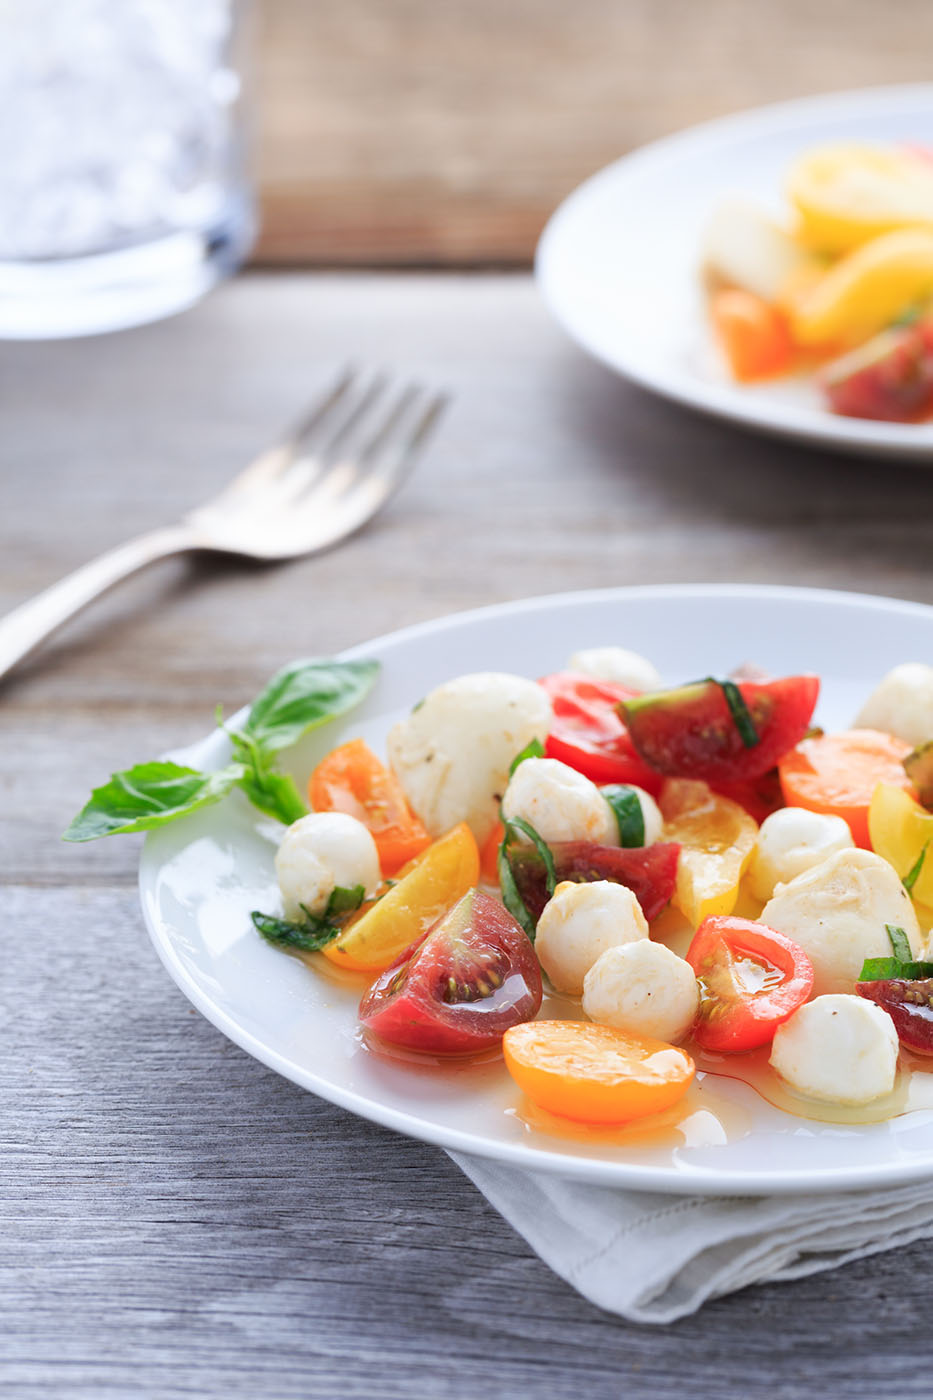
Large rectangular softbox; Canon EOS 5D Mark III with Canon 100mm f/2.8L Macro IS lens; 1/125 at f/8; ISO 100
The great thing is that you don’t have to sacrifice quality when creating the light yourself. As you can see, it’s possible to re-create beautiful, soft window light using off-camera strobes—and you don’t even have to use a strobe. You can achieve similar results with off-camera flash, continuous lighting, and even simple DIY lighting setups. The key is to make your light as big as possible by using very large diffusors, which can be done with any light, anywhere, at any time of day.
For more on Food Photography, you can check out Nicolesy on her blog at nicolesyblog.com and read more about her thoughts on photography. Nicole has a class on Food Photography over on KelbyOne as well as Joe Glyda. You can check out either one of those classes here. And you wouldn’t want to miss Scott Kelby’s take on the two-light food setup here on the Blog.
