As you get to know Adobe Photoshop Lightroom, you’ll no doubt appreciate that it emphasizes a workflow approach for your image processing.
That means it helps to streamline an overall process (rather than simply providing a set of individual tools) allowing you to work with your images very efficiently. What you may not realize initially is that for many tasks in Lightroom, you can achieve incredible efficiency by establishing preferred settings once and then using these settings with different images.
Let’s take a look at how Lightroom makes it easy to share your images in a Web gallery. Once we set up our gallery, we’ll show you how to do it again lightning fast with just a few clicks of the mouse. (If you’d like to learn more about making the most of Lightroom, check out my latest book, Adobe Photoshop Lightroom Workflow, Wiley 2007.)
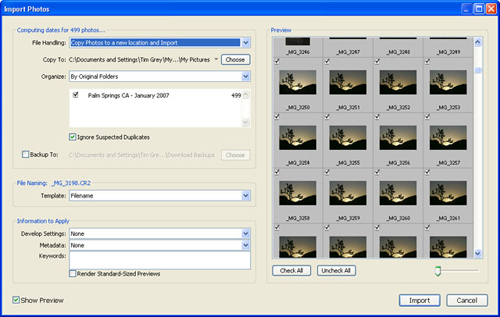
Step 1 Import Images
Before you can work with images in Lightroom you need to import them, so if the images you want to include in a Web gallery haven’t been imported already, that’s your first step. In the Library module, click the Import button below the Panels area on the left side, navigate to the folder containing the images you want to import, and click the Choose (PC: Choose Selected) button. Set the desired settings in the Import Photos dialog, and click Import to bring the images into Lightroom so you can start working with them.
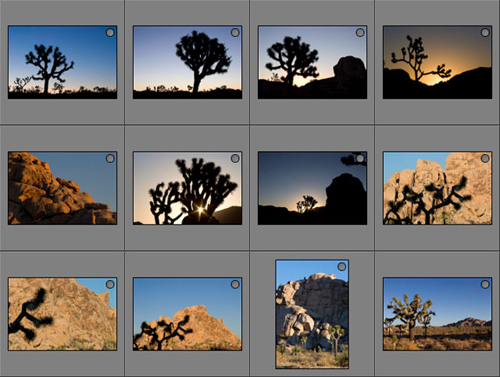
Step 2 Create Quick Collection
Working with a Quick Collection is a great way to temporarily group images together for a given project, especially if you’re including images from a variety of folders or collections. As you sort through the images you’re considering for the Web gallery, you can add an image to the Quick Collection by moving the mouse over the image and clicking on the Quick Collection marker (the circle that appears in the top-right corner of the image). You can click again to toggle the image out of the Quick Collection.


CREDIT: ALL IMAGES TIM GREY
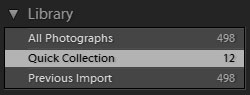
Step 3 Select the Quick Collection
You may have noticed that the Quick Collection is listed in the Library module’s Library panel. As you add images to the Quick Collection, you’ll see the number of included images change (shown to the right of the name Quick Collection). To work with only those images included in the Quick Collection, simply click on that line in the Library panel. When you do this, the main display and Filmstrip will show only the images included in the Quick Collection.
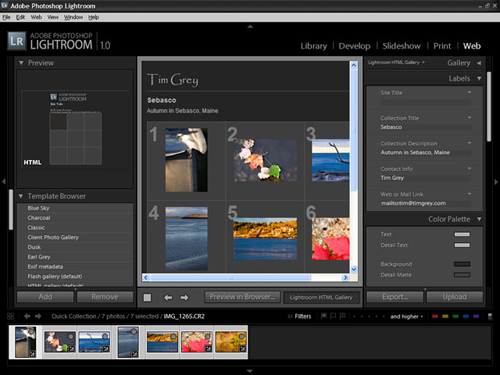
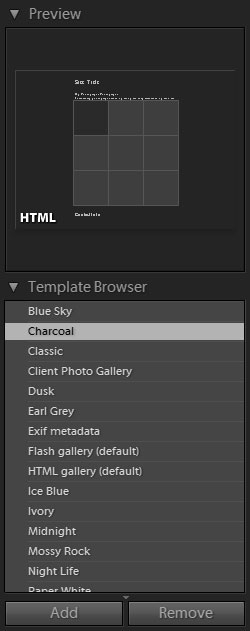
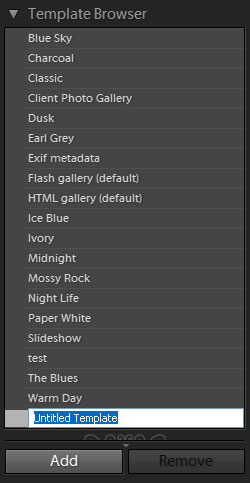
Step 4 Choose a Template
Go to the Web module and expand the Template Browser panel on the left. As you mouse over the template names in this list, you’ll see a preview of the template in the Preview panel above (move the mouse up and down really fast for a cool stroboscopic effect). When you find the template you want to use, click on it to set it as the layout for your Web gallery. But don’t worry, you’ll be able to fine-tune it to your heart’s content.
{module:ads/large_rectangle}
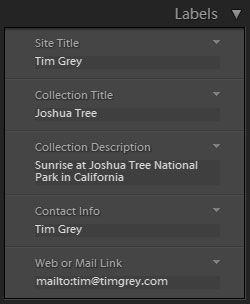
Step 5 Define Text for the Gallery
In the Panels area on the right, you’ll find the Labels panel that allows you to define the text that will appear on the main page of your Web gallery. It’s worth noting that once you’ve entered a value, it will appear in a drop-down menu to the right of the field, allowing you to quickly select that value again later. For the Web or Mail Link field, if you want to use an email address, precede it with “mailto:” (without the quotes) so the text will be an active link to create an email message.
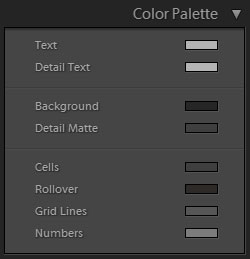
Step 6 Adjust the Colors
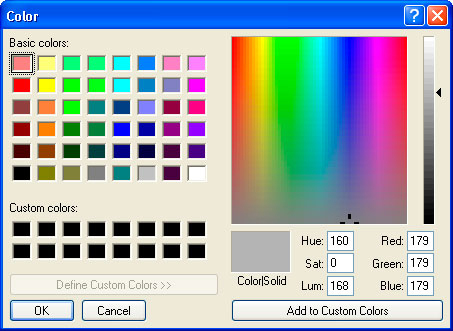
The Color Palette panel allows you to change the colors used in your Web gallery, which can obviously have a dramatic effect on the final appearance. To change the color of any element in the Web gallery, click the colored box associated with that element. This brings up the Colors (PC: Color) dialog, where you can select a new color.
Step 7 Set Appearance Options
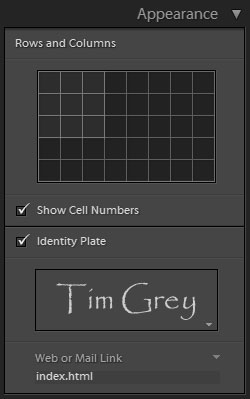
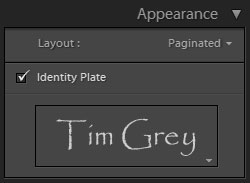
The contents of the Appearance palette change depending on whether your template is a Flash or HTML gallery. For Flash galleries, you’ll have a Layout drop-down menu with several options you can choose from (use the Preview to decide which option you like best). For HTML galleries, you’ll have a grid control that allows you to specify the number of rows and columns for thumbnails, and a Show Cell Numbers checkbox that allows you to include sequence numbers with each thumbnail. The Identity Plate section allows you to include (and modify) your Identity Plate as the title for your Web gallery.
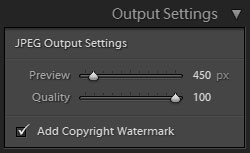
Step 8 Define Image Output Settings
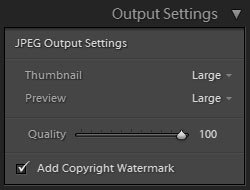
The Output Settings panel is where you can change settings regarding the size and quality of images included in the gallery. The specific options will vary for Flash and HTML galleries, but the basic concepts are the same. The Add Copyright Watermark checkbox allows you to include text (defined by the Copyright field of the Metadata panel in the Library module) in the corner of each image to identify them as yours and help discourage theft.
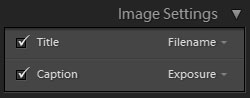
Step 9 Add Captions to the Images
In the Image Settings panel, use the Title and Caption checkboxes to include text with each image. These are included for the large images in your gallery, not the thumbnails. To define what text will appear for each, choose a field from the drop-down to the right, or select Custom Text and enter a value in the box provided. Note: Depending on the field you use, the text could be different for each image (e.g., to reflect changes in exposure from image to image); however, Custom Text will apply the same text to all images in the gallery.
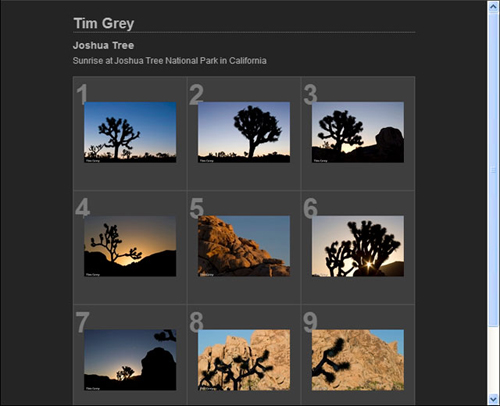
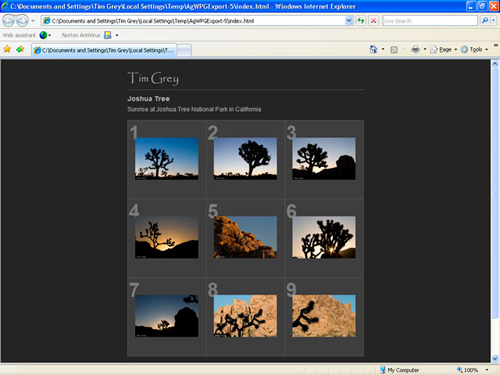
Step 10 Preview the Gallery
At this point you’ve defined all the settings that affect the appearance of your gallery, so it’s time to take it for a test drive. Click the Preview in Browser button at the bottom of the Preview area, and Lightroom will generate all the necessary files and display the gallery in your default Web browser. Give it a good once-over, and adjust any settings you’d like to change.
Step 11 Save the Template
When you’re happy with the Web gallery as you’ve defined it, it’s time to create a new template so you can make a similar gallery with different images later. Click the Add button at the bottom of the Template Browser panel and type a meaningful name for the template.
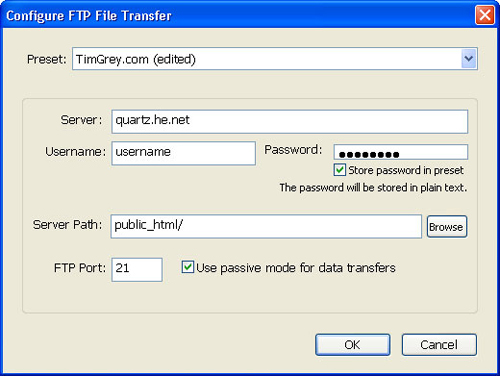
Step 12 Configure Server Settings
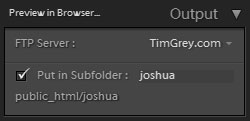
To make the most of the Web module, upload the gallery to your website for the whole world (or a select few) to see. Select Edit from the FTP Server drop-down in the Output panel, and enter the server settings from your Web hosting provider. In the Preset drop-down, choose Save as New Preset and enter a name so you’ll have quick access to these settings later, then click OK. I recommend putting each gallery into a subfolder below a primary folder on your site, so check the Put in Subfolder box in the Output panel and enter a name for that folder.
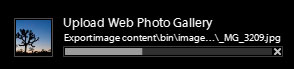
Step 13 Publish the Gallery
With everything set, you’re ready to go live with your new Web gallery. Click the Upload button at the bottom of the right Panels area to start the process. When all files have been uploaded, you can share the address (your site address based on the server settings you entered, plus the folder name if you chose that option) with others for them to view your cool new Web gallery.

Step 14 Next Time: Lightning Quick
The best part is doing this again, but faster! With the template created, all you’ll need to do in the future is select the images you want to include (I recommend the Quick Collection), select the template in the Template Browser panel, change the Labels (if necessary) for this new gallery, enter a new folder name in the Output panel, and click Upload. It’s really that easy!