
K1 Challenge #6: Water Drops on Flowers!
Ready for our 6th KelbyOne Challenge? It’s all about those pretty flower images with water beads — the ones that look like they were freshly picked from a countryside rose garden somewhere!
ENTER TO WIN our 6th KelbyOne Challenge by submitting one photo via Facebook, Twitter or Instagram using the hashtag #KelbyOneChallenge AND by sharing this post via one of the social-media share buttons!
WINNERS: If your image is selected as the winner, it will be featured on an episode of The Grid Live, it will be published in an upcoming issue of Photoshop User magazine AND you will receive an autographed Scott Kelby book of your choice! Additionally, one GRAND PRIZE winner will be selected from our 10 winners to receive a full KelbyOne membership!
CHALLENGE 6: The Water Drops on Flower Pic!
Dates: 7/15 – 7/19 at 11:59pm ET
Winner Announced: Wednesday, 7/22 on The Grid Live at 4pm ET
CHALLENGE TIP
By Scott Kelby
Excerpt from The Digital Photography Book, Volume 5
BEHIND THE SCENES: To get water on the petals, we’re simply using a spray bottle with water. There are all sorts of mixtures you can concoct to make the water bead up and have bigger drops (like using glycerine, water and milk, sugar, etc.), but I just use regular ol’ water. You don’t want big sprays of water, just squeeze the trigger a little bit and, of course, the more drops you want, the more times you pull the trigger.
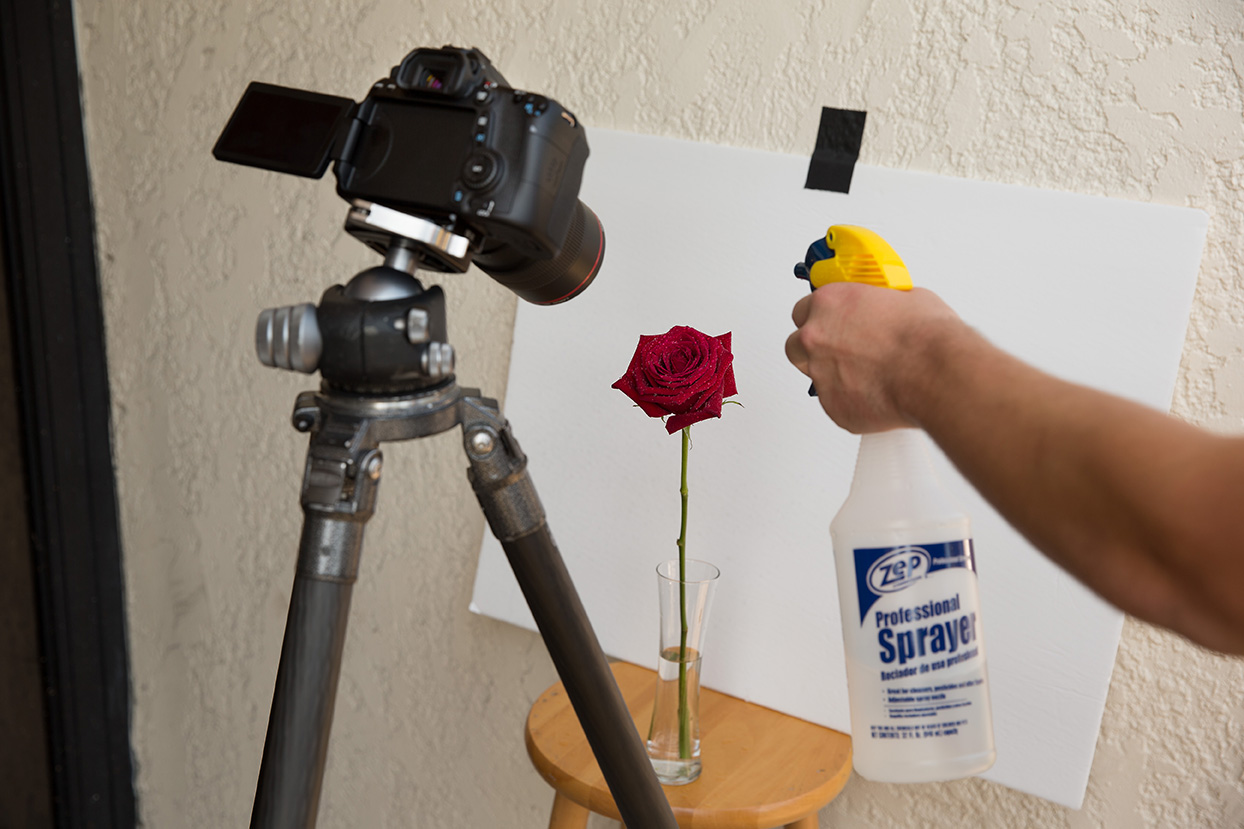
CAMERA SETTINGS: Once again, I’m using a 100mm macro lens with my f-stop at f/22, so I could keep as much depth of field as possible. My shutter speed is 1/15 of a second, which is why I’m on a tripod (but I’m always on a tripod when I shoot a macro lens because any tiny, little movement will create a really blurry image).
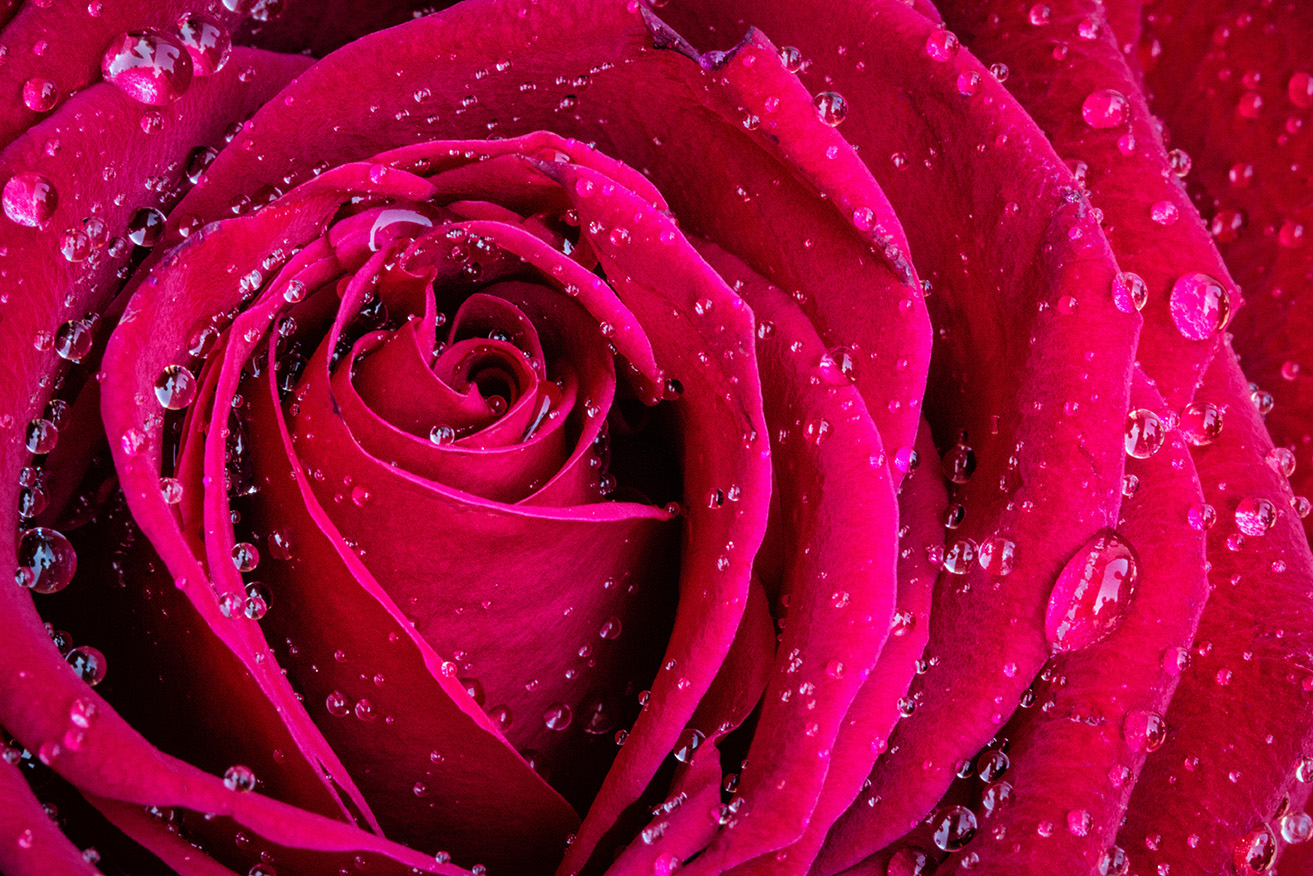
CHALLENGE IMAGE
THOUGHT PROCESS: If you look at the production photo on the facing page, you can see that I’m shooting down on the flower, rather than shooting it straight on. This means that even at an f-stop like f/16 or higher (again, I’m at f/22), my depth of field (the area in focus) will be very shallow—shallower than if I had kept the camera’s plane of focus straight, so it was aiming right at the flower (as seen in the previous flower recipe).
Keeping it straight like that gives you a greater depth of field (more of the flower will be in focus), but I was able to get away with aiming down here because the part of the flower that I was shooting is pretty flat to begin with. If I needed more of the flower in focus, I could have bent the stem of the flower, so rather than facing upward, it would be facing straight forward. Then, I could’ve lowered my tripod until the camera was aiming straight at the flower, keeping the camera’s sensor parallel to the flower, which creates a wider depth of field.
POST-PROCESSING: I increased the contrast a bit in Lightroom’s Develop module (or Camera Raw; pretty standard for me). Then, in the Effects panel, under Post Crop Vignetting, I dragged the Amount slider to –9 to darken the edges of the image just a tiny bit all the way around.
PS — Don’t forget to share this post via one of our social media buttons at the top of the post to be eligible to win. Hope to see some beautiful flower pics from this challenge. And as always, a HUGE thanks to Kim Doty from our KelbyOne Books Team for making this challenge possible. She pulls our images and content every week so we can make it happen! Follow her on Facebook and Twitter!