
How to Take a Perfect Long Exposure Photograph in 8 Steps

Ethereal atmospheres, smooth water, moving clouds, these are just some of the unique features that make the magical world of long-exposure photography so popular. While achieving these beautiful effects is fairly easy, it does require the use of a few pieces of specialized gear, as well as a few modifications to your traditional landscape photography workflow. If you love the look of long exposure photos but want to learn or improve upon your technique, take a look at this list of 8 steps that I follow to get a perfect long exposure photo every time.
1. Check the Weather
Great weather conditions are imperative to getting a great long exposure photo. That doesn’t necessarily mean that you need a beautiful sunny day with no clouds. In fact, clouds and wind are essential elements to capturing a great long exposure photo. While too much wind will work against you (see below), a little bit of wind will add motion to the clouds overhead. To monitor the weather, you can use a few specialized websites or smart phone apps.
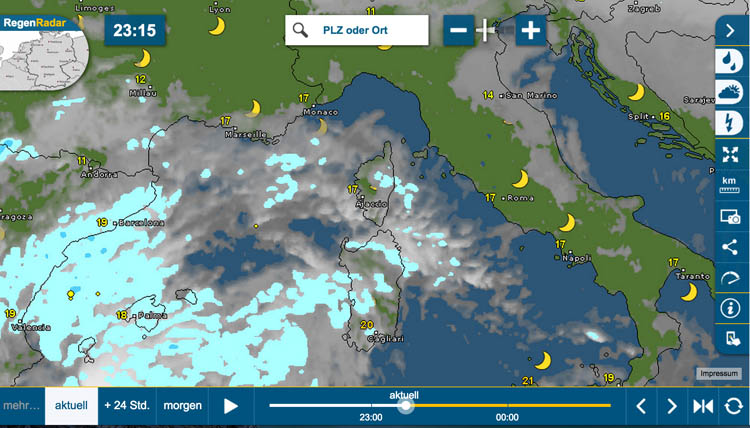
One of my favorite services is AccuWeather as it let you check, not only a reliable short term forecast, but also monitor a minute by minute evolution with a satellite weather map. If you live in Europe, a wise choice could be WetterOnline.
2. Place the Tripod
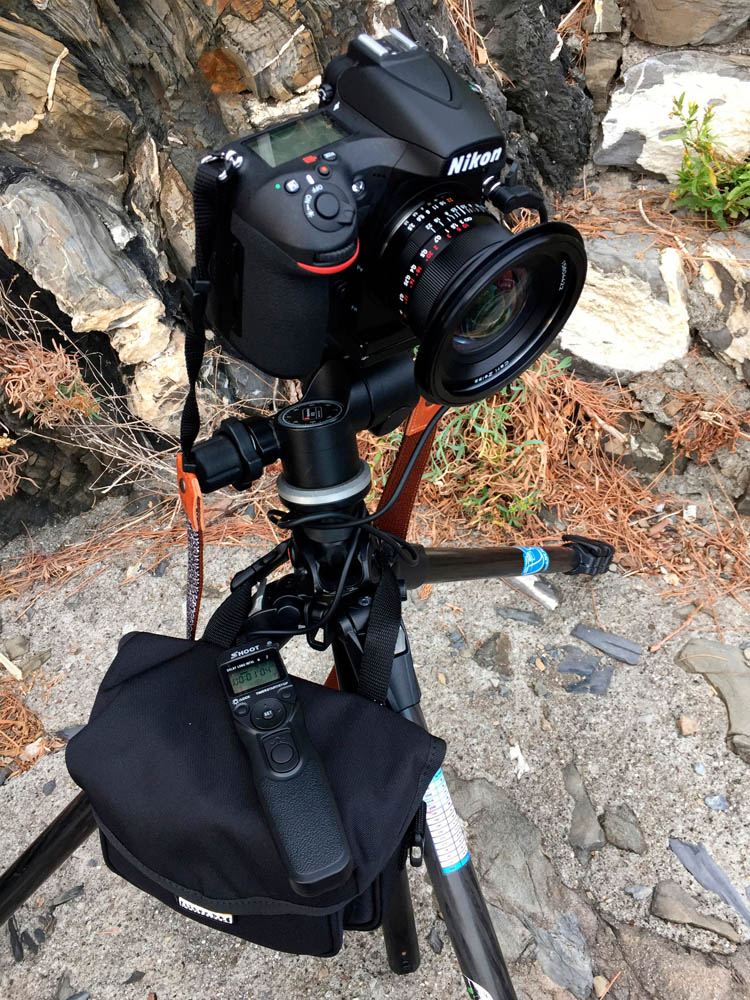
Although we said that the presence of the wind is essential for the movement of clouds, this does not mean that the wind is our friend. Even a single gust of wind for a few seconds can irreparably compromise the quality of an image by shaking the camera. For this reason, take extra care when you are placing your tripod. First of all, if you can, set all three legs of the tripod independently to better adapt to the shape of ground. Then, try to make sure that the camera is well balanced with a good center of gravity. If you can, try hanging your backpack from the center column to give your camera a bit of extra weight. Also avoid raising the center column of your tripod to prevent camera shake.
Among tripods, my favorites are the Manfrotto 055 and the Rollei c6i. Both are affordable, reliable and extremely sturdy in my opinion.
3. Compose the Image and Lock the Focus
Once the tripod is well positioned, you can now refine your composition. The secret to a successful long exposure photograph are the moving elements. So make sure to include elements like clouds and rough sea, minimizing the presence and importance of the static objects.
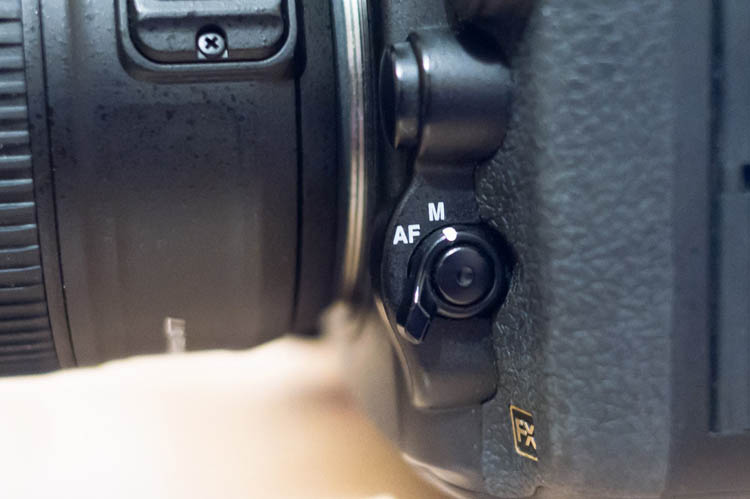
As soon as you are finished with the composition, maximize your camera’s depth of field, set the focus and then lock it. If you are using your camera’s autofocus, change the focus mode to manual as soon as you have achieved a focus lock. This will make sure that you do not lose focus once the filters are mounted.
4. Take a Test Shot
The Test Shot is the reference you will use to calculate the correct exposure time for your long exposure. Before mounting your ND filter, take a photo to achieve the right exposure. To determine if the exposure is correct, check the histogram and make sure that it isn’t clipping to the left (underexposed image) or to the right (Overexposed). When done, record the aperture values, ISO and shutter speed.
5. Choose and Install the Correct Filters
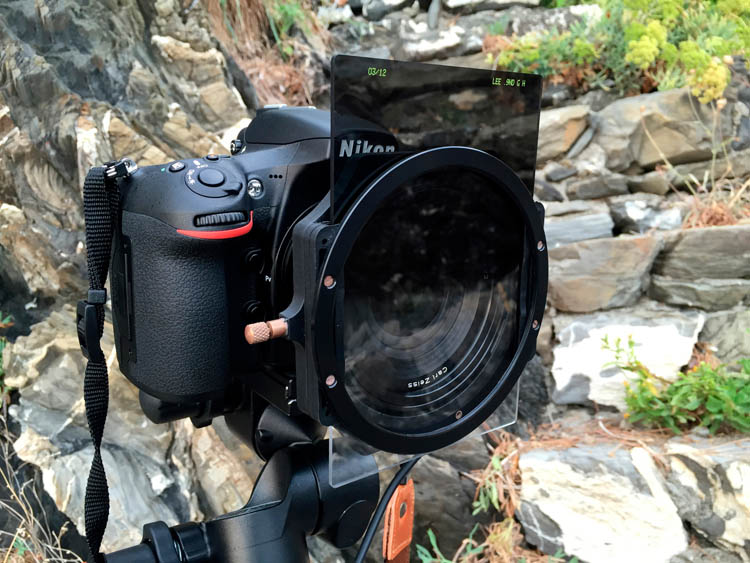
It’s finally time to install an ND filter. If you choose to use a filter such as a very dense 10 stop, you will notice that the scene both from the Live View and Viewfinder will be completely dark. Do not worry! Even though you can’t see anything through the viewfinder, your camera can.
When deciding which filter to use, consider the moving elements of the scene, such as if the clouds are moving slowly or if the sea is rough. To get the classic long exposure effect, a few minutes or more of exposure could be needed. In this case, a 10 stop filter might be the right choice. If the sea is very smooth and clouds are moving fast, a 3 stop filter could be a better choice.
If you’re looking for some filters, try to focus on quality, not quantity. Good filters may be quite expensive, but they last forever. My favorite brands are Lee Filters and NiSi, but if you’re looking for something more affordable, just to experiment the technique, I suggest you to start with a Haida Pro II MC ND1000.
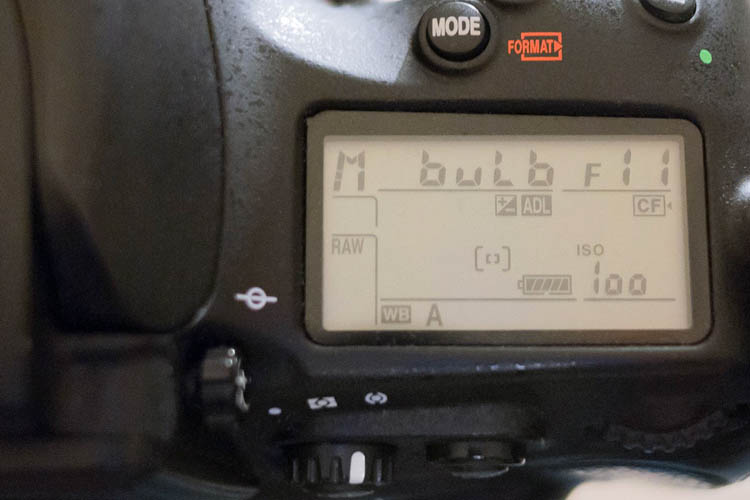
6. Set to Bulb Mode
To exceed the 30″ limit of your camera, set your shutter speed to Bulb mode. Bulb mode will allow you to keep your shutter open for a long as you hold down the button. To do this, it is best to use a shutter remote. That way, you don’t shake the camera while you pressing the button. Don’t worry however, remotes are generally reasonably priced. I suggest using a wired remote control as I find them to be the most reliable. There are lots of shutter remotes on the market. I have used a Canon model for more than 5 years but third-party devices also work well. Just make sure to do your research and purchase one that meets your personal needs.
7. Take a Photo
You are finally ready to take the long exposure photo. To decide how long to set the shutter, use the shutter speed of the test shot to calculate how long you will need to keep the mirror locked up. To make this calculation, you can download a conversion table from the Internet, or use a smart phone app like NDTimer or Photo Pills.
8. Refine the Shutter Speed According to Histogram
Once you have taken your photo, it’s time to take a look at the result using your camera’s LCD. While the conversion tables and apps are generally pretty good at predicting how much time you need to leave the shutter open for, they aren’t always 100% accurate.
After you have taken your photo, take a look at the photo’s histogram to make sure that your photo was exposed properly. To make sure it is correct, you can compare it to your original test photo. If they are about the same, then your photo should be perfectly exposed.
Conclusion
Whether you’re an experienced photographer or just a beginner, this technique can be an opportunity to see the world with different eyes. Fill your backpack, scout a location and enjoy, you’re just 8 steps away from your first long exposure!
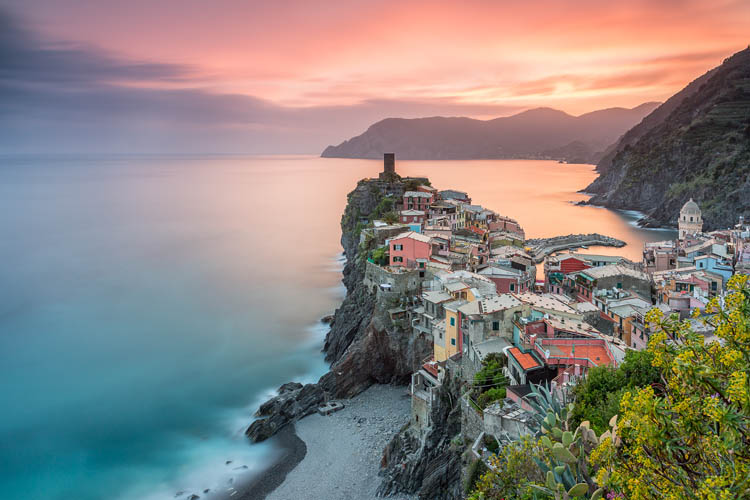
Photos by Francesco Gola.
