How to Get the Tilt Shift Effect in Photoshop

Excerpt from The Adobe Photoshop CC Book for Digital Photographers
The Blur filter gives you a really easy way to create the miniaturization effect you see all over the web, where a photo is transformed to look like a tiny toy model (well, think of it more like an architectural model). Using this filter is easy if (this is a big if) you have the right type of photo. Ideally, you’d use one where you photographed from a high point of view, looking downward, and the higher you are, and the steeper the angle, the better it helps sell the idea that you’re looking down on a scale model.
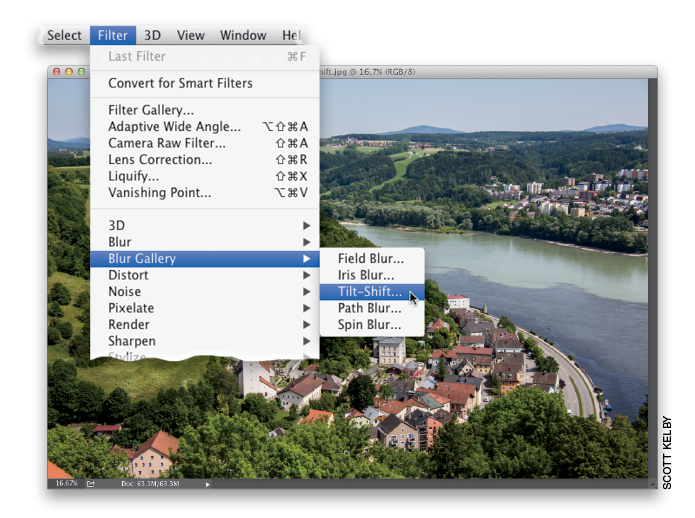
Step One: Open the image you want to apply the effect to (be sure to read the intro above to make sure you use the right type of image, or this effect will look pretty lame. Now, go under the Filter menu, under Blur Gallery, and choose Tilt-Shift (as shown here).
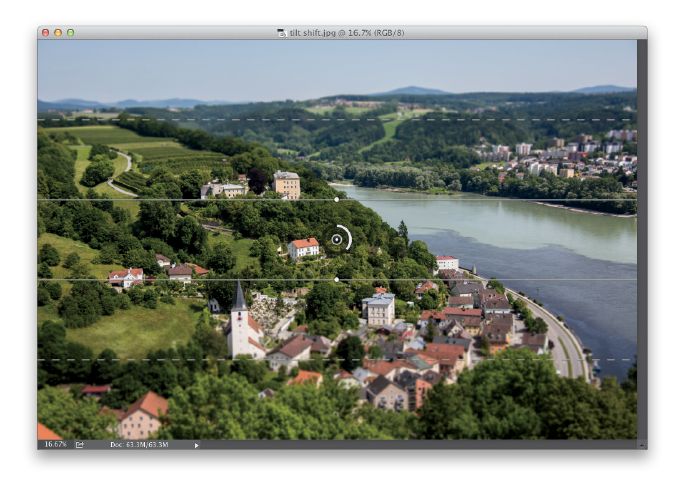
Step Two: When you use any of the filters in the Blur Gallery, it uses interactive, onscreen controls to work with your images. It places a round pin in the center of your image, and above and below that are two solid lines, and then two dotted lines. The solid lines show you the area that will remain in focus (the focus area), and the area between each solid line and dotted line is transition, where it fades from sharp to blurry. The wider the distance between the solid and dotted lines, the longer it takes to go from sharp (inside the solid line) to totally blurry (outside the dotted line). Note: To remove a pin, just click on it and hit the Delete (PC: Backspace) key on your keyboard.
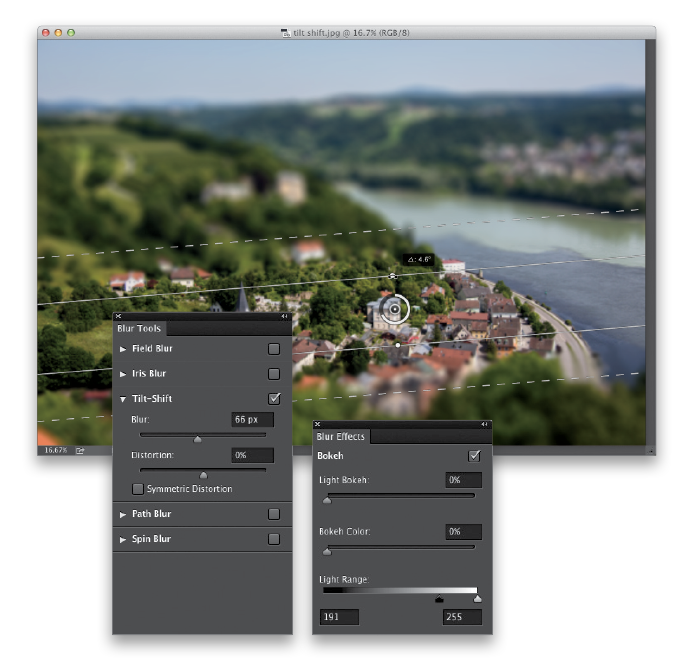
Step Three: You control the amount of blur by clicking on the gray part of the ring around the pin, and dragging around the ring. As you drag, the ring turns white to show you how far you’ve gone, and the actual amount of blur appears in a little pop-up display at the top of the ring (as seen here, where I dragged to 66). I totally dig adjusting the blur right on the image this way, but if it gets on your nerves, you can use the Blur slider in the Blur Tools panel that appears over on the right side of your workspace.

Step Four: When you’re going for this tiny models look, I think it looks better if you compress both of the focus areas—making the in-focus area smaller and the transition area smaller. Here’s how: First, click on the pin and move it down and to the right (as seen here). Then, click directly on the top solid line and drag inward toward the round pin thingy in the middle (and yes, thingy is the official name given by the International Board of Unsure Naming, or the IBUN). Get it pretty close. Now, do the same thing with the bottom solid line, moving it up toward the round pin thingy. Next, drag the center of the top dotted line in closer to the top solid line, and then do the same to the bottom dotted line (as shown here).

Step Five: If you want to rotate your in-focus area (and blur, and the whole shebang), move your cursor over the white center dot on the solid line above the pin, and it will turn into a two-headed rotate arrow. Click-and-hold on that white dot and rotate by dragging your cursor left/right. Easy peasy. There are a few more options you’ll want to know about: The first is the Distortion slider over in the Blur Tools panel, under Tilt-Shift. This lets you change the shape of the blur. If you turn on the Symmetric Distortion checkbox, it makes your blur look really bad and distorted. I personally haven’t come up with a reason why I’d ever turn this on, unless I was angry at my photo. Another set of controls is in the Blur Effects panel: The top one lets you increase the highlights in the blur area, which can be nice for some outdoor portraits, but it’s a very sensitive slider—if you drag too far, it looks like someone dropped a highlights grenade into your image, so use it sparingly.
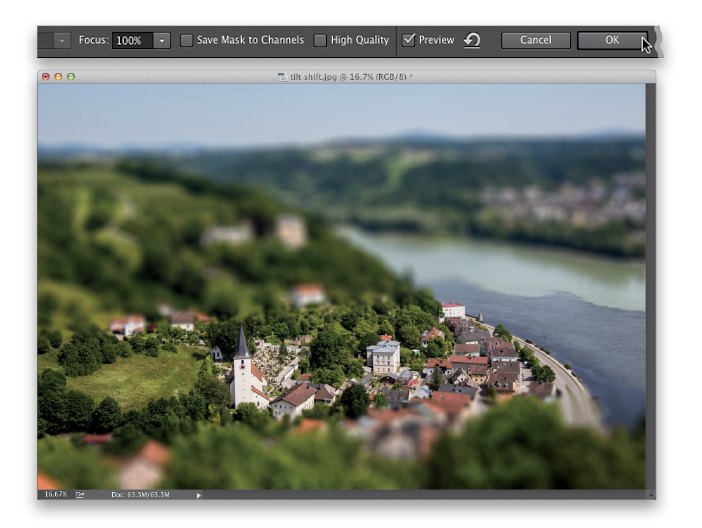
Step Six: There are a few more controls up in the Options Bar: One is the Focus amount, and it’s set at 100% (sharp focus) by default. The lower you set it, the more it makes the in-focus area blurry (I haven’t found a use for this). Next is the Save Mask to Channels checkbox, which lets you save the area you’ve masked (using this tool) to a channel (in the Channels panel), in case you want to edit it later (to add noise to it, or remove all the color, etc.). If you reload that channel, the masked area becomes selected. Lastly, there’s a High Quality checkbox, which gives you a better quality blur, but it takes longer to apply. Some handy shortcuts: press P to hide the blur (press it again to bring it back), and press-and-hold H to hide your round pin thingy and all the lines from view. Click OK at the end of the Options Bar. Here’s the final image with the Tilt-Shift effect applied.
Learn how to create other effects in Photoshop in The Adobe Photoshop CC Book for Digital Photographers or check out some of the great online Photoshop classes available at KelbyOne.