
HDR Another Way in Photoshop
As many of you know, it is difficult to obtain good exposure in both the highlights and shadows of scenes that exhibit a high dynamic range of light. Often, photographers will post-process using an HDR converter to achieve the desired exposure. However, there is another way to achieve correct exposure in both the highlights and shadows without using HDR.
This technique begins in the camera. Using a tripod, take two exposures of the same scene. Expose your first image to capture detail in the highlights. Expose your second image to capture shadow detail.

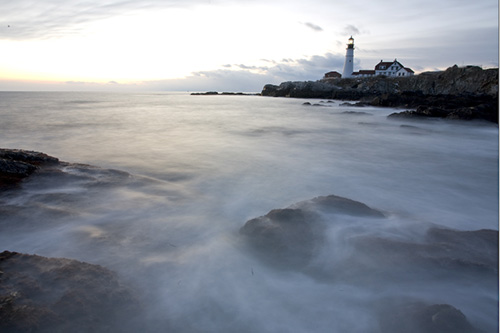
(Image 1 above contains the shadow detail, Image 2 below contains the highlight detail)

Note: Unlike most HDR processing methods, this technique works better when there is a large difference in light between shadow and highlight. For example, a sunrise or sunset shot would work better than a shot taken in overcast conditions.
Once back at your computer, upload your images making sure to label the images in the order they were taken.
Select two sequential exposures, one for highlights and one for shadows. Open them both in Adobe Camera RAW. (Note: CS3 Camera Raw is now an option for both TIFF and JPEG files). Select your shadows exposure and make adjustments that enhance the shadow details. Then select your highlights exposure and make adjustments that enhance your highlight details. Once you are happy with these adjustments save them and then open both images in Photoshop.
With both images open in Photoshop, hit the ‘F’ key to toggle through the screen modes until you are in Standard Screen Mode where you are able to see each image with a menu bar at the top.
Select the Move tool and click on one of the images. Then hold down the Shift key and click-and-drag that image into the other one so that the two are now part of the same document. By holding down the Shift key you are ensuring that both images will line up properly. However, since a perfect set of exposures is often hard to capture in the field, I often follow this step by using CS3s new Auto-Align Layers tool.

To take advantage of the Auto-Align tool, the first thing you will need to do is double-click on your background layer and make the background an editable layer. Now you have two editable layers.
Next, select both layers by holding down the Shift key and clicking on both. Then, go to the Edit menu and select Auto-Align Layers from the drop down menu. (Use the ‘Auto’ Projection option) Now you have two perfectly aligned exposures.
Again, select both layers in the Layers palette and drag them down to the New Layer icon. This will produce two copies of your active layers. Hide your two newly-created layers by clicking the Eye icon next to them in the Layers Pallete.
Next, blend the two layers together. Select the top layer, in this case the highlight detail, and select Blending Options from the Layers Style menu inside the Layers drop-down menu.

Inside the Blending Options menu, at the very bottom, you will see two sliders underneath a “blend if” dialog.
Move the menu box to the side, making sure you can see your image clearly. Then holding down the Alt key (Option on a Mac) grab the white arrow at the end of the top slider. Holding down the Alt key will split that white arrow in half.
Move that half of the arrow toward the black end of the slider. You will notice your image begin to blend.
Move the arrow until you feel the correct amount of blending has occurred. Keep in mind the image will appear very flat. Don’t worry, that will be corrected later.

Now that you have partially blended the original layers, move back to your unblended layer copies.
Make both visible again by clicking to the left of the thumbnail and bringing back the Eye icon.
Next, make sure these layers are above your masked layers.
One at a time, select the layer, hold the Alt key (Option on a Mac) and click the Add Layer Mask icon. Holding down the Alt key fills the layer masks with black. Add a black layer mask to both of the unblended layer copies. You have just hidden these layers again. However, this time you are able to selectively bring them back.
Selectively go through your image adding back pieces of the original exposure where you deem necessary. (I like to use a very low opacity brush, 40 or 50 percent usually works fine.)
Make sure to use a large, soft-edged brush to help prevent obvious brush lines in your image. Notice that by gently adding pieces of the original exposure you have already helped add contrast to the scene.

Now we are going to create what I like to call a ‘working layer’. Once you have blended the layers to your liking, select all the layers using the Shift key and make a copy of each. Select these newly-created copies and use the Fly Out menu at the upper right of your Menu Pallet to select Merge Layers. You have just created a working layer. It is from this layer that dust removal and/or lens corrections are made.
Now is the time that you add contrast to your final image. Select a soft-edged brush and go into the Quick Mask mode by pressing ‘Q’. Select portions of the image where you want to add contrast by painting on the image. The areas will show uup red in Quick mask mode. When you have selected the areas that need a boost in contrast, hit ‘Q’ again and go back to regular view. You will see all of the areas that you painted in red are now selected.
In most cases I find a simple curves adjustment layer is all that is necessary. However, this is a good place to experiment with levels as well. Apply your adjustment layer and tweak the settings to your liking.

Finish things up with a global curves and levels adjustment to your working layer.
Voila! You have yourself a natural High Dynamic Range image without using an HDR converter.

