
Photo Recipes: Faux Ring Light for Portraits
Welcome to the fourth post of my “Photo Recipes” column, which is based on the most popular chapter in my series of books called The Digital Photography Book, Volumes 1, 2, 3 (and shortly 4). In the books, I show a photo and then discuss how to take a similar shot, describing what lighting equipment was used, camera gear, settings, etc. The frustrating thing about the book is because the way it’s laid out, I can only show the single photo and then talk you through it—there’s no room for a behind-the-scenes photo to really show exact position of the light, where I was standing, how far the subject was from the background, and so on. That’s why I’m excited about this post, because not only can I share a behind-the-scenes photo, I can share other shots from the shoot to give you a feel for how the setup looks on more than just one image.
When it comes to lighting, I’m really one of those less-is-more guys, and my lighting setups tend to be mostly one or two lights, and occasionally three. This issue, we’re going to do a really simple one-light shoot—perhaps the easiest one-light shoot because it would really be hard to position the light incorrectly.
Here’s our image. The idea is to create the bright shadowless look of a ring flash without the harsh light, without the dark halo shadows, and even without actually using a ring flash.
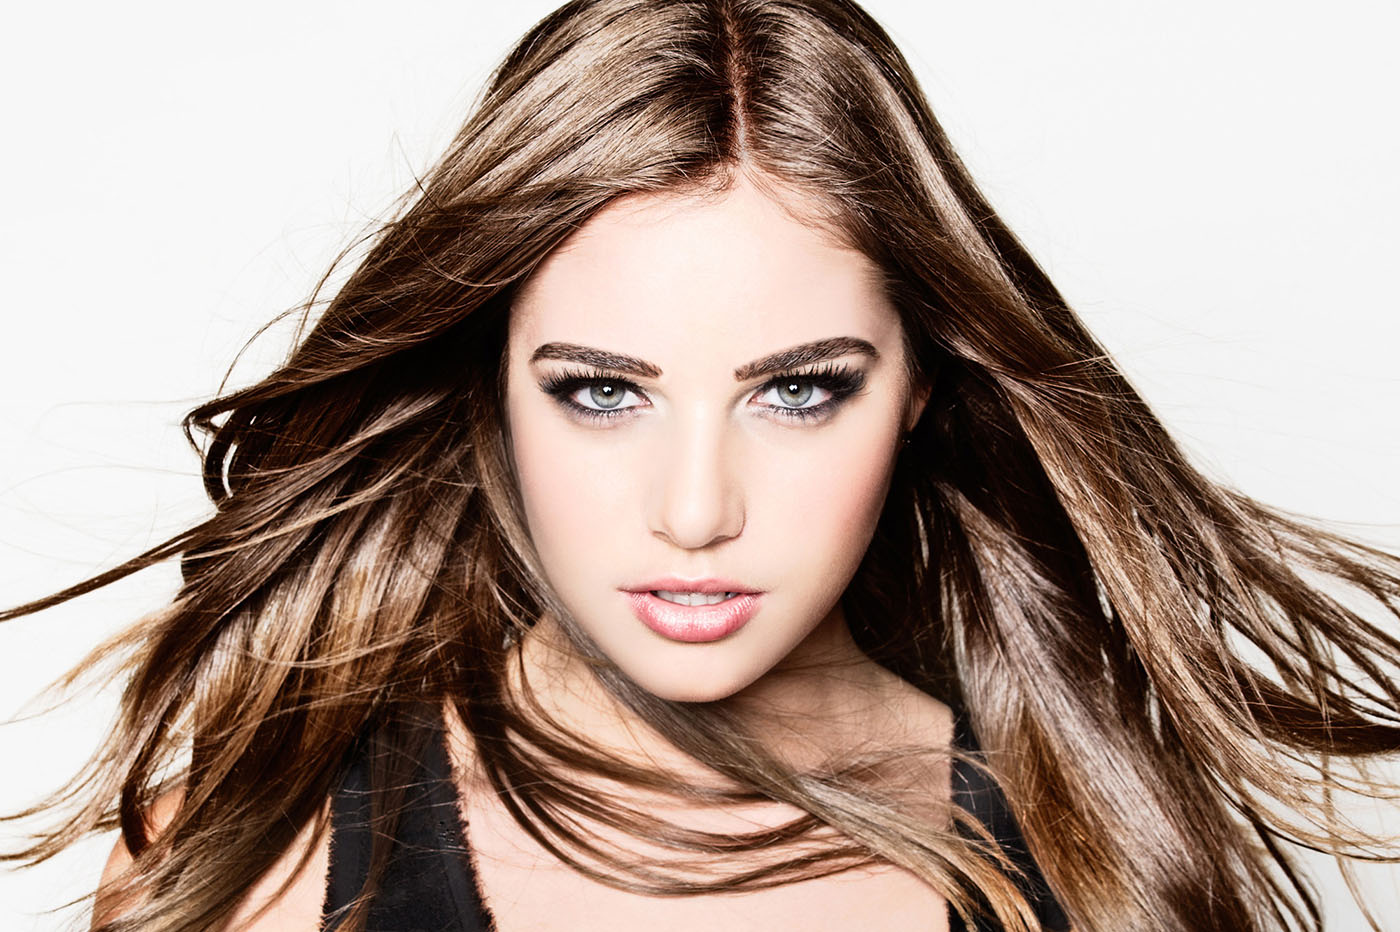
Camera Settings: This image was taken with a Nikon D3s and a 70–200mm f/2.8 lens, at a focal length of 70mm since this was just a tight headshot. It was shot at 200 ISO. I generally try to shoot at the lowest ISO I can in the studio, and 200 ISO is the native ISO for most Nikons. At 200 ISO, it delivers the cleanest, noise-free files. On a Canon camera, I’d shoot at 100 ISO instead for the best quality files. I shoot in the studio in Manual mode, so I can set the shutter speed and forget it (the shutter speed was 1/125). The f-stop was f/10, which is a good f-stop for situations where you want absolutely everything in focus in a portrait. I focused on the eye closest to me, held the shutter button down half way to lock focus, and then I recomposed the image (with it still held half-way down), and took the shot.
The Setup
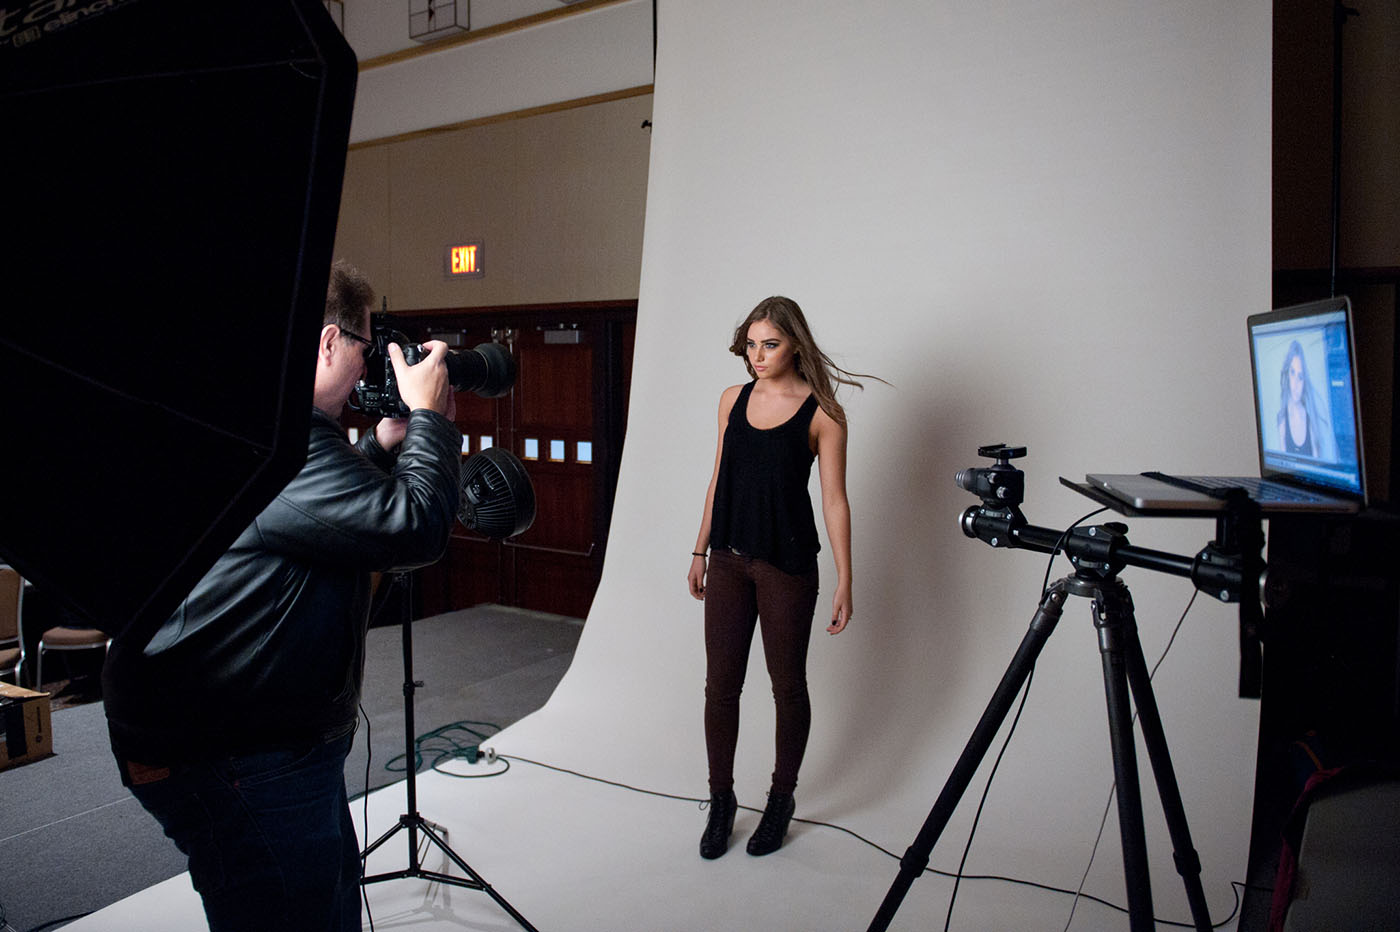
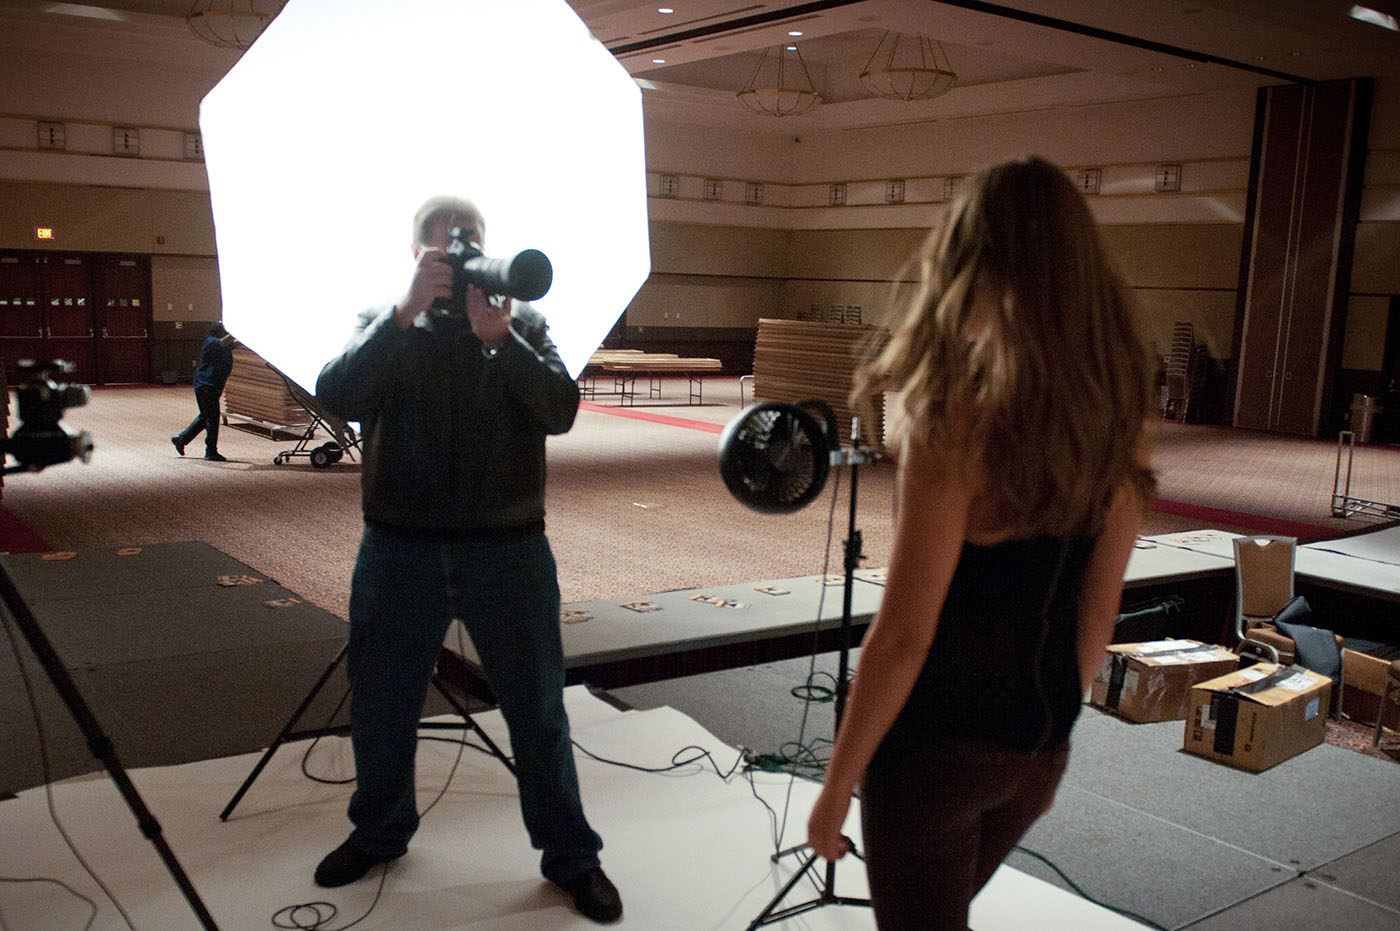
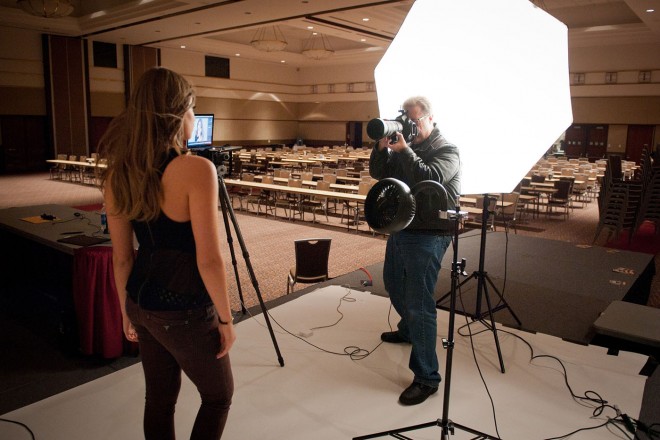
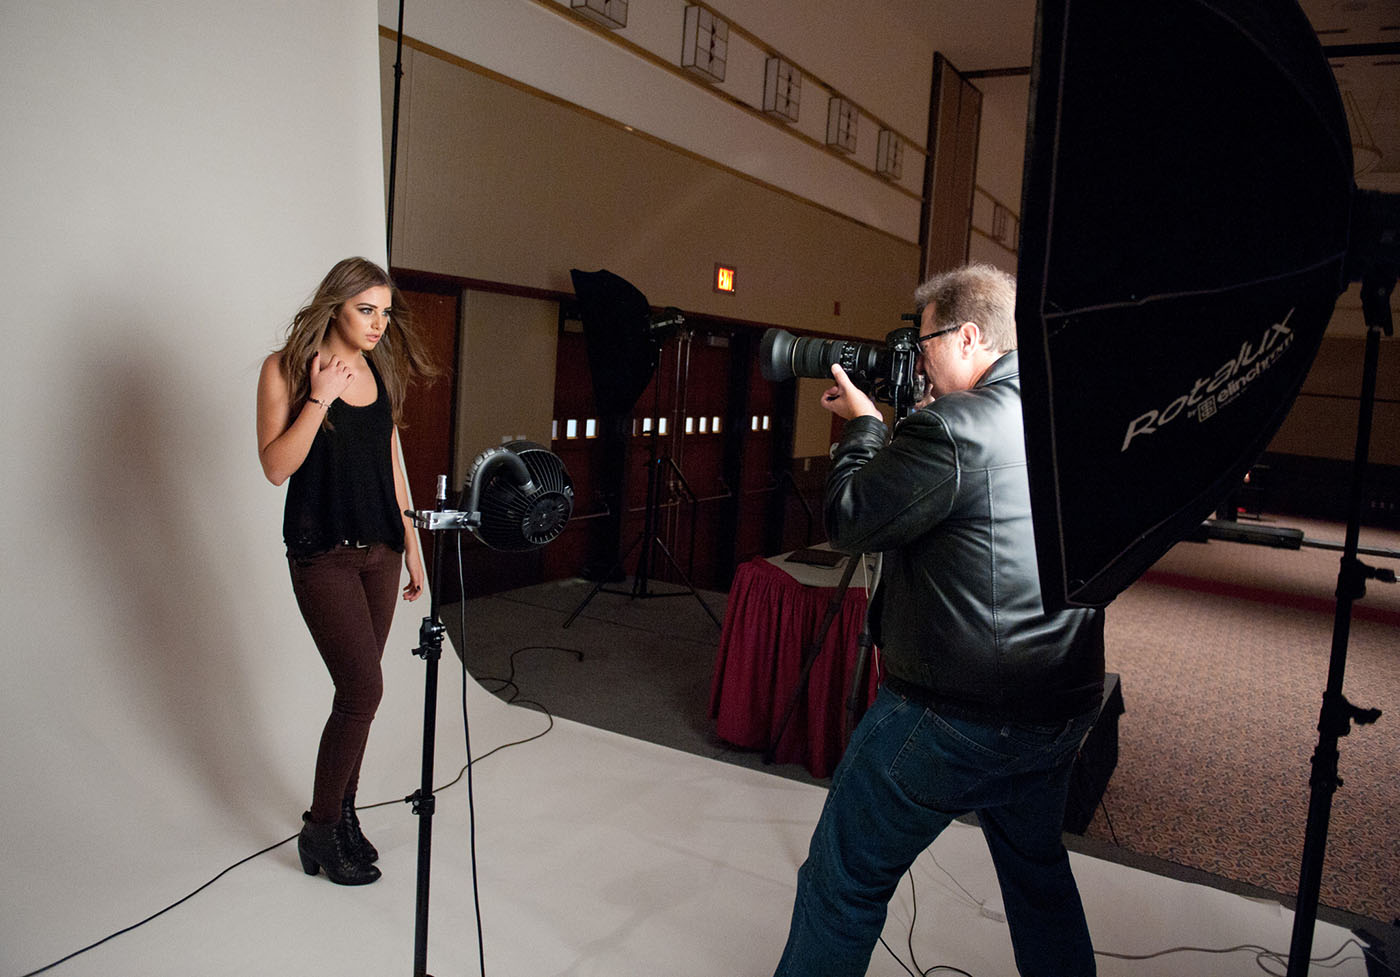
You can get this look with any large softbox (and by large, I mean a softbox that’s at least 36×36″). The bigger the better. For this look, I chose my favorite go-to softbox, which is a 53″ Elinchrom Midi Octa (again, any nice really large softbox will do). You can do this look wonderfully well with either a strobe or continuous light source, such as a Westcott Spiderlite TD6, as long as you use (here it comes) a really large softbox. In these behind-the-scenes shots, you can see the softbox is directly behind my shooting position (it’s just a few inches behind me). The fact that my head sticks up into the softbox doesn’t mess with the look at all.
Power Settings
The big softbox will be behind your shooting position, so it’s going to be farther from your subject than you’d normally place it (well, certainly farther away than I’d normally place it because I usually like it very close to my subject so I get really soft, wrapping light), so you’ll have to crank up the power quite a bit. I took this shot at 1/2 power on a 500-watt strobe. Most of my shots are taken at 1/4 power or less.
Blowing the Hair
To give the hair some movement, we used a fan that mounts directly on a light stand. My favorite (shown here) is the BlowIt fan from BlowItFans.com (it runs around $100 and has three speeds). Besides being able to control the height and exact position of the fan, one of my favorite features is that it’s not very loud.
The Background
It’s an inexpensive roll of white seamless paper—9′ wide and it only costs around $50. Although I have it rolled out pretty far in the production photos you see here, I wound up just doing head shots so I could have rolled it out just below her shoulders.
Positioning the Subject
I generally position my subject 8–10′ from the background, but in this case, I wanted the background to be well lit by just this one front light, so I needed to have her pretty close to the background. If you don’t have a light or two lighting a solid white background like this one, it will look solid gray. Although I’m usually very careful not to let my front light spill over onto my background, in this case I needed to have it light the background, as well, to get my white seamless paper to actually look white.
Editor’s Note: If you want to check out Scott’s books on Amazon, here is a link to the latest Digital Photography book. You can find Scott on tour right now teaching his latest seminar on “Shoot Like a Pro” traveling around the world right now. For more on Scott, go ahead and follow his blog.
