
Daylight Fill-in Flash by Rick Sammon
Technically speaking, every picture in this issue of Layers has the same main subject: light. Therefore, when we take a picture, all we’re doing is recording light. It may sound simple but in reality, it’s not that easy. Here’s why.
Our eyes have a dynamic range of about 11 f-stops, which is why in a high-contrast scene we can see details in shadow areas and highlight areas aren’t washed out. Our cameras, however, don’t “see” exactly what we see. Digital cameras have a dynamic range of about five f-stops. Sure, we can expand that range in Photoshop—and expand it greatly with high dynamic range (HDR) photos, as illustrated by my Photoshop buddy Ben Willmore in his lectures, books, and articles.
Expanding the dynamic range of an image is only one option to getting a good exposure: compressing the contrast range of the scene is another. Photographers basically have three techniques for compressing the contrast range of a scene: use a diffuser to soften shadows; use a reflector to fill in shadows; and use a flash or several flashes to fill in shadows.
In this issue, we’ll explore using a single flash for what’s called daylight fill-in flash photography. To illustrate the technique, I’ll share some photographs that I took on my recent photo workshop to Papua New Guinea. The photographs were taken with my Canon EOS-1Ds Mark III, Canon 24–105mm IS zoom, Canon 580EX II flash, and Canon ST-E2 wireless transmitter.
Balancing light
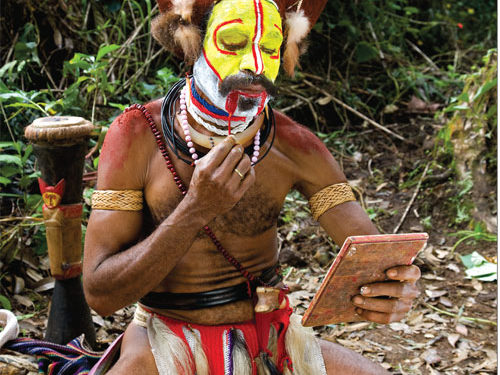
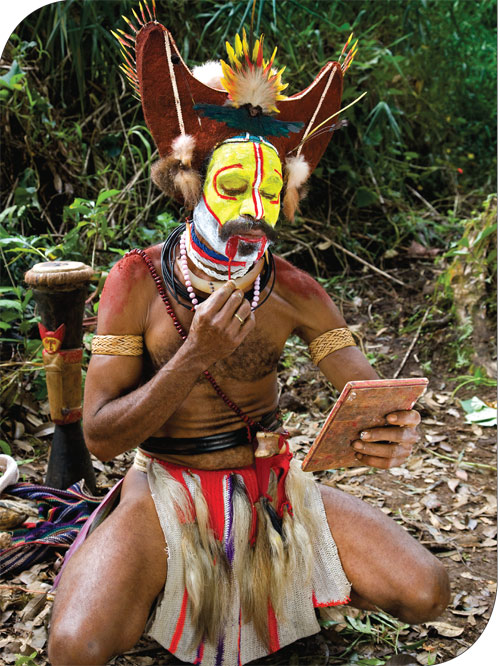
Check out the picture of a Huli Wigman that opens this column. It doesn’t look like a flash picture because the light from the flash is balanced to the ambient (available) light. Actually, that’s my goal when I take flash pictures (indoors and out): I try to balance the light so my pictures don’t look like flash pictures—pictures with harsh shadows.
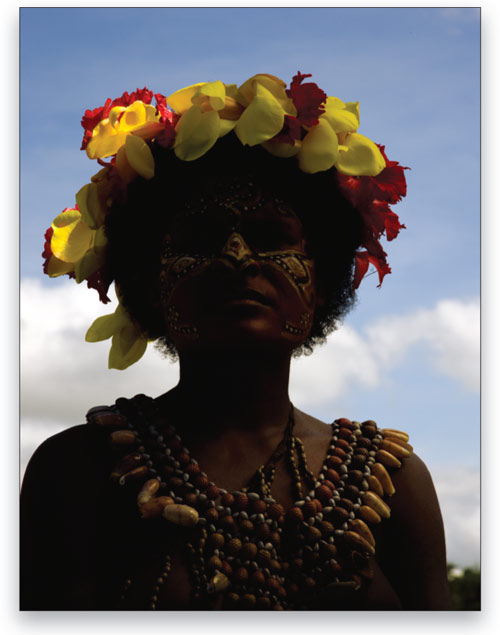
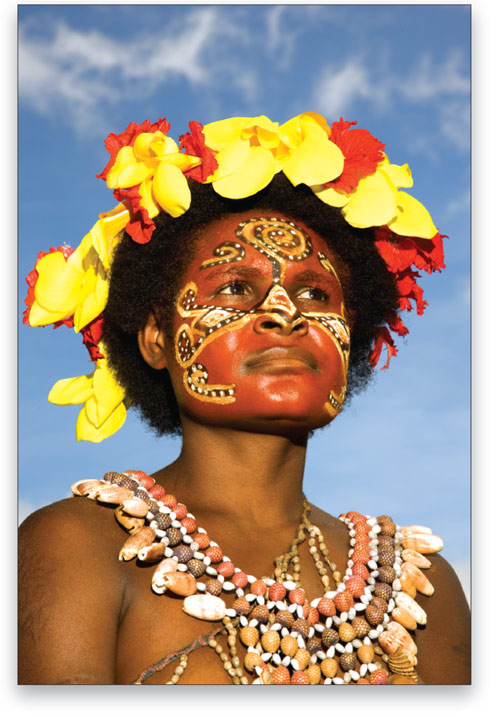
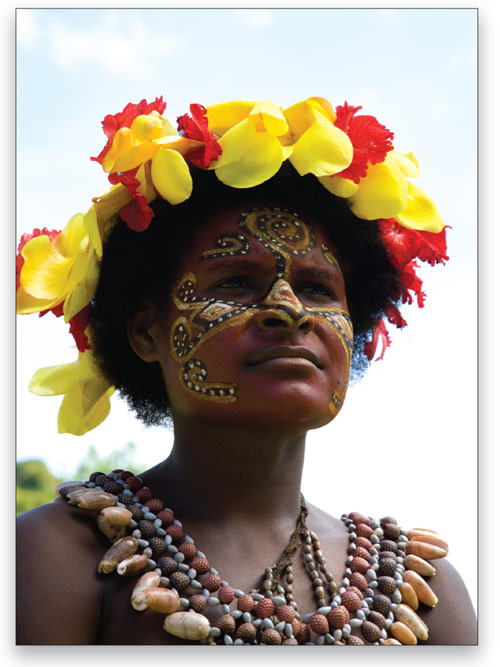
Following is the simple technique, illustrated with three pictures
I took of a woman who lives in a remote village on the Sepik River.
STEP ONE: Set your camera on Manual and adjust the shutter speed and f-stop for the correct exposure of the background or surrounding area. As illustrated in this backlit picture, the background will be correctly exposed but the subject will usually be too dark. Keep in mind that the brighter the background, the darker the subject.
Here, I set the shutter speed at 1/125 to prevent camera shake and subject movement. You’ll understand why I’m telling you this when you see the motion blur example later in this article.
STEP TWO: Turn on your flash and set it to TTL (through-the-lens, automatic exposure). Now, on your flash (or in-camera), reduce the flash output by –11/3. Take a shot and check your camera’s LCD monitor. If the subject is too dark, try setting the flash output at –1 or even –1/2. If the subject is overexposed, reduce the flash output until you get the correct exposure. For my daylight fill-in flash portrait, I had my flash reduced to –11/3.
Some newer digital SLRs provide darn good daylight fill-in flash pictures when the camera is set to the Aperture Priority mode; however, the aforementioned easy method offers more control over the scene’s lighting. If you want to darken the background, increase the shutter speed or f-stop so less available light reaches your camera’s sensor. The flash exposure of your subject will remain the same (as long as you’re within the flash’s range).
If you think that using daylight fill-in flash isn’t worth the effort, here’s an example of what happens when you don’t use a flash and simply set your camera to Program mode and point and shoot in a backlit situation.
Don’t forget the accessories
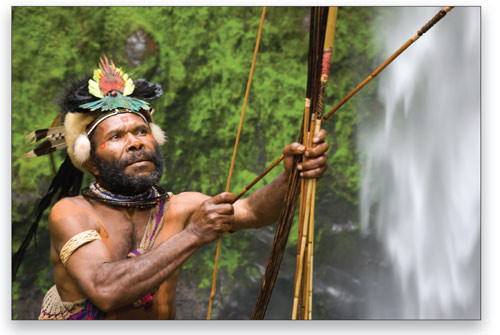
We can add to the natural look of our flash pictures by using a diffuser over the flash. For this portrait (of the security guard at the Ambua Lodge where our group stayed), I used the Micro Apollo flash diffuser from Westcott (www.fjwestcott.com) that attaches to the flash head with Velcro. A flash diffuser softens and spreads the light, which is useful when taking wide-angle photographs.
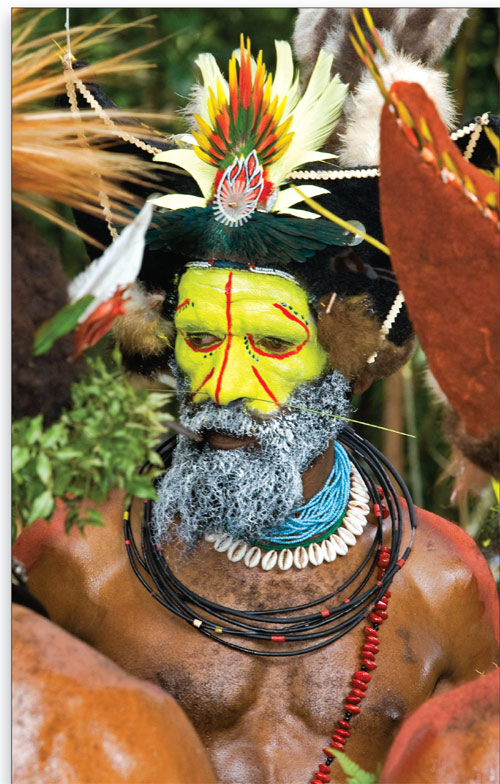
An essential accessory for the serious daylight fill-in flash shooter is a wireless transmitter. A transmitter fits in the hot-shoe of the camera and triggers a flash (or flashes) remotely. One advantage of wireless flash photography is that you have more control over where the light from the flash falls (i.e., the direction of the light). In this example, taken during a sing-sing (local festival), I positioned the flash high above my head so that the light from the flash didn’t overexpose the foreground elements (the shoulders of other Huli Wigmen).
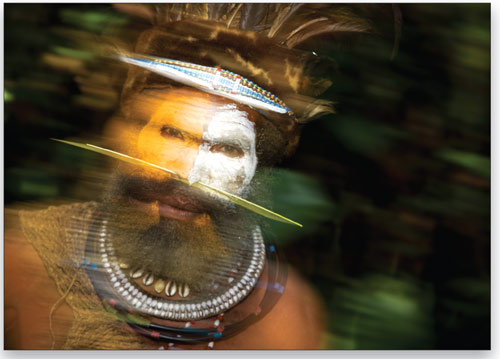
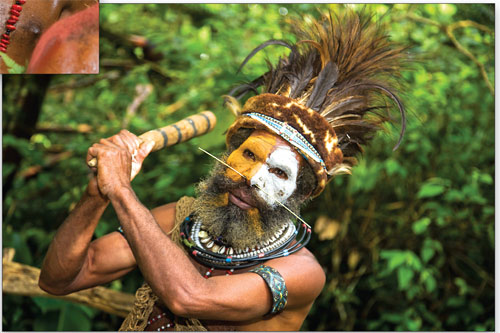
We can also use daylight fill-in flash to add a sense of motion and drama to a still picture. In the sharp shot of the Huli Wigman warrior at the right (he’s actually a nice guy!), I used a shutter speed of 1/125 to ensure no subject blur. In the motion blur shot (honestly not created with the Motion Blur filter in Photoshop), I set the shutter speed to 1/15 and, just before I took the picture, started to move the camera from left to right.
Of course, the motion blur picture was not my first attempt to create this effect during the photo session. I had to experiment with different slow shutter speeds and moving the camera at different speeds to get the desired effect. If you like this technique, plan on taking more than a few shots to get just the effect you want.
As you can tell, I’m big fan of daylight fill-in flash. In fact, I never leave home without two flashes and two wireless transmitters because I always want backups.
I’m also a big fan of Papua New Guinea, mainly because the country offers unlimited on-location portrait opportunities. I’m not a big fan, however, of the travel time to and from Papua New Guinea: basically 2.5 days each way. What’s more, the malaria medicine (mefloquine) produces very strange dreams, and Imodium A-D kinda dries you out. It’s great fun being a travel photographer!
Article by Rick Sammon
