
Creating an Offset Frame in Illustrator

If you want to have an offset box change with text when you change the point size or add to the text, try this technique. We’ll add dynamic frames to objects. This provides flexibility, especially when applied to type; you can change the text and the frame updates automatically.
1
To build the effect, first select the items that will get the frame and choose Add New Fill from the Appearance palette menu.
2
This will appear on top of the current attributes. You will want to drag it below the stuff you want to frame. For text or groups, put it below the Contents or Characters in the Appearance palette. With the Fill selected in the Appearance palette, change it’s color to something different than the text by clicking a color from the Color palette (Window>Color).
3
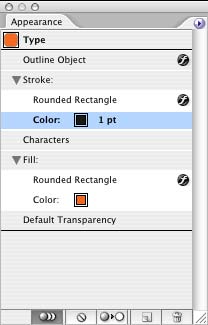
Next, while the Fill is still selected in the Appearance palette, select Effect>Convert to Shape>Rectangle (or Rounded Rectangle or Ellipse). Enter a number for an offset amount. Usually a relative amount works best, because the frame grows with the contents. When you added the new fill, a new stroke was added as well with a color of None. Click on the Stroke in the Appearance palette and add a color to it by clicking a color from the Color palette. Apply the Convert to Shape effect to the stroke as well to move the stroke to the shape instead of the text. You can quickly apply the last effect used by pressing Command-Shift-E (PC: Control-Shift-E).
4
Now when you resize the text, the box will move with it. When the effect is applied to text, the white space around the characters is used in determining the object’s size. If you later convert the text to outlines, that space is thrown out and the offset will be based on the new, smaller size.

As you change the text, the frame expands or contracts to match.
