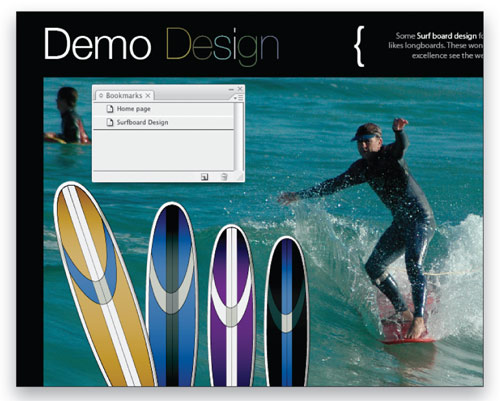
Supplying your portfolio in printed form is so last century. Everybody who’s anybody is using PDF as the means to deliver their portfolios. So let’s learn not only how to create an easy-to-email PDF but also how make it interactive as well—with navigation buttons and even movies!
1 [USE MASTER PAGES]
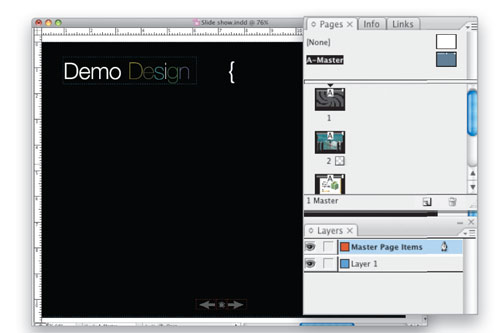
Setting up master pages for your portfolio is a great idea and it allows you to include items such as corporate branding, as well as navigation buttons and hyperlinks so they’ll appear on each page. In InDesign CS3, master page items are always in the back of objects on regular pages so, to overcome this, place master page items on their own layer. We can also easily recognize items on the master pages, because frame edges are displayed as a dotted line, rather than solid. Using master pages is also going to make your document easy to update later.
2 [CREATE URL HYPERLINKS]
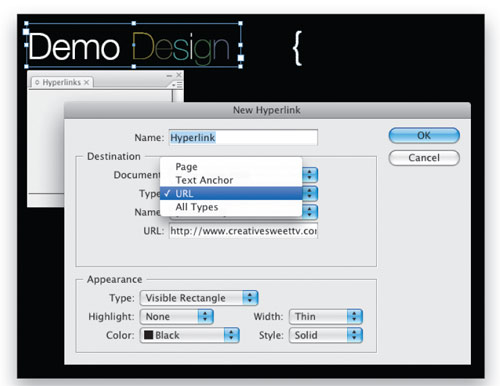
InDesign has a Hyperlinks panel, so you can work with hyperlinks the way you work with links, layers, and other features. Open the Hyperlinks panel (Window>Interactive>Hyperlinks), select the object you want to be the button (make sure you’re on the master page if it’s a master page item), then click the Create New Hyperlink icon at the bottom of the panel (or choose New Hyperlink from the flyout menu). In this case, we’ll select URL as the Type and then type in our URL. This is a great way of creating a basic link to your website from a PDF.
3 [CREATE AN EMAIL LINK]
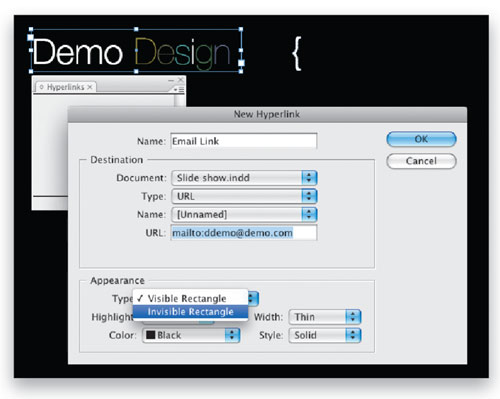
Using the same method as Step 2, we can create an email link in our PDF. Instead of typing in a Web address that would typically start with http://www.someaddress.com, we simply type in something like mailto:person@emailaddress.com. This will then link to the reader’s default email software when clicked. The New Hyperlink dialog also has some Appearance options. In this case, we don’t want the email link to have a box around it or an underline, so we’ll select Invisible Rectangle from the Type pop-up menu in this Appearance section, then click OK.
4 [CREATE PDF BOOK MARKS]
PDF bookmarks make it easy for viewers to quickly navigate through a document. Here’s how to create them in InDesign. Use the Pages panel to go to the page that you wish to create a bookmark for and then choose Window>Interactive>Bookmarks. Click the New Bookmark icon at the bottom of the Bookmarks panel. Rename it by selecting it in the panel and typing the new name.
Note: Bookmarks can also be generated automatically in InDesign if you’re taking advantage of the automatic Table of Contents feature (found under the Layout menu).
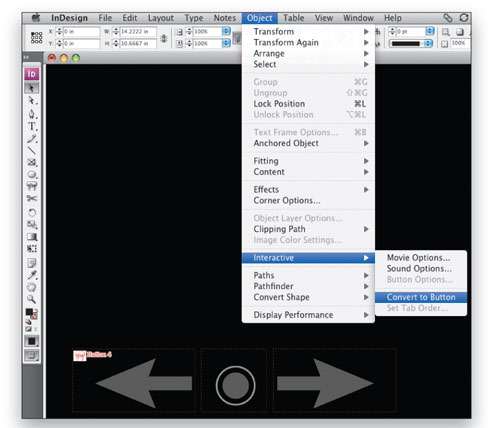
5 [CONVERT OBJECTS TO NAVIGATION BUTTONS]
Select the object you want to convert into a button. You can select an imported graphic, an object you drew in InDesign, or a text frame. In our document, we’re using the navigation buttons that reside on the master page. The buttons are a single, placed Illustrator file with multiple layers for different rollover states. Choose Object>Interactive>Convert to Button. If you’re in Normal View mode, InDesign identifies the button onscreen with a small button icon on the frame. (Note: If you can’t see the button icon, try going to View>Show Frame Edges.)
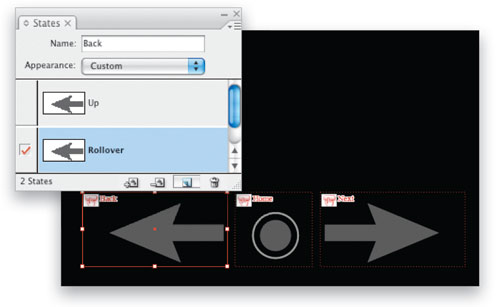
6 [CREATE ROLLOVER STATES]
Choose Window>Interactive>States. The States panel contains only the Up state, which is the default state for a button. In order to change its appearance, we’ll need to create another state. Click the Create New Optional State icon at the bottom of the States panel. InDesign adds a Rollover state to the panel. If you click the same icon again, InDesign adds a Down state to the panel. Don’t forget to repeat this for each button and then give each button a sensible name at the top of the States panel. In this case for navigation, we chose Next, Home, and Back.
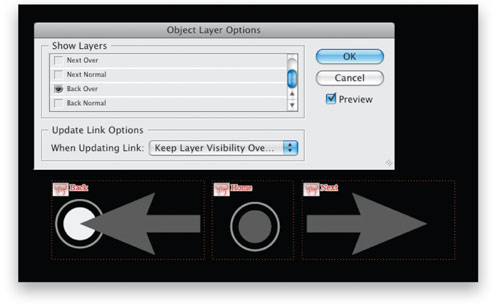
7 [CHANGE THE APPEARANCE]
Initially, each state is identical, but there isn’t much point in having different states if the button doesn’t give any feedback. Select the Rollover state for our button in the States panel, then use the Direct Selection tool (A) to select the button on the page. At this point we simply need to change the button’s appearance and we can do this in a variety of ways. In this case, we selected Object>Object Layer Options and chose a different layer to be visible from our placed Adobe Illustrator file. To see how your button works, select each state in the States panel. Repeat for each button.
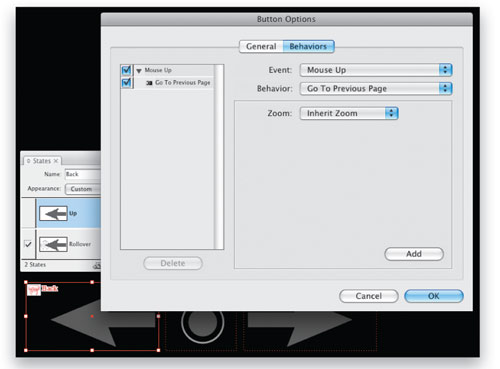
8 [ASSIGN BEHAVIORS]
Our buttons won’t be any good unless we can get them to actually do something. Anyone clicking the Back button expects to go to the previous page, so let’s set it up that way. Choose Button Options from the States panel flyout menu then click the Behaviors tab in the Button Options dialog. For the Event, we chose Mouse Up, so the Behavior will occur when the mouse button is released after clicking. And, because this is the Back button, for the Behavior we chose Go To Previous Page. Click Add and then OK. Choose the appropriate Behavior for each button.
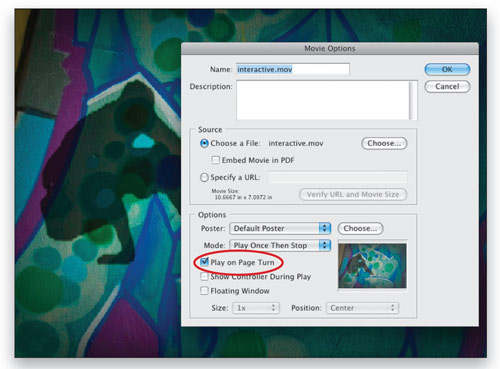
9 [PLACE QUICKTIME MOVIES]
You place a movie in an InDesign document just the way you’d place any other file. Choose File>Place, and then select the movie file—QuickTime, AVI, and MPEG. (QuickTime 6.0 or later is required.) Click where you want the movie to appear. Select the movie with the Selection tool (V) and choose Object>Interactive>Movie Options to set play options. Check the Play on Page Turn box to play the movie automatically when a viewer turns to that page in the PDF file. You can also provide buttons that will control it (Show Controller During Play). Click OK.
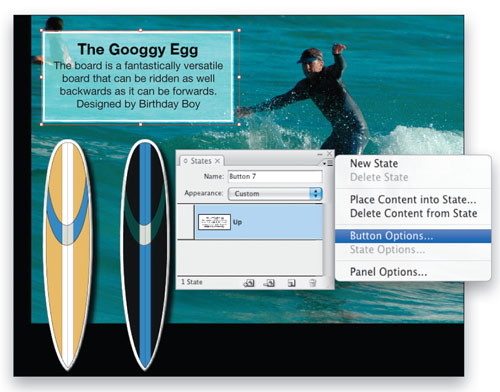
10 [CREATE HIDDEN FIELDS]
Let’s create a hidden information field; for example, when the cursor rolls over an image, the related text should appear next to it. First, we need to convert the related text frame to a button. Select the text frame with the Selection tool, and choose Object>Interactive>Convert to Button and give it a descriptive name in the States panel. By default, this button should be invisible. We only want it to show when someone moves the cursor over the graphic related to it. So choose Button Options from the States panel flyout menu. In the General tab, choose Hidden from the Visibility in PDF pop-up menu and click OK.
11 [SHOW FIELD ON MOUSE ENTER]
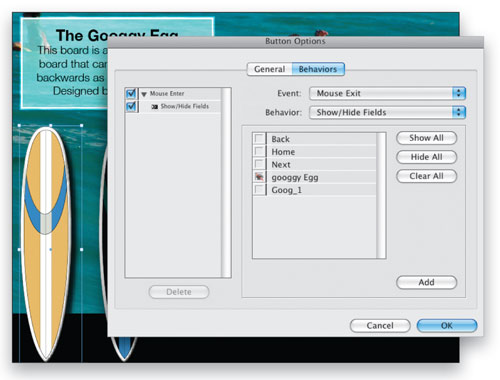
Now we need to convert the related graphic to a button as well, so select it with the Selection tool and choose Object>Interactive>Convert to Button. This will be the button that triggers the hidden text. Open the Button Options dialog again and click the Behaviors tab. Choose Mouse Enter for the Event, because we want the Behavior to occur whenever the mouse cursor enters the button area, then choose Show/Hide Fields from the Behavior pop-up menu. Don’t click OK yet.
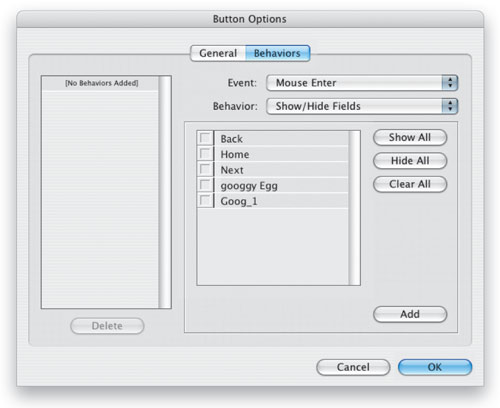
12 [HIDE FIELD ON MOUSE EXIT]
This is where you really appreciate good naming conventions. Click next to the name of the button you want to reveal when someone rolls over the graphic; an Eye icon appears next to it. Now the field we named “googgy egg” will show when the cursor enters the button area. Click the Add button, then select Mouse Exit for the Event and Show/Hide Fields for Behavior. Click the box twice next to the same button name and a red slash appears through the Eye icon. Now when the cursor leaves the button area, the text field will disappear. Click Add, then click OK.
13 [PUBLISH SETTINGS]
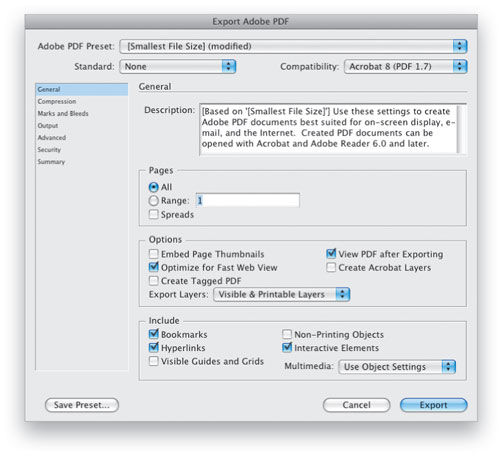
When you’re done, it’s time to test your work. To keep this simple, let’s use the built-in PDF export preset for Smallest File Size. Choose File>Adobe PDF Presets>Smallest File Size. With this setting we just need to make a couple of tweaks. Choose a name and location for your PDF in the Export dialog and click the Save button. In the resulting Export Adobe PDF dialog, let’s increase the Compatibility to Acrobat 8.0 and turn on Bookmarks, Hyperlinks, and Interactive Elements in the Include section. When done, click Export. Finally, open your PDF in Acrobat reader and test it out.
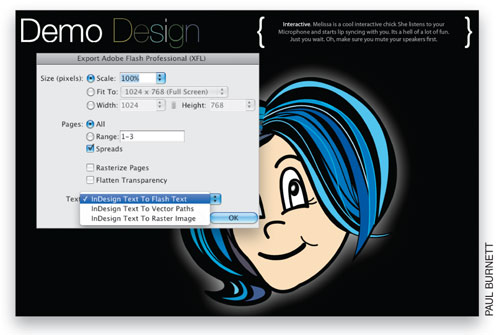
14 [LOOKING TO THE FUTURE]
Adobe is always looking to deliver innovative tools and solutions and is currently working on technology that will allow InDesign users to directly export a layout created in InDesign to a new interchange format called XFL. You open these XFL files using the Adobe Flash authoring tool, which will make it extremely easy for designers to publish their layouts to print and digital formats. Once in Flash, a layout can have an unlimited amount of interactivity and animation added to create sophisticated, engaging experiences in the Flash player.