
Photo Recipes: BTS of a Beauty Portrait
In this post I’m giving you a behind-the-scenes look at a beauty-style portrait shoot I did in studio with a bright wraparound edge light and then a solid gray background. Both were achieved without actually using any background at all. You’ll see how in a moment.
Figure One
This is a surprisingly easy setup (similar to what I used to shoot the cover shot for the premiere issue of our LightIt magazine), but with a twist and just a few lights (three for one portrait, two for the other). Believe me, it’s simple, as you’ll see.
Scott Kelby
Figure Two
Before I got to that final image, I started doing a more traditional beauty-style lighting setup with a trick I use to create the rim light behind her. So let’s start there and you’ll see how the shoot progresses and how the lighting changed. Here you can see the entire setup from where we started.
There are three lights in all, and we’ll start with the main light in front—on top. I’m using an Elinchrom BXRi 500 strobe for my main light (it’s a 500-watt strobe with a built-in wireless receiver). For beauty head shots, I use a 17″ beauty dish instead of using a softbox because it gives an edgier look, and if you have a subject with pretty decent skin, it’s really wonderful (if your subjects don’t have pretty good skin, you’ll want softer light and use a small softbox instead). By the way, the other guys in the scene are filming a behind-the-scenes video, so you can ignore them and the bright video light off to the right.
When I use a beauty dish on a photo of a woman, I add a diffusion sock that covers the front of the beauty dish, which softens the effect of the light (that’s what I did here). The beauty dish is positioned directly in front of my subject, up high on a boom stand and aiming back at her at a 45° angle.
The second light in front (the one at her waist height aiming upward) is there to help remove shadows under her chin and eyes. It’s a small softbox (but honestly the size doesn’t really matter; it can be a big one) and I position it waist-high, aiming upward at a 45° angle. When the lights are this close to your subject, you’re probably going to need to have the power of your lights down as low as they can go or they’ll be way too bright. I start by lowering the power of the bottom of the two lights to as low as it will go. Then I set the top light as low as it will go, but the key to making this work is to keep the top light a little brighter than the bottom light. If you keep them
the same, or if the bottom light is brighter, it creates a very unflattering lighting look (we call it the “Frankenstein” look because it makes people look menacing or scary). So, make the top light a little brighter than the bottom without clipping any highlights. Try 1/2 stop brighter and if that’s too bright, lower it 1/10 of a stop or so and try again.
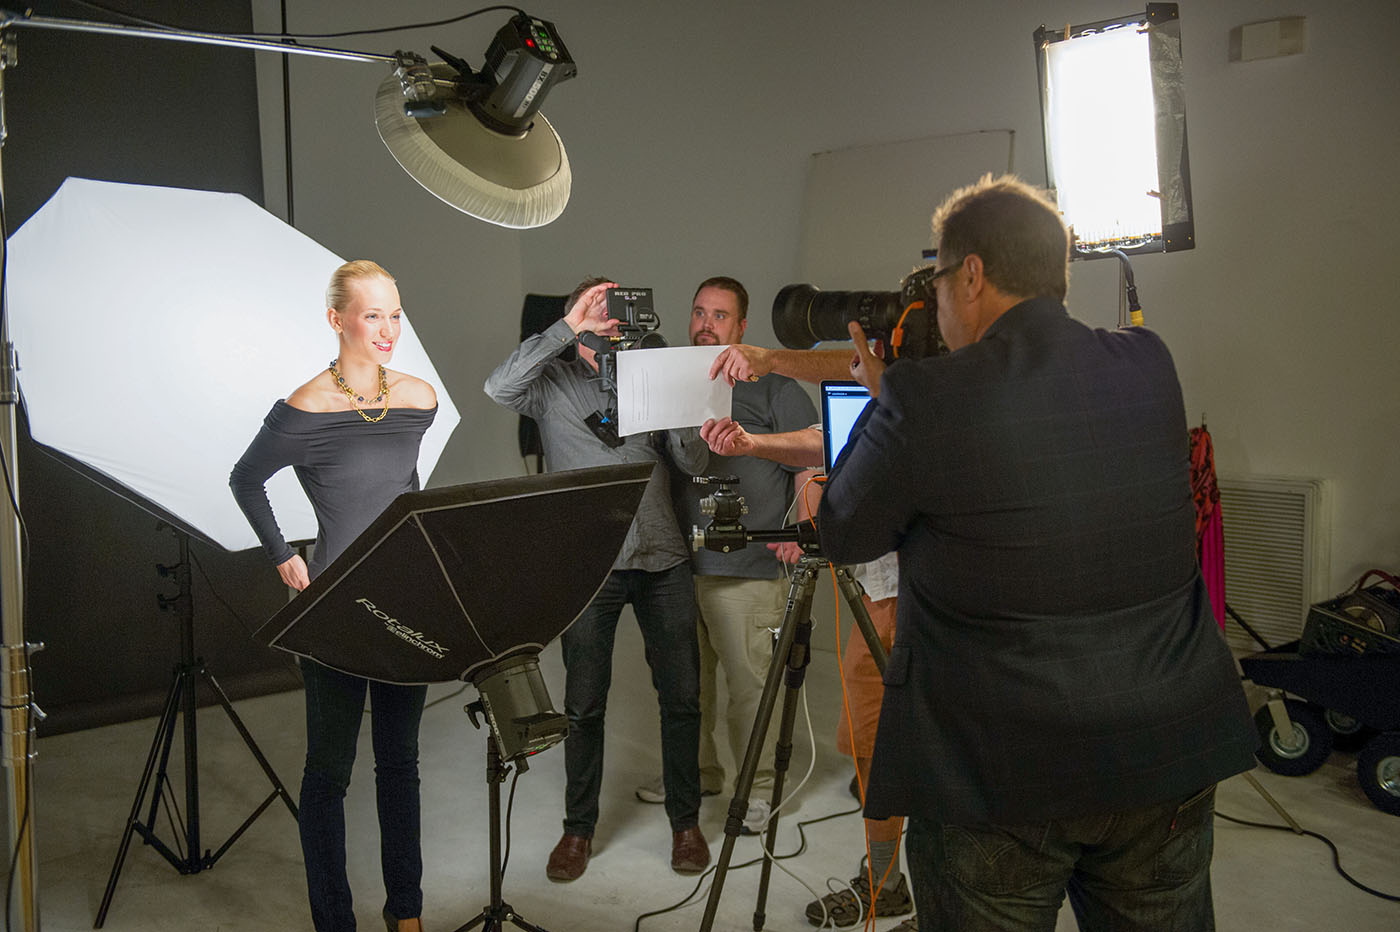
Figure Three
If you look at the image shown here you can see the third light, which is the large octabank positioned directly behind our model. The idea of placing a light directly behind her like this is that it creates a bright rim light on both sides of her face, and along her shoulders, and you get the bonus of an absolutely solid white background. So this light acts as your white background.
Now, if I aim this softbox directly toward the camera, I’m going to have a huge amount of lens flare coming into the camera when the flash fires and I’ll lose a lot of contrast, giving the whole image a washed-out look. To get around this, simply aim the softbox up toward the ceiling at a 45° angle. So now you have a three-light shoot: the beauty dish on top; a small softbox at waist level in front (right under the beauty dish) aiming upward with the power all the way down; and the big softbox in back creating the rim light around her.
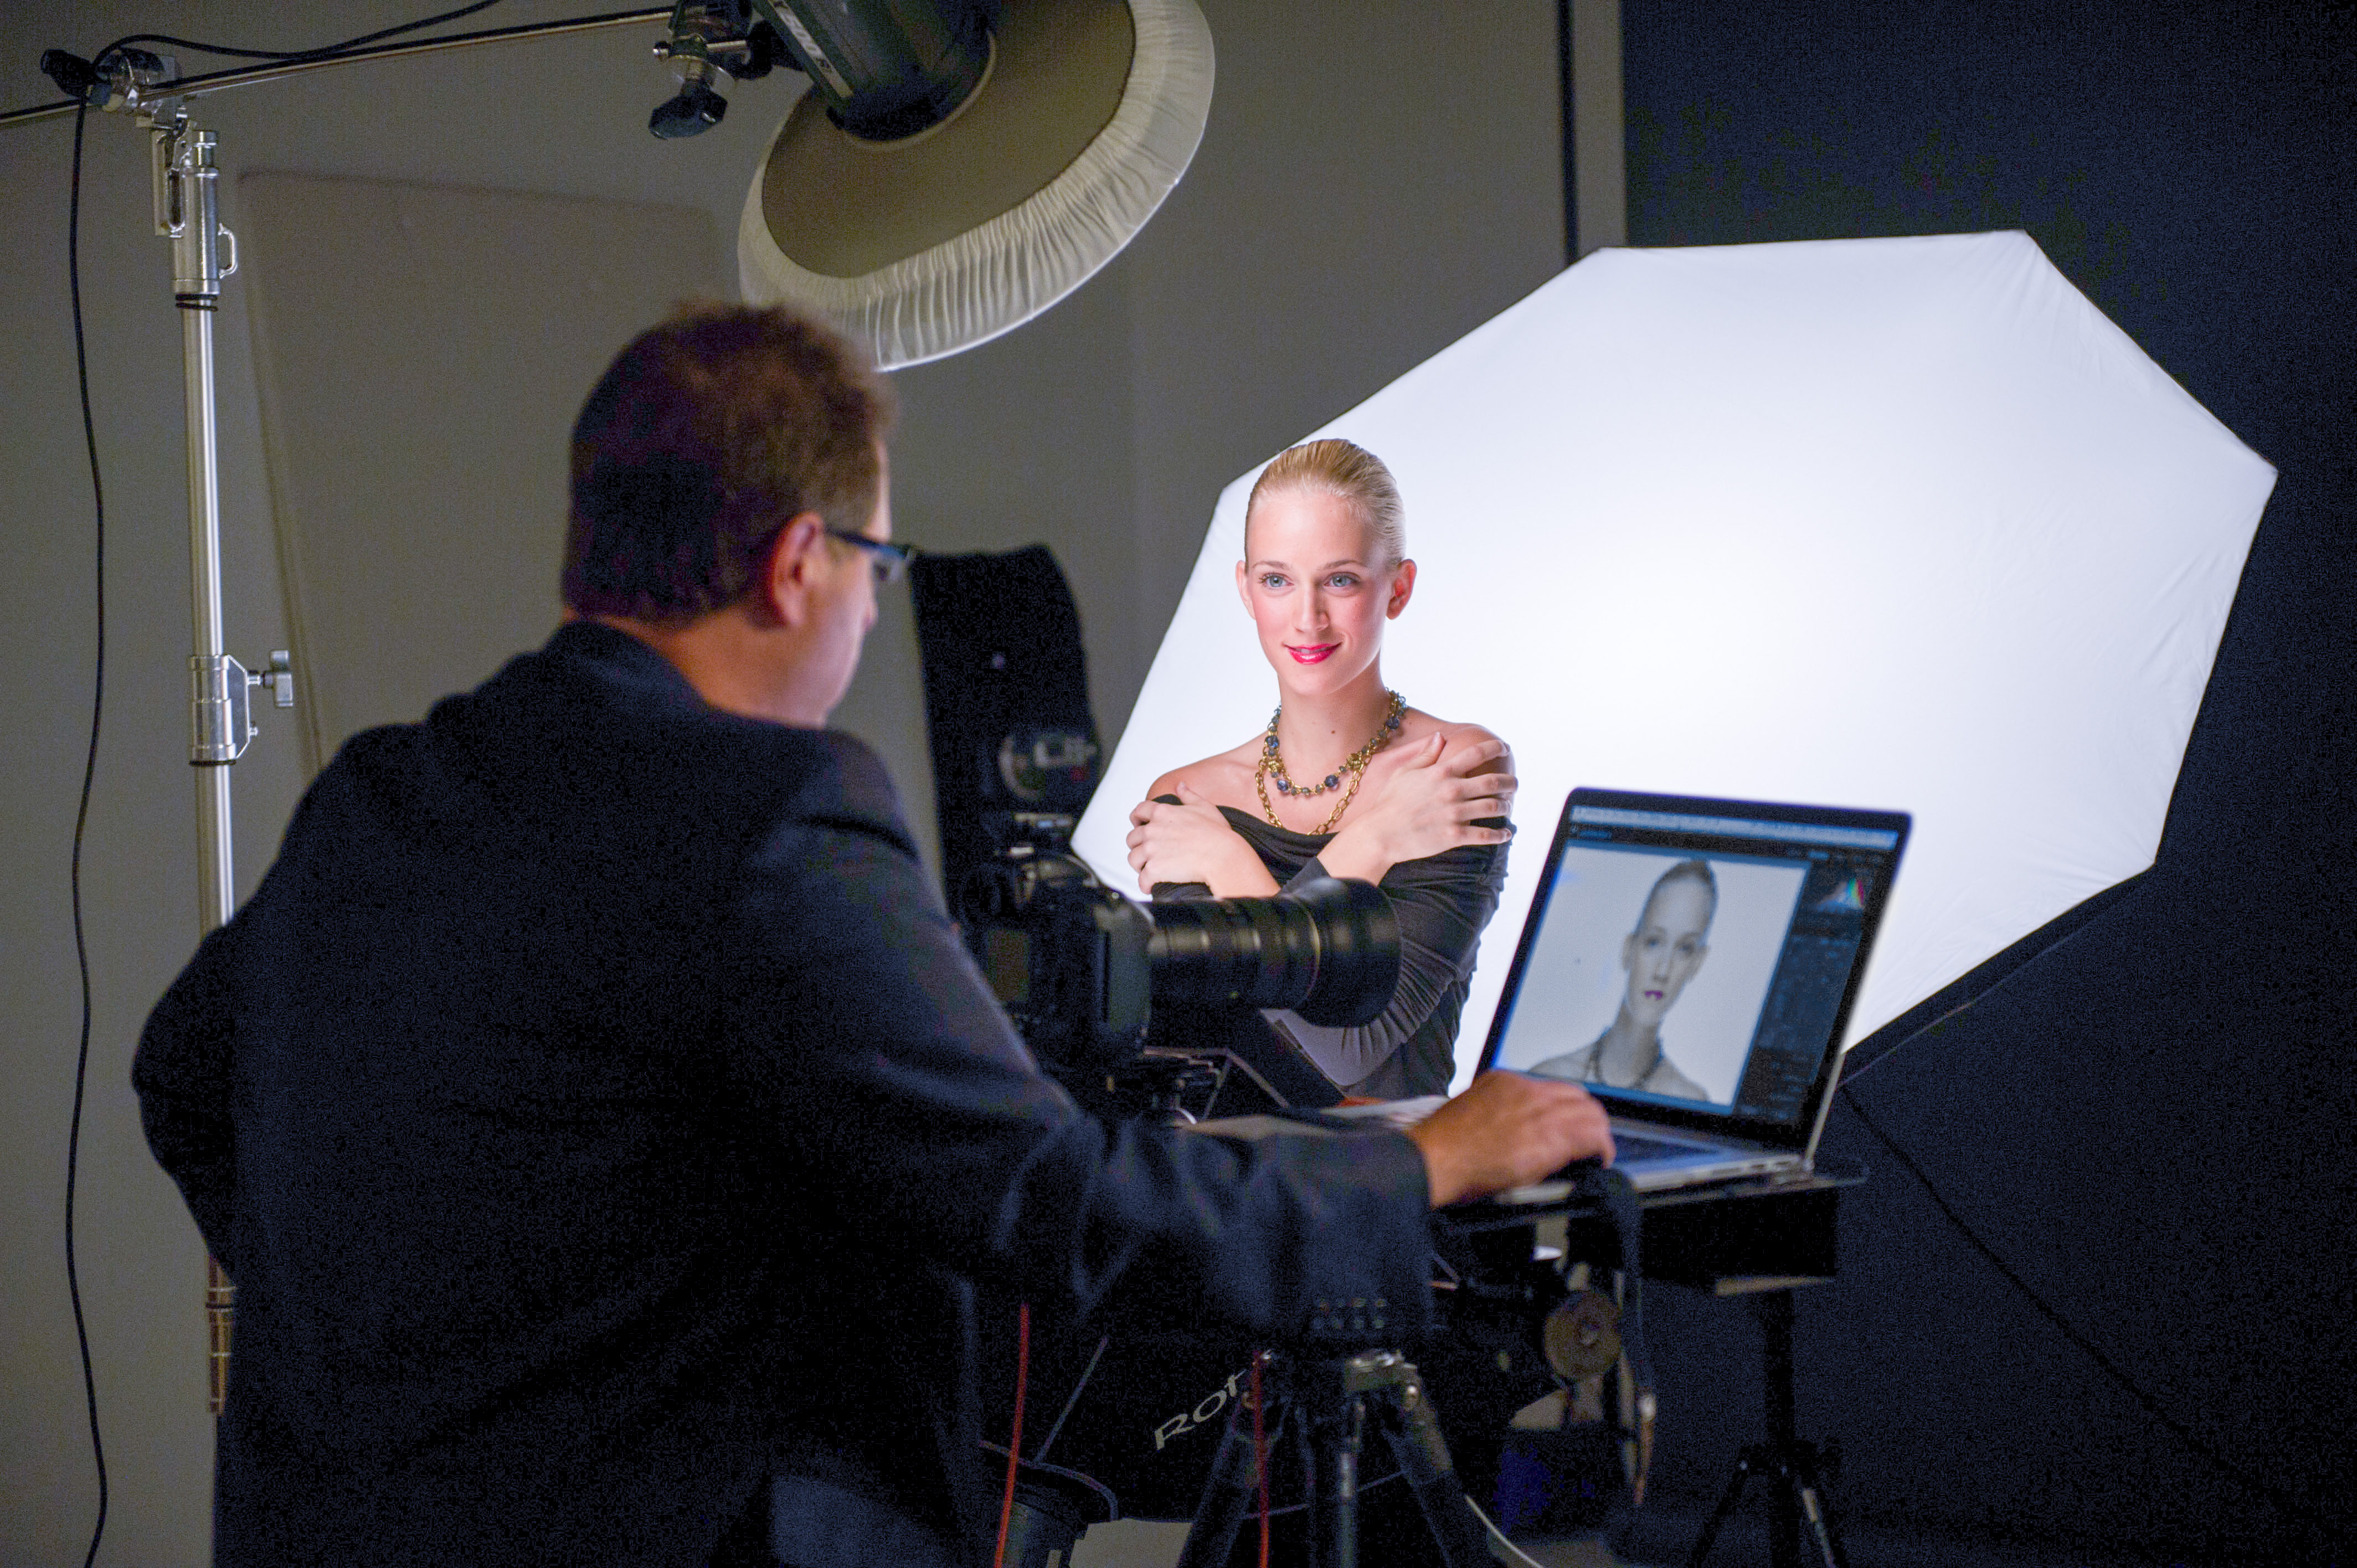
Figure Four
Here’s what the image looks like with the three-light setup I just explained.
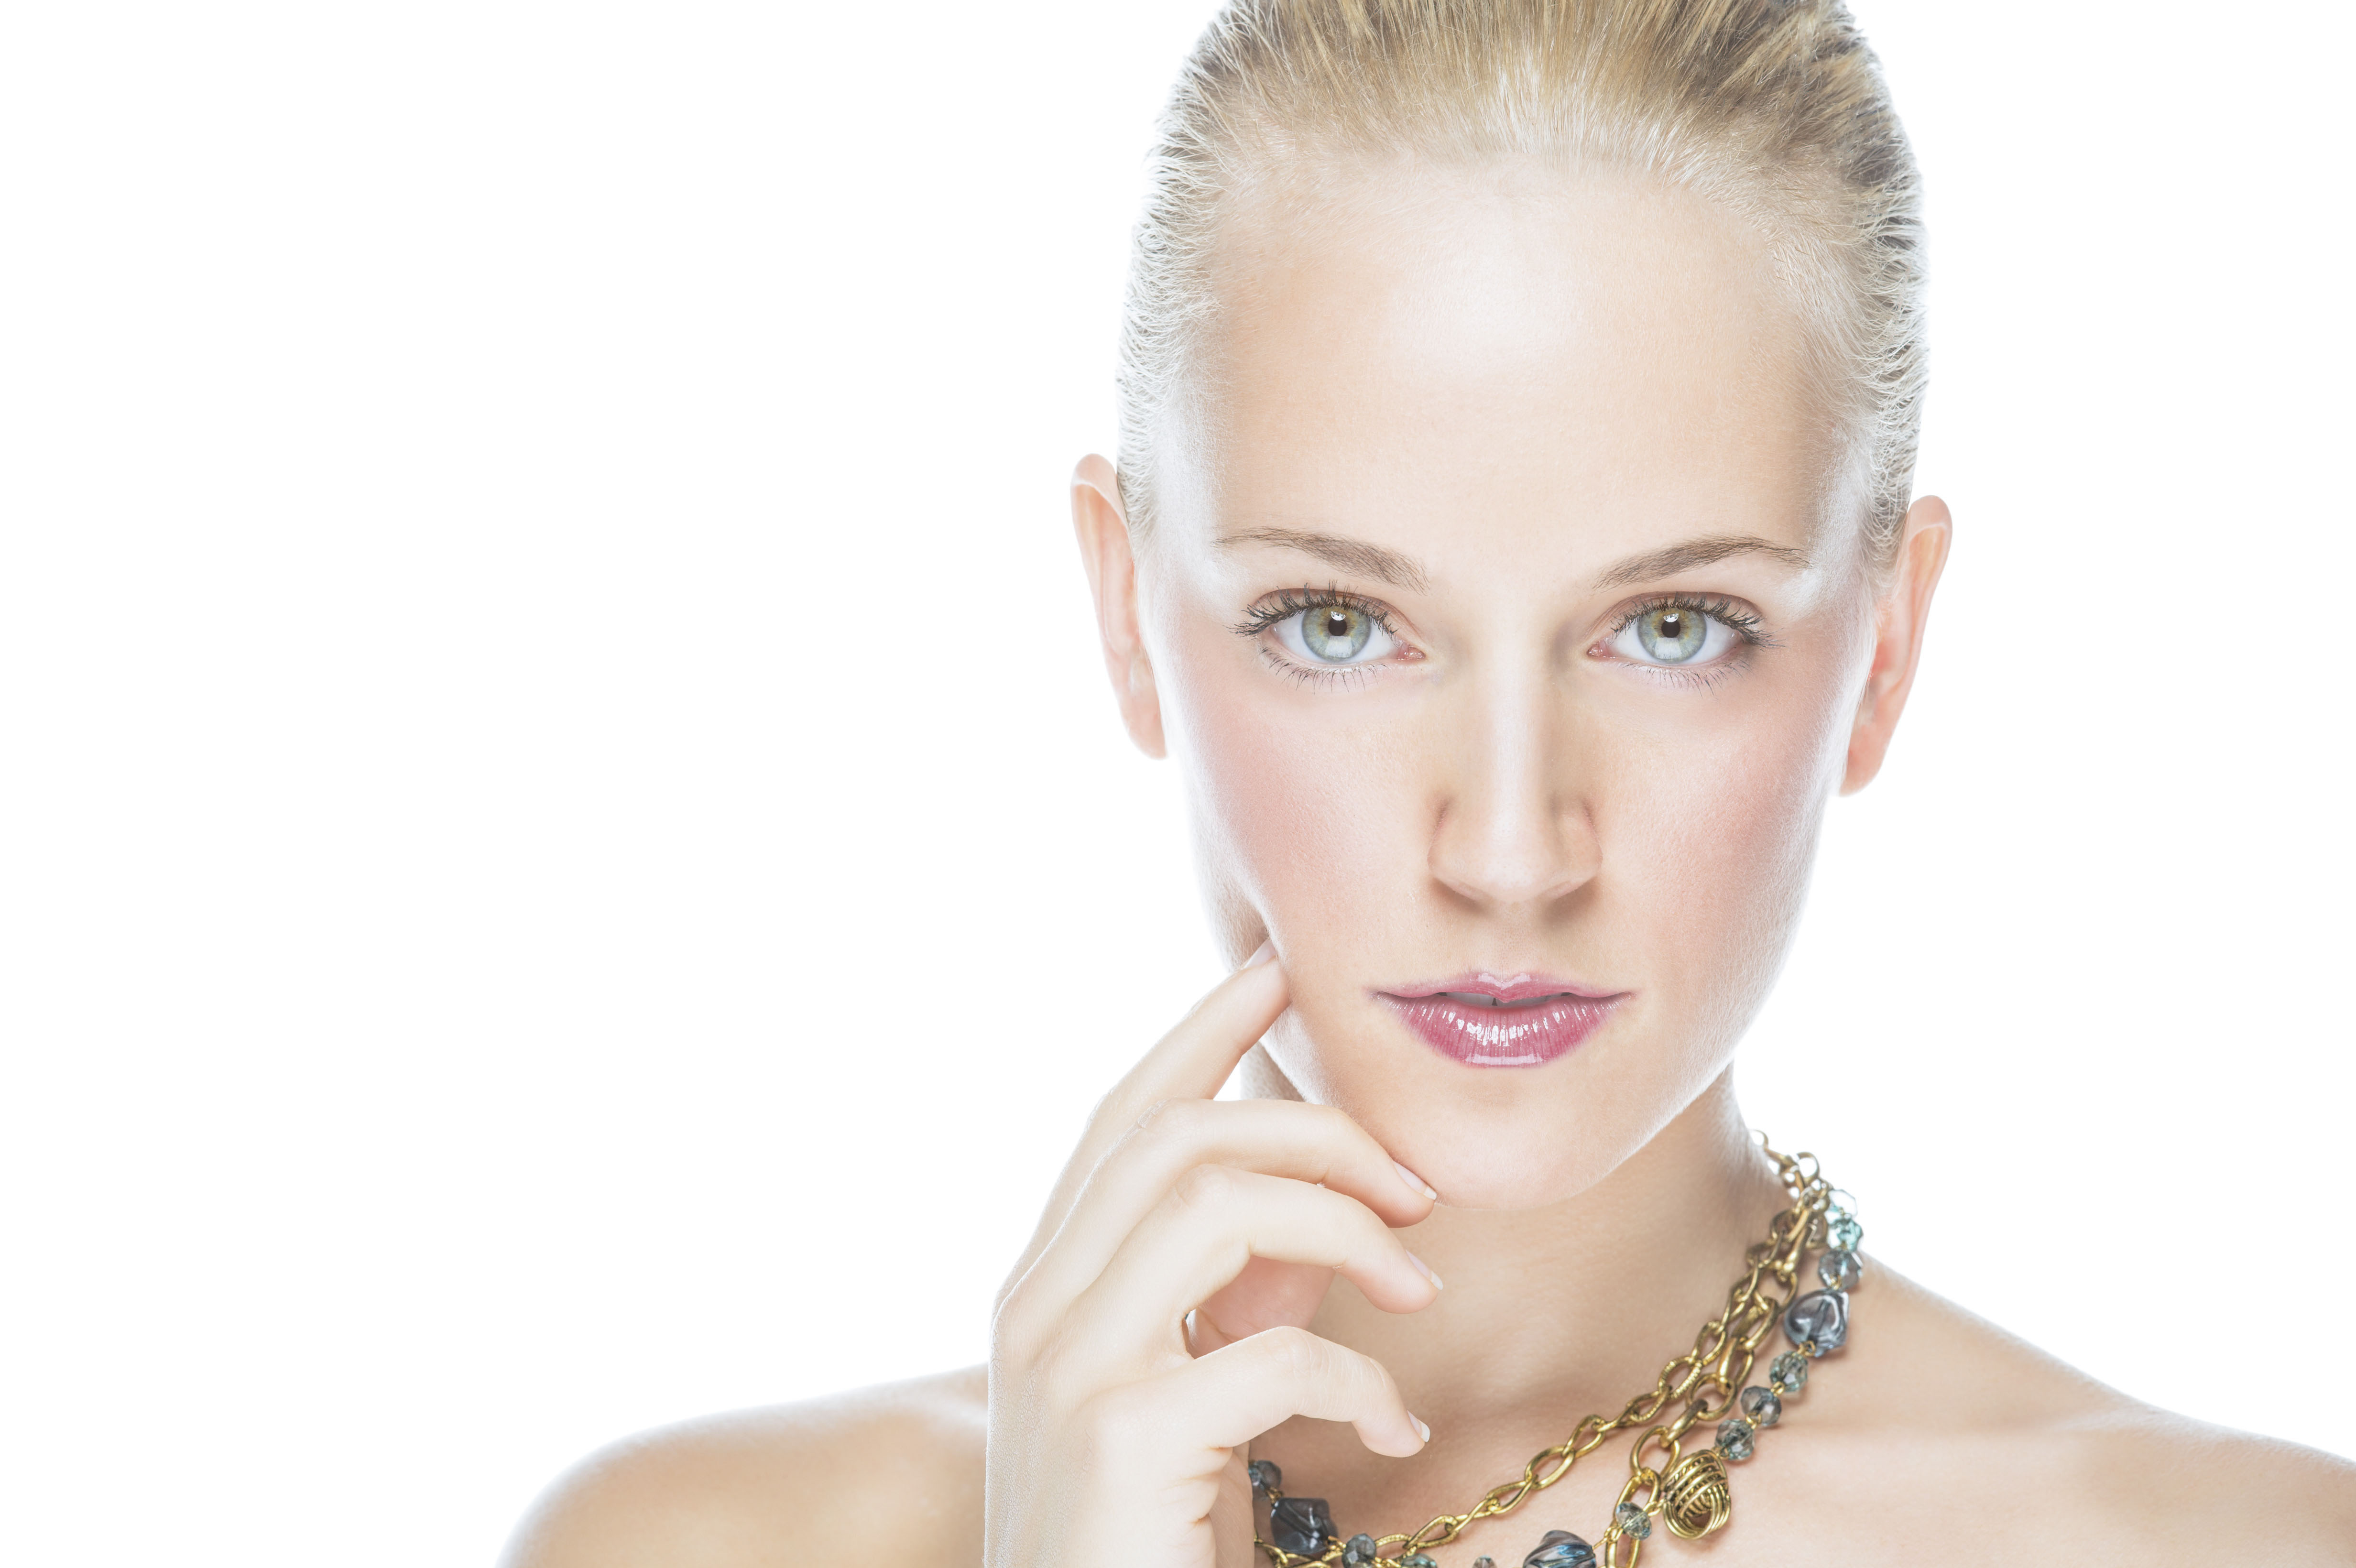
Figure Five
Once we had the beauty shot down, I wanted to try something different and add some very colorful scarves over her head so we’re just focused right in on her face. In this shot, I got in-house makeup and styling from our own Nicole Procunier, shown here helping our subject with getting the scarves in place. Of course, when you put on the scarves, you’re going to pretty much lose that rim light effect, but I took a test shot anyway. While the rim light was pretty much gone, that wasn’t the biggest problem—it was that the color got lost on that stark white background, so I simply turned off the large softbox in the back.
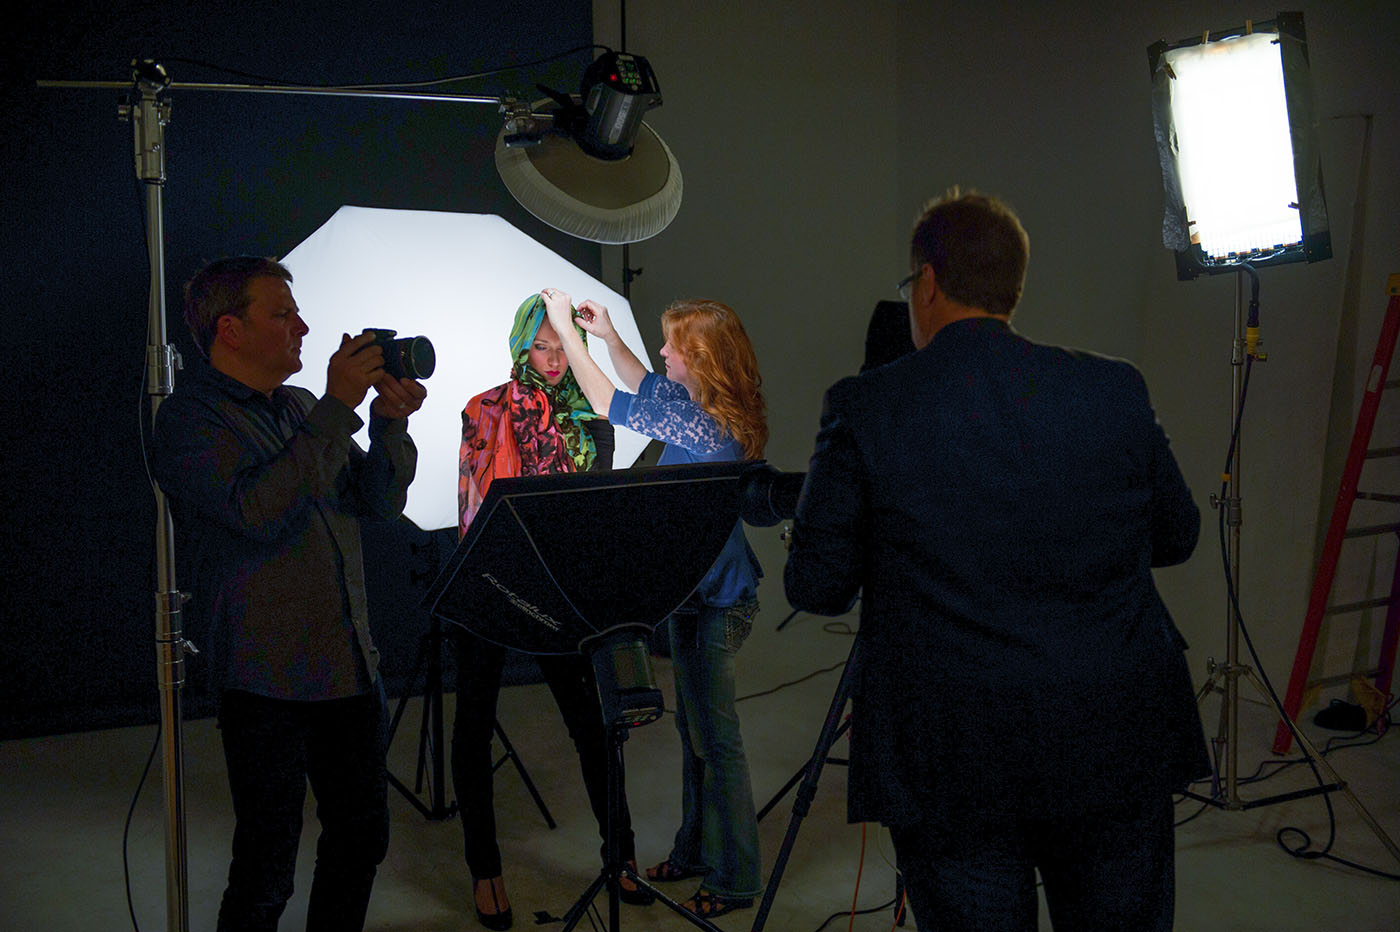
Figure Six
Here’s a production shot. Now I’m only using two of the three lights you see in this image—the front two. The back light is turned off, and even though the face of the light (the diffuser) is solid white, without the light being turned on and the front lights not aiming back at it, that white diffuser becomes a light-gray background.
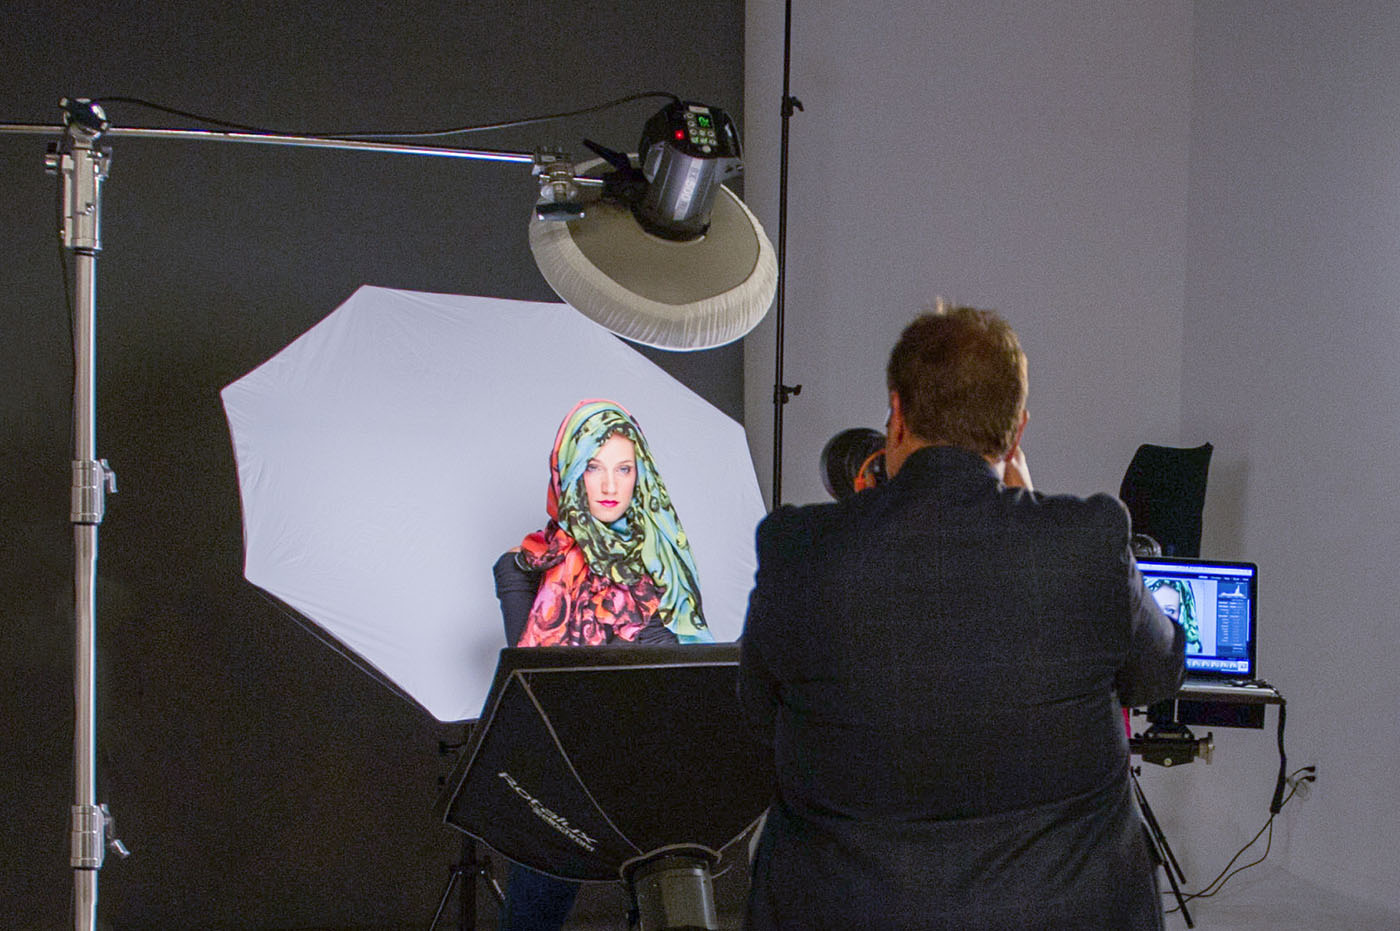
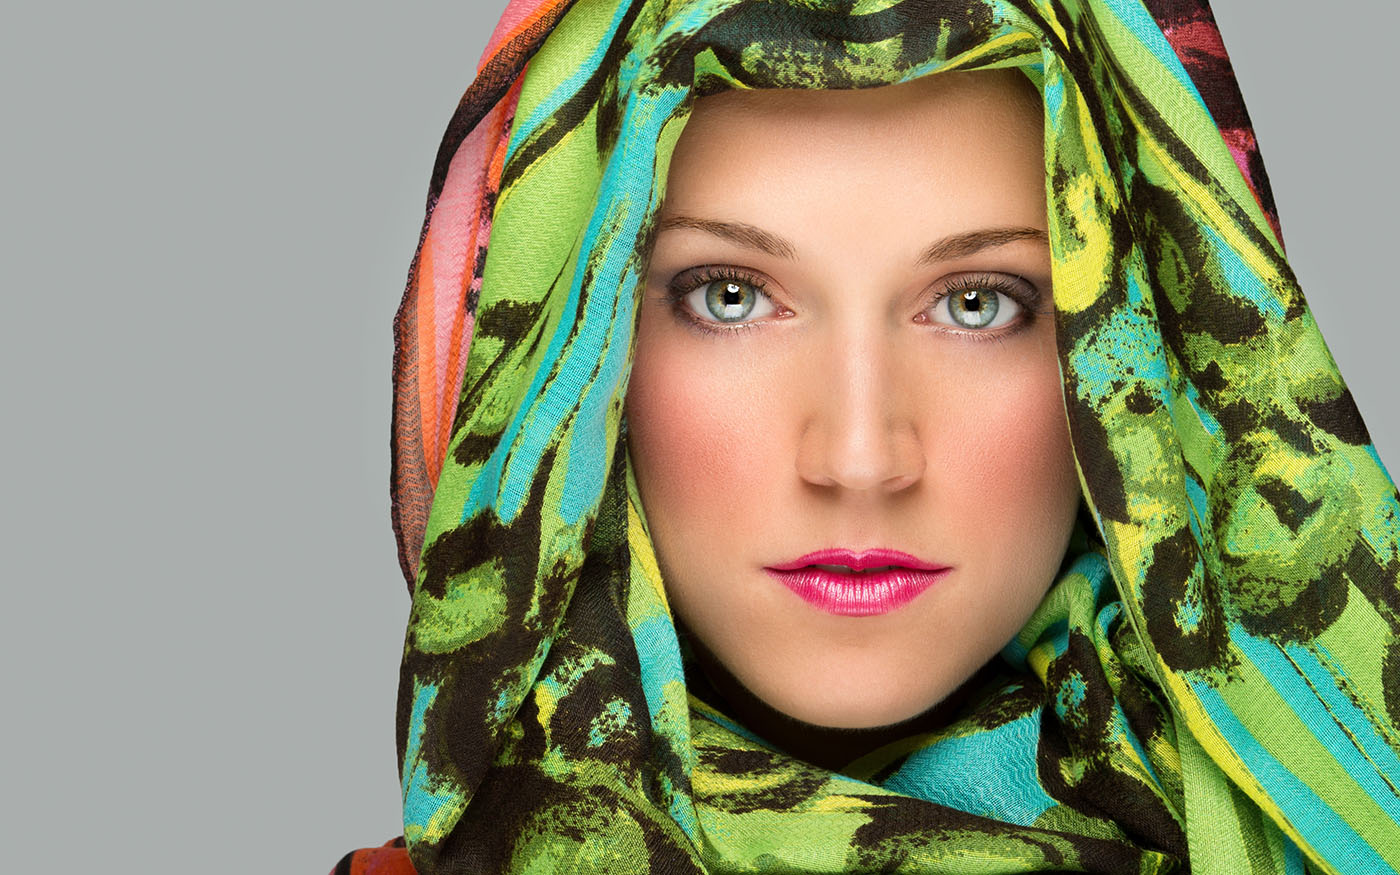
Figure Seven
Here’s the final shot, which you saw earlier. It was shot nice and tight using a 70–200mm lens at 200mm (and at f/11 so everything’s in focus). Of course, I finished the shot off with some retouching in Photoshop, with most of the time spent on her eyes.
Scott Kelby
For more on Beauty Retouching, we have a great selection of articles and courses for you to examine. Scott also wrote this great book, Light It, Shoot It, Retouch It as well as he has this class on the same topic as well.
